Advertisement
Available languages
Available languages
Quick Links
Assembly Instructions
IMPORTANT:
Please read and follow all safety statements, warnings, assembly instructions,
use & care directions, before attempting to assemble
I
MPORTANT:
1. When installing and assembling your gazebo, it is recommended that 4 or more adults
are involved.
2. Do not use the unit during an electrical storm, as there is a remote chance of getting
struck by lightning.
3. Do not climb on top of the gazebo. Falling off the gazebo can result in serious injury,
possibly even death.
4. Do not leave the gazebo assembled when there is a risk of high wind, as possible
damage will occur to the structure.
5. Never barbecue under this gazebo or use lanterns that contain open flames.
6. This package contains small items and plastic bags that should be kept away from
children.
7. Ensure that all connectors & poles are firmly secured fully in position. It is important to
do so before use so as to avoid collapsing or damage to the item, which could result in
injury.
Tools required: ladder, hammer screwdriver (not included)
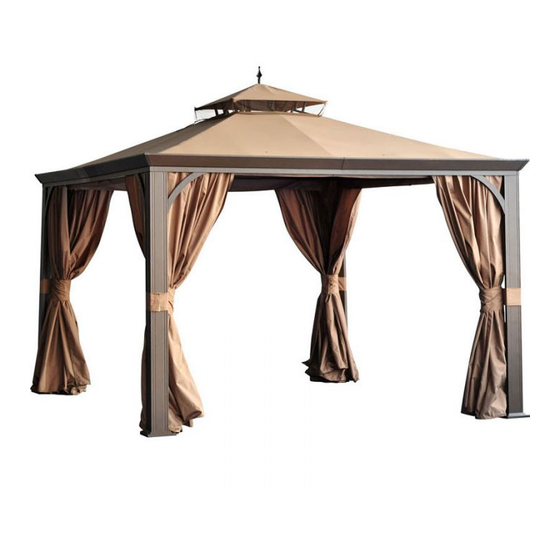
L-GZ205PCO-4
Florence Gazebo
1
Advertisement

Subscribe to Our Youtube Channel
Related Manuals for Sunjoy Florence


Summary of Contents for Sunjoy Florence
- Page 1 Assembly Instructions L-GZ205PCO-4 Florence Gazebo IMPORTANT: Please read and follow all safety statements, warnings, assembly instructions, use & care directions, before attempting to assemble MPORTANT: 1. When installing and assembling your gazebo, it is recommended that 4 or more adults are involved.
-
Page 2: Parts List
Parts List Long beam 1 Long beam 2 Short beam 1 Short beam 2 Long netting pipe Short netting pipe Support piece 1 Support piece 2 Top bar 1 Top bar 2 Top bar 3 Top connector Bar connector 1 Bar connector 2 Corner connector 1 Corner connector 2... - Page 3 Hook Patch Canopy Top canopy Wall Netting Hardware Pack used in Step 1 1/4”-20*0.6 Screw 32 PCS 1/4”-20 Flat washer 40 PCS 1/4”-20*0.6 Screw 8 PCS 1/4”-20 Wrench 1 PC Fig.1: Insert Beam A1 (B1) to Beam A2 (B2), and tighten them with Screw (CC) and Flat washer (BB). Use Screw (AA) and Flat washer (BB) to tighten Connector (K) to beams.
- Page 4 Hardware Pack used in Step 2 1/4”-20 Flat washer 16 PCS 1/4”-20*0.6 Screw 16 PCS Fig.4: Assemble Hook (P) to Top connector (H). Fig.4-1: Insert Bar connector (I2) to Top bar (F&G) and tighten them with Screw (CC) and Flat washer (BB).
- Page 5 Hardware Pack used in Step 3 1/4”-20*0.6 Screw 20 PCS 1/4”-20 Flat washer 60 PCS 1/4”-20*0.6 Screw 16 PCS 1/4”-20*0.75 Screw 16 PCS 1/4”-20*2.125 Screw 8 PCS Plastic ring 104PCS ¢5/16"*7.08 Stake 12 PCS...
- Page 6 Fig.7: Assemble Top canopy (S) on the frame, and screw Finial (O) on. Fig.8: Put Base (M) onto Pole (L), and tighten Stake plate (N) with Pole (L) with Screw (AA) and Flat washer (BB). Fig.9: Tighten Pole (L) to the beam corner with Screw (DD) and Flat washer (BB). Fig.10: Tighten Patch (Q) to Pole (L) with Screw (AA) and Flat washer (BB).
- Page 7 USE & CARE: 1. This Gazebo is not a permanent structure and should be disassembled & stored away after use. 2. Do not repack your gazebo until completely dry. 3. This Gazebo must be assembled by Four adults or more. 4.
-
Page 8: Instructions De Montage
Instructions de Montage L-GZ205PCO-4 Gazebo (Tente) Florence IMPORTANT: Veuillez lire et suivre tous les avertissements de sécurité, les avis, les instructions de montage, et d’emploi et soin, avant d’essayer de monter. MPORTANT: 1. Nous recommandons l’aide de 4 adultes ou plus pour l’installation et le montage de votre gazebo. -
Page 9: Liste De Pièces
Liste de Pièces Poutre Longue Poutre Longue Poutre Courte 1 Poutre Courte 2 Tuyau à Moustiquaire Long Tuyau à Moustiquaire Court Pièce de soutien 1 Pièce de soutien 2 Barre du Toit 1 Barre du Toit 2 Barre du Toit 3 Connexion de la Cime Connexion de Barre 1 Connexion de Barre 2... - Page 10 Crochet Plaque Toiture Toiture Supérieure Moustiquaire ère Sachet de Quincaillerie pour la 1 étape Boulon 1/4”-20*0.6 32 Pieces Rondelle Plate 1/4”-20 40 Pieces Boulon 1/4”-20*0.6 8 Pieces Clé 1/4”-20 1 Pièce Fig.1: Introduisez les Poutres A1 (B1) dans les Poutres A2 (B2), et fixez-les avec Boulon (CC) et Rondelle Plate (BB).
- Page 11 ème Sachet de Quincaillerie pour la 2 étape Rondelle Plate 1/4”-20 16 Pièces Boulon 1/4”-20*0.6 16 Pièces Fig.4: Vissez le Crochet (P) dans la Connexion de la Cime (H). Fig.4-1: Introduisez les Connexions de Barre (I2 ) aux Barres du Toit (F&G) et fixez-les avec Boulon (CC) et Rondelle Plate (BB).
- Page 12 ème Sachet de Quincaillerie pour la 3 étape Boulon 1/4”-20*0.6 20 Pièces Rondelle Plate 1/4”-20 60 Pièces Boulon 1/4”-20*0.6 16 Pièces Boulon 1/4”-20*0.75 16 Pièces Visse 1/4”-20*2.125 8 Pièces Anneau en Plastique Pièces ¢5/16"*7.08 Piquet 12 Pièces...
- Page 13 Fig.7: Assemblez la Toiture (S) sur la charpente, et vissez l’ornement (O) sur la connexion de la cime. Fig.8: Introduisez la Base (M) dans sur le Poteau (L), et fixez la Plaque d’Ancrage (N) à Poteau (L) avec Boulon (AA) et Rondelle Plate (BB). Fig.9: Fixez le Poteau (L) au coin de la Poutre avec Boulon (DD) et Rondelle Plate (BB).
- Page 14 EMPLOI ET SOIN: 1. Cette tente n’est pas une structure permanente et doit se démonter et se garder après l’emploi. 2. N’emballez pas votre tente de nouveau si il n’est pas complètement sec. 3. Quatre adultes ou plus seront nécessaires pour construire cette Tente. 4.
Need help?
Do you have a question about the Florence and is the answer not in the manual?
Questions and answers