Advertisement
Quick Links
Signal
Area Light
Installation Guide
Included components
12ft
16ft
Pole with base plate
2X - 5/16 button
Head cap screw
2X - 5/16
Top cap
Finial
OR
washer
Tools Required
• Safety glasses
• Hex key 5/32" for nut covers, 7/32" for luminaire to pole, 3/16" for top cap/finial attachment
• Wrenches, 1-1/8"
• Screwdrivers, Phillips and straight blade
• Wiring tools and connectors
• Proper personnel, crane or lift for hoisting unit onto anchors
• Level
• Dimming control, if required.
• Twist lock photo eye, if required
20ft
25ft
2X - 5/16
washer
Twist lock receptacle,
optional
2X - 5/16
Shorting cap for
sealing
Twist lock,
washer
optional
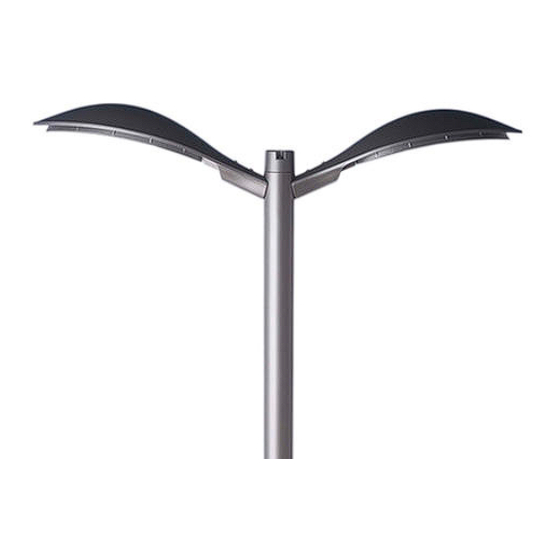
Signal 32 luminaire
Signal 24 luminaire
2X - 3/8
2X - 3/8 button
washer
Head cap screw
4X - Nut cover with
1/4-20 x 5/8" button
head cap screw
www.landscapeforms.com
ASSEMBLE WITH CARE! To protect this finish during assembly, place
unwrapped powdercoated parts on packaging foam or other non-marring
surface. Do not place or slide powdercoated parts on concrete or other
hard or textured surface – this will damage the finish causing rust to occur.
Use touch-up paint on any gouges in the finish caused by assembly tools.
Landscape Forms is not responsible for site preparation and
footings. Refer to the installation guide for the Signal Area light
anchor kit for installing the anchor bolts.
WARNING! Pole mounted luminaires must be attached either
before or immediately after pole installation. Failure to do so may
cause vibration damage to the pole and will void the pole
warranty.
CAUTION! This unit is heavy. To avoid injury or damage to the
finish, we recommend using a crane or lift for hoisting the unit
onto the anchors.
Date: December 12, 2019
Ph: 800.521.2546
Page 1 of 6
Advertisement

Related Manuals for Landscape Forms Signal


Summary of Contents for Landscape Forms Signal
- Page 1 Use touch-up paint on any gouges in the finish caused by assembly tools. Landscape Forms is not responsible for site preparation and Signal 32 luminaire footings. Refer to the installation guide for the Signal Area light anchor kit for installing the anchor bolts. WARNING! Pole mounted luminaires must be attached either before or immediately after pole installation.
-
Page 2: Basic Installation Steps
INSTALLATION INSTRUCTIONS: Route the line voltage wires (provided by others) up the pole and through the *refer to the Signal Area Light Anchor kit installation guide for setting the pole anchors. Concrete should be fully cured before installing the pole.* grommet at the bottom of the driver plate assembly. - Page 3 Signal Area Light Date: December 12, 2019 Installation Guide www.landscapeforms.com Ph: 800.521.2546 3/8 BUTTON HEAD CAP SCREWS AND WASHERS HAND HOLE ORIENTED ON SIDE OPPOSITE OF LUMINAIRE 24” MIN [609mm] Fig. 3 – Install nut covers SETBACK SIDEWALK Fig. 2 – Install pole Fig.
- Page 4 Fig. 9 – driver plate installation in pole Fig. 10 – Cool splice connector Fig. 10 – finial wiring for twist lock Step 1 Step 3 Step 2 SIGNAL WIRING DIAGRAM: 50W without twistlock SIGNAL WIRING DIAGRAM: 50W with twistlock Page 4 of 6...
- Page 5 Ph: 800.521.2546 TO LED LUMINAIRE TO LED LUMINAIRE SIGNAL WIRING DIAGRAM: 50W and 50W without twistlock SIGNAL WIRING DIAGRAM: 50W and 50W with twistlock SIGNAL WIRING DIAGRAM: 96W without twistlock SIGNAL WIRING DIAGRAM: 96W with twistlock Page 5 of 6...
- Page 6 Date: December 12, 2019 Installation Guide www.landscapeforms.com Ph: 800.521.2546 SIGNAL 32 SIGNAL 24 SIGNAL WIRING DIAGRAM: 96W and 50W without twistlock SIGNAL WIRING DIAGRAM: 96W and 50W with twistlock TO LED LUMINAIRE TO LED LUMINAIRE SIGNAL WIRING DIAGRAM: 96W and 96W without twistlock...
Need help?
Do you have a question about the Signal and is the answer not in the manual?
Questions and answers