Table of Contents
Advertisement
Quick Links
Advertisement
Table of Contents

Subscribe to Our Youtube Channel
Related Manuals for Arturia KEYSTEP PRO


Summary of Contents for Arturia KEYSTEP PRO
- Page 1 USER MANUAL...
- Page 2 Information contained in this manual is subject to change without notice and does not represent a commitment on the part of Arturia. The software described in this manual is provided under the terms of a license agreement or non-disclosure agreement. The software license agreement specifies the terms and conditions for its lawful use.
- Page 3 The Quick Start Guide for KeyStep Pro Be sure to register your KeyStep Pro as soon as possible! There is a sticker on the bottom panel that contains the serial number of your unit and an unlock code. These are required during the online registration process.
- Page 4 The information contained in this manual is believed to be correct at the time of printing. However, Arturia reserves the right to change or modify any of the specifications without notice or obligation to update the hardware that has been purchased.
- Page 5 These keys make the product smaller and more portable but—make no mistake—KeyStep Pro is built like a tank so that it can be taken on tour with confidence. We hope the four polyphonic sequencers will unleash your most interesting musical ideas.
- Page 6 MIDI Control Center. You’ll also find links to our tutorials and FAQs. KeyStep Pro is easy to use, so you’ll probably start experimenting with it right out of the box. However, please be sure to read this manual even if you are an experienced user as we describe many useful tips that will help you get the most out of your purchase.
-
Page 7: Table Of Contents
2.1. Usage Precautions................................6 2.2. Warning ...................................... 6 2.3. Register your Instrument..............................6 2.4. Connecting the KeyStep Pro to the World ......................6 Basic Operations ................................7 3.1. Plug and Play................................... 7 3.1.1. Slimkey Keyboard ........................................7 3.1.2. Keyboard MIDI Channel Selection ................................... 8 3.1.3. - Page 8 5.2.3. Editing an Arpeggio ........................................ 52 5.2.4. Arpeggiator Features ......................................53 5.2.5. Making the Most of the Arpeggiators................................57 5.3. The Four Sequencers ..............................58 5.3.1. Exploring the Sequencers ....................................58 5.3.2. Recording ............................................61 5.3.3. Editing Steps..........................................64 Advanced editing ........................................66 5.3.4.
- Page 9 Revise a Template........................................128 9.3.3. Revise a Pattern ........................................129 9.4. Store To/Recall From..............................130 9.4.1. Storing a Project to the KeyStep Pro ................................130 9.4.2. Recall a Project from the KeyStep Pro............................... 131 9.4.3. Template Utilities ........................................131 9.5.
- Page 10 Declaration of Conformity..........................147 Software License Agreement ........................148...
-
Page 11: Welcome And Introduction
Whatever you do, take the time to get to know the Keystep Pro inside out. To sustain the fascination you feel, learn the functions of the Keystep Pro one by one and test your knowledge continuously. The Keystep Pro is an advanced controller with many levels of understanding. -
Page 12: Installation
2. INSTALLATION 2.1. Usage Precautions The Keystep Pro uses an external power adapter. Do not use any power supply or adapter other than the unit provided by Arturia. Arturia accepts no responsibility for damage caused by the use of an unauthorized power supply. -
Page 13: Basic Operations
3. BASIC OPERATIONS 3.1. Plug and Play Connect the KeyStep Pro to your computer or an external device as shown in the image below and you're ready to go! Here are a few pointers to make the most of your first session. -
Page 14: Keyboard Midi Channel Selection
The KeyStep Pro can transmit notes and other MIDI messages on 16 channels numbered from 1 to 16. Each of the four tracks of the KeyStep Pro transmits on its own channel: Track 1 on MIDI channel 1, and Tracks 2, 3 and 4 on MIDI channels 2, 3 and 4, respectively. Track 1 is a special case because it has both a melodic sequencer and a drum sequencer. -
Page 15: Pitch And Mod Touch Strips
If you have a momentary footswitch, plug it into the Sustain jack socket on the rear panel. If it works the wrong way around, disconnect KeyStep Pro from its power source and then reconnect it. KeyStep Pro will sense the polarity of the pedal, and it should work fine after that. -
Page 16: Octave - / Octave
- Hold the SHIFT key (the leftmost button on the KeyStep Pro) and press 'Semi Up' or 'Semi Down' and hear how your sequence is transposed up or down in semitones (half steps) on the fly. -
Page 17: Time Division
Imagine starting with a simple pattern, copying it to the three other sequencers, modifying those copies with Invert, Nudge and Transpose, then running them simultaneously with the first sequence. You get the idea ... Arturia - User Manual Keystep Pro - Basic Operations... -
Page 18: Using The Arpeggiator
KeyStep Pro. Pressing HOLD lets you lift your fingers off the keys without stopping the arpeggio. What's more, once HOLD is active and if you keep at least one key pressed down, you can add notes to the arpeggio;... -
Page 19: Scales & Chords
♪: If at a later moment you want to check where the split point is, press the same two track buttons simultaneously. The KeyStep Pro will display the ranges in the colour of the tracks that are part of the split. -
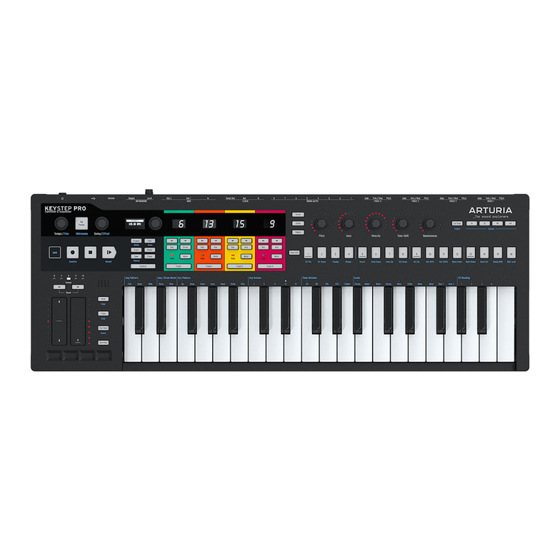
Page 20: Keystep Pro Overview
CV Gate outputs 4.1.1..with a Computer The KeyStep Pro is a USB class-compliant controller, so at its most basic level it can be connected to any computer with a USB port, through which it receives its DC power supply, and can be used as an input device for various applications. -
Page 21: With External Devices
4.1.2..with External Devices As shown above, you can connect the KeyStep Pro to a variety of synths, drum machines and/or Eurorack modules. • When connecting to a synth, use one of the two MIDI Out ports. If you need to... -
Page 22: Analog Connections (Cv And Gate)
Pitch, Velo/Mod and Gate connectors on the back panel. Each of the KeyStep Pro's four tracks has its own dedicated set of connectors, allowing you to hook up to and control as many as four devices at the same time! 4.1.4.1. -
Page 23: Midi Connections
MIDI channels. Connect the KeyStep Pro to a USB port on your computer using the supplied USB host cable. We first have to 'tell' Ableton that we want to use the KeyStep Pro as a controller in Ableton: •... - Page 24 Select 'in' to monitor directly what is coming in on this channel. Repeat this for KeyStep Pro Tracks 3 and 4 and select MIDI channel as input for Ableton track 3 and MIDI channel 4 as the input to Ableton track 4.
- Page 25 On Track 1 of the KeyStep Pro, press the Drum button. ♪: By default, the KeyStep Pro's drum track (only available on Track 1) will always transmit on MIDI channel 10. Because you've set the Ableton drum track to listen on MIDI channel 10, the two will match.
- Page 26 4.1.5.2. Tutorial 1: Using MIDI to Control Arturia's MINI V VST synth In this tutorial, we will use the KeyStep Pro to control the filter cut-off frequency of Arturia's MINI V VST synth. The MINI V is part of Arturia's V Collection, a great series of software emulations of classic hardware synths.
-
Page 27: Clock In/Out
If clock signals are being received but Play is not active, the unit will start as soon as you press the Play button. • If Sync is set to an external source and a TRS connector is used, the Keystep Pro will follow the master and will: •... -
Page 28: Master Or Slave
4.1.7. Master or Slave KeyStep Pro can be the clock master for an entire MIDI rig, or it can just as happily serve as a slave to several clock sources. Clock In and Clock Out can synchronize with older clock types such as 2, 24 or 48 ppqn (pulses per quarter note), or even a single pulse per step. - Page 29 4.1.7.2. KeyStep Pro as Slave The KeyStep Pro can function as a slave to an external clock source. To use the KeyStep Pro as a slave, in Utility>MIDI Setting>Clock receive must be on. This is the default setting. You can set the Slave sync options in Utility>Sync>Input. To access the utility menu, hold down SHIFT and press the Project button.
-
Page 30: Front Panel Overview
Looper Keyboard 4.2.1. Tempo Section Here you can find the tempo-related controls of KeyStep Pro. When KeyStep Pro is internally synchronized, your settings here will affect the internal sequencers/arpeggiators and any external equipment connected to KeyStep Pro. The Tempo/Fine knob sets the tempo from 30-240 beats per minute (BPM). As you turn this knob, the BPM value is automatically rounded off to the nearest whole number and shown on the KeyStep Pro's OLED display. - Page 31 Swing/Offset knob lets you adjust the timing offset for a track ♪: If the KeyStep Pro is externally synchronized, the master tempo will be determined by an external clock source and the Tempo/Fine knob and the Tap Tempo button will be ignored.
-
Page 32: Transport Section
The Stop button has an additional function. If for some reason you end up with a stuck note playing, just press the Stop button quickly three times in a row. The KeyStep Pro will then send an All Notes Off command via MIDI. -
Page 33: Control Section
The KeyStep Pro has many internal settings that you may want to adjust. The Utility menu is where you set and change most of the global settings for the KeyStep Pro. 'Global' means that these setting are shared by all projects. They will be saved as soon as you exit the Utility menu, which you access by holding down SHIFT and pressing the Project/Utility button. -
Page 34: Track Sections (4X)
Center. 4.2.6. Track Sections (4x) The KeyStep Pro has four separate tracks, each of which has its own dedicated set of buttons to give you instant control over important features. The track controls are identical except for one button: Track 1 has a Drum button for the drum sequencer, but Tracks 2, 3 and 4 each have an Arp button for the arpeggiators. - Page 35 Step Buttons or Keyboard LEDs. 4.2.6.4. Sequencer and Arpeggiator Buttons The KeyStep Pro has four tracks, each with its own independent sequencer or arpeggiator. Sequencer Arpeggiator...
-
Page 36: Arrangement Section
This is a special drum or 'trigger' sequencer that sends signals to the Drum Gates outputs on the back panel of the KeyStep Pro. The Drum sequencer has eight gate outputs (labelled 'Drum Gates 1-8'). You can use these outputs to trigger connected drum machines or synthesizer modules with gate (or 'trigger') signals. -
Page 37: The Step Edit Button
On the KeyStep Pro, these 16 Step buttons can do many other things that just active or deactivate steps. For example, holding down the Lst Step (Last Step) button while pressing one of the Step buttons lets you set the sequence's length. -
Page 38: The Main Encoders (5X)
Settings>Velocity Curve and the downloadable MIDI Control Center you can choose a suitable velocity scaling. In Arpeggio (Arp) mode, the Velocity encoder functions as a global encoder that simultaneously affects all velocities in your arpeggio. Arturia - User Manual Keystep Pro - KeyStep Pro Overview... - Page 39 Track 1, 2, 3 or 4 button, then hold down a Step button while adjusting one or more of the main encoders. Doing this will set specific values for that step that are different to the default parameters (as described above). Arturia - User Manual Keystep Pro - KeyStep Pro Overview...
-
Page 40: Keyboard Section
♪: The KeyStep Pro will remember the last position of the Mod strip of the currently selected track when you switch to another track. In a sense, you therefore have four modulation strips, one for each... - Page 41 ♪: To quickly reset the octave to the default mid-point, hold down both Octave arrow buttons simultaneously. Arturia - User Manual Keystep Pro - KeyStep Pro Overview...
- Page 42 You can always tell whether you're in add or replace mode: if you are in Quick Edit or Step Edit mode, when the LED above a key blinks the existing notes of the step will be replaced. Arturia - User Manual Keystep Pro - KeyStep Pro Overview...
-
Page 43: The Looper
Step buttons. With the Looper, you can loop a range of steps in a sequence. The length of the loop is determined by the indentation you press: 1/4, 1/8, 1/16 or 1/32. Arturia - User Manual Keystep Pro - KeyStep Pro Overview... -
Page 44: Keyboard
4.2.13.1. Keyboard LEDs Each key of the KeyStep Pro has a corresponding multi-colour LED located directly above it. These LEDs blink to provide visual feedback on what the four sequencers/arpeggiators are playing. The colour of each LED changes to match the selected track (Track 1 is green, Track 2 is orange, Track 3 is yellow and Track 4 is red). -
Page 45: Shift Functions
It's the leftmost button on the front panel and it's black. The blue SHIFT text reveals its crafty secret: it is linked to all KeyStep Pro functions that are printed in blue on the front panel. Take a good look and you'll find many of them: in the Transport section, to the left of the keyboard, above the keys of the keyboard (except the highest C), below the 16 step buttons, and in the Sequence Extend section. - Page 46 F#, G, G#, A, Bb or B in the lower octave). The KeyStep Pro can transform any chord you are holding down on the keyboard into an arpeggio. It can arpeggiate your chord in seven ways: up, down, exclusive pendulum, inclusive pendulum, random, in the order you played them or polyphonically.
- Page 47 When you select a scale by pressing SHIFT + a Scale key, everything in the currently selected track ‒ the notes you are playing on the KeyStep Pro's keyboard, the active track's sequence and the active track's arpeggio ‒ will play in that scale. This is a pattern setting that is stored with the pattern when you save it.
- Page 48 All sequencers and arpeggiators can send their output signals to the four Voice outputs on the KeyStep Pro's back panel. By default, the output of Track 1 will be sent to Voice 1, the output of Track 2 to Voice 2, etc. There may be situations where you want more control of the tracks' routings.
- Page 49 Semi Up This function is for intelligent semitone (half step) upward transposition of the current sequence. Again, it's intelligent because the transpose function takes the current scale setting into account. Arturia - User Manual Keystep Pro - KeyStep Pro Overview...
- Page 50 It is also possible to change the wait-to-load behavior of Scenes and Projects. Should the KeyStep Pro wait for 1 bar, 2 bars or 4 bars before switching to the next Scene or Project? Changing Scene and Project behavior is done in Utility>Launch Quantize or in the MIDI Control Center.
-
Page 51: The Sequence Extend Section
Pressing SHIFT + Lst Step / Follow lets you follow the actively playing step while the sequence is playing. In Drum mode, when Poly is activated, the individual drum tracks can have different lengths. Arturia - User Manual Keystep Pro - KeyStep Pro Overview... -
Page 52: Back Panel Overview
KeyStep Pro! In addition, the KeyStep Pro has powerful voice-routing options. ♪: Arturia's MIDI Control Center software and the Utility menu allow you to configure the type of electrical signals that are generated and sent to each output. See Chapter 9 [p.118]... -
Page 53: Drum Gates
[p.138]. 4.3.2. Drum Gates The KeyStep Pro's Track 1 can be configured to work as an eight-output drum-trigger sequencer by pressing the Drum button on the top panel. These are the individual gate outputs for that sequencer. -
Page 54: Clock Section
(such as early drum machines produced by Korg and Roland). The KeyStep Pro is capable of both sending and receiving synchronization signals. It also has a Reset Out, allowing external sequencers with a reset input to re-start from the beginning of a sequence whenever a KeyStep Pro sequence is restarted. -
Page 55: Metronome Section
Connect an optional sustain pedal to this input. It is best to connect the pedal before switching on the KeyStep Pro, so that it can correctly sense the pedal's polarity. Be sure to keep your foot off the pedal when switching on the KeyStep Pro or its operation may be reversed. -
Page 56: Usb And Power Section
"WARNING!: Although the KeyStep Pro might seem to work OK when you power it up with a powerbank, we strongly advise you NOT to power it this way. The KeyStep Pro needs a lot of current for its LEDs and analog output. Using a defective or partially charged powerbank could damage the KeyStep Pro."... -
Page 57: Making Tracks
5.2. The Three Arpeggiators One of the unique features of the KeyStep Pro is that it has three arpeggiators. What makes it even more unique is that these arpeggiators can run in different scales and time signatures simultaneously! 5.2.1. -
Page 58: Hold And The Arpeggiator
♪: The HOLD state is not saved with the Pattern. ♪: HOLD does not work with external MIDI. If you need to hold one or more external MIDI notes, send the KeyStep Pro a Sustain message using a sustain pedal. -
Page 59: Arpeggiator Features
5.2.4. Arpeggiator Features The KeyStep Pro's arpeggiators have many features not found on other arpeggiators. To start with, there are three arpeggiators (on Tracks 2, 3 and 4). Imagine the creative options at your disposal when you have three arpeggiators in HOLD playing simultaneously and you are able to transpose each of them individually within its predefined scale —... - Page 60 On most arpeggiators, pressing an octave down/up button will transpose all currently held notes in the arpeggio one octave down or up. Uniquely, the KeyStep Pro's arpeggiator will preserve the pitch of your arpeggio. If you shift the octave down or up, the...
- Page 61 While an arpeggio is running, you can alter its scale and root on the fly. Please refer to the to the Scales [p.85] section later in this chapter for more information. Arturia - User Manual Keystep Pro - Making Tracks...
- Page 62 When you are done, lift all your fingers off the keyboard and then release the SHIFT and Tie/Rest/Chord buttons. Now the Chord button will flash once per second, showing that the KeyStep Pro is in Chord mode. The next single key you press will play the chord you created; in other words, it will be the new root note of that chord.
-
Page 63: Making The Most Of The Arpeggiators
(LFO→Filter Cutoff), the Attack, Sustain and Decay stages of the note's amplitude or filter envelope, and its velocity or aftertouch (pressure). Arturia - User Manual Keystep Pro - Making Tracks... -
Page 64: The Four Sequencers
C once. Don't forget that the sequencers are polyphonic, capable of stacking up to 16 notes per step. The KeyStep Pro thus enables you to create and play up to 64 unique sequences wherever you go. And in spite of its small footprint, there are lots of ways to modify your sequences during a performance. - Page 65 Mono mode and suddenly introducing chords after switching to Poly mode. Of course, you have to play those notes yourself. The KeyStep Pro is an amazing piece of kit, but it cannot read your musical mind! In Drum mode, Mono mode means that all 24 tracks share the same length.
- Page 66 5.3.1.5. Scales, Chords and the Sequencer The KeyStep Pro gives you a lot of control over the tonality of your sequence. Once you've programmed a sequence, you can change its root note and the scale it plays in. To define a new root note for your sequence, hold down SHIFT and press the Root key (F in the upper octave), then press a key in the lower octave of the keyboard.
-
Page 67: Recording
♪: The KeyStep Pro is in Quick Record mode when both the Record and the Step Edit buttons are off. In Quick Record mode, the 16 step buttons turn into simple on/off controls for each step. To record something into a step just hold down the corresponding step button and play a note or a chord. - Page 68 Press RECORD to activate Step Record mode. The KeyStep Pro will jump to the first step of the Pattern and wait for you to enter a note or notes. Start playing and notice how the steps fill. At the end of the Pattern, the KeyStep Pro will loop back to the beginning and overwrite the notes you played before.
- Page 69 The sequencer is now looping; the notes of any keys you press will be added to the loop. The KeyStep Pro sequencers are polyphonic, so if you play a block chord instead of a single note, all the notes of the chord will be entered into the currently active step of the loop. Of course, if you want to hear all these notes, you must be in Poly mode.
-
Page 70: Editing Steps
Most early step sequencers could not do this; instead, the pitch of each note was set with a knob or slider. More importantly, the KeyStep Pro sequencer lets you edit all parameters of the note or notes stored in a step. - Page 71 That might seem trivial, but it can make a big difference to the feel of your sequence. When your sequence is running, the KeyStep Pro will light up the buttons of the steps that are ON in your sequence. You can do several things now: •...
-
Page 72: Advanced Editing
♪: In Overdub mode you can add notes to a chord until the maximum of 16 notes-per-step is reached. New notes you add when Overdub is ON will automatically be selected for advanced editing. Press OVERDUB once more to exit Advanced Edit mode. Arturia - User Manual Keystep Pro - Making Tracks... -
Page 73: Working With Patterns
It's called the Step Skip feature: hold down a step button and then press the sequence page buttons (16, 32, 48 and/or 64) in which you do not want the KeyStep Pro to play this step. For example, if you have four identical patterns in the four pages, hold down steps 8 and 16 then press 32 and 64. - Page 74 We've already hinted at this in a previous paragraph: whenever you add a note or notes to a (drum)sequence, the KeyStep Pro will read the current values of the Gate and Velocity encoders and insert the new note or notes with those values. This feature has an enormous creative potential that you will come to appreciate when you get to know your KeyStep Pro better.
-
Page 75: Copy, Paste & Erase (Steps)
♪: You can repeat paste as many times as you want, as long as you do not perform a new copy operation. If you do, the old contents of the copy buffer will be overwritten. Arturia - User Manual Keystep Pro - Making Tracks... -
Page 76: Copy, & Paste
5.3.7. Copy, & Paste (Pages) The KeyStep Pro has four 'pages' of steps: page 1 (steps 1-16); page 2 (steps 17-32); page 3 (steps 33-48); page 4 (steps 49-64). These correspond to the four long buttons to the right of the Lst Step button, under the Arturia brand name. -
Page 77: The Drum Sequencer
◦ your drum track. • The Drum sequencer has a polymeter feature (described in the next section) that allows each drum track within a Drum Pattern to have its own length. Arturia - User Manual Keystep Pro - Making Tracks... - Page 78 Drum track 4 recycles every 6 sixteenth notes. Therefore, it will take a long time before they all recycle at the same moment, as they did in the beginning. In fact, it will be 360 bars of 4/4 time before the first bar is heard again! Arturia - User Manual Keystep Pro - Making Tracks...
-
Page 79: Gates And Triggers
The duration of this decrease depends on the release setting (R) of the envelope generator. It is important to realise that the KeyStep Pro does not generate ADSR envelopes, nor can it control their parameters (A, D, S and R). The KeyStep Pro only generates gates and triggers. -
Page 80: Creating Drum Patterns
5.4.3. Creating Drum Patterns For this section, you need to have your KeyStep Pro in Drum mode. To do that, press the Drum button on Track 1. 5.4.3.1. Drum Quick Edit Mode Quick Edit is the fastest way to create and experiment with rhythmic patterns. - Page 81 DAW (consult the manual of the DAW or virtual instrument to discover how to do this) or by selecting another chromatic low note in the KeyStep Pro using Utility>DrumMap>Config>Chromatic Low Note or in the MIDI Control Center.
- Page 82 64th of a step (short) to 64 steps (long). These values can be set independently for each step in a Pattern. By default, the Gate time is set to half a step length for each event. Arturia - User Manual Keystep Pro - Making Tracks...
- Page 83 Velocity encoder and will keep playing for as long as you want it to (the Gate time). To silence a Drum event, simply press its step button to deactivate it. Arturia - User Manual Keystep Pro - Making Tracks...
- Page 84 To follow the sequence through the other page(s), hold down SHIFT and press Lst Step/Follow. This toggles the KeyStep Pro in/out of Pattern Follow mode. When Pattern Follow mode is active during playback, the buttons of the current page and...
- Page 85 50% chance it will play the next step, a 25% chance it will play the same step again and a 25% chance it will play the previous step. The default setting is Forward. Arturia - User Manual Keystep Pro - Making Tracks...
- Page 86 Triplet options are also available. ♪: When the KeyStep Pro clock is set to 1 pulse per step, changing Drum Time Division is only available when the KeyStep Pro is stopped. To set Time Division, hold down the SHIFT button then press the key that corresponds to the timing you want: •...
- Page 87 Step Skip feature: hold down a step button then press the buttons (16, 32, 48 or 64) of pages in which you do not want the KeyStep Pro to play that step. For example, if you have identical Patterns in each of the four pages, hold down step buttons 8 and 16, and press the 32 and 64 buttons.
-
Page 88: Rhythmic Examples
To program this rhythm into the KeyStep Pro, you might want to read 'S' as a drum hit with maximum velocity and 's' as a drum hit with medium velocity. The same applies to 'T' and 't'. - Page 89 • Select/load a drum kit on your DAW (MIDI) or external synth. • Play the keys of the lowest octave on the KeyStep Pro to familiarize yourself with the drum sounds triggered by each key. • Now, we want to make an 8-step rhythm. To create that, hold down 'Lst Step' and press the step 8 button.
- Page 90 Rwanda and Central Africa. Setting Pattern Rotation By shifting a Pattern one position to the right with the KeyStep Pro's nudge function (SHIFT + NUDGE>) you can change the overall character of the rhythm. If you start the above rhythm on the second step, as in [× · · × · ], it suddenly becomes a rhythm often found in Central Africa, Bulgaria, Turkey, Turkestan and Norway.
-
Page 91: Special Features
5.5. Special Features The KeyStep Pro has various special features that you can use to add spice and variation to your sequences: 5.5.1. Scales Scales express emotion in music. A single melodic line can evoke many emotions, but when you add chord notes from the scale to that melodic line, the feeling will become much stronger. - Page 92 Blues scale (C, Eb, F, Gb, G, Bb) To hear (and see) the effect of selecting a scale on your KeyStep Pro, switch it ON if it isn't on already (do you ever switch it off?) and select a preset on your external synth with a fairly simple sound.
- Page 93 SHIFT + Scale key option. You'll hear your arpeggio or sequence change scale on the fly. Remember, the KeyStep Pro has three arpeggiators, on Tracks 2-3. !: You can also use the Pitchbend strip to change the pitch of your arpeggio.
-
Page 94: Chord Mode
♪: If you haven't yet made any changes to the User 1 and User 2 scales, they will both be chromatic. 5.5.2. Chord Mode The KeyStep Pro can memorize a chord. You can then play that chord just by pressing a single key on the keyboard. The chord will transpose automatically as you press different keys. - Page 95 Tie/Rest/Chord, you can add notes to the chord. When you let go of both Tie/Rest/Chord and SHIFT, the KeyStep Pro will switch into Chord mode and the Tie/Rest/Chord button will flash once per second. The next single key you press will play the chord you created in the currently active scale.
-
Page 96: Using Sync
Time Division allows you to sync proportionally: at double speed, at half-speed, or even slower than that. The KeyStep Pro can also sync to your modular system. The CLOCK In jack on the back panel accepts clock signals that will sync the KeyStep Pro to the clock of your Eurorack system, be it a sequencer and LFO or a dedicated clock module. -
Page 97: What Is A Project
KeyStep Pro Projects are designed for that kind of situation. The internal memory of the KeyStep Pro holds a total of 16 Projects. You could think of a Project as a single song (although it could be an entire performance). Each Project contains: •... -
Page 98: Saving A Project
Warning! If Project 16 is current and you want to save it, it will be stored to Project 1, overwriting all existing data in Project 1 in the process. ♪: PASTE has no function at Project level. Arturia - User Manual Keystep Pro - What is a Project? -
Page 99: Erasing A Project
Track 1 can be either in Drum or Seq mode. Tracks 2, 3 and 4 can either be in Arp or Seq mode. ♪: When you save the current situation of the tracks in a Scene, your track selection will be saved with it. Arturia - User Manual Keystep Pro - What is a Project? -
Page 100: Selecting A Track
Track buttons. Transpose, Octave, pitch bends, SHIFT functions (SHIFT + key), steps and the parameter changes you make with the main encoders all apply to the track in focus. Arturia - User Manual Keystep Pro - What is a Project? -
Page 101: Patterns
Why is this important? The KeyStep Pro is very much an improvisation tool, so when you load a Pattern you have many tools available to create variations of that current Pattern. When you are making changes, some will turn out OK but others will be undesirable or even disastrous. -
Page 102: Copy, Paste & Erase Sequencer Patterns
Keep holding down Paste and press the step button(s) of the destination(s) to which you want to copy the Pattern. The content of the copy buffer will be pasted into the Patterns you select. Press the Exit button to exit the Paste process. Arturia - User Manual Keystep Pro - What is a Project? -
Page 103: Copy, Paste & Erase Of Drum Patterns
Unlit for an empty Pattern Keep the Erase button held down and press the step button(s) of the Pattern(s) you want to erase. To exit Erase mode press EXIT. Arturia - User Manual Keystep Pro - What is a Project? -
Page 104: Undo
6.3.6. Undo Of course, there's always the risk that you erase something unintentionally. Fortunately, the KeyStep Pro has an undo function. It can't save you all the time, but when available, usually after a critical erase, the Exit button blinks. - Page 105 [16] first sequence [1] first sequence [1] dummy [16] dummy [16] second sequence [2] second sequence [2] first sequence [1] dummy [16] dummy [16] dummy [16] second sequence [2] Arturia - User Manual Keystep Pro - What is a Project?
-
Page 106: Scenes
If you want to preserve your Chain for posterity, don't forget to save it before powering off the KeyStep Pro. You save the Chains you've created for each track by saving the current project by pressing SAVE + Project and confirming my pressing the selection encoder. - Page 107 Scene, once loaded, will start playing. ♪: Scenes are saved in the KeyStep Pro's internal memory, so if you power down the KeyStep Pro OFF and then switch it back ON, your saved Scenes will still be there. All Patterns of all sequencers – but not the arpeggios – will reset when a new Scene is loaded.
-
Page 108: Wait To Load
6.4.3. Wait to Load The KeyStep Pro can play Patterns and Chains (if any) in a Project and Scenes. With so many 'play options' in your controller, you need a way to specify when to switch from one Scene to another, or from one Project to another. Do you want to switch Scenes the very... -
Page 109: Top-Down
6.4.5. Top-Down There are two ways you can start composing and song-writing on the KeyStep Pro. The first is the top-down approach. It's similar to a writer who sketches a storyline for a book. He/ She will start by writing a series of scenes that make up the story. -
Page 110: Bottom-Up
Of course, if sync is not what you're after, throw in a few odd numbers. The number 9 has interesting permutations: • 3+3+3 • 4+5 or 5+4 • 3+2+2+2 or 2+2+3+2 Whatever you do, enjoy it! Arturia - User Manual Keystep Pro - What is a Project? -
Page 111: Timing
7. TIMING This chapter is all about timing. How do you sync your external gear to the KeyStep Pro? Or, the other way around, how do you sync the KeyStep Pro's sequencers and arpeggiators to an external sequencer or a DAW? Hopefully, you'll find all the answers here. -
Page 112: Metronome
7.1.2. Metronome The Keystep Pro has a metronome function that enables you to hear the beat in tempo as well as count-ins before realtime recording. By default, the Metronome is off. To turn it on, hold down SHIFT and press the Tap Tempo/Metronome button. The retractable Level knob on the back panel of the KeyStep Pro enables you to change the volume of the built-in piezoelectric speaker (above the Hold/Clear button). -
Page 113: Sync
KeyStep Pro. That is where Sync comes in. The KeyStep Pro can send sync signals via USB, MIDI Out 1, MIDI Out 2 or Clock Out to external devices. It can also receive sync signals from external devices via USB, MIDI In or Clock In. -
Page 114: Sequencer Sync
The Sync option is the key to unlocking the creative power of the sequencers. By default, Sync is ON. When Sync is active (set to AUTO) the KeyStep Pro's tempo will lock to the nearest multiple of the tempo of the incoming clock signal. -
Page 115: Control Mode
MIDI CC# messages have existed for over 40 years and, despite their enormous potential, they are not widely used. When the KeyStep Pro is in Control mode and you turn one of the five main encoders, a CC# message will be transmitted. The default CC# messages that will be transmitted are:... -
Page 116: Cc# Patterns
If you now turn the main encoders, you will see their CC# messages (changing values) displayed in the console window. ♪: If you're a lucky owner of the Arturia Pigments software synth, you could map four of these encoders to Pigment's four macro knobs. 8.1.2. CC# Patterns A Pattern in the KeyStep Pro's Control Track runs in parallel with the normal Track Patterns (sequences). -
Page 117: Control Mode As Daw Automation
8.2.1. Using CC# Patterns to Store and Playback CC Values With a track of the KeyStep Pro in Control mode, the Patterns you create will act as DAW automation lanes. You can store CC# values in them that will control parameters on external MIDI devices. -
Page 118: Recording Control Changes In Step Edit Mode
CC number and its value. When the encoder is in the position that you want to record, release it. The KeyStep Pro will take a 'snapshot' of the encoder position and store it in that step. - Page 119 By default, the MicroFreak receives on all 16 channels, so we can send CC# messages from any KeyStep Pro encoder. By default, Control mode transmits on MIDI channel 1. We will assign CC 9 to Encoder 1 (Pitch). CC 9 changes Oscillator Type on the MicroFreak.
-
Page 120: Controlling Parameters In A Daw
DAW. All plugins of the Arturia V Collection series have a MIDI learn feature that enables you to link knobs on the KeyStep Pro front panel to knobs in the plugin. Imagine all the new sonic options you have when using the KeyStep Pro's encoders to simultaneously control the filters of the CZ V, the DX7 V and the Buchla Easel V, for example. -
Page 121: More About Cc# Patterns
If there is no recorded CC# data corresponding to a main encoder, its LED ring will have all LEDs lit up to indicate the previously registered value of the CC# (plus one dimmed LED at the end of the ring, if applicable). Arturia - User Manual Keystep Pro - Control Mode... -
Page 122: Realtime Recording Of Cc# Values
To exit Control mode, press the Track button of the Live Track again. All normal SHIFT functions are now at your disposal again. ♪: The Overdub button has no effect while Control mode is active. Arturia - User Manual Keystep Pro - Control Mode... -
Page 123: Front Panel Functions
8.3. Front Panel Functions In Control mode, most of the performance controls in the left half of the KeyStep Pro's front panel control the same functions as they do in normal mode, unless configured otherwise using MIDI Control Center. There are some slight variations, though, which we'll point out as we go through the performance controls: 8.3.1. -
Page 124: Keystep Pro Configuration
9. KEYSTEP PRO CONFIGURATION The KeyStep Pro has many settings that you may want to adjust, and please don't hesitate to do so. It's not like the temperature setting on a fridge that you set once and then forget about. Changes to these settings can make a lot of difference. The right settings will help you to develop a personal synthesis style. -
Page 125: Sync
To use the Metronome, activate it with SHIFT + Tap Tempo/Metronome. The default time signature is 4/4. For example, to set the time signature to 5/8, set Time division to 8 and Time signature to 5. Arturia - User Manual Keystep Pro - KeyStep Pro Configuration... -
Page 126: Launch Quantize
Pattern In this menu, you 'tell' the KeyStep Pro how it should continue to the next Pattern, Chain or Scene. Should it wait for 1 bar, 2 bars or 4 bar to make the switch? This is useful in live performance settings where you may not want to interrupt the flow of the music between Projects. - Page 127 9.1.5.5. Transport Receive This setting allows you to set whether and how the KeyStep Pro will respond to transport commands it receives over MIDI. It can either be OFF, MCC (meaning that the KeyStep Pro will use the setting currently stored in the MIDI Control Center) or use the current realtime setting.
-
Page 128: Cv Settings
9.1.5.7. Clock Receive Set whether the KeyStep Pro will receive clock signals from external MIDI devices. 9.1.6. CV Settings Values Description settings Voice 1..4 Pitch [1V/Oct Defines the voltage level the KeyStep Pro will output at the CV Pitch Format 1.2V/Oct Hz/V]... -
Page 129: Controller
These parameters enable you to set up the KeyStep Pro as a controller. 'Global MIDI Channel' sets the default MIDI channel on which the KeyStep Pro will transmit. The Knob (encoder) settings define the functionality of the five main encoders. Each encoder can have a different profile. -
Page 130: Looper Touch Strip
This menu item enables you to set the values the Looper will receive and transmit when touched. 9.1.8.1. MIDI Send/Receive Use this menu to specify whether the KeyStep Pro's Looper Touch Strip will send MIDI and react to incoming MIDI messages. The range of transmitted and recognized values is detailed below in Using the Looper Touch Strip with a DAW [p.136]. -
Page 131: Drum Map
Sets the start time of the VEGAS LED pattern. Screen Saver [2min (d), 10min, 30min] Sets the start time for the screen saver. Reset Factory Confirm [Yes,No] Restores factory settings Firmware version Displays current firmware version Arturia - User Manual Keystep Pro - KeyStep Pro Configuration... -
Page 132: Midi Control Center
Center will launch but the KeyStep Pro won't be detected properly. To use the MIDI Control Center to alter the parameters of your KeyStep Pro you will need to exit the DAW application. Arturia - User Manual Keystep Pro - KeyStep Pro Configuration... -
Page 133: Device Projects
Projects is selected from the list, the MIDI Control Center can recall that Project from the internal memory of the KeyStep Pro and place it into the User Project area in the Project Browser window. See the Store To/Recall From [p.130]... -
Page 134: Project Browser
KeyStep Pro internal memory at that Project location. !: This process will overwrite the selected Project in the KeyStep Pro internal memory. Be sure to save what you were doing before you transfer the file! Arturia - User Manual Keystep Pro - KeyStep Pro Configuration... -
Page 135: Revise A Pattern
Pattern directly into the KeyStep Pro. !: When the MIDI Control Center sends a Pattern to KeyStep Pro it will overwrite the Pattern in that memory location. Be sure this is what you want to do before you transfer one of these files! -
Page 136: Store To/Recall From
CAUTION: If you follow the procedure below, you will overwrite the current Project that resides inside the KeyStep Pro. Be sure this is what you want to do! If not, please store it to another location inside the KeyStep Pro. -
Page 137: Recall A Project From The Keystep Pro
9.4.2. Recall a Project from the KeyStep Pro It is possible to make whole Projects in the KeyStep Pro without a computer attached. It is, however, good practice to back them up from time to time. Just grab any one of the internal Projects or Patterns directly from the internal memory and store it as a Template in the Project Browser window of the MIDI Control Center. -
Page 138: Device Settings
[p.118]. 9.5.1. Midi Channel In this menu, you set the channels on which the four tracks of the KeyStep Pro will send and receive MIDI signals. The four tracks default to their track number (MIDI channels 1-4); the Drum channel defaults to MIDI channel 10. -
Page 139: Sync
9.5.4. Launch Quantize In this menu, you 'tell' the KeyStep Pro how it should continue to the next Pattern, Chain or Scene. Should it wait for 1 bar, 2 bars or 4 bar to make the switch? This is useful in live performance settings where you may not want to interrupt the flow of the music between Projects. -
Page 140: Midi Settings
9.5.5.5. Transport Receive This setting allows you to set whether and how the KeyStep Pro will respond to transport commands it receives over MIDI. It can either be OFF, MCC (meaning that the KeyStep Pro will use the setting currently stored in the MIDI Control Center) or use the current realtime setting. -
Page 141: Cv Gate Settings
These parameters enable you to set up the KeyStep Pro as a controller. 'Global MIDI channel' sets the default MIDI channel on which the KeyStep Pro will transmit. The Knob (encoder) settings define the functions of the five main encoders. Each encoder can have a different profile. -
Page 142: Touch Strip
This menu itum enables you to set the values the Looper will transmit when touched 9.5.8.1. MIDI Send/Receive Use this menu to specify whether the KeyStep Pro's Looper Touch Strip will send MIDI and react to incoming MIDI messages. The range of transmitted and recognized values is... -
Page 143: Drum Map
Sets the start time of the VEGAS LED pattern. Screen Saver [2min (d), 10min, 30min] Sets the start time for the screen saver. Reset Factory Confirm [Yes,No] Restores the factory settings Firmware version Displays current Firmware version Arturia - User Manual Keystep Pro - KeyStep Pro Configuration... -
Page 144: Keystep Pro And Your Modular System
RackBrute system. To make this possible, the KeyStep Pro has a Clock Output. A smart solution is to connect the KeyStep Pro's Clock Out to a clock divider, which will divide the tempo in half or smaller fractions. You can then use these timing signals to start events on each beat, every two beats or on each bar, for example. -
Page 145: The Modular Adventure
In addition, it has eight Drum Gate outputs that you can use to trigger Eurorack drum modules. In many areas, though, the KeyStep Pro is more advanced than the Beatstep Pro, so we at Arturia hope that the KeyStep Pro will become the controller of choice for keyboard-oriented musicians and composers. -
Page 146: Using Midi To Control Modules In Vcv Rack
10.3. Using MIDI to Control Modules in VCV Rack In the example below, we'll use a KeyStep Pro arpeggiator to control an oscillator in VCV Rack, a free virtual modular system that you can download from https://vcvrack.com install on your computer. - Page 147 From now on, whatever encoder changes you make on the KeyStep Pro will be mirrored in VCV Rack. To hear the effect, on the KeyStep Pro press the Arp button, play a chord and tweak the main encoders at will.
-
Page 148: Cv/Gate Functions
Connection diagrams for each of these interfaces are available in Making the Connections [p.14]. In this chapter, we'll focus on the features of the KeyStep Pro CV/Gate circuitry. Refer to the MIDI Control Center [p.126] chapter for in-depth coverage of the MIDI features available. -
Page 149: Routing Signals
Voice outputs! If you have more than four notes in a step, the KeyStep Pro will 'steal' voices to solve that problem; with five notes in a chord, the lowest note of the chord will be dropped, sacrificed to play the fifth note. -
Page 150: Cv/Gate Signals: Daw Configuration
The KeyStep Pro can be used as a MIDI to CV converter. Send note-related data from the MIDI tracks of your DAW to the KeyStep Pro via USB or MIDI In. If the MIDI channels match (that is, if they are set to 1, 2, 3 or 4), the MIDI data will appear in analog form as control voltages at the CV/Gate outputs of Voices 1 to 4. -
Page 151: Drum Gates
It's possible to send triggers from up to eight MIDI tracks on your DAW indirectly via the KeyStep Pro's USB or MIDI In to the Drum Gate jacks. There's a MIDI note number assignment for each Drum Gate, and you can set those values in the Utility menu (Utility>Drum Map) or using the... -
Page 152: How Should I Route The Signals
Fortunately, we've designed the KeyStep Pro Drum Gate outputs to operate as either a V- trigger or an S-trigger. These settings will work with the vast majority of analog devices you will encounter on Planet Earth. - Page 153 Important notice: DO NOT MODIFY THE UNIT! This product, when installed as indicate in the instructions contained in this manual, meets FCC requirement. Modifications not expressly approved by Arturia may avoid your authority, granted by the FCC, to use the product.
- Page 154 The License is not a sale of the original SOFTWARE. 2. Grant of License Arturia grants you a non-exclusive license for the use of the software according to the terms and conditions of this Agreement. You may not lease, loan or sub- license the software.
- Page 155 (a) return of the purchase price or (b) replacement of the disk that does not meet the Limited Warranty and which is returned to Arturia with a copy of your receipt. This limited Warranty is void if failure of the software has resulted from accident, abuse, modification, or misapplication.
Need help?
Do you have a question about the KEYSTEP PRO and is the answer not in the manual?
Questions and answers