Table of Contents
Advertisement
Quick Links
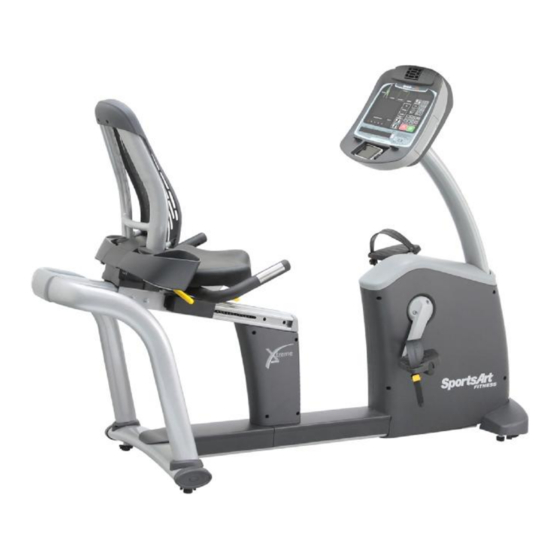
SPORTSART C572R RECUMBENT BIKE
TABLE OF CONTENTS
1. INTRODUCTION..................................................................................................
2. IMPORTANT SAFETY PRECAUTIONS...............................................................
3. LIST OF PARTS...................................................................................................
STEP 1 Separate Product from Packaging.......................................................
STEP 2 Support the Frame...............................................................................
STEP 3 Install the Rear Support........................................................................
STEP 4 Secure the Seat Carriage.....................................................................
STEP 5 Install the Pedestal and pedals.............................................................
STEP 6 Install Covers.........................................................................................
STEP 7 Move the Product..................................................................................
STEP 8 Seat Position Adjustment......................................................................
STEP 9 Maintenance.........................................................................................
STEP 10 How To Connect The Ground Wire........................................................
DISPLAY Overview...............................................................................................
DISPLAY Windows...............................................................................................
DISPLAY Keys......................................................................................................
DISPLAY Specifications........................................................................................
OPERATION Quick Start......................................................................................
OPERATION Workout Settings.............................................................................
OPERATION Cool Down......................................................................................
OPERATION Workout Programs..........................................................................
OPERATION Basic Settings.................................................................................
HEART RATE Telemetry.......................................................................................
HEART RATE Contact..........................................................................................
HOW HARD SHOULD I EXERCISE?...................................................................
HOW LONG SHOULD I EXERCISE?...................................................................
HOW OFTEN SHOULD I EXERCISE?.................................................................
9. MAINTENANCE CHECK LIST............................................................................
10. BLOCK DIAGRAM..............................................................................................
1
2
6
8
9
10
13
16
18
19
20
21
22
23
24
24
26
27
27
28
28
31
33
33
35
35
35
36
38
Advertisement
Table of Contents

Related Manuals for SportsArt Fitness C572R


Summary of Contents for SportsArt Fitness C572R
-
Page 1: Table Of Contents
STEP 6 Install Covers..................STEP 7 Move the Product.................. STEP 8 Seat Position Adjustment..............STEP 9 Maintenance..................STEP 10 How To Connect The Ground Wire............5. UNDERSTANDING THE C572R DISPLAY CONSOLE DISPLAY Overview....................DISPLAY Windows....................DISPLAY Keys...................... DISPLAY Specifications..................6. OPERATING THE C572R EXERCISE BIKE OPERATION Quick Start.................. -
Page 2: Introduction
1. INTRODUCTION Congratulations on your purchase of one of the finest exercise products on the market today, the SportsArt C572R recumbent exercise cycle. Constructed of high quality materials and designed for years of reliable usage, this product was made to become an integral part of your commercial fitness venue. -
Page 3: Important Safety Precautions
2. IMPORTANT SAFETY PRECAUTIONS Such parts... -
Page 7: List Of Parts
3. LIST OF PARTS Assembly Parts Name Qty No. Description Seat carriage Pedestal and display Main frame and body Seat back Pedals Seat bottom Handlebars (with contact heart Support covers rate detection) Rear frame cover Rear support Hardware kit... - Page 8 Hardware Kit Name Specification Notes L-shaped Allen wrench (M5) L-shaped Allen wrench (M6) Double open-end wrench (12*15) Screwdriver handle green Screwdriver bit Flat and Phillips Parts in the Hardware Kit Name Specification Notes M8*L15 Mushroom top inner hex screw Flat washer D15.5*d8.1*t0.5 M6*L15 Inner hex screw...
-
Page 9: Assembling The Product
4. ASSEMBLE THE PRODUCT Follow instructions below to assemble this product. Note that in this manual, the words "left" and "right" are used to refer to the product and its parts. As such, these designations correspond to the "left" and "right" sides of a person exercising on the product. -
Page 10: Step 2 Support The Frame
STEP 2 Support the Frame Before assembling the bike, please insert a piece of corrugated cardboard as shown to lift the main frame approximately 60 mm (about 2 11/32 inch). This will aid in the installation of the rear support. -
Page 11: Step 3 Install The Rear Support
STEP 3 Install the Rear Support... - Page 12 Install the rear support as shown in steps (a) through (b) below. (a) Remove screws from the rear support (A6). Insert the stem of the rear support (A6) into the main frame (A2) as shown. (b) First, loosely secure screws (21) into the top of the main frame. Do not fully tighten these screws yet.
-
Page 13: Step 4 Secure The Seat Carriage
STEP 4 Secure the Seat Carriage Secure the seat carriage and handlebars as shown in steps (a) through (d). (a) First, remove screws (22) from the rear support (A6). Then insert the end of the seat carriage (A7) into its mount on the rear support (A6). (b) Loosely secure screws (22) in area A before loosely securing screws in area B. - Page 14 (e) Push the seat carriage (A6) toward the rear support. Then fully secure screws in areas A, B, and C in sequence, starting with those in area A. Connect the seat carriage (A7) cable to the connector in the seat post of the main frame (A2). After completing this step, remove the corrugated cardboard from beneath the frame.
- Page 15 STEP 4 Secure the Seat Carriage, Continue...
- Page 16 Follow steps (a) through (c) to install the seat bottom and seat back. (a) Remove screws (24) from the seat bottom (A9). Place the seat bottom (A9) onto the seat carriage (A7). Align the screw holes. From the bottom, secure the screws (24) into place.
-
Page 17: Step 5 Install The Pedestal And Pedals
STEP 5 Install the Pedestal and pedals... - Page 18 Follow steps (a) through (c) to install the pedestal assembly and the pedals. (a) Remove screws (26) from the main frame (A2). Connect the cable from the pedestal (A1) into the connector in the main frame (A2). Then insert the pedestal (A1) into its mount on the main frame (A2).
-
Page 19: Step 6 Install Covers
STEP 6 Install Covers Follow steps (a) through (b) to install the rear frame cover and the seat post covers. (a) Remove screws (27) from the main frame (A2). Slide the rear frame cover (A5) from the back toward the front on the main frame (A2). Use screws (28) to secure the cover into place. -
Page 20: Step 7 Move The Product
STEP 7 Move the Product Lift the rear support and push, rolling the bike into place for use. -
Page 21: Step 8 Seat Position Adjustment
STEP 8 Seat Position Adjustment For proper functioning, the bike must be level. To inspect the leveling, push down on the legs of the rear support. Does the bike sit flat on the floor, or does it rock? If necessary, follow steps (a) through (c) to level the bike. (a) First, loosen the leveler nuts. -
Page 22: Step 9 Maintenance
STEP 9 Maintenance MAINTENANCE Lubrication If the seat carriage does not roll fore and aft easily, follow steps (a) through (b) to lubricate the seat carriage. (a) Push the seat all the way forward. Add a few drops of silicone lubricant to the slide tracks on both sides. -
Page 23: Step 10 How To Connect The Ground Wire
STEP 10 How To Connect The Ground Wire Note: The installation of a ground wire is required by European safety standards. The ground wire is not required by North American safety standards. Ground wire installation: Use a screw to secure one end of the ground wire to the product frame as shown. -
Page 24: Understanding The C572R Display Console
5. UNDERSTANDING THE C572R DISPLAY CONSOLE DISPLAY Overview The C572R exercise cycle is designed for user convenience. With better feedback about your workout, you get better results. The following explains the display key and window functions. Please read this manual, understand the display functions, and thereby get optimum enjoyment and benefit from this product. -
Page 25: Display Windows
DISPLAY Windows ■ Cardio Advisor shows heart rate goals, WT LOSS 65% and CARDIO 80%, and actual heart rate (center). ■ Exercise feedback screen -- shows usage prompts and workout information. ■ Dot matrix screen shows workout program illustrations. ■ Workout goal percentage complete screen -- shows percentage of goal completed. - Page 26 RANDOM Press this key to select one of an almost endless number of randomly generated workout programs. INTERVAL Press this key to select one of three interval programs: 1:1, 1:2, 2:2. Numbers represent minutes. For example, the 1:1 interval program would consist of one minute of rest, followed by one minute of work.
-
Page 27: Display Specifications
DISPLAY Specifications ˙ Workout level (resistance level): 1 - 20 ˙ Time: 0:00 - 99:59 ˙ Distance: 0.00 - 9999 km or mile ˙ Calories: 0.0 - 9999 kcal ˙ Calories per hour: 0.0 - 999.9 kcal ˙ MET (Metabolic Equivalent of Task): 0.0 - 99.0 ˙... -
Page 28: Operating The C572R Exercise Bike
6. OPERATING THE C572R EXERCISE BIKE There are two ways to start operating this product, either through the QUICK START mode or through a workout program. OPERATION Quick Start Press the QUICK START key to start exercising immediately, without inputting any user information. -
Page 29: Operation Cool Down
Follow prompts to begin your workout. Please refer to OPERATION Workout Programs for information about specific workout programs. Note that during workouts: ˙ The Workout Goal Percent Completed window will show how much of the workout has been completed. ˙ The workout goal will appear in the setting window. - Page 30 The optimum RPM range is from 40 to 70 RPM, with 50 RPM the recommended rate. If actual RPM is below 40 RPM for five seconds, "SPEED UP" will appear on the exercise feedback screen. If actual RPM is above 70 RPM for five seconds, "SPEED DOWN"...
- Page 31 Interval 1:1 indicates one segment of one minute in duration, followed by a second segment of one minute in duration. Interval 1:2 indicates one segment of one minute in duration, followed by a second segment of two minutes in duration. Interval 2:2 indicates one segment of two minutes in duration, followed by a second segment of two minutes in duration.
-
Page 32: Operation Basic Settings
Stage 16: 10,13,15,17,17,16,15,14,12,11,..Stage 17: 11,12,13,14,18,17,16,15,..Stage 18: 12,19,13,18,14,17,16,15,..Stage 19: 13,20,14,19,15,18,16,17, Stage 20: 14,20,15,20,16,20,17,20,18,20,19,20,..CUSTOM A heart rate control program, CUSTOM allows you to determine your target heart rate. The CUSTOM heart rate setting range is 84 to 199 beats per minute, with a default setting of 120 beats per minute. - Page 33 STOP key to exit the procedure and return to the startup banner screen. USB Port The USB port in this product can be used for either one of the following: (1) Providing power (5V 500mA) for USB memory sticks, iPods, cameras, mobile phones, and other items.
-
Page 34: About Heart Rate Detection And Presentation
7. ABOUT HEART RATE DETECTION AND PRESENTATION Heart rate detection functions are optional and may not be included in your particular model. If your bike is equipped with these functions, please note the following information. HEART RATE Telemetry The word "telemetry heart rate" refers to the detection of the heart rate, usually via a strap worn on the exerciser's chest and transmitted over the air for reception by a receiver built into the product. - Page 35 4.The vibration of treadmills at speeds over 4 mph / 6.4 kph makes heart rate detection difficult. Also, if your hands move, heart rate detection becomes difficult. SUGGESTIONS For better heart rate detection, keep hands in one place on the contact plates. Or wear a telemetry heart rate strap on your chest.
-
Page 36: Guidelines For Exercise How Hard Should I Exercise
8. GUIDELINES FOR EXERCISE HOW HARD SHOULD I EXERCISE? Studies show that to achieve the benefits of aerobic exercise, it is necessary to work within your training zone. Your training zone depends on your age and level of fitness. The above chart indicates the recommended Heart Rate training zones (darkened area of the chart). -
Page 37: Maintenance Check List
9. MAINTENANCE CHECK LIST Like cars, fitness products require maintenance. Regular maintenance extends the life of your fitness product, and failure to provide regular maintenance will void your warranty. Copy the maintenance log sheet and record maintenance work. DAILY TASKS 1. - Page 38 MAINTENACE One-Year Maintenance Log Facility Name: Maintenance Supervisor: Product Serial Number: Product Model Number: Start Date: End Date: Daily Tasks Week1 Week2 Week3 Week4 1.Safe 2.Clean Daily Tasks Week5 Week6 Week7 Week8 1.Safe 2.Clean Week9 Week10 Week11 Week12 Daily Tasks 1.Safe 2.Clean Month 10-12...
-
Page 39: Block Diagram
10. BLOCK DIAGRAM Your Authorized SPORTS ART Distributor...
Need help?
Do you have a question about the C572R and is the answer not in the manual?
Questions and answers