Table of Contents
Advertisement
Advertisement
Table of Contents

Related Manuals for SportsArt Fitness C5150


Summary of Contents for SportsArt Fitness C5150
- Page 1 PDF created with FinePrint pdfFactory Pro trial version http://www.pdffactory.com...
-
Page 2: Table Of Contents
B. INTRODUCTION....................C. ASSEMBLING YOUR CYCLE List of parts......................Step by step instructions..................Floor level adjustment.................... Seat adjustment..................... D. UNDERSTANDING THE C5150 DISPLAY CONSOLE Windows........................ Keypad........................E. OPERATING YOUR CYCLE Powers Up the Cycle..................... Turn Off the Cycle....................Power Standby Mode.................... -
Page 3: Safety Guidelines
Keep this owner's manual for future use and reference. • Read this owner's manual and follow the instructions. • Assemble and operate the Sports Art C5150 cycle on a solid, level surface. • Never allow children on or near the machine. •... -
Page 4: Introduction
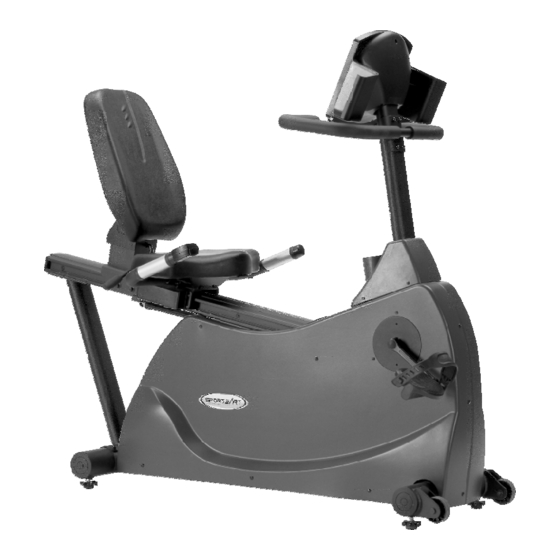
Congratulations on purchasing one of the finest pieces of commercial grade exercise equipment in the market today, the Sports Art C5150. Constructed of high quality materials and designed for years of trouble free usage, the C5150 will be an integral part of your fitness regimen. -
Page 5: Assembling Your Cycle
ASSEMBLING YOUR CYCLE List Of Parts: Six 5/16"x 3/4" bolts - Upright post Four 5/16" wave washers - Upright post Two 5/16" flat washers - Upright post Four philip screws - Upright post cover Four 1/4" x 1/2" bolts - Handlebar Four 5/16"x 3/4"... -
Page 6: Step By Step Instructions
Before assembling your cycle, make sure that you have all parts listed on the previous page. The following steps explain how to assemble your Sports Art C5150. Please read every step thoroughly, and follow the directions completely to ensure correct assembly. - Page 7 5. Use 4 pcs screws provided to secure the upright post cover (see Fig.3). Fig.3 6. Attach the foot pedals to the crank arms on the cycle using the wrench provided. Be careful to install the pedals on the correct crank arm. A " R " or " L " on the foot pedal indicates the correct side.
- Page 8 7. Use the 1/4" bolts to fix the handlebar to the upright post. Make sure the angle between the handlebar and the upright post is more than 90 (see Fig.5). Fig.5 8. Attach the handlebar mounting plate to the cycle frame, using the bolts and washers provided.
- Page 9 9. Insert the seat back into the seat post, using the 5/16" bolts and washers to secure it ( see Fig.7). Fig.7 10. Attach the seat base to the handlebar mounting plate, using the bolts and washers provided. Insert the bolts from underneath the seat, two in back and two in front, through the handlebar mounting plate.
-
Page 10: Floor Level Adjustment
Fig.9 Seat Adjustment The C5150 is equipped with a two-piece seat, allowing you to adjust the seat back's angle of incline. Pull on the seat back adjustment lever and move the seat up and back to find the most comfortable position for you, then release the lever (see Fig.10). - Page 11 Release the seat adjustment lever (see Fig.11, 12). Fig.11 Fig.12 Your C5150 semi-recumbent cycle is assembled and ready to use. PDF created with pdfFactory trial version www.pdffactory.com...
-
Page 12: Understanding The C5150 Display Console Windows
PDF created with pdfFactory trial version www.pdffactory.com... -
Page 13: Keypad
PDF created with pdfFactory trial version www.pdffactory.com... -
Page 14: Operating Your Cycle Powers Up The Cycle
PDF created with pdfFactory trial version www.pdffactory.com... -
Page 15: Entering User's Personal Information
PDF created with pdfFactory trial version www.pdffactory.com... -
Page 16: Overview Of Programs Manual Mode
PDF created with pdfFactory trial version www.pdffactory.com... -
Page 17: Hill
PDF created with pdfFactory trial version www.pdffactory.com... -
Page 18: Int I
PDF created with pdfFactory trial version www.pdffactory.com... -
Page 19: Cool Down
PDF created with pdfFactory trial version www.pdffactory.com... -
Page 20: Displaying Workout Data
PDF created with pdfFactory trial version www.pdffactory.com... -
Page 21: Setting Weight Unit
2. SETTING WEIGHT UNIT (This setting does not apply to cycles sold in the U.S.A. as they are preset in LB). ▼▲ The weight unit can be switched from LB to KG units. After "PRESS SELECT LB/KG" scrolls across the dot matrix window, the previous weight setting ▲... -
Page 22: Maintaining The Cycle
MAINTAINING THE CYCLE C5150 The Sports Art C5150 requires little maintenance. The C5150's smooth operation is dependent on keeping the unit as clean as possible. Regular cleaning is recommended to keep your cycle C5150 at peak performance. Before your workout, use a dry cloth to clean the surface of the electronics package. -
Page 23: Trouble Shooting
TROUBLE SHOOTING: If the REMOTE CONTROL UNIT doesn't function properly: 1 . Replace the two AAA 1.5V (4M-4) batteries (see Fig. 16-17). Fig.16 Fig.17 2. If the unit still doesn't function properly after replacing the batteries, please contact your authorized Sports Art dealer. IF THE LOAD DOES NOT RESPOND PROPERLY : If there is no load or the load does not respond properly when you set the LEVEL, please contact your authorized Sports Art dealer for further details. - Page 24 Wiring Schematic: C5150 Your Authorized Sports Art Distributor PDF created with pdfFactory trial version www.pdffactory.com...
Need help?
Do you have a question about the C5150 and is the answer not in the manual?
Questions and answers