Table of Contents
Advertisement
Quick Links
C530 OWNER'S MANUAL CONTENTS
1. INTRODUCTION ..............................................................................
2. SAFETY PRECAUTIONS ................................................................
3. LIST OF PARTS ...............................................................................
4. ASSEMBLE THE PRODUCT ..........................................................
STEP 1 Install the Stabilizers, Pedals and Handlebar ........................
STEP 2 Install the Console, Water Bottle Cage and Saddle ................
STEP 3 Remove the Plastic Battery Insulation Tab ............................
STEP 4 Level the Bike ........................................................................
5. OPERATE THE PRODUCT .............................................................
OPERATION Safety Operating Area ...................................................
OPERATION Proper Workout Position ................................................
OPERATION Proper Usage .................................................................
OPERATION Overview ........................................................................
OPERATION Operating Guide .............................................................
OPERATION Function Specification ....................................................
6. MAINTENANCE ...............................................................................
MAINTENANCE Safety Precautions .................................................... 19
MAINTENANCE Replace the Battery ................................................... 20
MAINTENANCE Schedule ...................................................................
MAINTENANCE Task List .................................................................... 22
MAINTENANCE One-Year Maintenance Log ......................................
7. APPENDIXES ..................................................................................
APPENDIXES Exploded Diagrams....................................................... 24
2
3
7
8
8
9
10
11
12
12
13
14
15
16
17
19
21
23
24
Advertisement
Table of Contents

Related Manuals for SportsArt Fitness C530


Summary of Contents for SportsArt Fitness C530
-
Page 1: Table Of Contents
C530 OWNER’S MANUAL CONTENTS 1. INTRODUCTION ................2. SAFETY PRECAUTIONS ..............3. LIST OF PARTS ................4. ASSEMBLE THE PRODUCT ............STEP 1 Install the Stabilizers, Pedals and Handlebar ......STEP 2 Install the Console, Water Bottle Cage and Saddle .... -
Page 2: Introduction
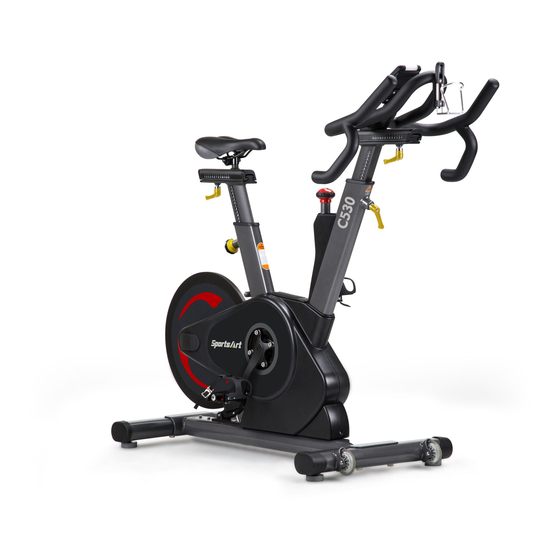
1. INTRODUCTION Congratulations on your purchase of one of the finest exercise products on the market today, the C530 Indoor Cycle. Constructed of high quality materials and designed for years of reliable usage, this product was made to become an integral part of your commercial fitness venue. -
Page 3: Safety Precautions
2. SAfETy PRECAUTIONS Your SportsArt bike was designed and built for optimum safety. However certain precautions apply whenever you use your bike. Please read the entire manual before assembly and operation. Also, please note the following safety precautions: ● Read instruction manual before using. ●... - Page 4 2. SAfETy PRECAUTIONS (CONTINUED) ● Warning that any of the adjustment devices that could interfere with the user’s movement should not be left projecting. ● It is not suitable for therapeutic purposes. Caution If you feel any pain or abnormal sensation, STOP YOUR WORKOUT and consult your physician immediately.
- Page 5 2. CONSIgNES DE SéCURITé • Votre vélo SportsArt a été conçu et fabriqué afin d’assurer une sécurité optimale. Cependant certaines précautions s’appliquent chaque fois que vous utilisez votre vélo de course. • Lisez entièrement le manuel avant l’assemblage et l’utilisation. Veuillez aussi noter les consignes de sécurité...
- Page 6 2. CONSIgNES DE SéCURITé (SUITE) Ce vélo n’est pas destiné à être utilisé par des personnes (y compris des enfants) dont les capacités physiques, sensorielles ou mentales sont réduites ou qui ne disposent pas de l’expérience ou du savoir nécessaires, sauf si celles-ci ont au préalable été...
-
Page 7: List Of Parts
3. LIST Of PARTS Components in the Hardware Kit Name Qty. Specification Notes 30 Front stabilizer tube Washer Ø22×Ø10×2t Cap nut M10*P1.5 Bolt M10×P1.5×80L 32 Rear stabilizer tube 33 Right out cover E-003 seal bearing SPD pedal 5/8"axle 35 Handlebar set 36 Floating piece Ø22×Ø9.5×15 37 Screw... -
Page 8: Assemble The Product
4. ASSEMBLE THE PRODUCT Follow instructions below to assemble this product. Note that in this manual the words “left” and “right” are used to refer to the product and its parts. As such, these designations correspond to the “left” and “right” sides of a person in position to exercise on this product. -
Page 9: Step 2 Install The Console, Water Bottle Cage And Saddle
STEP 2 Install the Console, Water Bottle Cage and Saddle (e) Pull cable (38) out from the stem tube for a certain length (f) Install console (41) with screws (42) and fix it onto bracket and then secure screws (37). Finally, install the seat post bottom slider’s end cap (front) as shown. -
Page 10: Step 3 Remove The Plastic Battery Insulation Tab
STEP 3 Remove the Plastic Battery Insulation Tab (i) Please gently pull the plastic battery insulation tab as shown prior to use. The console will make a beep sound when power is on. -
Page 11: Step 4 Level The Bike
STEP 4 Level the Bike For the user’s safety and the proper functioning of the product, this bike must sit level on a flat floor. If necessary, adjust the levelers by following instructions (a) through (c) below. (a) Loosen the leveler nut. (b) Rotate the leveler foot downward so it firmly touches the floor. -
Page 12: Operate The Product
5. OPERATE THE PRODUCT OPERATION Safety Operating Area (a) Safety clearance required as below shown. Do not allow people to be near this area when operating. (b) Noise emission under load is higher than without load... -
Page 13: Operation Proper Workout Position
OPERATION Proper Workout Position (a) User proper workout position as below shown. (b) Over exercise or improper workout position may result in serious injury. (c) User can hold onto handles for stability when getting on or getting off from the right/left side of the bike. (d) This product is intended for exercise legs. -
Page 14: Operation Proper Usage
OPERATION Proper Usage • Handlebar and seat adjustment. It is important that the handlebar and seat are set at the correct height for your body. If necessary, ask your instructor for assistance. The handlebar position can be adjusted forward or backward. Undo the release lever in area A located below the handlebar slider. -
Page 15: Operation Overview
OPERATION Overview... -
Page 16: Operation Operating Guide
OPERATION Operating guide Exercise Target Setting Exercise Target Setting is the function as COUNTING DOWN by Time or Distance. If user doesn’t set any Exercise Target as the free-ride mode then the monitor will be counted up all exercising values. 1. -
Page 17: Operation Function Specification
OPERATION Function Specification Auto ON/Off The monitor will automatically be started working once the user starts to do exercise on the machine. It will be automatically turned off after the machine is not used for 1 minute. LEVEL The monitor will automatically detect level numbers and display it on monitor. Level display range is 1~32 TIME 1. - Page 18 After age setting, monitor will calculate and set suitable Light-blinking threshold automatically. Attention Working Temperature: 0°C~ 50°C Storage Temperature: -10°C~ 60°C Additional function C530 bike has a built-in ANT+ wireless Cadence sensor. It can record RPM of the user via a wearable device.
-
Page 19: Maintenance
6. MAINTENANCE Maintenance topics are presented below in the following order: error messages, Product maintenance, schedule, task list, one-year maintenance log, and electronics block diagram. MAINTENANCE Safety Precautions ● Please follow standard safety precautions when servicing on this product. ● Must be performed by trained service personnel only. ●... -
Page 20: Maintenance Replace The Battery
MAINTENANCE Replace the Battery (a) Console battery: Remove screws (37) and the battery cover (51) from the front stabilizer tube (30) as shown and then replace the new battery (52). (b) ANT + battery: Press cover and pull it out and then turn ANT + battery cover (53) to replace the new battery (54) as shown. -
Page 21: Maintenance Schedule
MAINTENANCE Schedule Area Day Week Month Quarter year Notes Exterior ● Clean. Inspect for Screws ● looseness and secure if necessary. Wipe clean with a Saddle ● slightly damp towel. Inspect for Pedals ● looseness and secure if necessary. Stem ●... -
Page 22: Maintenance Task List
MAINTENANCE Task List Like cars, fitness products require maintenance. Regular maintenance extends product life, and failure to maintain products can void the manufacturer’s warranty. Copy the maintenance log sheet, and record maintenance work for each fitness product. Daily tasks • Use a clean, lint-free towel, dampened with a mixture of Simple Green®... -
Page 23: Maintenance One-Year Maintenance Log
MAINTENANCE One-year Maintenance Log Facility:_______________________ Supervisor:____________________ Product model number:__________ Serial number:_________________ Start date: ____________________ End date:_____________________ Daily Tasks Weeks 1-7 Weeks 8-14 Weeks 15-21 Week 22-28 Completed Daily Tasks Week 29-35 Week 36-42 Week 43-49 Week 50-52 Completed Weekly Tasks Weeks 1-7 Weeks 8-14 Weeks 15-21 Weeks 22-28... -
Page 24: Appendixes
7. APPENDIXES APPENDIXES Exploded Diagram Note: We reserve the right to revise the following diagrams at any time without notice or obligation to notify any person of such revisions or changes. Please visit our official website www.gosportsart.com for the latest version. - Page 25 your Authorized Distributor...
Need help?
Do you have a question about the C530 and is the answer not in the manual?
Questions and answers