Advertisement
Advertisement
Table of Contents

Related Manuals for Enwork ADVENTURE NE0001


Summary of Contents for Enwork ADVENTURE NE0001
- Page 1 ADVENTURE Team Table Installation Instructions NE0001 07/24/2018 9:00 AM - Rev A...
- Page 2 INSTALLATION GUIDE 1) Parts and Fasteners Included Center Rail and Turnbuckle - Leg Kit - NEWxxxxx Foot Rail Pair – NEWDxxx NEWSxxx ¼-20 x 1/2” Hex Drive Flat ¼-20 x 5/8 Flat Washer ¼-20 Hex Nut Head 3/8-16 x 1.25” Flange Head #10 x 1, ¼”...
- Page 3 INSTALLATION GUIDE 2) Tools and Supplies Required Drill / Screwdriver Socket Wrench Adjustable Wrench 5/32 Hex Bit Phillips Bit 5/32 Allen Wrench 5/8” Socket 3/8” Socket 1/2” Socket...
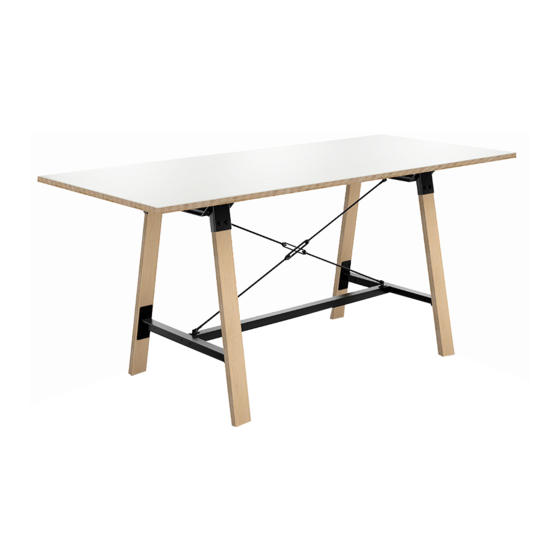
- Page 4 INSTALLATION GUIDE 3) Assembly Overview 1. Lay the Table Surface upside down on a soft, clean, and level surface to avoid damage. Place both legs on top of it, but do not attach them yet. (Figure #1) 2. Your assembly may include a Center Rail with Turnbuckles, or a Figure #1 Foot Rail pair, or both.
- Page 5 INSTALLATION GUIDE 3) Assembly Overview 4. If you have the Foot Rail Pair, then your table will have the two outer positions filled. (Figure #4) 5. If you are assembling a 3 Leg Table (108-192” Long) or 4 Leg Table (204-240” Long) then you will need to use the ¼-20 x 1”...
- Page 6 INSTALLATION GUIDE 3) Assembly Overview 8. Attach the Turnbuckle Rods to the Top Plates of the legs using ¼-20 x ½” Hex Drive Flat Head Bolts. You may need to thread or unthread the turnbuckle to adjust the rod length so that the holes will line up.
- Page 7 12900 Christopher Drive Lowell, MI 49331 800.815.7251 www.enwork.com Specifications subject to change without notice.
Need help?
Do you have a question about the ADVENTURE NE0001 and is the answer not in the manual?
Questions and answers