Table of Contents
Advertisement
Quick Links
Clean Water Made Easy
www.cleanwaterstore.com
7500 Greensand Filter Installation & Start‐Up
Guide
Thank you for purchasing a Clean Water System! With proper installation and a little routine maintenance
your system will be providing iron free water for many years.
Please review this start‐up guide entirely before beginning to install your system, and follow the steps
outlined for best results.
GREENSAND MEDIA CONTAINS DUST.
USE PAPER MASK AND VENTILATE TO AVOID BREATHING DUST.
Questions?
Call us toll‐free: 1‐888‐600‐5426 or 1‐831‐462‐8500
Email us: support@cleanwaterstore.com
See more information on our website: www.cleanwaterstore.com/resources
Advertisement
Table of Contents

Related Manuals for Clean Water Systems Greensand 7500


Summary of Contents for Clean Water Systems Greensand 7500
- Page 1 Clean Water Made Easy www.cleanwaterstore.com 7500 Greensand Filter Installation & Start‐Up Guide Thank you for purchasing a Clean Water System! With proper installation and a little routine maintenance your system will be providing iron free water for many years. Please review this start‐up guide entirely before beginning to install your system, and follow the steps outlined for best results. GREENSAND MEDIA CONTAINS DUST. USE PAPER MASK AND VENTILATE TO AVOID BREATHING DUST. Questions? Call us toll‐free: 1‐888‐600‐5426 or 1‐831‐462‐8500 Email us: support@cleanwaterstore.com See more information on our website: www.cleanwaterstore.com/resources ...
-
Page 2: Table Of Contents
7500 Pro‐Ox Filter Installation & Startup Guide Contents Packing List .............................. 3 Greensand Filter 0.75 cubic foot size ....................... 3 Greensand Filter 1.0 cubic foot size ...................... 3 Greensand Filter 1.5 cubic foot size ...................... 3 Greensand Filter 2.0 cubic foot size ...................... 3 Greensand Filter 2.5 cubic foot size ...................... 4 Pre‐Installation .............................. 4 Best Practices for Piping & Drain Installation .................... 4 Installation of Your System Into Copper or Metal Piping Systems ............ 5 How Your Greensand Filter Works ...................... 5 Assembly and Installation Instructions ..................... 6 2. Basic Setting & Usage .......................... 7 Programming the 7500 Valve: ........................ 9 Typical Bypass assembly: ........................ 11 Initial Backwash: ............................. 12 How To Remove Media From Control Head ................... 12 Page 2 www.cleanwaterstore.com Rev 060116 ... -
Page 3: Packing List
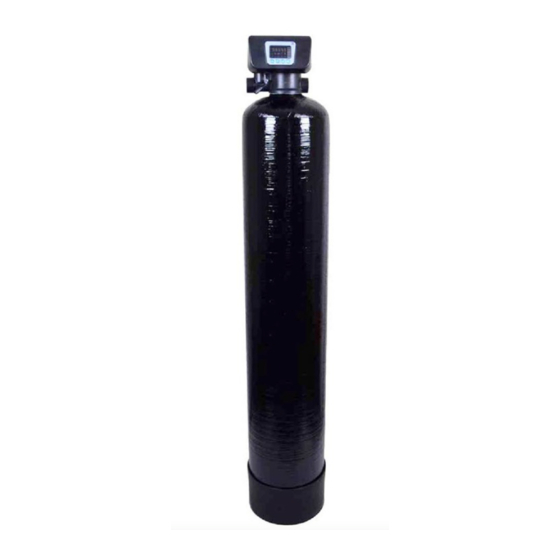
7500 Pro‐Ox Filter Installation & Startup Guide Packing List Greensand Filter 0.75 cubic foot size 7500 Backwash Control Valve 5 GPM External Drain line Flow Control Fitting 8” x 44” filter tank with distributor tube Blue media funnel for adding the Greensand media 8 lbs. Filter gravel 0.75 cubic foot of Greensand media Greensand Filter 1.0 cubic foot size 7500 Backwash Control Valve 7 GPM External Drain line Flow Control Fitting 9” x 48” filter tank with distributor tube Blue media funnel for adding the Greensand media 12 lbs. Filter gravel 1 cubic foot of Carbon media Greensand Filter 1.5 cubic foot size 7500 Backwash Control Valve 10 GPM External Drain line Flow Control Fitting 10” x 54” filter tank with distributor tube Blue media funnel for adding the Greensand media 16 lbs. Filter gravel 1.5 cubic foot of Greensand media Greensand Filter 2.0 cubic foot size 7500 Backwash Control 12 GPM External Drain line Flow Control Fitting 12” x 52” filter tank with distributor tube Blue media funnel for adding the Greensand media 20 lbs. Filter gravel and 2.0 cubic foot of Greensand media Page 3 www.cleanwaterstore.com Rev 060116 ... -
Page 4: Greensand Filter 2.5 Cubic Foot Size
7500 Pro‐Ox Filter Installation & Startup Guide Greensand Filter 2.5 cubic foot size 7500 Backwash Control 15 GPM External Drain line Flow Control Fitting 12” x 52” filter tank with distributor tube Blue media funnel for adding the Greensand media 20 lbs. Filter gravel and 2.0 cubic foot of Greensand media Greensand Filter 3.0 cubic foot size 7500 Backwash Control 20 GPM External Drain line Flow Control Fitting 12” x 52” filter tank with distributor tube Blue media funnel for adding the Greensand media 20 lbs. Filter gravel and 2.0 cubic foot of Greensand media Pre‐Installation 1. Review your packing list and make sure you have received all the parts before beginning installation. 2. If you are going to be turning off the water to the house and you have an electric water heater, shut off the power to the water heater before beginning installation in case water heater is accidentally drained. 3. Pick a suitable location for your filter system on a dry level spot where it won’t be exposed to freezing temperatures. A minimum of 20 PSI is required. Maximum pressure is 90 PSI. 4. Get all of your plumbing parts together before beginning installation, and make sure you have received all of your packages before beginning or scheduling an installation. Installation typically takes 3 to 5 hours. However, after installation the Greensand Filter must be allowed to run through a complete backwash and rinse cycle. 5. After the system is installed and running, your water may be discolored, or full of sediment or rust, particularly if this is older or corroded piping. This typically clears up over a day or two. Best Practices for Piping & Drain Installation 1. See typical installation on page 7 (Fig 2). The Greensand filter is installed after the pressure tank. 2. Make sure to connect the Inlet from your water source. Make sure to connect the Outlet to where the water is being used and be sure and install the External Flow Control fitting onto the ... -
Page 5: How Your Greensand Filter Works
7500 Pro‐Ox Filter Installation & Startup Guide Drain Port. From the male pipe thread on the External Flow fitting, you can transition to a barb fitting and run tubing to where you need to. 3. Make sure there is a working gate or ball valve before the 7500 Greensand Filter and also one after as shown in Fig 2. The pressure gauges are optional, but they are a great way to tell at a glance if your filter needs to be backwashed. A hose bib (which is a faucet to which you can attach a garden hose) is strongly recommended after the Greensand Filter and before the second ball valve. This makes it easy to rinse your new Greensand Filter on start‐up and gives you a place to test the water before it enters your household plumbing. 4. If you will be using copper piping, do not sweat the copper pipe directly on to the 7500 control valve. Avoid heating up the 7500 control valve plastic with the torch. 5. You should install unions and a bypass around the valve, so that you can remove it and still have water. 6. The drain line tubing (not supplied) is connected to a drain from the External Flow Control fitting using a Female X Barbed fitting and flexible tubing. Note that the drain can run up above the 7500 control head and into a drain, it does not have to drain down, as the filter backwashes under line pressure from your well pump. Most plumbing codes require an air‐gap connection, so that if your sewer or septic tank backs up, it cannot cross connect with the drain tubing. How Your Greensand Filter Works See Fig 1 on the right. In your Greensand Filter the water enters the top of the tank (red arrows) and flows down through the media and up the distributor Greensand tube (blue arrows). The downflow type Greensand Filter removes Media iron and can be backwashed, which cleans and re‐classifies the media, preventing channeling. During backwash the flow of water is reversed and water flows down the distributor tube and up through the media, lifting and expanding the Greensand media. During the backwash the media is cleaned by the action of the water flowing through it. Page 5 www.cleanwaterstore.com ... -
Page 6: Assembly And Installation Instructions
7500 Pro‐Ox Filter Installation & Startup Guide Assembly and Installation Instructions 1. Wrap the top of distributor tube with black electrical tape or blue painter’s masking tape so that no gravel or Greensand media will go down the distributor tube when adding the media. Also, leaving a folded tab of tape that you will be able to grab onto to gently pull off the tape after filling the tank. When you are ready to screw the valve head on, apply silicone lubricant to the outside of the distribution tube, and the o‐ring on the control valve where the tube goes in. 2. Add the filter gravel that came with your order. You want the gravel to cover the bottom distributor screen before adding the Greensand media. 3. Next add Greensand media. The tank should be about 2/3rds full of media, do not fill more than 2/3rds, even if there is some media left over. 4. Remove tape from top of distributor tube. Be careful not to pull up distributor tube when removing tape. 5. Add 1 cup household bleach to inside distributor tube and fill Greensand Filter with water. This will allow the Greensand Filter media to settle and eliminate the need of “purging” the air out of the tank later. Let chlorine water solution soak for 1 – 2 hours before backwashing and rinsing. 6. Attach plastic top screen to the under‐side of the 7500 control valve. It is a funnel‐shaped plastic screen that snaps on to the control valve and prevents resin from being backwashed out to drain during the regeneration cycles. It may twist on clockwise or counter‐clockwise. 7. Screw on 7500 control valve carefully. Do not use pipe‐joint compound, vegetable oil, Teflon tape, or Vaseline or other petroleum greases to lubricate tank threads. Page 6 www.cleanwaterstore.com Rev 060116 ... -
Page 7: 2. Basic Setting & Usage
7500 Pro‐Ox Filter Installation & Startup Guide 2. Basic Setting & Usage: Digital Display Icons and the four Service Buttons: In addition to the Dynamic Display Stripe (explained immediately below this) there are six digital icons on the display that will indicate “where the valve is”. They are as follows: Green Key Icon: Indicates that the buttons are locked; press and hold both scroll buttons to unlock. Blue Clock‐face Icon: Indicates that the red digital display is showing the Current Clock Time. Blue Hourglass Icon: Indicates how many days remaining until the next backwash. Green Wrench Icon: This indicates that you are in the programming menu and can change the values. Red Backwash Icon: three arrows pointing up, underneath a rectangle with dots. This indicates that you are programming the Backwash step, or that the filter is in backwash. Red Rapid Rinse Icon: three arrows pointing down, on top of a rectangle with dots. This indicates that you are programming the Rapid Rinse step, or that the filter is in Rapid Rinse. Dynamic Display Stripe: On the left side of the digital display, there are seven green bars that light up and repeat a “going up” pattern. When the valve is in Service Mode, you will see that bar display flashing. The green Key Icon indicates that the buttons are “locked”. To unlock the buttons, press and hold both scroll arrows. While locked, the menu also changes, scrolling Page 7 www.cleanwaterstore.com Rev 060116 ... - Page 8 7500 Pro‐Ox Filter Installation & Startup Guide between the currant clock time (blue Clock Icon will be lit), the number of days until the next backwash (the blue Hourglass Icon will be lit) and the Backwash Start Time (only the green key is lit). Sample Displays Showing Service Mode and Backwash and Fast (or Rapid) Rinse Modes: Four Service Buttons: Left to right, Menu/Confirm, Manual/ Return, Scroll Down, Scroll Up. Up and Down Arrows: When the Green Key Icon is lit, press and hold both buttons to unlock. When the Dynamic Display Stipe is blinking, pushing the up/down buttons has no effect. When the Green Wrench icon is lit, pressing either up/down arrow will scroll through the menu options. There are a total of seven Menu items (explained later). Menu/ Confirm Button (the button on the far left, an empty square with an arrow pointing left): This is the button you press (after you have unlocked the screen) that puts you in the Service Menu, so you can program the valve. The first time you press it, the Dynamic Display Stripe goes away and the Green Wrench icon appears. Whichever of the Icons is lit at this time, pressing the Menu/ Confirm button again will now cause that Icon’s value to flash, on the red digital display. Manual/ Return Button: Second from left, button icon is a “pointing index finger” with a left‐ pointing arrow underneath. Pressing this button in Service Mode (Dynamic Display Stripe is running) will IMMEDIATELY start a backwash cycle. Pressing this button when in Program Mode will return you to the Service Mode. A. Time of day indicator • When the blue Clock Icon is lit, the digital display is showing the current time. That time is displayed in 24‐hour format, i.e. 13:00 is 1:00 pm. Page 8 www.cleanwaterstore.com Rev 060116 ...
-
Page 9: Programming The 7500 Valve
7500 Pro‐Ox Filter Installation & Startup Guide B. Button lock indicator • When the green Key Icon is lit, the buttons are locked. Press and hold both the Up and Down arrows to unlock. Buttons will lock 60 seconds after the last time a button is pressed. C. Program mode indicator (shown on drawing as Enquiry/ Setting) is the green Wrench Icon. To activate this Icon from Service Mode, press and release the Menu/Confirm button (button on far left, with a square and an arrow pointing left) and the green Wrench Icon will be lit. • With the green Wrench icon lit, you can press either the scroll Up or scroll Down buttons to navigate to each menu item. You will do this in order to: Set/confirm that the valve is programmed for Non‐external input mode. Set Current Clock Time Set the time when you want the filter to backwash Set the number of complete backwash cycles it will do at that time Set how many days between backwashes Set the number of minutes for the Backwash Cycle Set the number of minutes for the Rapid Rinse Cycle. • When the green Wrench Icon is flashing, whatever parameter that is selected (set clock time, set cycle step, etc.) can now be adjusted by using the Scroll buttons. For example, When you press it the first time, the Dynamic service Stripe goes away, the Green Wrench Icon is lit, and the other icon that is lit is the Blue Clock Icon‐ that means that whatever digits are on the red display, they are stating the clock time (in 24 hour mode). When you press the menu/ Confirm button again, the Hours will flash, and now you can change the hour by pressing the scroll arrows. When you are at the correct hour, press the Menu/Confirm button, and the Minutes will flash. After adjusting the minutes with the Scroll arrow, pressing the Menu/Confirm one more time displays your currently set clock time, and the digits are not flashing. ... - Page 10 7500 Pro‐Ox Filter Installation & Startup Guide Press the Menu/Confirm button (far left) and the Green Wrench Icon will come on. You can now use either the scroll Up or Down buttons to stop at each of the 7 menu items you will need to program. They are listed below in the order they appear if you use the scroll down arrow and, when you enter the programming, it will be at whichever Menu option that was last displayed when the programming mode was exited. The factory default screen is where this list starts: 1. b ‐ 01. This setting must be at b – 01. If it says b – 02, press the Menu/Confirm button, the 02 will start flashing. Press either scroll key and it will display b – 01, press the Menu/Confirm button again, and it will say b – 01 and not be flashing. Press the Scroll Down button to continue. 2. Blue Clock Face Icon is displayed. To change the clock time, press the menu/Confirm button; the hours will flash. Adjust the hours with the scroll arrows. Clock time is 24‐ Hour (or Military Time), so 1 pm is 13:00, two pm is 14:00, etc.… When you are at the correct hour, press the Menu/Confirm button and the minutes will flash, set the minutes using the scroll up/down buttons, and press the Menu/ Confirm button when done. The time you set will now be displayed, and not flashing. Press the Scroll Down button to continue. 3. This is the screen where you set what time of day the backwash will start. 02:00 (2 am) is the default time. The backwash cycle should be started while no one is using water, and while no other filters you may also have are backwashing. You will adjust the clock time for this as you did for the Current time clock above. Note: This is the one parameter that does not have an Icon that identifies it. When the Service Screen is automatically scrolling, or you are programming, the Current Clock time shows the Blue Clock face Icon. The Backwash Start Time (also called the regeneration time) does not have an icon. 4. F ‐00 This menu item sets the number of complete backwash cycles the valve will do, when it reaches the time to do a backwash cycle. The default is F – 00, which is doing one cycle. If you set it at F – 01, then it will do two backwash cycles. Your 7500 filter only needs to backwash one time each time, so leave this at F – 00. Greensand ...
-
Page 11: Typical Bypass Assembly
7500 Pro‐Ox Filter Installation & Startup Guide 7. 3 – 10 This menu item is for the number of minutes for the Fast (or Rapid) Rinse. The default is 10 minutes. Press the menu/confirm button, the 10 will flash; adjust it down to 06 with the Scroll Down button, and press the Menu/ Confirm button. Now the valve is programmed to Rapid Rinse for six minutes. Press the scroll down button, and you are back at the first menu item, b – 01. Press the Menu/Confirm button, and the Green Wrench Icon goes away, the Dynamic Display Stripe returns, and you are done programming your valve. When the motor is turning ‐00‐ is displayed… This valve can be used with Chemsorb (sediment media), Calcite (Acid Neutralizer media), Carbon (Carbon media) and different types of Iron Removal media (Greensand, Mang‐Ox, Katalox lite and Greensand). Typical Bypass assembly: It is imperative that the three ball valves be installed. Care must also be taken to plumb the bypass assembly with a minimum of pipe deflection, so that excess pressure is not placed on the main valve body, where the valve threads into the tank. Page 11 www.cleanwaterstore.com Rev 060116 ... -
Page 12: Initial Backwash
7500 Pro‐Ox Filter Installation & Startup Guide Initial Backwash: Before the unit can be put into service, a couple of backwash cycles must be done. This is for: Rinsing the dust off the media Remove media “fines” (bits of broken media so small they pass through the screen) Test system for plumbing leaks/ failures. You will start the first backwash with the Inlet and Outlet valves closed. 1) From the Service Mode (Dynamic Display Stripe is showing), press the Manual/Return button. This will advance the valve to the backwash position (red icon, three arrows pointing down). 2) Open the Inlet valve just enough so that you can hear water going through. After a few seconds, a small amount of water will start coming out of the drain line. The valve is counting down, from ten minutes. 3) Open the valve a little more; you will see an increase in the flow coming out of the drain line. Each time you open the valve, you are looking for bubbles and for the water to turn black for a while‐ the dust How To Remove Media From Control Head Sometimes, when doing the Initial Backwash, the media gets lifted up into the control head. You can tell this happened because you will have little or no flow, either going out to drain while in the backwash positon, or when in the service positon. To remove media from a control head, do the following: 1) Put the Inlet Bypass in the Closed position. 2) From the Service Mode, initiate a manual regeneration, by pressing and holding the regen button (button on far left). 3) The valve will advance to the BW (backwash) position, and start counting down. Press the Regen button again, and wait for the valve to advance and stop at the Rapid Rinse (RR) position. 4) With the valve in the RR position, open and close the Inlet Bypass valve several times. After the third or fourth time, leave it in the open position and check the drain line‐ do you have a good solid flow? 90% of the time, the answer is yes, but sometimes, even after opening and closing the valve many times, you still don’t have good flow… But, in either case (good or no flow), continue… 5) With the Inlet Valve OFF, Advance the valve back to Service position again, and again press and hold the Regen button, we are putting the valve back to the Backwash position. Page 12 www.cleanwaterstore.com ... - Page 13 7500 Pro‐Ox Filter Installation & Startup Guide 6) Open the Inlet valve just enough so you can hear the water passing thru the valve‐ you should notice a corresponding slow flow out of the drain line. After a minute, if there are no air bubbles present, open the valve about another quarter inch‐ again, you should see a corresponding increase in the flow… And you will continue until the valve is full open. IMPORTANT: Any time that you are in the Backwash or Rapid Rinse position, you may need to unplug the power‐ this will hold the valve in its current position, so it doesn’t ‘time out’ and go to the next position. When you plug the valve back in, after a minute it will return to where it was when you unplugged it (i.e. 2:32 remaining in BW). Understand, it is not possible to jam media into the head while in Rapid Rinse, or Service, just in the Backwash, when the flow direction is reversed. What you are trying to accomplish, after you have pushed the media back in to the tank in the Rapid Rinse position, is to get the Inlet valve all the way open in the Backwash position, without it jamming media back in the head, and this is the part where you have to go slow, open up the Inlet valve a little bit at a time and let it run for a few minutes‐ this is why you may have to unplug it‐ and then, once you have done that, finally, do one more backwash, starting with the Inlet valve open, just as it will be when it does it automatically at night. Once it does that successfully, you are done. Page 13 www.cleanwaterstore.com Rev 060116 ...
Need help?
Do you have a question about the Greensand 7500 and is the answer not in the manual?
Questions and answers