Table of Contents
Advertisement
Quick Links
Clean Water Made Easy
www.cleanwaterstore.com
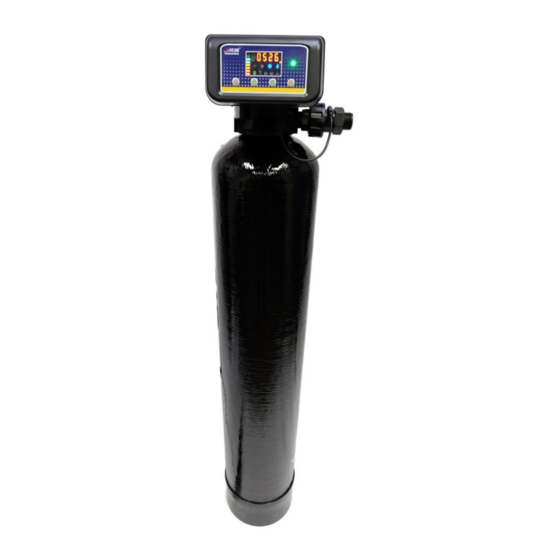
7500-S1 Sediment Filter
Installation Guide
Thank you for purchasing a Clean Water System! With proper
installation and a little routine maintenance your system will be
providing chlorine free water for many years.
Please review this start‐up guide entirely before beginning to install
your system, and follow the steps outlined for best results.
Minimum pressure of 30 PSI recommended.
Maximum pressure recommended 80 PSI.
For indoor installation only.
Protect from sunlight, rain, and freezing.
SEDIMENT MEDIA CONTAINS DUST.
USE MASK TO AVOID BREATHING DUST.
OK to wet down media with spray bottle
To connect drain line to drain, use an air-gap connection
Questions?
Call us toll‐free: 1‐888‐600‐5426 or 1‐831‐462‐8500
Email us:
support@cleanwaterstore.com
See more information on our website:
www.cleanwaterstore.com/resources
Advertisement
Table of Contents

Related Manuals for Clean Water Systems 7500-S1


Summary of Contents for Clean Water Systems 7500-S1
- Page 1 Clean Water Made Easy www.cleanwaterstore.com 7500-S1 Sediment Filter Installation Guide Thank you for purchasing a Clean Water System! With proper installation and a little routine maintenance your system will be providing chlorine free water for many years. Please review this start‐up guide entirely before beginning to install your system, and follow the steps outlined for best results.
-
Page 2: Table Of Contents
Table of Contents Packing Lists ..............................3 Pre‐Installation: ............................. 2 Best Practices for Piping & Drain Installation: ....................2 Installation of Your System in to Copper or Metal Piping Systems: ............. 3 How Your Sediment Filter Works: ......................... 4 Assembly and Installation Instructions: ......................4 Programming Overview: .......................... -
Page 3: Packing Lists
7500-S Sediment Filter Installation & Startup Guide Packing Lists All systems include: 7500‐S control valve; power supply; funnel for adding media through the top; drain line flow control; and items included in one of the following options: Find Your Size System to See What is Included: Sediment Filter 0.75 cubic foot size Sediment Filter 2.0 cubic foot size 8”... -
Page 4: Pre-Installation
Pre-Installation: 1. Review your packing list and make sure you have received all the parts before beginning installation. 2. If you are going to be turning off the water to the house and you have an electric water heater, shut off the power to the water heater before beginning installation in case water heater is accidentally drained. -
Page 5: Installation Of Your System In To Copper Or Metal Piping Systems
7500-S Sediment Filter Installation & Startup Guide Installation of Your System in to Copper or Metal Piping Systems: If your new filter system is to be installed in a metal (conductive) plumbing system, i.e. copper or galvanized steel pipe, the plastic components of the system will interrupt the electrical continuity of the plumbing system. -
Page 6: How Your Sediment Filter Works
7500-S Sediment Filter Installation & Startup Guide How Your Sediment Filter Works: Water enters the top of the tank and flows down through the media and up the distributor tube. The downflow type Sediment Filter removes sediment and can be backwashed, which cleans and re‐... -
Page 7: Assembly And Installation Instructions
7500-S Sediment Filter Installation & Startup Guide Assembly and Installation Instructions: 1. Wrap the top of distributor tube with electrical or duct tape so that no gravel or Sediment media will go down the distributor tube when adding the media. 2. - Page 8 7500-S Sediment Filter Installation & Startup Guide The 7500‐S Does not come with a pre‐made bypass; you can build one yourself with PVC pipe or can also purchase our kit. Flex lines may be used where the unions shown where the Elbow Connector is, you could have slip by male fittings, then flex lines, then male nipples, and then you do not have to worry about plumbing it with too much pipe deflection‐...
-
Page 9: Programming Overview
7500-S Sediment Filter Installation & Startup Guide Programming Overview: Note: Indicator and button locations may vary between models 1. Menu/Confirm 10. Scroll down 2. Return/Manual regeneration override 11. Minutes 3. Enquiry/Setting 12. Button Lock 4. Power Indicator 13. Fast Rinse 5. - Page 10 7500-S Sediment Filter Installation & Startup Guide Blue Clock-face Icon: Indicates that the red digital display is showing the Current Clock Time. Green Hourglass Icon: Indicates the system is in normal Service (Filtering) Mode. Blue Wrench Icon: This indicates that you are in the programming menu and can change the values.
- Page 11 7500-S Sediment Filter Installation & Startup Guide Manual/ Return Button: Second from left, button icon is a “pointing index finger” with a left‐ pointing arrow underneath. After unlocking the display, pressing this button in Service Mode (Dynamic Display Stripe is running) will start a backwash cycle.
-
Page 12: Program The 7500 S Valve
7500-S Sediment Filter Installation & Startup Guide Program the 7500 S Valve Turn On Valve: Plug the valve in, and wait for the Service Screen to come on, the Dynamic Display Strip is blinking and the numbers 3101 will flash briefly, indicating you have a filter valve and not a softener type valve. - Page 13 7500-S Sediment Filter Installation & Startup Guide Set Days Between Backwash Display will read 1 – 01. Press the Menu/Confirm button and days will flash. Using the up or down arrow adjust to number of Days between Backwash. For Sediment Backwash filters, we recommend 4 – 6 days. This can be changed later. If you find you have pressure loss (meaning the sediment filter material needs backwashing) adjust to more frequent backwashes up to 1 per day.
-
Page 14: Initial Backwash
7500-S Sediment Filter Installation & Startup Guide Set Output Signal Relay Controllers (Generally not used) Underneath the valve are two relay outputs, one is normally closed contacts and one is normally open contacts. These can be set to be normally open or normally closed. For this setting you don’t need to do anything and can be left at b‐01. - Page 15 7500-S Sediment Filter Installation & Startup Guide 5 Verify that the backwash flow rate coming out of the drain line corresponds with the size of your system below. You can easily run the drain hose to a bucket and using a watch verify the flow rate in gallons per minute.
-
Page 16: Maintenance
7500-S Sediment Filter Installation & Startup Guide Maintenance: Normal Operation ‐Normal service display alternates between service days, time of day and scheduled rinsing time. ‐Days remaining until the next service will count down from the day value to 1 day remaining.
Need help?
Do you have a question about the 7500-S1 and is the answer not in the manual?
Questions and answers