Fronius MagicWave 190 Operating Instructions Manual
Tig
Hide thumbs
Also See for MagicWave 190:
- Operating instructions manual (132 pages) ,
- Quick manual (2 pages)
Table of Contents
Advertisement
Quick Links
Advertisement
Table of Contents
Troubleshooting

Related Manuals for Fronius MagicWave 190


Summary of Contents for Fronius MagicWave 190
- Page 1 / Perfect Charging / Perfect Welding / Solar Energy Operating Instructions MagicWave 190 MagicWave 230i TIG Power source TransTig 230i 42,0426,0250,EN 008-11112019 Fronius prints on elemental chlorine free paper (ECF) sourced from certified sustainable forests (FSC).
-
Page 3: Table Of Contents
Contents Safety rules ..............................Explanation of safety notices ........................ General ..............................Proper use ............................Environmental conditions........................Obligations of the operator........................Obligations of personnel ........................Mains connection ..........................Protecting yourself and others ......................Danger from toxic gases and vapours ....................Danger from flying sparks ........................Risks from mains current and welding current.................. - Page 4 General ..............................TIG AC welding............................. TIG DC welding............................. MMA welding ............................Before installation and commissioning....................... Safety..............................Utilisation for intended purpose ......................Setup regulations ..........................Mains connection ..........................Generator-powered operation....................... Information on system components ...................... Connecting the mains cable........................General ..............................Safety..............................
- Page 5 Deleting EasyJob operating points ....................... Welding job ..............................Safety..............................Preparatory work........................... Welding a job ............................Setup settings The Setup menu ............................General ..............................Accessing the Setup menu ........................Overview ............................... Changing menus and parameters......................The TIG menu............................Parameters in the TIG DC menu ......................Parameters in the TIG AC menu......................
- Page 6 At every start-up............................ 144 Every 2 months ............................. 144 Every 6 months ............................. 145 Disposal ..............................145 Appendix Technical data............................149 Special voltages............................ 149 MagicWave 190 ............................ 149 MagicWave 230i ........................... 151 TransTig 230i ............................153 Explanation of footnotes ........................154...
-
Page 7: Safety Rules
Safety rules Explanation of DANGER! safety notices Indicates immediate danger. ► If not avoided, death or serious injury will result. WARNING! Indicates a potentially hazardous situation. ► If not avoided, death or serious injury may result. CAUTION! Indicates a situation where damage or injury could occur. ►... -
Page 8: Proper Use
For the location of the safety and danger notices on the device, refer to the section headed "General" in the operating instructions for the device. Before commissioning the device, rectify any faults that could compromise safety. This is for your personal safety! Proper use The device is to be used exclusively for its intended purpose. -
Page 9: Mains Connection
Before leaving the workplace, ensure that people or property cannot come to any harm in your absence. Mains connection Devices with a higher rating may affect the energy quality of the mains due to their current consumption. This may affect a number device types in terms of: Connection restrictions Criteria with regard to the maximum permissible mains impedance Criteria with regard to the minimum short-circuit power requirement... -
Page 10: Danger From Flying Sparks
Welding fumes contain substances that can cause cancer, as stated in Monograph 118 of the International Agency for Research on Cancer. Use at-source extraction and a room extraction system. If necessary, use a welding torch with an integrated extraction device. Keep your face away from welding fumes and gases. -
Page 11: Meandering Welding Currents
Make sure that you and others are protected with an adequately insulated, dry temporary backing or cover for the earth or ground potential. This temporary backing or cover must extend over the entire area between the body and the earth or ground potential. All cables and leads must be secured, undamaged, insulated and adequately dimen- sioned. -
Page 12: Emc Device Classifications
If distribution boards, twin-head mounts, etc., are being used, note the following: The elec- trode of the welding torch / electrode holder that is not used is also live. Make sure that the welding torch / electrode holder that is not used is kept sufficiently insulated. In the case of automated MIG/MAG applications, ensure that only an insulated wire elec- trode is routed from the welding wire drum, large wirefeeder spool or wirespool to the wire- feed unit. -
Page 13: Emf Measures
EMF measures Electromagnetic fields may pose as yet unknown risks to health: effects on the health of others in the vicinity, e.g. wearers of pacemakers and hearing aids wearers of pacemakers must seek advice from their doctor before approaching the de- vice or any welding that is in progress for safety reasons, keep distances between the welding cables and the welder's head/ torso as large as possible... -
Page 14: Factors Affecting Welding Results
If the wire-feed unit is attached to a crane holder during welding, always use a suitable, insulated wirefeeder hoisting attachment (MIG/MAG and TIG devices). If the device has a carrying strap or handle, this is intended solely for carrying by hand. The carrying strap is not to be used if transporting with a crane, counterbalanced lift truck or other mechanical hoist. -
Page 15: Danger From Escaping Shielding Gas
Danger from es- Risk of suffocation from the uncontrolled escape of shielding gas caping shielding Shielding gas is colourless and odourless and, in the event of a leak, can displace the ox- ygen in the ambient air. Ensure an adequate supply of fresh air with a ventilation rate of at least 20 m³/hour. Observe safety and maintenance instructions on the shielding gas cylinder or the main gas supply. -
Page 16: Noise Emission Values
Always fasten the shielding gas cylinder securely and remove it beforehand if the device is to be transported by crane. Only the manufacturer's original coolant is suitable for use with our devices due to its prop- erties (electrical conductibility, anti-freeze agent, material compatibility, flammability, etc.). Only use suitable original coolant from the manufacturer. -
Page 17: Disposal
(e.g. relevant product standards of the EN 60 974 se- ries). Fronius International GmbH hereby declares that the device is compliant with Directive 2014/53/EU. The full text on the EU Declaration of Conformity can be found at the following address: http://www.fronius.com... -
Page 19: General Information
General information... -
Page 21: General
General Device concept The TransTig (TT) 230i, MagicWave (MW) 190 and MagicWave (MW) 230i TIG power sources are fully digitised, microprocessor- controlled inverter power sources. Their modular design and potential for sys- tem add-ons ensure a high degree of flexi- bility. -
Page 22: Fcc / Rss / Eu Compliance
FCC / RSS / EU Compliance This equipment complies with the limit values for an EMC device class A digital device pur- suant to Part 15 of the FCC Rules. These limit values are intended to provide an adequate level of protection against harmful emissions when the device is being used in an industrial environment. - Page 23 * MV power sources: 1 ~ 100 - 230 V Safety symbols on the rating plate: Welding is dangerous. The following basic requirements must be met: Welders must be sufficiently qualified Suitable protective equipment must be used All persons not involved in the welding process must be kept at a safe distance Do not use the functions described here until you have fully read and understood the fol- lowing documents: These Operating Instructions...
-
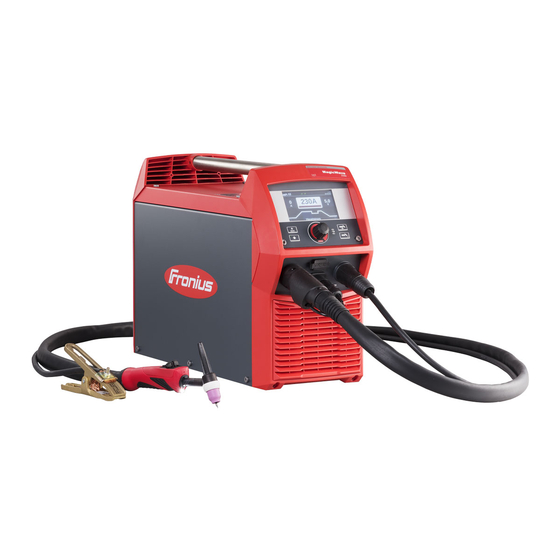
Page 24: System Components
System components General The TransTig and MagicWave power sources can be used with a wide variety of system add-ons and options. Overview TIG welding torch Power sources Cooling unit (only for TT / MW 230i) Trolley with gas cylinder holder Not illustrated: Remote controls Pedal remote controls... -
Page 25: Control Elements And Connections
Control elements and connections... -
Page 27: Control Panel
Control panel General NOTE! Due to software updates, you may find that your device has certain functions that are not described in these operating instructions or vice versa. Individual illustrations may also differ slightly from the actual controls on your device, but these controls function in exactly the same way. - Page 28 Function Mode/welding process button For selecting welding processes and mode Gas-test button To set the required shielding gas flow rate on the gas pressure regulator After pressing the gas-test button, shielding gas flows for 30 seconds. Press the button again to stop the gas flow prematurely. Key card reader for NFC keys MW / TT 230i only and only in certified countries to lock/unlock the power source using NFC keys...
-
Page 29: The Favourites Button
The favourites button Assigning the Fa- The Favourites button can be assigned a parameter from the following Setup menus: vourites button This parameter can then be called up and changed directly on the control panel. Select the desired parameter in the Setup menu More information about the Setup menu can be found from page onwards To assign the selected parameter to the Favourites button, press the Favourites but-... -
Page 30: Deleting Favourites
Deleting favour- Press the Favourites button for longer than 5 seconds ites The assigned parameter is deleted and a message is displayed. Press the adjusting dial to confirm Assigning Easy- If the FP Job function package is present on the power source, EasyJobs can be assigned Jobs to the Fa- to the Favourites button. - Page 31 The 5 EasyJob buttons are displayed and can be selected by turning and pressing the adjusting dial. 50 A More information about using EasyJobs can be found in the "EasyJob mode" section start- ing on page 75.
-
Page 32: Connections, Switches And Mechanical Components
Connections, switches and mechanical components Connections, switches and me- chanical compo- nents Front Rear Function (-) current socket with integrated gas connection To connect: the TIG welding torch the electrode cable for manual metal arc welding ... Symbols on TransTig power sources ... - Page 33 Mains switch for switching the power source on and off Mains switch for MV devices: Mains cable with strain relief device On MV devices: Mains cable connection Shielding gas connection Blanking cover for Ethernet option...
-
Page 35: Installation And Commissioning
Installation and commissioning... -
Page 37: Minimum Equipment Needed For Welding Task
Minimum equipment needed for welding task General Depending on which welding process you intend to use, a certain minimum equipment lev- el will be needed in order to work with the power source. The welding processes and the minimum equipment levels required for the welding task are then described. -
Page 38: Before Installation And Commissioning
Before installation and commissioning Safety WARNING! Danger due to incorrect operation and incorrectly performed work. This can result in severe personal injury and damage to property. ► All the work and functions described in this document must only be carried out and used by trained and qualified personnel. -
Page 39: Generator-Powered Operation
NOTE! Inadequately dimensioned electrical installations can cause serious damage. The incoming mains lead and its fuse must be dimensioned to suit the local power supply. The technical data shown on the rating plate applies. Generator-pow- The power source is generator-compatible. ered operation In order to dimension the required generator output, the maximum apparent power S 1max... -
Page 40: Connecting The Mains Cable
Connecting the mains cable General If power sources are delivered without a mains cable fitted, a mains cable that is suitable for the connection voltage must be connected to the power source before commissioning. The mains cable in included in the scope of supply of the power source. Safety WARNING! Work that is carried out incorrectly can cause serious injury and damage. -
Page 41: Start-Up
Start-up Safety WARNING! An electric shock can be fatal. If the device is plugged into the mains during installation, there is a high risk of very serious injury and damage. ► Only carry out work on the device if the mains switch is in the "O" position. ►... -
Page 42: Assembling The System Components (Overview)
Assembling the system compo- nents (overview) -
Page 43: Connecting The Gas Cylinder
Connecting the WARNING! gas cylinder There is a high risk of very serious injury and damage if a gas cylinder falls over. ► Place gas cylinders on a solid, level surface in such a way that they remain stable. ► Secure gas cylinders to prevent them from toppling over: Fix the safety strap at the same height as the top part of the cylinder. -
Page 44: Connecting The Welding Torch To The Power Source And The Cooling Unit
Connecting the NOTE! welding torch to the power source Do not use pure tungsten electrodes (colour-coded green) on TransTig power and the cooling sources. unit Set up the welding torch in accordance with the welding torch operating instructions NOTE! Before each start-up: ►... -
Page 45: Locking And Unlocking The Power Source Using The Nfc Key
Locking and unlocking the power source using the NFC key General remarks NFC key = NFC card or NFC key ring The power source can be locked using an NFC key, e.g. to prevent unauthorised access or welding parameters being changed without permission. A contactless system on the control panel allows the power source to be locked and un- locked. -
Page 47: Welding
Welding... -
Page 49: Tig Modes
TIG modes Safety WARNING! Danger from incorrect operation. Possible serious injury and damage to property. ► Do not use the functions described here until you have read and completely under- stood these Operating Instructions. ► Do not use the functions described here until you have fully read and understood all of the Operating Instructions for the system components, in particular the safety rules! See the "The Setup menu"... -
Page 50: 2-Step Mode
2-step mode Welding: Pull back and hold the torch trigger End of welding: Release the torch trigger DOWN 2-step mode 4-step mode Start of welding with starting current I : Pull back and hold the torch trigger Welding with main current I : Release the torch trigger Lowering to final current I : Pull back and hold the torch trigger... -
Page 51: Spot Welding
Spot welding When the spot welding operating mode is selected, the symbol for spot welding appears on the status display next to the welding process symbol: Welding: briefly pull back the torch trigger The welding time corresponds to the value set for the spot welding time setup param- eter. -
Page 52: Tig Welding
As soon as the mains switch is in the "I" position, the tungsten electrode of the welding torch is live. ► Ensure that the tungsten electrode does not touch any persons or electrically conduc- tive or earthed parts (e.g. housing, etc.). Move the mains switch to the "I" position The Fronius logo appears on the display. -
Page 53: Tig Welding
TIG welding Press the welding process / operating mode key The welding process and operating mode are displayed. Select the desired welding process by turning the adjusting dial Confirm the selection by pressing the adjusting dial Select the desired operating mode by turning the adjusting dial Confirm the selection by pressing the adjusting dial After a short period of time or after pressing the welding process / operating mode key, the available TIG welding parameters are displayed. -
Page 54: Welding Parameters For Tig Dc Welding
NOTE! All welding parameter set values that have been set using the adjusting dial remain stored until the next time they are changed. This applies even if the power source is switched off and on again. Start welding (ignite the arc) Welding parame- The polarity welding parameter is only available on MagicWave power sources. - Page 55 Main current (I 50 A 50 A Main current, 2-step mode and spot welding Main current, 4-step mode Setting range: 3 - 190 ... MW 190 A, 3 - 230 ... MW / TT 230 A Factory setting: - IMPORTANT! On welding torches with the Up/Down function, the entire setting range can be selected while the device is idling.
- Page 56 DownSlope 0.5 s 0.5 s DownSlope, 2-step mode and spot welding DownSlope, 4-step mode Setting range: off; 0.1 - 30.0 s Factory setting: 1.0 s IMPORTANT! The saved DownSlope value applies to both the 2-step and 4-step modes. Final current Final current, 2-step mode and spot welding Final current, 4-step mode Setting range: 0 - 100% (of main current)
-
Page 57: Welding Parameters For Tig Ac Welding
Polarity Setting range: DC-/AC Factory setting: DC- Welding parame- The polarity welding parameter is only available on MagicWave power sources. ters for TIG AC If the polarity welding parameter is set to AC, the following welding parameters are availa- welding ble: xxA = actual current value depending on the specified main current Starting current... - Page 58 Main current (I 50 A 50 A Main current, 2-step mode and spot welding Main current, 4-step mode Setting range: 3 - 190 ... MW 190 A, 3 - 230 ... MW / TT 230 A Factory setting: - IMPORTANT! On welding torches with the Up/Down function, the entire setting range can be selected while the device is idling.
- Page 59 DownSlope 0.5 s 0.5 s DownSlope, 2-step mode and spot welding DownSlope, 4-step mode Setting range: off; 0.1 - 30.0 s Factory setting: 1.0 s IMPORTANT! The saved DownSlope value applies to both the 2-step and 4-step modes. Final current Final current, 4-step mode Final current, 2-step mode and spot welding Setting range: 0 - 100% (of main current)
- Page 60 Setting range: 15 - 50% Factory setting: 35% 15: highest fusing power, lowest cleaning action 50: highest cleaning action, lowest fusing power Effect of the balance on the waveshape: I (A) t (s) Electrode diameter 2.4mm Setting range: Off; 1.0 - 4.0 mm Factory setting: 2.4 mm Cap mode on MagicWave only...
- Page 61 (1) ... before ignition (2) ... after ignition Cap mode must be activated separately for each tungsten electrode. NOTE! The automatic cap-shaping function is not necessary if a sufficiently large cap has already formed at the tip of the tungsten electrode. Polarity Setting range: DC-/AC Factory setting: DC-...
-
Page 62: Igniting The Arc
Risk of injury due to shock caused by electric shock (HF ignition) Although Fronius devices comply with all relevant standards, high-frequency ignition can transmit a harmless but noticeable electric shock under certain circumstances. ► Use prescribed protective clothing, especially gloves! ►... -
Page 63: Touchdown Ignition
Increase the tilt angle of the torch and actuate the torch trigger according to the mode you have selected The arc ignites without the electrode touching down on the workpiece. Tilt the torch back into the normal posi- tion Carry out welding Touchdown igni- If the ignition timeout setup parameter is set to off, HF ignition is deactivated. -
Page 64: Electrode Overload
Actuate the torch trigger Shielding gas flows Gradually tilt the welding torch up until the tungsten electrode touches the workpiece Raise the welding torch and rotate it into its normal position The arc ignites. Carry out welding Electrode over- If the tungsten electrode is overloaded, material can detach from the electrode that then load contaminates the weld pool. -
Page 65: Ignition Time Out, Tig Pulsing And Tacking Function
Ignition time out, TIG pulsing and tacking function Ignition timeout The power source has an ignition timeout function. function Once the torch trigger is pressed, gas pre-flow begins immediately. Ignition then begins. If an arc does not appear within the time specified in the Setup menu, the power source cuts out automatically. -
Page 66: Tacking Function
Tacking function The tacking function is available for the TIG DC welding process. When a time period is specified for the tacking setup parameter (4), the tacking function is assigned to 2-step mode and 4-step mode. The operating sequence of the modes remains unchanged. -
Page 67: Mma Welding
As soon as the mains switch is in the "I" position, the rod electrode in the electrode holder is live. ► Make sure that the rod electrode does not touch any persons or electrically conducting or earthed parts (e.g. the housing, etc.). Move the mains switch to the "I" position The Fronius logo appears on the display. -
Page 68: Mma Welding
MMA welding Press the Mode button The welding process and operating mode are displayed. Select electrode welding processes (Stick / MMA) or CEL (turn and press the adjusting dial) Turn the adjusting dial to select the Polarity parameter: DC- / DC+ / AC ... during MMA welding DC- / DC+ ... -
Page 69: Welding Parameters For Manual Metal Arc Welding
Welding parame- Depending on the selected current type, (+), (-) or the alternating current symbol is ters for manual displayed here. metal arc welding xxA = actual current value depending on the specified main current Starting current 100% Starting current: starting current < main current Starting current: starting current = main current ("SoftStart") 150%... - Page 70 Main current 130 A 130 A Main current: starting current < main current Main current: starting current = main current ("SoftStart") 130 A Main current: starting current > main current ("Hot- Start") Setting range: 0 - 190 A ... MW 190, 0 - 230 A ... MW / TT 230 Factory setting:- Arc-force dynamic To obtain optimum welding results, it will sometimes be necessary to adjust the arc-force...
-
Page 71: Welding Parameters For Mma Welding With Cellulose Electrodes
Polarity Polarity, set to DC- Polarity, set to DC+ Polarity, set to AC Setting range: DC- / DC+ / AC Factory setting: DC- Welding parame- Depending on the selected current type, (+) or (-) is displayed here. ters for MMA welding with cel- xxA = actual current value depending on the specified main current lulose electrodes... - Page 72 Setting range: 0 - 200% (of main current) Factory setting: 150% Main current 130 A 130 A Main current: starting current < main current Main current: starting current = main current ("SoftStart") 130 A Main current: starting current > main current ("Hot- Start") Setting range: 0 - 190 A ...
-
Page 73: Starting Current >100% (Hotstart)
Polarity Polarity, set to DC- Polarity, set to DC+ Setting range: DC- / DC+ Factory setting: DC- Starting current Advantages > 100 % (Hot- Improved ignition properties, even when using electrodes with poor ignition properties Start) Better fusion of the base material in the start-up phase, meaning fewer cold-shut de- fects Largely prevents slag inclusions Starting current time... -
Page 74: Starting Current <100% (Softstart)
Starting current A starting current < 100% (SoftStart) is intended for basic electrodes. Ignition takes place < 100 % at a low welding current. Once the arc is stable, the welding current continues to rise until (SoftStart) it reaches the welding current command value. Benefits: Improved ignition properties for elec- trodes that ignite at low welding cur-... -
Page 75: Easyjob Mode
EasyJob mode Storing EasyJob NOTE! operating points The EasyJobs are stored under job number 1 - 5 and can also be retrieved from the Job menu. Storing an EasyJob overwrites any other job saved under the same number! Prerequisite: EasyJobs must be assigned to the Favourites button (see "Assigning EasyJobs to the Fa- vourites button", starting on page 30. -
Page 76: Retrieving Easyjob Operating Points
Retrieving Easy- Press the Favourites button Job operating points The 5 EasyJob buttons are opened. Turn the adjusting dial and select the desired storage location To retrieve a saved EasyJob operating point, press the adjusting dial briefly (< 3 sec- onds) The size and colour of the button changes. -
Page 77: Welding Job
Welding job Safety WARNING! Danger from incorrect operation. Possible serious injury and damage to property. ► Do not use the functions described here until you have read and completely under- stood these Operating Instructions. ► Do not use the functions described here until you have fully read and understood all of the Operating Instructions for the system components, in particular the safety rules! WARNING! An electric shock can be fatal. -
Page 78: Welding A Job
Welding a job Press the "Mode" button The welding process and operating mode are displayed. Select "JOB" (turn adjusting dial and press) The welding parameters of the previously opened job are displayed after a short time. The job number is selected. Press the adjusting dial The job number can now be modified. -
Page 79: Setup Settings
Setup settings... -
Page 81: The Setup Menu
The Setup menu General The Setup menu provides easy access to the knowledge base in the power source and to additional functions. The Setup menu can be used to make simple adjustments to the weld- ing parameters to suit the various job settings. The following can be found in the Setup menu: all setup parameters that have an immediate effect on the welding process, all setup parameters needed for making the preliminary settings on the welding sys-... -
Page 82: Overview
Overview (14) (13) (12) (11) (10) Item Description TIG menu for setting TIG parameters for TIG-DC and TIG-AC Rod electrode menu for setting rod electrode parameters CEL menu for setting the parameters for manual metal arc welding with cellulose electrodes Ignition and mode settings for setting the Ignition parameters... -
Page 83: Changing Menus And Parameters
Defaults for setting the Display: set display backlighting, languages, date & time, display additional parameters System: restore factory settings, reset website password, perform R/L alignment Network: Bluetooth on, configure Bluetooth devices User administration: create user / overview, create role / overview, CENTRUM server Management System information to view device information such as software version or IP address (if power... - Page 84 Setting parameters Press the adjusting dial in the selected menu The first parameter in the menu is selected. Turn the adjusting dial and select the desired parameter Press the adjusting dial to change the parameter The background of the parameter value becomes blue. Turn the adjusting dial and set the value of the parameter The change in the parameter value takes effect immediately Press the adjusting dial to select other parameters...
-
Page 85: The Tig Menu
The TIG menu Parameters in the Tacking TIG DC menu Tacking function – duration of the pulsed welding current at the start of tacking off / 0.1 - 9.9 s / on Factory setting: off The pulsed welding current remains until the end of the tacking process 0.1 - 9.9 s The set time begins with the UpSlope phase. - Page 86 Pulse waveform to optimize arc pressure Hard rectangle / Soft rectangle / Sine Factory setting: Hard rectangle Hard rectangle: Pure rectangular waveform; slightly louder arc noise. Rapid current changes Used for orbital welding, for example Soft rectangle: Rectangular waveform with decreased edge steepness, for noise reduction compared to the pure rectangular waveform;...
- Page 87 Final current time The final current time specifies the duration of the final current phase. off / 0.01 - 30 s Factory setting: off IMPORTANT! The final current time only applies to 2-step mode and spot welding. In 4- step mode, the duration of the final current phase is controlled using the torch trigger (see "TIG operating modes").
-
Page 88: Parameters In The Tig Ac Menu
Parameters in the Pulse frequency TIG AC menu off / 0.20 - 2000 Hz (10,000 Hz with FP Pulse Pro option) Factory setting: off IMPORTANT! If the pulse frequency is set to "off", the Base current and Duty cycle param- eters cannot be selected. - Page 89 Slope reduced current To set the Slope1 reduced current and Slope2 reduced current parameters Slope1 reduced current off / 0.01 - 30 s Factory setting: off If a time value has been entered for the Slope1 reduced current parameter, the short-term current reduction or current increase is not abrupt, but rather slow and adapted to the de- sired current curve.
- Page 90 Effect of the AC frequency on the waveshape: I (A) t (s) 60 Hz 120 Hz AC current offset -70 to +70% Factory setting: 0% +70% wide arc with shallow heat input -70% narrow arc, deep heat input, higher welding speed Effect of the AC current offset on the waveshape: I (A) t (s)
- Page 91 Negative half-wave waveform Hard rectangle / Soft rectangle / Triangle / Sine Factory setting: Soft rectangle Hard rectangle pure rectangular waveform (stable but loud arc) Soft rectangle rectangular waveform with decreased edge steepness, for noise reduction compared to the pure rectangular waveform Triangle triangular waveform Sine...
-
Page 92: The Mma Menu
The MMA menu Parameters in the Starting current time rod electrode HotStart menu 0.0 - 2.0 s Factory setting: 0.5 s To obtain optimum welding results, it will sometimes be necessary to adjust the HotStart function. Benefits: Improved ignition properties, even when using electrodes with poor ignition properties Better fusion of the base material in the start-up phase, meaning fewer cold-shut de- fects Largely prevents slag inclusions... - Page 93 NOTE! When setting a flat characteristic (5), set the arc-force dynamic to a higher value. P-constant (constant welding power) If the P-constant characteristic is set, the welding power is kept constant, irrespective of the welding voltage and welding current. This results in a hyperbolic characteristic (6).
- Page 94 For characteristics (5) and (6), if a constant value is set for I , the welding current (I) will also become smaller or larger depending on the welding voltage. Break-voltage Welding voltage limitation 20 - 90 V Factory setting: 20 V The arc length depends on the welding voltage.
-
Page 95: The Cel Menu
The CEL menu Parameters in the Starting current time CEL menu HotStart 0.0 - 2.0 s Factory setting: 0.5 s To obtain optimum welding results, it will sometimes be necessary to adjust the HotStart function. Benefits: Improved ignition properties, even when using electrodes with poor ignition properties Better fusion of the base material in the start-up phase, meaning fewer cold-shut de- fects Largely prevents slag inclusions... -
Page 96: Ignition And Mode Settings
On. CAUTION! Risk of injury due to shock caused by electric shock Although Fronius devices comply with all relevant standards, high-frequency ignition can transmit a harmless but noticeable electric shock under certain circumstances. ► Use prescribed protective clothing, especially gloves! ►... -
Page 97: Arc Monitoring
IMPORTANT! Reversed polarity ignition is not recommended when welding light gauge sheet. Arc monitoring Ignition timeout Ignition timeout until safety cut-out after abortive ignition attempt. 0.1 - 9.9 s Factory setting: 5 s IMPORTANT! Ignition timeout is a safety function and cannot be deactivated. The description of the ignition timeout function can be found in the section "TIG welding". -
Page 98: Operating Mode Defaults
Operating mode Torch trigger defaults Welding start using torch trigger on / off Factory setting: on Welding is started via the torch trigger Welding is started by touching the workpiece with the tungsten electrode; especially suitable for welding torches without a torch trigger, ignition sequence depending on ignition parameters The display shows the symbol for the deactivated torch trigger in the status line, the selec- tion of the operating mode is deactivated. - Page 99 Sequence: Welding At the end of the welding action, briefly raise the welding torch The arc length is increased significantly. Lower the welding torch The arc length is reduced significantly The Comfort Stop function has been activated Keep the welding torch at the same height The welding current is continuously decreased (downslope).
-
Page 100: The Gas Menu
The gas menu Parameters in the Gas pre-flow Gas menu Duration of gas pre-flow 0.0 - 9.9 s Factory setting: 0.4 s Gas post-flow Duration of gas post-flow auto / 0 - 60 s Factory setting: auto auto Depending on the electrode diameter and welding current, the power source calculates the optimum gas post-flow time and adjusts it automatically. -
Page 101: The Components Menu
The components menu Parameters in the Cooling unit operating mode Components for controlling a cooling unit menu eco / auto / on / off Factory setting: auto auto When welding is started, the cooling unit starts to operate (fan and coolant pump are run- ning). -
Page 102: Emptying The Torch Hosepack
Emptying the Prerequisites for emptying the torch hosepack: torch hosepack MultiControl cooling unit present Cooling unit operating mode = eco or auto Power source must not be in welding mode Torch hosepack must not be in the process of being filled via the "Fill torch hosepack" function Torch body must be fitted Torch hosepack must be connected up correctly... -
Page 103: Filling The Torch Hosepack
The emptying process will start as soon as the coolant temperature is low enough. It takes roughly 30 seconds to empty the torch hosepack. During this time the LED on the welding torch will flash roughly every second. When the emptying process has been completed successfully, a confirmation to this effect is displayed. - Page 104 Start via key combination on welding torch Press and hold the "LED" key Press and hold the Up (+) key for 2 se- conds * Press intermediate lowering key to interrupt the pro- cess The filling process is started. It takes roughly 30 seconds to fill the torch hosepack. During this time the LED on the welding torch will flash roughly every second When the filling process has been completed successfully, a confirmation to this effect is displayed.
-
Page 105: The Job Menu
The Job menu Saving jobs When jobs are saved, the welding process and all the settings in the welding parameters and the respective Setup menus are saved. When creating jobs you MUST therefore also take into account the welding parameters in the Setup menus. -
Page 106: Loading A Job
Loading a job The Load job function can be used to load the data for a saved job or an EasyJob into the welding parameters. The relevant data from the job can be changed, saved as a new job or EasyJob, or used to start welding. -
Page 107: Defaults
Defaults Overview Defaults contains the following sections: Display Backlighting Languages Time & Date Show system data Display additional parameters System Power source configurations Reset to factory settings Reset website password Perform R/L alignment Network Bluetooth on Configure Bluetooth devices User management Create User / Overview Create Role / Overview CENTRUM server... -
Page 108: Display
Display Backlighting Backlighting to set the brightness of the display Unit - Setting range 0 - 10 Factory setting 10 Adjust backlighting: Defaults / Display / Backlighting Press the adjusting dial Select backlighting brightness (turn adjusting dial and press) Languages Language Setting range: dependent on the software version Factory setting: English... -
Page 109: Show System Data
Show system After selecting "Show system data", the current system data of the welding system is dis- data played: Welding current actual/hold value Current arc power Current arc energy Coolant circulation Coolant temperature Total operating hours Current flow time Welding voltage Welding current command value Press the adjusting dial to hide the system data and return to the welding parameters screen. - Page 110 Ignition settings: HF ignition, HF ignition delay time, ignition timeout, arc break filter time, arc break monitoring, torch trigger, arc-break voltage, comfort stop sensitivity, reversed polarity ignition Gas settings: Gas pre-flow, gas post-flow Components settings: Cooling unit operating mode, filter time flow sensor, cooler flow warning limit Display additional parameters: Default / Display / Display additional parameters Press the adjusting dial...
-
Page 111: System
System Power source Defaults / System / Power source configuration configurations Press the adjusting dial Select name, plant, hall, cell, additional info by turning the adjusting dial Press the dial to edit the selection The keyboard is displayed. Enter the configuration data by turning and pressing the adjusting dial Select "OK"... - Page 112 If an increased welding circuit resistance is detected, e.g. after changing the welding torch, this may mean that the following components are faulty: Torch hosepack Welding torch Grounding (earthing) connection to the workpiece Grounding cable Welding circuit inductivity L [μH] The way that the hosepack is arranged has a very significant effect on the weld proper- ties.
-
Page 113: Network
Network General Each Bluetooth user has its own MAC address. This MAC address can be used to assign the devices to specific power sources, preventing mix-ups. The power source is able to communicate with the following devices: Remote control RC Panel Basic /BT Pedal remote control RC Pedal TIG /BT Welding helmet Vizor Connect /BT An active Bluetooth connection is indicated in the status bar on the display by an illuminat-... -
Page 114: Configure Bluetooth Devices
Configure Blue- Switch on the Bluetooth device tooth devices Defaults/Network/Configure Bluetooth devices ... Press the adjusting dial All Bluetooth devices detected are displayed in a list along with their names, MAC address- es and additional information. Turn the adjusting dial and select the desired Bluetooth device Compare the MAC address displayed with the MAC address on the device Press the adjusting dial to create an active connection with the selected device A prompt to connect to the Bluetooth device is displayed. -
Page 115: User Management
User management Overview User management consists of the following sections: General Create users and roles Edit user / roles, deactivate user administration CENTRUM server... -
Page 116: General
General General remarks User management is advisable if several users work with the same power source. User management works with different roles and the help of NFC keys. Users are assigned different roles depending on their level of training or qualifications. Explanation of Administrator terms used... -
Page 117: Recommendation For Creating Roles And Users
Please proceed systematically when creating roles and NFC keys. tion for creating roles and users Fronius recommends creating one or two administrator keys. Without administrator rights, it may in the worst-case scenario no longer be possible to operate a power source. NOTE! Losing an NFC administrator key can lead to the power source becoming unusable, depending on the settings. -
Page 118: Create Users And Roles
Create users and roles Creating a user NOTE! If an NFC key is assigned to the predefined user "admin" under Defaults / User man- agement / Create user - overview, the user administration is activated. Defaults / User management / Create user - overview Press the adjusting dial The list of existing users is displayed. -
Page 119: Creating Roles
Creating roles Defaults / User management / Create role - overview Press the adjusting dial The list of existing roles is displayed. Turn the dial and select "Create new role" Press the adjusting dial The keyboard is displayed. Enter the role name by turning and pressing the adjusting dial Select "OK"... - Page 120 Function Setting range Website Current system data Job data Backup & Restore Backup & Restore User management Export & import CENTRUM server Overview Update Function packages Screenshot Client websites ... hidden ... read only ... read and write Select "Save" and press the adjusting dial...
-
Page 121: Edit User / Roles, Deactivate User Administration
Edit user / roles, deactivate user administration Editing users Defaults / User management / Create user - overview Press the adjusting dial The list of existing users is displayed. Turn the adjusting dial and select the user to be edited Press the adjusting dial "Edit user"... -
Page 122: Centrum - Central User Management
CENTRUM - Central User Management Activating the CENTRUM is a piece of software for the central management of users. Detailed informa- CENTRUM server tion is available in the CENTRUM Operating Instructions (42,0426,0338,xx). The CENTRUM server can also be activated using the power source, as follows: Defaults / User management / CENTER server Press the adjusting dial "CENTRUM server settings"... -
Page 123: Management
Management Trial license The trial license allows you to use and test all currently available functional packages free of charge on the power source. Once the trial license is activated, all functional packages and extensions are available for a period of 10 hours of arc time. A warning message appears 2 hours before the trial li- cense expires. -
Page 124: System Informations
System informations Device informa- The following data is displayed in device information: tion Serial number Image version Software ver. IP addr.(es) Show open source licences... Turn the adjusting dial to select "Show open source licences..." Press the adjusting dial The open source licences used are displayed. Select close by turning the adjusting dial Press the adjusting dial... -
Page 125: Smartmanager - The Power Source Website
SmartManager - The power source website... -
Page 127: Smartmanager - The Power Source Website
Enter the IP address in the browser search field SmartManager Enter user name and password Factory setting: User name = admin Password = admin The power source SmartManager is displayed. Fronius A click on the Fronius logo opens the homepage of Fronius: www.fronius.com. -
Page 128: Changing Password / Logging Off
Changing pass- word / logging off By clicking this symbol the user password can be changed you can log out of SmartManager Changing the password for the SmartManager: Enter the old password Enter the new password Repeat the new password Click on "Save"... -
Page 129: Current System Data
Current system data Current system Depending on the welding process, the current data on the welding system is displayed, data e.g.: Welding process ACTUAL or HOLD Welding current Welding voltage Current arc power Current arc energy Coolant circulation * Coolant temperature * Shielding gas flow rate Arc time Total operating hours... -
Page 130: Job-Data
Job-Data Job data The Job data entry is only displayed if the FP Job function package is present in the power source. In the "Job data" entry, existing welding system jobs can be viewed existing welding system jobs can be optimised jobs stored externally can be transferred to the welding system existing jobs in the welding system can be exported as a PDF * or CSV file Job overview... -
Page 131: Importing A Job
Creating a new job Click on "Create new job" Enter job data Click on "OK" to apply the new job Importing a job This function enables previously exported jobs to be transferred into the welding system. Click on "Search Job-file" Select desired job file Individual jobs can be selected and new job numbers assigned in the preview of the job import list. - Page 132 A PDF or CSV file containing the selected jobs is created and saved according to the set- tings of the browser in question.
-
Page 133: Backup & Restore
Backup & Restore General In the backup & restore entry all welding system data can be saved as a backup (e.g. current parameter settings, jobs, defaults, etc.), any existing backups can be restored to the welding system Backup & Restore Starting backup Click on "Start backup"... -
Page 134: Overview
Overview Overview In the overview entry, welding system components and options are displayed with all avail- able information, e.g. firmware version, item number, serial number, production date, etc. Expanding / re- ducing all groups Clicking on the button "Expand all groups" displays further details for the individual system components. -
Page 135: Update
To restart the power source, click on "Yes" The power source restarts; the display goes black for a short time. The Fronius logo is shown on the power source display during the restart. Once the update has been completed successfully, a confirmation and the current firmware version are displayed. -
Page 136: Function Packages
Function Packages Function packag- In the Function Packages entry, the function packages present on the power source are displayed. New function packages can be uploaded. Installing a func- Organise and save a function package tion package Click on "Search function package file" Select the desired function package file (*.xml) Click on "Open"... -
Page 137: Screenshot
Screenshot Screenshot In the Screenshot entry, a digital image of the power source display can be created at any time, irrespective of the navigation or set values. Click on "Create screenshot" to capture a screenshot of the display A screenshot of the currently displayed settings is created. Different functions are available for saving the screenshot depending on the browser used;... -
Page 139: Troubleshooting And Maintenance
Troubleshooting and maintenance... -
Page 141: Troubleshooting
Troubleshooting General The digital power sources are equipped with an intelligent safety system. This means that apart from the fuse for the coolant pump, it has been possible to dispense with fuses en- tirely. After a possible malfunction or error has been remedied, the power source can be put back into normal operation again without any fuses having to be replaced. - Page 142 No welding current Mains switch is ON, overtemperature indicator is lit up Cause: Overload Remedy: Check duty cycle Cause: Thermostatic safety cut-out has tripped Remedy: Wait until the power source automatically comes back on after the end of the cooling phase Cause: The fan in the power source is faulty Remedy:...
- Page 143 Poor weld properties Cause: Incorrect welding parameters Remedy: Check the settings Cause: Grounding (earthing) connection is incorrect Remedy: Check the grounding (earthing) connection and terminal for correct polarity Welding torch becomes very hot Cause: The design dimensions of the welding torch are not sufficient for this task Remedy: Observe the duty cycle and loading limits Cause:...
-
Page 144: Care, Maintenance And Disposal
Care, maintenance and disposal General Under normal operating conditions, the power source requires only a minimum of care and maintenance. However, it is vital to observe some important points to ensure it remains in a usable condition for many years. Safety WARNING! Work that is carried out incorrectly may result in serious injury or damage to prop-... -
Page 145: Every 6 Months
Every 6 months CAUTION! Danger due to the effect of compressed air. This can result in damage to property. ► Do not bring the air nozzle too close to electronic components. Dismantle device side panels and clean inside of device with dry, reduced com- pressed air If a lot of dust has accumulated, clean the cooling air ducts WARNING! -
Page 147: Appendix
Appendix... -
Page 149: Technical Data
NOTE! An inadequately dimensioned electrical installation can cause serious damage. The mains cable and its fuse must be dimensioned accordingly. The technical data shown on the rating plate applies. MagicWave 190 MW 190 MW 190 MV Mains voltage U 1 x 230 V... - Page 150 MW 190 MW 190 MV Overvoltage category Pollution degree according to IEC 60664 3 EMC Emissions class Insulation class Dimensions L x W x H (with handle) 558 / 210 / 369 mm 558 / 210 / 369 mm 22.0 / 8.3 / 14.5 in. 22.0 / 8.3 / 14.5 in.
-
Page 151: Magicwave 230I
MagicWave 230i MW 230i MW 230i MV Mains voltage U 1 x 230 V 1 x 120 / 230 V Mains voltage tolerance ± 15% ± 15% Grid frequency 50/60 Hz 50/60 Hz Mains fuse protection (slow-blow) 16 A 16 A (U = 230 V) 20 A (U = 120 V) - Page 152 MW 230i MW 230i MV Max. shielding gas pressure 6 bar 6 bar 87.02 psi 87.02 psi Noise emission (L 68 dB(A) 68 dB(A)
-
Page 153: Transtig 230I
TransTig 230i TT 230i TT 230i MV Mains voltage U 1 x 230 V 1 x 120 / 230 V Mains voltage tolerance ± 15% ± 15% Grid frequency 50/60 Hz 50/60 Hz Mains fuse protection (slow-blow) 16 A 16 A (U = 230 V) 20 A (U = 123 V) -
Page 154: Explanation Of Footnotes
TT 230i TT 230i MV Max. shielding gas pressure 6 bar 6 bar 87.02 psi 87.02 psi Noise emission (L 68 dB(A) 68 dB(A) Explanation of connected to public mains supply with 230 / 400 V and 50 Hz footnotes D.C. - Page 156 FRONIUS INTERNATIONAL GMBH Froniusstraße 1, A-4643 Pettenbach, Austria E-Mail: sales@fronius.com www.fronius.com Under www.fronius.com/contact you will find the addresses of all Fronius Sales & Service Partners and locations Find your spareparts online...
Need help?
Do you have a question about the MagicWave 190 and is the answer not in the manual?
Questions and answers