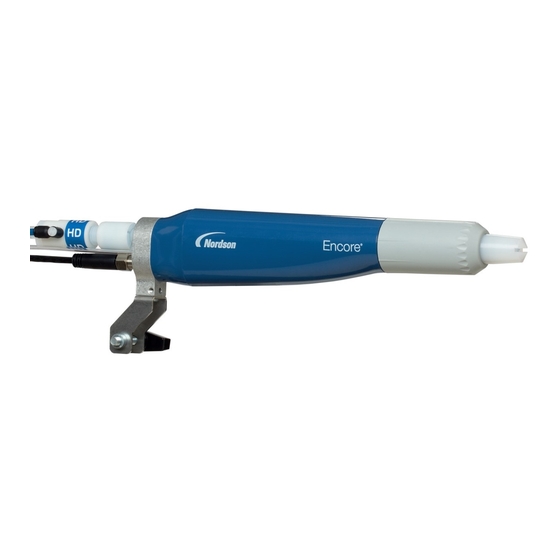
Nordson Encore HD Customer Product Manual
Powder spray system with pump cabinet
Hide thumbs
Also See for Encore HD:
- Customer product manual (144 pages) ,
- Manual (98 pages) ,
- Product manual (68 pages)
Table of Contents
Advertisement
Quick Links
Encorer HD Powder Spray System
with Pump Cabinet
Customer Product Manual
Part 1612632-03
Issued 12/18
For parts and technical support, call the
Industrial Coating Systems Customer Support Center at (800) 433-9319
This document is subject to change without notice.
Check http://emanuals.nordson.com/finishing for the latest version.
NORDSON CORPORATION • AMHERST, OHIO • USA
Advertisement
Chapters
Table of Contents
Troubleshooting

Related Manuals for Nordson Encore HD


Summary of Contents for Nordson Encore HD
- Page 1 Part 1612632-03 Issued 12/18 For parts and technical support, call the Industrial Coating Systems Customer Support Center at (800) 433-9319 This document is subject to change without notice. Check http://emanuals.nordson.com/finishing for the latest version. NORDSON CORPORATION • AMHERST, OHIO • USA...
-
Page 2: Table Of Contents
Wiring Diagram Dual Pump/Spray Gun System Contact Us Notice This is a Nordson Corporation publication which is protected by copyright. Nordson Corporation welcomes requests for information, comments, and Original copyright date 2018. No part of this document may be inquiries about its products. General information about Nordson can be... - Page 3 Change Record Change Record Revision Date Change 1/18 Released 7/18 Added system numbers for systems using an nLighten option 12/18 Part Number 1615940 was 1605940, part number 1613041 was 1053510, and 1613039 was 1606480. Part 1612632−03 E 2018 Nordson Corporation...
- Page 4 Change Record Part 1612632−03 E 2018 Nordson Corporation...
-
Page 5: Safety
Make sure all equipment is rated and approved for operating or servicing equipment. the environment in which it is used. Any approvals obtained for Nordson equipment will be voided if instructions for installation, operation, and service Qualified Personnel are not followed. -
Page 6: Fire Safety
Use only replacement parts that are designed for use with original equipment. Contact your Action in the Event of a Malfunction Nordson representative for parts information and advice. If a system or any equipment in a system malfunctions, shut off the system immediately and... -
Page 7: Description System Components
HD Powder Spray System with Pump Cabinet Description System Components The Encore HDr manual spray system with an Encore pump cabinet includes the advanced design of the Encore HD manual spray gun and the Encore HD manual controller. Encore HD Encore HD Spray Spray Gun... -
Page 8: Pump Panel
WARNING: Allow only qualified pneumatic enclosure for the Encore HD manual personnel to service this panel. Shut off system. The pump panel houses the Encore HD power at an external disconnect before pumps, pump manifolds and pump control board, performing any electrical repairs. Shut... -
Page 9: Pump Panel Components
26. Pump 2 control manifold 7. Line filter 17. Air filter 8. Power switch 18. Air supply ball valve 9. Contact block 19. Pinch low regulator/gauge 10. Vacuum generator mufflers 20. Pinch high regulator/gauge Part 1612632−03 E 2018 Nordson Corporation... -
Page 10: Hd Pump Manifold Components
Encore HD Powder Spray System with Pump Cabinet HD Pump Manifold Components The Encore HD powder feed pump transports precise amounts of powder from a feed source to a powder spray gun. The pump manifold controls the pump air and vacuum flow. The pump control board controls all manifold functions. -
Page 11: Solenoid And Flow Control Valve Functions
Right Side Delivery Pinch Valve Left Side Fluidizing Tube Vacuum Air (Bottom of Manifold) Left Side Suction Pinch Valve Pattern Air Flow Control Right Side Suction Pinch Valve Pump Air Flow Control Right Side Fluidizing Tube Part 1612632−03 E 2018 Nordson Corporation... -
Page 12: Spray Gun Controller
The Encore HD manual powder spray gun Operator Controls Controller provides electrostatic, powder flow, and The Arrow keys and Rotary Knob serve two pattern air controls for the Encore HD manual functions: to move the cursor around the screen, powder spray gun. and to change settings. -
Page 13: Installation
(6), but do not tighten the screws. Figure 7 Pump and Manifold Installation 1. Mounting screws (2) 3. Pump panel wall 5. Manifold 2. Pump 4. Manifold mounting bracket 6. Manifold mounting screws (2) Part 1612632−03 E 2018 Nordson Corporation... -
Page 14: Pump Control Board
Pump 2 Pump Air Flow Control Valve JTAG Programming/Debug/Connector Pump 1 Solenoid I/O Harness Pump 2 Solenoid I/O Harness DC Power In Purge Connector CAN Out Connector CAN In Connector CAN Network Termination Header Part 1612632−03 E 2018 Nordson Corporation... -
Page 15: Switches And Indicators
Not Used Suction 1 − Solenoid 3 Not Used Pressure 1 − Solenoid 2 Not Used Delivery 1 − Solenoid 1 Pull up resistor for CCS Vacuum − Solenoid 7 Color Change Status (CCS) Part 1612632−03 E 2018 Nordson Corporation... - Page 16 Control Board and Manifold Connections Note: The control board is shipped with air tubing labeled from 4−1 installed in the XDCR fittings. Connect the tubing to the appropriate fittings on the manifolds as illustrated. Part 1612632−03 E 2018 Nordson Corporation...
-
Page 17: Control Board Configuration
Move the jumper to pins 1 and 2. As-shipped position (for dual spray gun system) CAN BUS TERM Position for Color-on-Demand single or dual spray gun system CAN BUS TERM Figure 10 CAN BUS TERM Jumper Settings Part 1612632−03 E 2018 Nordson Corporation... -
Page 18: Configuration Procedure
Figure 11 Displaying and Changing Configuration Functions Use the function controls F-34 through F-37 to See the Encore HD Manual Powder Spray set the conveyance air and pattern air System Controller manual for more information calibration values. See Table 2. -
Page 19: Air And Powder Tubing Connections
Pump 1 Flow Air Supply 3.45 bar (50 psi) 4-mm Clear 3 − 4 Pressure Transducer 10-mm Blue Vacuum Generator Vent Top of Manifold Bottom of Manifold Figure 12 Powder and Air Tubing Connections Part 1612632−03 E 2018 Nordson Corporation... -
Page 20: System Diagram
Controller Controller Pump Control Pump 2 Pump 1 Panel Power Switch System Power Pump Adapters System Air Powder Hopper Fluidizing Air Regulator Fluidizing Air Figure 13 Typical System Diagram (Dual Pump Manual System Shown) Part 1612632−03 E 2018 Nordson Corporation... -
Page 21: Pneumatic Diagram Dual Pump/Spray Gun System
MANIFOLD FILTER CHECK VALVE VENT VACUUM GENERATOR VACUUM GENERATOR INPUT EXHAUST EXHAUST PATTERN AIR PATTERN AIR (12MM TUBE FITTING) GUN 2 GUN 1 Figure 14 Pump Panel Pneumatic Diagram (Two Pump/Spray Gun System Shown) Part 1612632−03 E 2018 Nordson Corporation... -
Page 22: Wiring Diagram Dual Pump/Spray Gun System
GREY BLACK BLACK TERMINAL BLOCK POWER SUPPLY BLACK BLACK SWITCH BLUE BROWN FILTER FUSE GRN/YEL TIME DELAY 3.15 A BLUE GRN/YEL POWER CORD BROWN Figure 15 Pump Panel Wiring Diagram (Dual Pump System Shown) Part 1612632−03 E 2018 Nordson Corporation... -
Page 23: Operation
The color change cycle, which purges the pump, spray gun, delivery tubing, and suction lines of powder and loads a new color powder, is controlled by the Purge screen settings on the spray gun controller. Part 1612632−03 E 2018 Nordson Corporation... -
Page 24: Troubleshooting
Refer to Flow Control Valve changes Cleaning on page 22 for instructions. If the problem persists, replace the pattern air flow control valve. Refer to Flow Control Valve Replacement on page 23 for instructions. Part 1612632−03 E 2018 Nordson Corporation... -
Page 25: Repair
6. Remove the two screws securing the manifold 3. Tag the pump manifold air tubing, then to the mounting bracket. Relocate the manifold disconnect the tubing from the manifold. assembly to a clean work surface. Part 1612632−03 E 2018 Nordson Corporation... -
Page 26: Flow Control Valve Cleaning
Manifold Repair, Flow Control Valve Cleaning and Replacement, and Solenoid Valve Replacement 1. Nut 5. Spring 9. Orifice 2. Coil 6. Cartridge 10. Long screws (2) 3. Short screws (2) 7. Valve body 11. Screws (2) 4. Valve stem 8. O-rings (2) 12. Solenoid valve Part 1612632−03 E 2018 Nordson Corporation... -
Page 27: Flow Control Valve Replacement
The circuit board is an electrostatic-sensitive detailed removal, installation, and calibration device (ESD). Wear a grounding wrist strap instructions. Follow the instructions carefully to connected to the pump panel or other ground. avoid damaging the circuit board. Part 1612632−03 E 2018 Nordson Corporation... -
Page 28: Parts
HD Powder Spray System with Pump Cabinet Parts To order parts, call the Nordson Industrial Coating Systems Customer Support Center at (800) 433-9319 or contact your local Nordson representative. For customers outside the USA, refer to the Global Locations list on www.nordson.com. - Page 29 Encore HD Powder Spray System with Pump Cabinet This page intentionally left blank. Part 1612632−03 E 2018 Nordson Corporation...
-
Page 30: Pump Panel
Encore HD Powder Spray System with Pump Cabinet Pump Panel Figure 17 Pump Panel Parts (Two-Gun System Version Shown) Part 1612632−03 E 2018 Nordson Corporation... -
Page 31: Nordson Corporation
1009090 FUSE, time delay, 215 series, 3.15 A, 5 x 20 mm 1099534 VALVE, solenoid, 3 port, 24 V, with adapter A, D 1101498 KIT, PCA replacement, Encore HD pump control 1034396 MUFFLER, exhaust, in. NPT male 1062366 FILTER, air, in. -
Page 32: Manifold
Encore HD Powder Spray System with Pump Cabinet Manifold Figure 18 Manifold Parts Part 1612632−03 E 2018 Nordson Corporation... - Page 33 NOTE A: These are not serviceable parts. Do not remove these from the manifold. B: If using an old harness with three positions, use the supplied adapter. If using a new harness with two positions, the supplied adapter can be discarded. AR: As Required Part 1612632−03 E 2018 Nordson Corporation...
-
Page 34: Air And Powder Tubing
8-mm Clear polyethylene 900742 6-mm Blue polyurethane 173101 8-mm Clear polyethylene 900617 4-mm Clear polyurethane 1, 8 900740 10-mm Blue polyurethane Top of Manifold Bottom of Manifold Figure 19 Air and Powder Tubing Parts Part 1612632−03 E 2018 Nordson Corporation... -
Page 35: Pca Replacement Kit
HD Powder Spray System with Pump Cabinet PCA Replacement Kit See Figure 20 and refer to the following parts list. Part Description Note 1101498 KIT, PCA, replacement, pump control Figure 20 PCA Replacement Kit Part 1612632−03 E 2018 Nordson Corporation... - Page 36 Encore HD Powder Spray System with Pump Cabinet This page intentionally left blank. Part 1612632−03 E 2018 Nordson Corporation...
- Page 37 Issued 12/18 For parts and technical support, call the Finishing Customer Support Center at (800) 433-9319. This document is subject to change without notice. Check http://emanuals.nordson.com/finishing for the latest version and available local languages. NORDSON CORPORATION • AMHERST, OHIO • USA...
- Page 38 ....... Contact Us Notice This is a Nordson Corporation publication which is protected by copyright. Nordson Corporation welcomes requests for information, comments, and Original copyright date 2017. No part of this document may be inquiries about its products.
- Page 39 Change Record Change Record Revision Date Change 11/17 New publication 3/18 Added CE mark and new DOC14045-01. 12/18 1093557 was 1903557. Part 1605708−02 E 2018 Nordson Corporation...
- Page 40 Change Record Part 1605708−02 E 2018 Nordson Corporation...
-
Page 41: Safety
Make sure all equipment is rated and approved for documentation where appropriate. the environment in which it is used. Any approvals obtained for Nordson equipment will be voided if Make sure all equipment documentation, including instructions for installation, operation, and service these instructions, are accessible to all persons are not followed. -
Page 42: Fire Safety
Use only replacement parts that are designed ground gun electrodes before making for use with original equipment. Contact your adjustments or cleaning powder spray guns. Nordson representative for parts information Connect all disconnected equipment, ground and advice. cables, and wires after servicing equipment. -
Page 43: Description
Encore HD+ Encore HD Encore XD Figure 1 Encore HD Pump Series Features and Benefits Standard pump (HD) has blue pinch valves, Improved uniformity of powder output molded Y blocks and standard porous tubes... -
Page 44: Pump Components
Inlet Fitting Connects to the tubing leading from the power source Outlet Fitting Connects to the tubing leading to the powder spray gun Encore HD Pump Encore HD+, XD Pump Figure 2 Encore Pump Components Part 1605708−02 E 2018 Nordson Corporation... -
Page 45: Theory Of Operation
Encore HD Pump Theory of Operation Pumping The Encore HD pump consists of two halves that function identically. The halves alternately draw powder in and dispense powder out of the pump; Left half suction while one half is drawing powder in, the other half valve is dispensing powder out. -
Page 46: Purging
After the delivery side is purged, the delivery pinch Powder valves close and the suction pinch valves open. The suction side is purged in the same way as the delivery side. Figure 5 Purging Operation Part 1605708−02 E 2018 Nordson Corporation... -
Page 47: Pump Port Functions
The pump control manifold controls the air flow in and out of the pump. Manifold is shown for reference only, please refer to the Encore HD Pump Control Unit and Power Supply manual for more information. Position... -
Page 48: Operation
The spray gun controller will generate a fault to Encore Manual Spray Gun Controller manual for indicate this condition and notify you that it is time specific instructions. to replace the fluidizing tubes. Correct vacuum reading is (9−14 in. Hg). Part 1605708−02 E 2018 Nordson Corporation... -
Page 49: Specifications
189mm (7.44 in) 233mm 237mm (9.19 in.) (9.34 in.) 282mm (11.10 in.) 79mm (3.10 in.) 74mm (2.89 in.) Encore HD Encore HD+ and XD (HD+ Stamped on Encore HD+) Figure 8 Encore Pump dimensions Part 1605708−02 E 2018 Nordson Corporation... -
Page 50: Installation Pump Tubing Installation
1. Pump Flexible Tubing 2. Pump mounting hardware 3. Panel or cabinet wall Figure 9 Powder Tubing Installations 4. Manifold 1. Lower Y block 2. Barbed tubing adapter 3. Poly tubing 4. Flexible tubing Part 1605708−02 E 2018 Nordson Corporation... -
Page 51: Maintenance
Y-block for signs of wear or impact fusion. Clean these parts in an ultrasonic cleaner if necessary. Every Six Months Each Time You Disassemble the Pump Lower Y Block Inspect the gasket for damage. Gasket Replace if necessary. Part 1605708−02 E 2018 Nordson Corporation... -
Page 52: Troubleshooting
These troubleshooting procedures cover only the most common problems that you may encounter. If you cannot solve the problem with the information given here, call the Nordson Finishing Customer Support Center at (800) 433-9319 or contact your local Nordson representative for help. - Page 53 Increase or decrease the fluidizing air incorrect pressure. The powder should be gently boiling. Powder damp or Check the air driers and filter/separators. contaminated Check the powder in the feed hoppers and make sure it flows easily. Continued... Part 1605708−02 E 2018 Nordson Corporation...
- Page 54 The delivery tubing must be arranged arrangement in a 3-ft. coil and be parallel to the ground. Delivery tubing length is not to The delivery tubing must be 60 ft. specification from the pump to the spray gun. Continued... Part 1605708−02 E 2018 Nordson Corporation...
-
Page 55: Nordson Corporation
If the discs are even slightly raised, the gasket will leak, causing the pump to malfunction. Pinch valve leaking Replace the pinch valves and filter disks. Lower Y-block plugged Remove and clean the lower Y-blocks. Part 1605708−02 E 2018 Nordson Corporation... -
Page 56: Delivery Check
Figure 11 on page 17. If the problem remains, the pump control 2. Trigger the gun and observe the powder manifold is bad. See Pump is bad, requires flow. repair in the Troubleshooting table. Part 1605708−02 E 2018 Nordson Corporation... -
Page 57: Bubble Test For Color-On-Demand (Cod) System
The test any that are worn out. mode button pressurizes all the air lines to the COD manifold pinch valves. If any of the pinch valves are leaking, bubbles will appear in the water. Part 1605708−02 E 2018 Nordson Corporation... -
Page 58: Repair
2. Loosen the fluidizing tube access plug and pull the fluidizing tube straight out of the pump body. Retrofit Pump Retrofit Pump Standard Pump Standard Pump Figure 13 Loosening the fluidizing tubes Figure 15 Reinstalling the purge air tubing. Part 1605708−02 E 2018 Nordson Corporation... -
Page 59: Pump Disassembly
Figure 16 Retrofit Pump Disassemble Preparation NOTE: Refer to the Pinch Valve Replacement Instructions, page 23 to remove pinch valves from pinch valve chamber. Figure 17 Standard Pump Disassemble Preparation Part 1605708−02 E 2018 Nordson Corporation... - Page 60 Encore HD Pump Figure 18 Pump Disassembly (Encore HD shown) 1. Fitting Caps (2) 9. Purge Manifold 17. Filter Discs (4) 2. O−rings (2) 10. Manifold Gasket 18. Pinch Valve Block 3. Check Valves (2) 11. Block Seal 19. Gasket 4.
-
Page 61: Pump Assembly
(17) and additional O−rings onto the fluidizing tubes (18) Figure 20 Assemble the Pinch Valve Housing Figure 22 Assemble Fittings to Fluidizing Tubes Part 1605708−02 E 2018 Nordson Corporation... - Page 62 Refer to Installation on page 10 for more information. PolyTubing Flex Tubing Figure 23 Fasten Fluidizing Tubes into Manifold Figure 24 Assemble Tubing into Lower Y Block Part 1605708−02 E 2018 Nordson Corporation...
-
Page 63: Pinch Valve Replacement
Align the pinch valve point to the center of the pinch valve housing. Pinch Valve position Figure 27 Inserting Pinch Valve into Insertion Tool Part 1605708−02 E 2018 Nordson Corporation... - Page 64 Continue pulling on the insertion tool until the pinch valve pops through the valve body and the tool comes loose. Figure 29 Pulling Pinch Valve into Valve Body Part 1605708−02 E 2018 Nordson Corporation...
- Page 65 Encore HD Pump This page intentionally left blank. Part 1605708−02 E 2018 Nordson Corporation...
-
Page 66: Parts Pump
Encore HD Pump Parts Pump To order parts, call the Nordson Finishing Customer Support Center at (800) 433-9319 or contact your local Nordson representative. Figure 31 Encore HD, HD+ and XD Standard Parts Part 1605708−02 E 2018 Nordson Corporation... -
Page 67: Nordson Corporation
Encore HD Pump See Figure 31. Item Part Part Part Description Quantity Note — 1605940 PUMP ASSEMBLY, Encore HD — 1610978 PUMP ASSEMBLY, Encore HD+ — 1611247 PUMP ASSEMBLY, Encore XD 1604060 1604060 1604060 S BLOCK, pinch valve chamber 1612217... -
Page 68: Spare Parts
Fluidizing Tube Kit HD+, XD Pump Amber Pinch Valve Kit 1093557 Extreme Duty Pump 1612218 Includes the following 8 Pinch Valves 8 O−Rings 8 Filter Discs Gasket Barbed Tubing Adapter for Flexible Tubing 1078006 Part 1605708−02 E 2018 Nordson Corporation... -
Page 69: Air And Powder Tubing Part Numbers
6 mm Blue Polyurethane 173101 8 mm Clear Polyethylene 900617 4 mm Clear Polyurethane 900740 10 mm Blue Polyethylene Top of Manifold Pump Tubing Bottom of Manifold Figure 32 Air and Powder Tubing Part Numbers Part 1605708−02 E 2018 Nordson Corporation... - Page 70 Encore HD Pump This page intentionally left blank. Part 1605708−02 E 2018 Nordson Corporation...
- Page 71 Issued 04/18 For parts and technical support, call the Industrial Coating Systems Customer Support Center at (800) 433-9319 or contact your local Nordson representative. This document is subject to change without notice. Check http://emanuals.nordson.com/finishing for the latest version and available local languages.
-
Page 72: Contact Us
Contact Us Notice This is a Nordson Corporation publication which is protected by copyright. Nordson Corporation welcomes requests for information, comments, and Original copyright date 2014. No part of this document may be inquiries about its products. General information about Nordson can be... -
Page 73: Nordson Corporation
Change Record Change Record Revision Date Change 01/14 New release 09/14 Re-zero procedure revised 01/15 New equipment labels 10/15 Revised illustrations and content 04/18 Revised some illustrations for new pump. Updated Certification Label. Part 1604870-05 E 2018 Nordson Corporation... - Page 74 Change Record Part 1604870-05 E 2018 Nordson Corporation...
- Page 75 Controller Connections ....... . Part 1604870-05 E 2018 Nordson Corporation...
- Page 76 ........Part 1604870-05 E 2018 Nordson Corporation...
-
Page 77: Safety
Regulations and Approvals Make sure all equipment is rated and approved for the environment in which it is used. Any approvals obtained for Nordson equipment will be voided if instructions for installation, operation, and service are not followed. All phases of equipment installation must comply with all federal, state, and local codes. -
Page 78: Personal Safety
Clean, maintain, test, and repair equipment according to the instructions in your equipment documentation. Use only replacement parts that are designed for use with original equipment. Contact your Nordson representative for parts information and advice. Part 1604870-05 E 2018 Nordson Corporation... -
Page 79: Grounding
Disconnect and lock out electrical power. Close pneumatic shutoff valves and relieve pressures. Identify the reason for the malfunction and correct it before restarting the equipment. Disposal Dispose of equipment and materials used in operation and servicing according to local codes. Part 1604870-05 E 2018 Nordson Corporation... - Page 80 Safety Part 1604870-05 E 2018 Nordson Corporation...
-
Page 81: Description
Figure 2-1 Encore HD/XT Manual Powder Spray System Controller The system controller is used with the Encore HD with HDLV technology and the Encore XT with venturi technology. The Encore HD and XT controller may be used in the following systems:... -
Page 82: Specifications
Description Specifications Model: Encore HD and XT Interface Controller Input voltage rating 24 VDC, 2.75 A Output voltage rating +/− 19 VAC, 1A Input air 6.0−7.6 bar (87−110 psi), <5μ particulates, dew point <10 _C (50 _F) Maximum relative humidity... -
Page 83: System Setup
3. Install the universal mounting bracket (3) to the controller rail mount bracket (2). Figure 3-1 Controller Rail Mount Installation (Bottom to Top Orientation) 1. Product stand arm 3. Universal mounting bracket 4. Encore HD controller 2. Controller rail mount bracket Part 1604870-05 E 2018 Nordson Corporation... -
Page 84: System Connections
System Diagram WARNING: This diagram does not show system grounds. All conductive equipment in the spray area must be connected to a true earth ground. Use the grounding block supplied with the Nordson system. Powder Spray Gun 4 mm in... -
Page 85: Controller Connections
Standard System − One 3 meter (10 ft) Cable Optional Cable Configuration To Interface Module To Power Unit Nipple Sockets Pins Sockets Pins Figure 3-4 Encore Controller Interconnect Cable Connection Part 1604870-05 E 2018 Nordson Corporation... - Page 86 System Setup Part 1604870-05 E 2018 Nordson Corporation...
-
Page 87: Operation
European Union, ATEX, Special Conditions for Safe Use 1. The Encore XT manual applicator or the Encore HD manual applicator shall only be used with the Encore XT and HD interface controller and the Encore XT controller power unit or the Encore HD controller power unit over the ambient temperature range of +15 _C to +40 _C. -
Page 88: Initial Startup
Table 4-1 Function Settings Function Function Function Default Number Name Values HDLV Mode Gun Type 00=Encore XT/HD, 02=Robot Fluidizing 00=Hopper, 01=Box, 02=Disable Pump Type 00=Venturi, 01=HDLV, 02=COD Control Type 00=Local, 01=External Gun Number 1−4 Part 1604870-05 E 2018 Nordson Corporation... -
Page 89: Standby Button
When the controller interface is off, the spray gun cannot be triggered and the spray gun interface is disabled. To shut off controller power, use the power switch on the pump control unit. Part 1604870-05 E 2018 Nordson Corporation... -
Page 90: Factory Set Presets
Powder Flow % kV Setting μA Setting Setting Icons Pattern Air Flow Setting Function/Help Display Help Button Rotary Knob Standby Button Nordson Button (Configuration) View Button Enter Button Color Change Button Figure 4-2 Controller Interface Part 1604870-05 E 2018 Nordson Corporation... -
Page 91: Changing A Factory Configured Preset Or Setpoint Value
4. To change a preset value, first choose the desired preset by using the Rotary Knob. Once the preset is selected, change the electrostatic and powder flow settings to the desired values. Part 1604870-05 E 2018 Nordson Corporation... -
Page 92: Electrostatic Settings
Mode 3 Figure 4-5 Select Charge Mode NOTE: If the operator tries to adjust kV or μA values while a Select Charge mode is selected, the controller will switch to Custom or Classic mode. Part 1604870-05 E 2018 Nordson Corporation... -
Page 93: Custom Mode
Refer to View B. When the gun is triggered the actual kV and μA outputs are displayed. View A View B Custom Mode − Gun Triggered Custom Mode − Preset Setpoints Figure 4-6 Custom Mode − Electrostatic Displays Part 1604870-05 E 2018 Nordson Corporation... -
Page 94: Classic Mode
1. To adjust the kV setpoint, press the kV button. The button LED lights to show that kV is selected. 2. Turn the Rotary Knob to increase or decrease the kV setpoint. The setpoint automatically saves in 3 seconds or when any button is pressed. Part 1604870-05 E 2018 Nordson Corporation... - Page 95 3 seconds, or when any button is pressed. NOTE: The default μA range is 10−50 μA. The limits of the range can be adjusted. Refer to Controller Configuration on page 4-20. Part 1604870-05 E 2018 Nordson Corporation...
-
Page 96: Help Codes
To clear the Help codes, scroll through them until CLr is displayed, then press the Enter button. The Help icon stays lit until the controller clears the codes. Refer to Section 5, Troubleshooting, for help code troubleshooting, general system troubleshooting, and controller wiring diagram. Part 1604870-05 E 2018 Nordson Corporation... -
Page 97: Assist Air Setting, Fast Flow Setting, And Software Versions
NOTE: Adjustments to Assist Air and Fast Flow preset values only affect the preset you are currently viewing. A user can program as many as 20 presets, and each preset must be adjusted individually where required. Part 1604870-05 E 2018 Nordson Corporation... -
Page 98: Powder Flow Settings
When the spray gun is triggered the actual flows are displayed. Flow Button Flow Icon Pattern Button Pattern Icon Figure 4-10 Flow or Pattern Setpoints NOTE: Increasing pattern air will not increase powder flow output. Part 1604870-05 E 2018 Nordson Corporation... -
Page 99: Xt Powder Flow Settings
Total Flow R: 2.55−10.2 M /HR, minimum 0.17 M /HR increments, or 1.5−6.0 SCFM, minimum 0.1 SCFM increments. Part 1604870-05 E 2018 Nordson Corporation... - Page 100 When the spray gun is triggered the displays show actual flows. Flow Air % Total Flow Air in M /HR or SCFM Figure 4-13 Smart Flow Mode − Flow Air % or Total Flow ∑ Part 1604870-05 E 2018 Nordson Corporation...
- Page 101 6.37 6.79 7.22 7.64 8.07 8.49 8.92 9.34 9.77 10.19 5.95 6.80 7.22 7.65 8.07 8.50 8.92 9.35 9.77 10.20 0.85 1.27 1.70 2.12 2.55 2.97 3.40 3.82 4.25 4.67 5.10 5.52 5.95 Flow Part 1604870-05 E 2018 Nordson Corporation...
- Page 102 4.00 4.25 4.50 4.75 5.00 5.25 5.50 5.75 6.00 3.50 4.00 4.25 4.50 4.75 5.00 5.25 5.50 5.75 6.00 0.50 0.75 1.00 1.25 1.50 1.75 2.00 2.25 2.50 2.75 3.00 3.25 3.50 SCFM Flow Part 1604870-05 E 2018 Nordson Corporation...
-
Page 103: Color Change Purge
DUAL - Both guns (two gun systems) are purged. DISABLED - Color Change key is disabled. Automatically selected if the Gun Type is set to HDLV-COD or EXTNAL-COD REMOTE - Purging is controlled by the iControl system. Part 1604870-05 E 2018 Nordson Corporation... - Page 104 (F30) SIPHON PULSES: 1−99 pulses, default is 7. (F31) GUN PULSES: 1−99 pulses, default is 13. NOTE: Refer to functions F22 through F33 in the Controller Configuration section on page 4-20 for more information. Part 1604870-05 E 2018 Nordson Corporation...
-
Page 105: Color-On-Demand (Cod) System Purge
(F31) GUN PULSES: 1−99 pulses, default is 18. (F32) POWDER PRE-LOAD: 0−99 seconds, default is 4. NOTE: To return to the factory defaults, manually reset F15 to 02. Refer to the Controller Configuration section on page 4-20 for more information. Part 1604870-05 E 2018 Nordson Corporation... -
Page 106: Controller Configuration
4-20 Controller Configuration Opening the Function Menu and Setting Preferences Press and hold the Nordson button for 5 seconds. The Function/Help display lights to show the function numbers and values. Use the functions to configure the controller for your application. - Page 107 00−90 Seconds Sets the number of On=Continuous seconds the vibratory Operation box continues to operate after the gun trigger is released. Choose from 0 to 90 seconds, or choose ON for continuous operation. Continued... Part 1604870-05 E 2018 Nordson Corporation...
- Page 108 Gun Display Brightness 00=Low Sets brightness for gun 01=Medium display. 02=Maximum Number of Presets 01−20 Presets Choose from 1 to 20 presets. See page 4-5 for more information. Continued... Part 1604870-05 E 2018 Nordson Corporation...
-
Page 109: Nordson Corporation
0.00 - 5.00 Seconds in Sets the number of 0.00 0.25 Increments seconds the pattern air continues to operate after the gun trigger is released. Choose from 0 to 5 seconds in 0.25 increments. Continued... Part 1604870-05 E 2018 Nordson Corporation... - Page 110 (Gun Pulses). Powder Pre−Load 1−99 The new color powder is pumped to the spray gun for the set time at 100% of flow to load the system for production. Continued... Part 1604870-05 E 2018 Nordson Corporation...
- Page 111 NOTE: If you configure F19=01 External (Robot Gateway), then there are only 10 presets. NOTE: If the function is set to F17−01, then only 1 preset will be available for use. Part 1604870-05 E 2018 Nordson Corporation...
-
Page 112: Hd System Shutdown
4. If shutting down for the night or a longer period of time, move the power unit switch to the OFF position to shut off system power. 5. Perform the Maintenance procedures on page 4-27. Part 1604870-05 E 2018 Nordson Corporation... -
Page 113: Maintenance
Daily maintenance for the controller should include blowing off the interface module with a blow gun. Wipe any residual powder off the controller with a clean cloth. Periodically check all system ground connections. Part 1604870-05 E 2018 Nordson Corporation... - Page 114 Operation 4-28 Part 1604870-05 E 2018 Nordson Corporation...
-
Page 115: Troubleshooting
These troubleshooting procedures cover only the most common problems. If you cannot solve a problem with the information given here, contact Nordson technical support at (800) 433−9319 or your local Nordson representative for help. Help Code Troubleshooting The Help icon in the Function/Help display lights if a problem occurs that the controller can sense. -
Page 116: Help Code Troubleshooting Chart
Startup section on page 4-2 for more information on setting up gun numbers. EEPROM Read Failed Reset the fault (press the Nordson key to open the fault screen). This fault will sometimes occur when the software is upgraded. Gun Open Trigger the gun and check the display. - Page 117 Refer to the Repair section in the Encore XT Manual Powder Spray Systems manual for procedures using the iFlow Air Flow Verification Kit (1039881) to check the operation of the iFlow module proportional valves and the output of the precision air pressure regulator. Continued... Part 1604870-05 E 2018 Nordson Corporation...
- Page 118 Perform the Conveyance Air Flow Verification for HD procedure on page 5-13. Check for water and/or oil contamination in the transducer filters by removing the board from the flow manifold. Replace filters with 1604436. Continued... Part 1604870-05 E 2018 Nordson Corporation...
- Page 119 5-13. Check for water and/or oil contamination in the transducer filters by removing the board from the flow manifold. Replace filters with 1604436. Atomizing Air Flow High Fault See H25 (XT) (XT) Continued... Part 1604870-05 E 2018 Nordson Corporation...
- Page 120 Robot Heartbeat Missing System controller is configured for External Mode, and cannot detect the Prodigy PLC Gateway heartbeat. Check CAN cable. Make sure Gateway is configured properly. Refer to the Prodigy PLC Gateway manual. Continued... Part 1604870-05 E 2018 Nordson Corporation...
-
Page 121: Nordson Corporation
Purge Valve 9 Fault Check J12-3 for loose harness connection. Check Valve 9 for loose connection. Purge Pinch Pressure Select Check J12-2 for loose harness connection. Valve 8 Fault Check Valve 8 for loose connection. Part 1604870-05 E 2018 Nordson Corporation... -
Page 122: General Troubleshooting Chart
Air tubing kinked or plugged (H24 Check pattern air tubing for kinks. or H25) Fluidizing air too high If fluidizing air is set too high the ratio of powder to air will be be too low. Continued... Part 1604870-05 E 2018 Nordson Corporation... - Page 123 − water contamination of Replace filter element if necessary. flow controller Clean system, replace components if necessary. Flow valve plugged (H24 or H25) Refer to Proportional Valve Cleaning in the pump control unit manual. Continued... Part 1604870-05 E 2018 Nordson Corporation...
- Page 124 Resistance Test as described in your spraying spray gun manual. Damaged gun cable Perform the Gun Cable Continuity Test as described in your spray gun manual. If an open or short is found, replace the cable. Continued... Part 1604870-05 E 2018 Nordson Corporation...
- Page 125 Presets with no set values for flow rate and electrostatics are automatically skipped. Loose or defective trigger switch Check for a loose trigger switch connection. The trigger switch is plugged into the gun display module. Continued... Part 1604870-05 E 2018 Nordson Corporation...
- Page 126 ON, kV OK Input air turned OFF Check the gauge on the filter regulator and make sure the air is turned ON. Check for Help Codes and follow the procedures Part 1604870-05 E 2018 Nordson Corporation...
-
Page 127: Re-Zero Procedure
1. At the pump control panel, disconnect the 6 mm pattern air tubing and install 8 mm plugs in the output fittings. 2. Press the Nordson button for 5 seconds to display the controller functions. F00−00 is displayed. 3. Rotate the knob until F10−00 is displayed. - Page 128 CAN + J1−2 P1−2 V− BLACK J1−3 P1−3 2 CAN + J1−4 P1−4 4 V+ 4 V+ SHIELD/DRAIN BARE 2 CAN + J1−5 P1−5 3 V− 3 V− Figure 5-2 Controller Interconnect Cable Wiring Part 1604870-05 E 2018 Nordson Corporation...
-
Page 129: Wiring Diagram
5 (YELLOW) FEEDBACK (WHITE) CAN+ (GREEN) CHASSIS (BLUE) CAN− (BLACK) DC COM 3 (BLACK) DC COM 4 (WHITE) CAN+ 5 (BLUE) CAN− 1 (GREEN) CHASSIS 2 (RED) +24VDC Figure 5-3 Controller Interface Wiring Diagram Part 1604870-05 E 2018 Nordson Corporation... - Page 130 Troubleshooting 5-16 Part 1604870-05 E 2018 Nordson Corporation...
-
Page 131: Repair
See Figure 6-1 for a view of the interface module assembly and repair parts. Refer to Section 5, Troubleshooting, for the interface electrical schematic and harness connections. Refer to Section 7, Parts for repair kits. Part 1604870-05 E 2018 Nordson Corporation... - Page 132 Repair External Enclosure Ground Internal Enclosure Ground Connect to 2A, J6 Figure 6-1 Interface Module Assembly 1. Bezel 2A. Main Control Board 2C. Keypad Panel 2. Keypad/PCB Assembly 2B. Main Display Board 3. Enclosure Part 1604870-05 E 2018 Nordson Corporation...
-
Page 133: Parts
To order parts, call the Nordson Industrial Coating Systems Customer Support Center at (800) 433-9319 or contact your local Nordson representative. This section covers components, parts and options for the Encore HD and XT system controller. Refer to the following manuals for additional information and optional equipment. -
Page 134: Controller Parts
Parts Controller Parts Controller Exploded View Figure 7-1 Controller Parts Part 1604870-05 E 2018 Nordson Corporation... -
Page 135: Controller Parts List
− 1604125 CONTROL UNIT, interface, Encore HD/XT 1604855 S PANEL, keypad, Encore HD controller 1085084 S PCA, main controller display, Encore HD 1601341 S PCA, main control, Encore HD 983403 S WASHER, lock, split, M4, steel, zinc 982308 S SCREW, pan head, recessed, M4 x 10, zinc... - Page 136 SCREW, hex, serrated, M8 x 16mm, zinc 982448 SCREW, skt, cap, M4 x 12mm 1084121 WASHER, lock, dished #8 983403 WASHER, lock, M4 981346 SCREW, hex, 0.5/16 − 8 x 2.500 1082732 BRACKET, universal mount Part 1604870-05 E 2018 Nordson Corporation...
- Page 137 Issued 07/18 For parts and technical support, call the Industrial Coating Systems Customer Support Center at (800) 433-9319 or contact your local Nordson representative. This document is subject to change without notice. Check http://emanuals.nordson.com/finishing for the latest version and available local languages.
-
Page 138: Contact Us
Contact Us Notice This is a Nordson Corporation publication which is protected by copyright. Nordson Corporation welcomes requests for information, comments, and Original copyright date 2014. No part of this document may be inquiries about its products. General information about Nordson can be... -
Page 139: Nordson Corporation
03/18 Changed description for gun labels 07/18 Added nLighten LED inspection kit, added XD electrode support, new reference document links and updated description for part number 1600819. Added power supply resistance test nomenclature changes Part 1604869-13 E 2018 Nordson Corporation... - Page 140 Change Record Part 1604869-13 E 2018 Nordson Corporation...
- Page 141 ....... . . Maintenance Procedures ....... Part 1604869-13 E 2018 Nordson Corporation...
- Page 142 7-11 Powder Hose and Air Tubing ......7-11 Part 1604869-13 E 2018 Nordson Corporation...
-
Page 143: Safety
Regulations and Approvals Make sure all equipment is rated and approved for the environment in which it is used. Any approvals obtained for Nordson equipment will be voided if instructions for installation, operation, and service are not followed. All phases of equipment installation must comply with all federal, state, and local codes. -
Page 144: Personal Safety
Clean, maintain, test, and repair equipment according to the instructions in your equipment documentation. Use only replacement parts that are designed for use with original equipment. Contact your Nordson representative for parts information and advice. Part 1604869-13 E 2018 Nordson Corporation... -
Page 145: Grounding
Disconnect and lock out electrical power. Close pneumatic shutoff valves and relieve pressures. Identify the reason for the malfunction and correct it before restarting the equipment. Disposal Dispose of equipment and materials used in operation and servicing according to local codes. Part 1604869-13 E 2018 Nordson Corporation... - Page 146 Safety Part 1604869-13 E 2018 Nordson Corporation...
-
Page 147: Description
HD manual powder spray gun with 6 meter power cable and tubing. The Encore HD manual powder spray gun should be used with the Encore HD manual controller, which provides electrostatic voltage control, electrode air-wash air, and powder pump air. It is compatible with the following... -
Page 148: Specifications
Description Optional equipment is available for the Encore HD manual spray gun including the following: Additional flat, conical and cross-cut nozzles options 6-meter cable extension 150 and 300-mm lance extensions Pattern adjuster for use with lance extensions Ion collector See Options section beginning on page 7-4 for information on additional options. -
Page 149: Setup
Delivery In 6 mm Pattern Air 4 mm Clear Air Wash 6 mm In Gun Cable Delivery Powder Manual Hose System Controller Network/Power Interconnect Pump Control Unit Figure 3-1 System Diagram (Common System Equipment Shown) Part 1604869-13 E 2018 Nordson Corporation... -
Page 150: Spray Gun Installation
4. Connect the gun cable (6) to the gun connection on the back of the Encore HD manual system controller. 5. Use the sections of black spiral wrap supplied with the system to bundle together the spray gun cable, all air tubing, and powder hose. Take care not to smash, squish, kink, bind, or deform the powder tubing. -
Page 151: Operation
European Union, ATEX, Special Conditions for Safe Use 1. The Encore HD manual applicator shall only be used with the associated Encore XT/HD interface control unit and Encore HD controller power unit, over the ambient temperature range of +15 _C to +40 _C. -
Page 152: System Operation
Operation System Operation This manual includes information on the Encore HD Manual Powder Spray Gun. Refer to appropriate system, controller and control panel manuals for information on system components. Spray Gun Operation The spray gun interface and settings trigger allow you to change the preset or the powder flow settings, or purge the gun as needed, without using the controller interface. -
Page 153: Changing Powder Flow With The Settings Trigger
The purge length and frequency required will depend on the application. NOTE: The purge air only cleans the spray gun powder path. Refer to the system controller manual for additional HDLV purge information. Part 1604869-13 E 2018 Nordson Corporation... -
Page 154: Electrode Air Wash Operation
Standby Button Use the Standby button on the Encore HD controller to shut off the interface and disable the spray gun during breaks in production. When the controller interface is off the spray gun cannot be triggered, and the spray gun interface is disabled. -
Page 155: Changing Flat Spray Nozzles
NOTE: To clean nozzles, use the Recommended Cleaning Procedure for Powder Contact Parts on page 4-9. Nozzle Nut Flat Spray Electrode Assembly Flat Spray Nozzle Figure 4-4 Changing a Flat Spray Nozzle Electrode Assembly Bridge Figure 4-5 Correct Nozzle Orientation Part 1604869-13 E 2018 Nordson Corporation... -
Page 156: Converting From Flat Spray Nozzles To Conical Nozzles
Powder Contact Parts on page 4-9. Electrode Flat Spray Nozzle Flat Spray Electrode Holder Nozzle Nut Conical Spray Nozzle Conical-Spray Electrode Holder Deflector Figure 4-6 Converting from a Flat Spray Nozzle to a Conical Spray Nozzle Part 1604869-13 E 2018 Nordson Corporation... -
Page 157: Changing Deflectors Or Conical Nozzles
6. Screw the nozzle nut onto the gun body clockwise until finger-tight. 7. Install a new deflector on the electrode assembly. Do not bend the electrode wire. Deflector Conical Electrode Nozzle Nut Conical Electrode Holder Nozzle Assembly Figure 4-7 Changing a Conical Nozzle Part 1604869-13 E 2018 Nordson Corporation... -
Page 158: Installing The Optional Pattern Adjuster Kit
WARNING: Before performing the following tasks, turn off the controller and disconnect system power. Relieve system air pressure and disconnect the system from its input air supply. Failure to observe this warning may result in personal injury. Part 1604869-13 E 2018 Nordson Corporation... -
Page 159: Recommended Cleaning Procedure For Powder Contact Parts
Operation Recommended Cleaning Procedure for Powder Contact Parts Nordson Corporation recommends using an ultrasonic cleaning machine and Oakiter BetaSolv emulsion cleaner to clean spray gun nozzles and powder path parts. NOTE: Do not immerse the electrode assembly in solvent. It cannot be disassembled;... - Page 160 Operation 4-10 Part 1604869-13 E 2018 Nordson Corporation...
-
Page 161: Repair
7. Filter assembly 19. Cable assembly 28. Settings/purge trigger 10. Display module 19B. Power supply connector (J2) 29. Screw (handle to gun body) Note: Ground terminal (19D) must always be connected to the ground screw (16). Part 1604869-13 E 2018 Nordson Corporation... -
Page 162: Display Module Replacement
6. Gently fold the trigger switch ribbon cable and display module cable into the gun, and install the display module onto the gun. 7. Slide the hook (11) onto the display module, then install the bezel (12). 8. Install and tighten the screws (13). Part 1604869-13 E 2018 Nordson Corporation... -
Page 163: Nordson Corporation
(new switch) Display Module and Cable J3 Connectors Adhesive Switch Support Pad Header Figure 5-2 Display Module Replacement 10. Display module 12. Bezel A. Ground wire connector 11. Hook 13. M3 x 35 screws Part 1604869-13 E 2018 Nordson Corporation... -
Page 164: Power Supply And Powder Path Replacement
The air wash tubing will prevent a complete separation; leave it connected unless it must be replaced. Figure 5-3 Removing the Gun Body from the Handle Part 1604869-13 E 2018 Nordson Corporation... -
Page 165: Power Supply Replacement
4. Press on the end of the power supply to ensure that the power supply contact tip is firmly seated against the brass contact inside the gun body. 5. Route the power supply harness connector through the top hole in the bulkhead. Part 1604869-13 E 2018 Nordson Corporation... -
Page 166: Powder Path Removal
NOTE: To verify proper installation, place a flashlight inside the bottom of the inlet adapter and verify the internal connections by looking through the outlet tube from the front of the powder spray gun. Part 1604869-13 E 2018 Nordson Corporation... - Page 167 Figure 5-5 Powder Path Replacement 4. Outlet tube kit 7. Filter assembly 21. M3 x 20 screws 5. Elbow 17. Ground pad 24. Inlet tube/hose adapter kit 6B. Gun body 20. Handle base 25. Handle Part 1604869-13 E 2018 Nordson Corporation...
-
Page 168: Gun Re-Assembly
6. Install the nozzle (2) on the electrode assembly, making sure the keys in the electrode assembly slide into the slots on the nozzle. 7. Install the nozzle nut (1) over the nozzle and rotate clockwise to secure. Part 1604869-13 E 2018 Nordson Corporation... -
Page 169: Cable Replacement
VIEW A VIEW B Figure 5-7 Cable Replacement 13. M3 x 35 screw 16. M3 x 6 screw 18. Retaining ring 15. Lock washer 17. Ground pad 20. Handle base 21. M3 x 20 screws Part 1604869-13 E 2018 Nordson Corporation... -
Page 170: Cable Installation
5. Remove the spray trigger (27), actuator (26), and purge trigger (28) from the handle. 6. Use a tool to pry and pull the trigger switch (14) off the handle, then pull it up and out of the handle. Part 1604869-13 E 2018 Nordson Corporation... -
Page 171: Switch Installation
6. Feed the trigger switch ribbon cable through the bottom of the bulkhead and connect the ribbon cable connector to the display module as described in Display Module Installation on page 5-2. 7. Re-assemble the gun as described in Gun Re-assembly on page 5-8. Part 1604869-13 E 2018 Nordson Corporation... - Page 172 Repair 5-12 Part 1604869-13 E 2018 Nordson Corporation...
-
Page 173: Troubleshooting
These troubleshooting procedures cover only the most common problems. If you cannot solve a problem with the information given here, contact Nordson technical support at (800) 433−9319 or your local Nordson representative for help. Part 1604869-13... -
Page 174: Spray Gun Power Supply Resistance Test
C or 72 F. Allow time for the multiplier to cool to room temperature for repeatable results. 225-335 Megohms at 500 VDC J2−3 (YELLOW) J2−1 (RED) FEEDBACK J2−2 (BLACK) COMMON Figure 6-9 Power Supply Resistance Test Part 1604869-13 E 2018 Nordson Corporation... -
Page 175: Electrode Assembly Resistance Test
The resistance should be 19−21 megohms. If the resistance is out of this range replace the electrode assembly. 19−21 Megohms Figure 6-10 Electrode Assembly Resistance Test Part 1604869-13 E 2018 Nordson Corporation... -
Page 176: Gun Cable Continuity Test
(BLUE) J3−3 AND BLUE) (ORANGE) J3−1 J1−1 (WHITE) J1−3 (ORANGE) (RED) J2−1 J2−3 J1−6 (RED) J1−4 (YELLOW) J2−2 (GREEN) (WHITE) (BLACK) J1−5 J2 (FACE VIEW) (YELLOW) POWER SUPPLY CONNECTOR Figure 6-11 Gun Cable Wiring Part 1604869-13 E 2018 Nordson Corporation... -
Page 177: Parts
To order parts, call the Nordson Industrial Coating Systems Customer Support Center at (800) 433-9319 or contact your local Nordson representative. This section covers parts and options for the Encore HD manual powder spray gun. Reference Documentation For additional information related to other components in the system,... -
Page 178: Spray Gun Parts
Parts Spray Gun Parts See Figure 7-1 and the parts list on the following pages. 24, 24C, 24D Figure 7-1 Encore HD Manual Spray Gun and Accessories Parts Part 1604869-13 E 2018 Nordson Corporation... -
Page 179: Spray Gun Parts List
S CHECK VALVE, male, M5 x 6 mm 1081616 S FITTING, bulkhead, barb, dual, 10−32 x 4 mm 1608282 S KIT, inlet tube and hose adapter, Encore HD, Gen 2 1084773 S S O-RING, silicone, 18 mm ID x 2 mm wide 1081785 S S O-RING, silicone, 0.468 x 0.568 x 0.05 in. - Page 180 S O-RING, silicone, 0.468 x 0.568 x 0.05 in. 941113 S O-RING, silicone, 0.438 x 0.625 x 0.094 in. 1096696 ELBOW, powder tube, Encore, impact resistant 1085168 CABLE, 6-wire, shielded, handgun, 6 meter extension NS: Not Shown Part 1604869-13 E 2018 Nordson Corporation...
-
Page 181: Nlightent
LED inspection kit that helps powder coaters improve quality by effectively illuminating hard to see surface areas. Any imperfection or missed area is quickly identified and corrected. Find out more at: nordsoncoating.com/nLighten. 1611977 nLighten Figure 7-2 LED Inspection Kit Part 1604869-13 E 2018 Nordson Corporation... -
Page 182: Flat Spray Nozzles
1081658 1081659 6 mm Flat Spray 4 mm Flat Spray Figure 7-3 Flat Spray Nozzles Cross Cut Nozzles 1082184 1082185 1082186 60 Degree Cross-cut 90 Degree Cross-cut 2.5 mm Castle Figure 7-4 Cross-cut Nozzles Part 1604869-13 E 2018 Nordson Corporation... -
Page 183: 45-Degree Corner-Spray Nozzle
Three angled slots in-line with spray gun axis Slot Type Top and bottom coating; typically no in/out part positioning Application Part Description Note 1102871 NOZZLE, 45 degree, flat spray, Encore Figure 7-6 45-Degree Flat Spray Nozzle Part 1604869-13 E 2018 Nordson Corporation... -
Page 184: Conical Nozzle, Deflectors And Electrode Assembly Parts
S DEFLECTOR, 26 mm 1082060 S NOZZLE, conical S ELECTRODE HOLDER, conical 1605861 NOTE A: The conical nozzle requires a different style electrode holder than what is used in the flat spray nozzle electrode assembly. Part 1604869-13 E 2018 Nordson Corporation... -
Page 185: Conical Electrode Assembly
The XD (extended duty) Electrode Support provides 2 to 3 times longer wear life than that of the standard duty electrode support. 1613835 1613834 XD Conical Spray Electrode Support XD Flat Spray Electrode Support Figure 7-10 Conical Spray and Flat Spray Electrode Supports Part 1604869-13 E 2018 Nordson Corporation... -
Page 186: Pattern Adjuster Kit
EXTENSION, lance, 150 mm, Encore HD 1604970 EXTENSION, lance, 300 mm, Encore HD NOTE A: If a longer lance extension is required, contact your Nordson representative. Ion Collector Kit This kit installs on the standard length gun. Refer to the instruction sheet shipped with the spray gun for installation instructions and repair parts. -
Page 187: Ion Collector Components For Lance Extensions
Do not replace with non-conductive tubing. E: Standard powder hose delivered with system. F: Optional powder hose to use in place of the standard polyolefin. Part 1604869-13 E 2018 Nordson Corporation... - Page 188 Parts 7-12 This page intentionally left blank. Part 1604869-13 E 2018 Nordson Corporation...
- Page 189 For parts and technical support, call the Industrial Coating Systems Customer Support Center at (800) 433-9319 or contact your local Nordson representative. This document is subject to change without notice. Check http://emanuals.nordson.com for the latest version and available local languages. NORDSON CORPORATION • AMHERST, OHIO • USA...
-
Page 190: Contact Us
Contact Us Notice This is a Nordson Corporation publication which is protected by copyright. Nordson Corporation welcomes requests for information, comments, and Original copyright date 2015. No part of this document may be inquiries about its products. General information about Nordson can be... - Page 191 Standalone, Rail Mount, and Wall Mount System Air Supply ..3-11 Encore HD Powder Pump Hose ......
- Page 192 ........Part 1606783−05 E 2018 Nordson Corporation...
-
Page 193: Nordson Corporation
Change Record Change Record Revision Date Change 10/15 New release 03/16 Updated gaskets. 1/18 Updated for new Encore HD pump information. 11/18 Replacing part number 1606690 with 1615026 Part 1606783−05 E 2018 Nordson Corporation... - Page 194 Change Record Part 1606783−05 E 2018 Nordson Corporation...
-
Page 195: Safety
Regulations and Approvals Make sure all equipment is rated and approved for the environment in which it is used. Any approvals obtained for Nordson equipment will be voided if instructions for installation, operation, and service are not followed. All phases of equipment installation must comply with all federal, state, and local codes. -
Page 196: Personal Safety
Clean, maintain, test, and repair equipment according to the instructions in your equipment documentation. Use only replacement parts that are designed for use with original equipment. Contact your Nordson representative for parts information and advice. Part 1606783−05 E 2018 Nordson Corporation... -
Page 197: Grounding
Disconnect and lock out electrical power. Close pneumatic shutoff valves and relieve pressures. Identify the reason for the malfunction and correct it before restarting the equipment. Disposal Dispose of equipment and materials used in operation and servicing according to local codes. Part 1606783−05 E 2018 Nordson Corporation... - Page 198 Safety Part 1606783−05 E 2018 Nordson Corporation...
-
Page 199: Description
Introduction See Figure 2-1. This manual covers the Encore HD pump control unit, which is used to supply power and to operate Encore HD manual powder spray systems. The pump control unit comes equipped with a Encore HD powder feed pump. -
Page 200: Specifications
Description Specifications Model: Encore HD Controller Power Unit Input Rating: 100−240 VAC, 50/60 Hz, 125 VA Output Rating: 24 VDC, 2.5 A Input Air: 6.0−7.6 bar (87−110 psi), <5μ particulates, dew point <10 _C (50 _F) Max Relative Humidity: 95% non-Condensing... - Page 201 Encore HD Controller Power Unit Dimensions 179 mm 296 mm (7.0 in.) (11.6 in.) 370 mm 375 mm (14.5 in.) (14.8 in.) 304 mm (11.9 in.) 217 mm (8.6 in.) Figure 2-3 Encore HD+, XD Controller Power Unit Dimensions Part 1606783−05 E 2018 Nordson Corporation...
-
Page 202: Pump Control Unit Certification Label
(9.19 in.) (9.34 in.) 282mm (11.10 in.) 79mm (3.10 in.) 74mm (2.89 in.) Encore HD Encore HD+ and XD (HD+ Stamped on Encore HD+) Figure 2-4 Encore Pump dimensions Pump Control Unit Certification Label 1606121_02 Part 1606783−05 E 2018 Nordson Corporation... -
Page 203: Encore Hd Pump
Description Encore HD Pump See Figure 2-1. The Encore HD (High-Density powder, Low-Velocity air) powder feed pump transports precise amounts of powder from a feed source to a powder spray gun. The design of the pump and the small diameter powder tubing used allow powder to be purged quickly and thoroughly for fast color changes. -
Page 204: Hd Pump Components
Connect the inlet and outlet fittings to the pinch valves on either half of the pump. Inlet Fitting Connects to the tubing leading from the power source Outlet Fitting Connects to the tubing leading to the powder spray gun Part 1606783−05 E 2018 Nordson Corporation... -
Page 205: Nordson Corporation
Description Encore HD Pump Encore HD+, XD Pump Figure 2-2 Encore Pump Components Part 1606783−05 E 2018 Nordson Corporation... -
Page 206: Theory Of Operation
Theory of Operation Pumping The Encore HD pump consists of two halves that function identically. The halves alternately draw powder in and dispense powder out of the pump; while one half is drawing powder in, the other half is dispensing powder out. - Page 207 Powder Powder Powder Powder Left Side Drawing In Left Side Dispensing Right Side Dispensing Right Side Drawing In Figure 2-3 Operation of Pump (Shown as rear, right view of the pump) Part 1606783−05 E 2018 Nordson Corporation...
-
Page 208: Purging
After the delivery side is purged, the delivery pinch valves close and the suction pinch valves open. The suction side is purged in the same way as the delivery side. Part 1606783−05 E 2018 Nordson Corporation... - Page 209 2-11 Description Stage 1 Stage 2 Soft Purge to Soft Purge to Spray Gun Feed Source Powder Powder Powder Stage 3 To Spray Gun and Feed Source Hard Purge Powder Figure 2-4 Purging Operation Part 1606783−05 E 2018 Nordson Corporation...
-
Page 210: Pump Control Manifold Components
High Pinch Valve Regulates the high pinch valve 80 psi pressure Low Pinch Valve Regulates the low pinch valve 37 psi pressure Vacuum Generator Regulator Regulates the supply from the 80 psi vacuum generator Part 1606783−05 E 2018 Nordson Corporation... -
Page 211: Nordson Corporation
2-13 Description Figure 2-5 Pump Control Manifold Part 1606783−05 E 2018 Nordson Corporation... - Page 212 2-14 Description Part 1606783−05 E 2018 Nordson Corporation...
-
Page 213: Installation
Wall Mount Configuration Rail Mount Configuration Figure 3-1 Controller with Mounting Brackets NOTE: Filter ordered separately. Less than 5 micron filtration before point of use is recommended. Part 1606783−05 E 2018 Nordson Corporation... - Page 214 Fasteners shown are provided with the controller. Make sure to provide clearance for the connections to both the power unit and the interface module. Figure 3-2 Pump Control Unit Wall Mounting Brackets 1. Pump control unit 2. Wall mount bracket 3. Rail mount bracket Part 1606783−05 E 2018 Nordson Corporation...
-
Page 215: Interconnect Cable Connection
Interconnect Cable Connection See Figure 3-3. Connect the gray, 3 meter (10 ft) interconnect cable to the net/auxiliary receptacles on Encore HD system controller to the pump control unit. NOTE: The interconnect cable shipped with the system is 3 meters (10 ft) long. -
Page 216: System Connections
For additional information, see the Wiring Diagrams section. Encore HD Manual Powder Spray Gun Hopper Pump Vacuum Pinch Hi/Lo Pump Manifold Purge Encore HD Flow Module Figure 3-4 Encore HD Pump Control Unit Pneumatic Diagram Part 1606783−05 E 2018 Nordson Corporation... -
Page 217: Nordson Corporation
Spray Gun Pump Manifold Pump Purge Valve Pinch Hi/Low Valve Blue LED Encore HD Flow Module AC Power Relay/ Power Supply Filter Fuses VBF Motor Figure 3-5 Encore HD Pump Control Unit Electrical Diagram Part 1606783−05 E 2018 Nordson Corporation... -
Page 218: Pump Control Unit Connections
Installation Pump Control Unit Connections The Encore HD spray gun is controlled by the system controller and pump control unit connected by a network/power cable. The pump control unit houses a 24Vdc power supply, circuit board, and iFlowr air controller and valves used to control the Encore HD pump. -
Page 219: Spray Gun Connections
3. Thread the cable nut onto the receptacle and tighten the nut securely. Net Cable Cable to (To Pump Contol Unit) Spray Gun Figure 3-7 Spray Gun Cable Connection to System Controller − Mobile System Shown Part 1606783−05 E 2018 Nordson Corporation... -
Page 220: Air Tubing And Powder Tube
4-mm Clear Electrode Air Wash Tubing HD Tube Adapter Spray Gun Cable 8 mm Powder Hose 6-mm Blue Pattern Air Tubing Figure 3-8 Spray Gun Connections Part 1606783−05 E 2018 Nordson Corporation... -
Page 221: Bundling Tubing And Cable
Spiral wrap is used to protect the tubing from the swivel castors. For Standalone and Rail/Wall systems: The tubing must be coiled in a 3 ft diameter in a horizontal orientation. Part 1606783−05 E 2018 Nordson Corporation... -
Page 222: Main System Air And Electrical Connections
10-mm Air Tubing 10-mm Air Tubing Main Supply Air Input Output to Pump Control Unit Air Filter Figure 3-10 System Air Supply Connection (Shown with Mobile System) Part 1606783−05 E 2018 Nordson Corporation... -
Page 223: Standalone, Rail Mount, And Wall Mount System Air Supply
Air Filter Installation − Standalone and Rail/Wall Mount Systems 1. 10-mm air tubing (blue) 4. Bracket 6. Release latch 2. 10-mm tube x 1/2 male connectors 5. Flow indicator 7. Customer-supplied fasteners 3. M5 screws Part 1606783−05 E 2018 Nordson Corporation... -
Page 224: Encore Hd Powder Pump Hose
3. Push the flexible powder tubing (4) over the barbed ending of the adapter (2). Poly Tubing Flexible Tubing Figure 3-12 Encore HD Pump Tubing Installation 1. Lower Y block 3. Poly tubing 2. Barbed tubing adapter 4. Flexible tubing Part 1606783−05... -
Page 225: Pump Adapter Installation
Installation Pump Adapter Installation See Figure 3-13. The pump adapter allows you to connect the Encore HD pump to your powder source. Install the tubing onto the barbed hose adapter. Then, plug the barbed hose adapter into the pump adapter. -
Page 226: Electrical Connections
Use the ESD ground bus bar kit included with the system to connect the power unit ground stud to the grounded spray booth or a true earth ground. Refer to the instructions included with the kit. Part 1606783−05 E 2018 Nordson Corporation... -
Page 227: Operation
European Union, ATEX, Special Conditions for Safe Use 1. The Encore HD manual applicator shall only be used with the associated Encore HD system controller and Encore HD pump control unit, over the ambient temperature range of +15 _C to +40 _C. -
Page 228: Maintenance
Y-block for signs of wear or impact fusion. Clean these parts in an ultrasonic cleaner if necessary. Every Six Months Each Time You Disassemble the Pump Lower Y Block Inspect the gasket for damage. Gasket Replace if necessary. Part 1606783−05 E 2018 Nordson Corporation... -
Page 229: Troubleshooting
These troubleshooting procedures cover only the most common problems. If you cannot solve a problem with the information given here, contact Nordson technical support at (800) 433−9319 or your local Nordson representative for help. Part 1606783−05... -
Page 230: Pump Troubleshooting
If the exhaust muffler appears to be plugged, replace it. Defective pump air flow Clean the pump air flow control valve. control valve Refer to either the pump panel or control manifold manual for more information. Part 1606783−05 E 2018 Nordson Corporation... -
Page 231: Pump Port Functions
Function Right Side Suction Pinch Valve Right Side Delivery Pinch Valve Right Side Fluidizing Tube Left Side Fluidizing Tube Left Side Delivery Pinch Valve Left Side Suction Pinch Valve Figure 5-15 Pump Port Functions Part 1606783−05 E 2018 Nordson Corporation... -
Page 232: Manifold Troubleshooting
Refer to iFlow Module Repair on page 6-4 for instructions. If the problem persists, replace the pattern air flow control valve. Refer to iFlow Module Repair on page 6-4 for instructions. Part 1606783−05 E 2018 Nordson Corporation... -
Page 233: Solenoid And Flow Control Valve Functions
Right Side Delivery Pinch Valve Vacuum Generator Right Side Fluidizing Tube High Pinch Valve (80 psi) Left Side Fluidizing Tube Low Pinch Valve (37 psi) Left Side Delivery Tube Vacuum Generator Regulator (80 psi) Part 1606783−05 E 2018 Nordson Corporation... -
Page 234: Re-Zero Procedure
1. At the pump control panel, disconnect the 6 mm pattern air tubing and install 8-mm plugs in the output fittings. 2. Press the Nordson button for 5 seconds to display the controller functions. F00−00 is displayed. 3. Rotate the knob until F10−00 is displayed. -
Page 235: Repair
CAUTION: Electrostatic sensitive device. To avoid damaging the controller circuit boards, wear a grounding wrist strap and use proper grounding techniques when making repairs. Refer to the Wiring Diagram section for the pump control unit electrical schematic and harness connections. Part 1606783−05 E 2018 Nordson Corporation... -
Page 236: Removing Panel Assembly
External Enclosure Ground Internal Enclosure Ground Figure 6-18 Sub-Panel Removal 1. Enclosure 3. Panel Assembly 2. Screws Part 1606783−05 E 2018 Nordson Corporation... -
Page 237: Sub-Panel Components
2. Set the regulator to 85 psi. 3. Remove the gauge and replace the plug in the regulator fitting. 4. Push the regulator knob to lock the setting. Fittings 10014746 Figure 6-19 Regulator Adjustment Part 1606783−05 E 2018 Nordson Corporation... -
Page 238: Iflow Module Repair
4. Decrease the assist air to −50% and trigger the pump ON. The monometer should read 1.0−3.0 psi (0.1−0.2 bar). Pattern Air Use the flow verification tool (1039881) with its instructions and connect to the pattern air output. Part 1606783−05 E 2018 Nordson Corporation... -
Page 239: Solenoid Valve Replacement
See Figure 6-20. If cleaning the proportional valve does not correct the flow problem then replace the valve. Before installing a new valve, remove the protective cover from the bottom of the valve body. Be careful to not lose the O-rings under the cover. Part 1606783−05 E 2018 Nordson Corporation... - Page 240 7. Direction of flow arrow 11. Valve body 3. Coil−proportional valve (2) 8. Stem 12. Orifice 4. Long screws−valve to manifold (2) 9. Spring 13. Solenoid valves 5. Short screws−valve stem to body (2) Part 1606783−05 E 2018 Nordson Corporation...
-
Page 241: Vibrator Motor Replacement
Check the ID plate on the power unit. Replacement motors include the power cable. Refer to the Power Unit Wiring Diagram in the Troubleshooting section of this manual for internal VBF wiring. Part 1606783−05 E 2018 Nordson Corporation... -
Page 242: Fluidizing Tube Replacement
Figure 6-21 Removing the purge air tubing. 2. Loosen the fluidizing tube access plug and pull the fluidizing tube straight out of the pump body. Retrofit Pump Standard Pump Figure 6-22 Loosening the fluidizing tubes Part 1606783−05 E 2018 Nordson Corporation... - Page 243 Figure 6-23 Replacing the Access Plugs to the Fluidizing Tubes. 4. Install the fluidizing tube assemblies into the pump body. Tighten the access plugs, then reconnect the purge air tubing. Retrofit Pump Standard Pump Figure 6-24 Reinstalling the Purge Air Tubing. Part 1606783−05 E 2018 Nordson Corporation...
-
Page 244: Pump Disassembly
Gaskets that are glued on do not need to be removed unless they are damaged. NOTE: Refer to Pinch Valve Replacement on page 6-15 for instructions on removing the pinch valves from the pinch valve body. Retrofit Pump Standard Pump Figure 6-25 Disassembly Preparation Part 1606783−05 E 2018 Nordson Corporation... - Page 245 6-11 Repair Figure 6-26 Pump Disassembly (Encore HD Shown) 1. Fitting caps (2) 9. Purge manifold 17. Filter discs (4) 2. O-rings (2) 10. Manifold gasket 18. Pinch valve block 19. Gasket 3. Check valves (2) 11. Block seal 4. O-rings (2) 12.
-
Page 246: Pump Assembly
2. Assemble pinch valves (5), filter discs (6), and O-rings (7) into pinch valve housing (8). Refer to Pinch Valve Replacement on Page 6-15 for assembly procedure. Figure 6-28 Assemble the Pinch Valve Housing Part 1606783−05 E 2018 Nordson Corporation... -
Page 247: Nordson Corporation
(17) and additional O-rings onto the fluidizing tubes (18) Figure 6-30 Assemble Fittings to Fluidizing Tubes 5. After the pump is assembled, completely tighten the long screw to fit all components together securely. Part 1606783−05 E 2018 Nordson Corporation... - Page 248 7. Mount the pump to the cabinet before assembling the feed tubing to the ports in the bottom of the pump. Refer to Installation on page 3-12 for more information. PolyTubing Flex Tubing Figure 6-32 Assemble Tubing into Lower Y Block Part 1606783−05 E 2018 Nordson Corporation...
-
Page 249: Pinch Valve Replacement
3. Cut the flange off with scissors, then pull the rest of the pinch valve out of the top of the pinch valve body. Figure 6-34 Pinch Valve Removal Part 1606783−05 E 2018 Nordson Corporation... -
Page 250: Pinch Valve Installation
Figure 6-35 Inserting Pinch Valve into Insertion Tool 2. Drag the valve through the chamber and check the alignment of the pinch valve in the housing. Pinch Valve position Figure 6-36 Pull Insertion Tube through Chamber Part 1606783−05 E 2018 Nordson Corporation... - Page 251 Pull and twist the pinch valve to align the ribs with the grooves as necessary. Check rib on valve matches groove on pinch valve chamber Figure 6-38 Checking Rib and Groove Alignment Part 1606783−05 E 2018 Nordson Corporation...
-
Page 253: Parts
A dash (—) is used when the part number applies to all parts in the illustration. The number in the Part column is the Nordson Corporation part number. A series of dashes in this column (- - - - - -) means the part cannot be ordered separately. - Page 254 Item Part Description Quantity Note — 1606977 PUMP CONTROL UNIT, 115 V, Encore HD — 1606978 PUMP CONTROL UNIT, 230 V, Encore HD - - - - - - S PANEL, controller, power/pneumatic 1045837 S SCREW, pan, recessed, M5 x 12, with internal lock...
- Page 255 Parts 17,18,19,20 5, 15, 16 7, 8, 24 17,18,19,20,26 10013427 Figure 7-1 Pump Control Unit Part 1606783−05 E 2018 Nordson Corporation...
-
Page 256: Panel Assembly
1081114 S PUMP ASSEMBLY, HDLV, Gen II 1027585 S VALVE, solenoid, 3−way, sub base 1605442 S MODULE, digital air flow, manual system, Encore HD 1604082 S VALVE, solenoid, 3−port, 24 vdc, ¼ NPTF 1100310 S REGULATOR, NPT, 7−125 psi, pneumatic... - Page 257 S CONNECTOR, male, elbow, 6 mm T x 972313 S TEE, union, 8 mm tube x 8 mm tube, pl 1604804 S MANIFOLD ASSEMBLY, pump control, Encore HD 1605754 S FILTER, line, with terminals, Encore HD 984702 S NUT, hex, M5, brass 983021 S WASHER, flat, E, 0.203 x 0.406 x 0.040, br...
-
Page 258: Iflow Module
1099288 S VALVE, solenoid, 3-way, w/connector 1027547 S VALVE, proportional, solenoid, sub-base 1602319 S PCA, Encore HD flow node, 1 channel 972277 S CONNECTOR, male, elbow, 8 mm T x 972399 S CONNECTOR, male, with/int hex, 6 mm T x... -
Page 259: Manifold Assembly
Description Quantity Note — 1604804 MANIFOLD ASSEMBLY, pump control, Encore HD 1604080 S GASKET, pump control manifold, Encore HD 1074535 S CONNECTOR, male, 90 elbow, 10 mm T x 1603927 S CONNECTOR, male elbow, 8 mm x 1605530 S CONNECTOR, male, elbow, 6 mm T x RPT. - Page 260 Parts 1604804 Figure 7-5 Manifold Assembly Parts Part 1606783−05 E 2018 Nordson Corporation...
-
Page 261: Pump
Parts Pump To order parts, call the Nordson Finishing Customer Support Center at (800) 433-9319 or contact your local Nordson representative. Figure 7-6 Encore HD, HD+ and XD Standard Parts Part 1606783−05 E 2018 Nordson Corporation... - Page 262 7-10 Parts See Figure 7-6. Item Part Part Part Description Quantity Note — 1605940 PUMP ASSEMBLY, Encore HD — 1610978 PUMP ASSEMBLY, Encore HD+ — 1611247 PUMP ASSEMBLY, Encore XD 1604060 1604060 1604060 S BLOCK, pinch valve chamber 1612217 1612217...
-
Page 263: Spare Parts
HD+, XD Pump 1612218 1903557 Includes the following 8 Pinch Valves 8 O−Rings 8 Filter Discs Gasket Check Valve Barbed Tubing Adapter Service Kit (Retrofit) for Flexible Tubing 1078161 1078006 Check Valve Service Kit 1605570 Part 1606783−05 E 2018 Nordson Corporation... -
Page 264: Wall/Rail Mount System
Do not replace with non-conductive tubing. E: Standard powder hose delivered with system. F: Optional powder hose to use in place of the standard polyolefin. Part 1606783−05 E 2018 Nordson Corporation... -
Page 265: Miscellaneous Options
7-13 Parts Miscellaneous Options Part Description Quantity Note 1091429 KIT, input air, Encore HD manual systems 972841 S CONNECTOR, male, 10 mm tube x in. unithread 971102 S CONNECTOR, male, 10 mm tube x in. unithread 973500 S COUPLING, pipe, hydraulic, in., steel, zinc... -
Page 267: Wiring Diagrams
Wiring Diagrams Section 8 Wiring Diagrams Description Part Number Encore HD Power/Pneumatic 10013427 Controller Assembly Part 1606783−05 E 2018 Nordson Corporation... - Page 268 Wiring Diagrams Part 1606783−05 E 2018 Nordson Corporation...
- Page 269 The Encore XT Manual system uses venturi style pump technology for supplying power to the spray gun. While the Encore HD Manual system uses high density pump technology for supplying power to the spray gun. The Encore Auto Gun is listed with Manual XT controls for single auto gun applications and could be mounted to a gun stand or on a robot.
- Page 270 REVISION 1084547 NOTICE THIS DRAWING IS NORDSON PROPERTY,CONTAINS PROPRIETARY INFORMATION AND MUST BE RETURNED UPON REQUEST. DO NOT CIRCULATE, REPRODUCE OR DIVULGE TO OTHER PARTIES WITHOUT WRITTEN CONSENT OF NORDSON. nLIGHTEN 1611977 OPTIONAL LED LIGHT KIT ENCORE XT HANDGUN 1600818...
-
Page 271: Nordson Corporation
1084547 NOTICE THIS DRAWING IS NORDSON PROPERTY,CONTAINS PROPRIETARY INFORMATION AND MUST BE RETURNED UPON REQUEST. DO NOT CIRCULATE, REPRODUCE OR DIVULGE TO OTHER PARTIES WITHOUT WRITTEN CONSENT OF NORDSON. CONTROLLER INTERFACE CABLE 115V VIBRATOR MOTOR 1604511 230V VIBRATOR MOTOR 1080950 1080718-10 FT. - Page 272 TO BACK OF HOUSING REMOVE JUMPER FOR 230V APPLICATION DETAIL E SCALE 1 : 1 AIR IN FRONT PANEL SET TO 85 PSI BOTTOM VIEW MANIFOLD REF DWG,PWR/PNEU CTRLR ASSY,ENCORE HD DESCRIPTION 10013427 NUMBER REVISION SHEET AIR IN FRONT PANEL...
- Page 273 BLACK DC COMM FILTER BLACK DC COMM BROWN BROWN RED + 24VDC RED + 24VDC NETWORK (GREEN/YELLOW) JUMPER 120v VBF ONLY WHITE BLACK (GREEN/YELLOW) GREEN VBF RECEPTACLE REF DWG,PWR/PNEU CTRLR ASSY,ENCORE HD DESCRIPTION 10013427 NUMBER REVISION SHEET INSIDE TOP OF HOUSING...
Need help?
Do you have a question about the Encore HD and is the answer not in the manual?
Questions and answers