
Subscribe to Our Youtube Channel
Related Manuals for Winmate R19IHAT-66EX


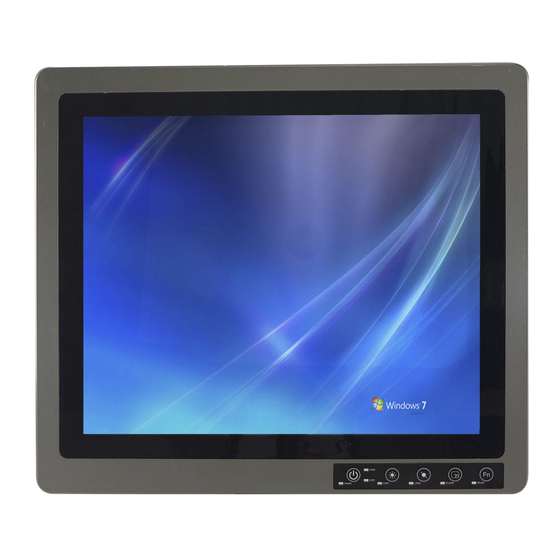
Summary of Contents for Winmate R19IHAT-66EX
- Page 1 Full IP66 Aluminum Flat Touch Panel PC Series R19IHAT-66EX for ATEX Zone II and C1D2 R19IHAT-66EX User Manual Document Version 11.0 Document Part No. PPM201404282...
-
Page 2: Table Of Contents
R19IHAT-66EX User Manual Contents Preface Chapter 1: Introduction 1.1 Overview 1.2 Features 1.3 Package Contents 1.4 Product Overview 1.5 Front Buttons Chapter 2: Getting Started 2.1 Turning On Your Device 2.2 Adjusting the LCD Display Brightness 2.3 Turning Off Your Device Chapter 3: Installation 3.1 Wiring Requirements... -
Page 3: Preface
Preface Preface Copyright Notice No part of this document may be reproduced, copied, translated, or transmitted in any form or by any means, electronic or mechanical, for any purpose, without the prior written permission of the original manufacturer. Trademark Acknowledgement Brand and product names are trademarks or registered trademarks of their respective owners. - Page 4 R19IHAT-66EX User Manual Customer Service We provide service guide for any problem as follow steps: First, visit the website of our distributor to find the update information about the product. Second, contact with your distributor, sales representative, or our customer service center for technical support if you need additional assistance.
- Page 5 Preface the power outlet. • Position the power cord so that people cannot step on it. Do not place anything over the power cord. • All cautions and warnings on the equipment should be noted. • If the equipment is not used for a long time, disconnect it from the power source to avoid damage by transient over-voltage.
- Page 6 R19IHAT-66EX User Manual • AVERTISSEMENT - L'équipement doit être adéquatement protégé de la lumière directe lors de l'installation intérieure ou extérieure. • WARNING – DO NOT OPEN, MAINTAIN OR SERVICE IN AN AREA WHERE AN EXPLOSIVE ATMOSPHERE MAY BE PRESENT.
-
Page 7: Chapter 1: Introduction
This includes technologies used in potentially explosive atmospheres. The Winmate 19” HazLoc PPC is the first of its kind to offer the Class1 Division2 certification, ensuring safe and reliable data collection and processing in Hazardous Locations. -
Page 8: Package Contents
R19IHAT-66EX User Manual 1.3 Package Contents Before using this Panel PC, please make sure that all the items listed below are present in your package: Standard Accessories: Before using this Panel PC, please make sure that all the items listed below are present in your package:... -
Page 9: Product Overview
Chapter 1: Introduction Optional Accessories: Wi-Fi Antenna extension Side Handle cable (Optional) (Optional) Note: All cables are for testing only, Do Not use these cables under Hazardous area. 1.4 Product Overview (Unit: mm) Front View... -
Page 10: Front Buttons
R19IHAT-66EX User Manual 1.5 Front Buttons Front Button & LED Indicators Button Type Function Power on/off Increase the brightness of the Panel Decrease the brightness of the Panel Suspend the touch’s function temporarily Programmable function key configured by Hot Tab Utility... -
Page 11: Chapter 2: Getting Started
Chapter 2: Getting Started Chapter 2: Getting Started 2.1 Turning On Your Device 1. Remove the I/O protection cover plate. 2. Connect the Power adapter to the device. 3. Plug the power adapter power cord to an electrical outlet. 4. Touch the Power button on the front to turn on the device. Note When the system hangs, press the Reset button to restart the device. -
Page 12: Adjusting The Lcd Display Brightness
R19IHAT-66EX User Manual 2.2 Adjusting the LCD Display Brightness Use the OSD membrane buttons on the front bottom side to increase / decrease the display brightness. Brightness Brightness Down 2.3 Turning Off Your Device To shut down your device, do the following: Tap Start ( ) >... -
Page 13: Chapter 3: Installation
Chapter 3: Installation Chapter 3: Installation 3.1 Wiring Requirements The following common safety precautions should be observed before installing any electronic device: Strive to use separate, non-intersecting paths to route power and networking wires. If power wiring and device wiring paths must cross make sure the wires are perpendicular at the intersection point. -
Page 14: Wiring
R19IHAT-66EX User Manual The unit is available with different pass through glands for cable connections (required to maintain enclosure protection rating). These glands are water and gas tight and must be tightened with a torque described in the gland manufacturer’s instructions provided with the unit. Cables must be passed through the glands and wired to the associated I/O connectors. - Page 15 Chapter 3: Installation 2. I/O cover has been removed and internal I/O ports will be seen. 3. Loosen the cable gland and let the cable go through to connect the internal terminal block connector. Connect to the terminal block Cable goes through cable gland...
-
Page 16: Pin Assignments
R19IHAT-66EX User Manual 4. Tighten the cable gland and screw the I/O protection cover plate back. Tighten the gland to hold the cable 3.3 Pin Assignments The pin assignments of the connectors are as follows: VGA Port (Only used in safe area) - Page 17 Chapter 3: Installation COM Port (Only used in safe area) Signal Name Signal Name USB Port (Only used in safe area) Signal Name LAN1 Port (Only used in safe area) Signal Name Signal Name MDI0_IN+ MDI0_IN- MDI1_IN+ MDI2_IN+ MDI2_IN- MDI1_IN- MDI3_IN+ MDI3_IN- Power terminal block...
- Page 18 R19IHAT-66EX User Manual To connect the Panel PC to AC power source: 1. Plug the DC Plug of AC adapter to the Panel PC DC IN Jack. 2. Connect the AC adapter to the power cord. 3. Plug the power cord to a working AC outlet. The device will boot automatically.
- Page 19 Chapter 3: Installation To connect the Panel PC DC power source: 1. Insert the exposed wires of the DC Power Cable to the appropriate connectors on the terminal block plug. 2. Plug the terminal block plug firmly to the DC IN Jack. 3.
- Page 20 R19IHAT-66EX User Manual LAN2 Port Signal Name Signal Name MDIO3- MDIO3+ MDIO2- MDIO2+ MDIO1- MDIO1+ MDIO0- MDIO0+ Ethernet connection pin Assignments for T568A RJ4-45 Pin No. Wire Color 10BASE-T/100 BASE -T 1000 BASE -T Signal Signal Transmit+ BI_DA+ White/Green Transmit-...
-
Page 21: Chapter 3: Mounting Solution
Chapter 3: Mounting Solution Chapter 3: Mounting Solution 3.1 Clamp Mount With the mounting clamps and screws, it provides fast and easy mounting of the 19” Panel PC onto an instrument panel or wall panel To mount the device to a sub frame or panel, do the following: 1. -
Page 22: Vesa Mount
R19IHAT-66EX User Manual 3.2 VESA Mount Dimensions: 100 x 100mm Screw Hole Diameter: M4 x 5 mm Direction: Compatible with swimming arms mounting kits. -
Page 23: Chapter 4: Windows 7 Driver Installation
Chapter 4: Windows 7 Driver Installation Chapter 4: Windows 7 Driver Installation 4.1 Chipset Driver Installation The Intel Chipset Drivers should be installed first before the software drivers to enable Plug & Play INF support for Intel chipset components. Follow the instructions below to complete the installation. Step 1. - Page 24 R19IHAT-66EX User Manual Step 3. Click on “Next“ to install driver. Step 4. Click on “Yes, I want to restart this computer now“ to go on.
-
Page 25: Graphic Driver Installation
Chapter 4: Windows 7 Driver Installation 4.2 Graphic Driver Installation IHAT Motherboard is with Intel mobile Core i7-4650U dual core CPU and with an integrated graphics controller. You need to install the Graphic driver to enable the function. Intel Graphic supports versatile display options and 32-bit 3D graphics engine. Triple independent display, enhanced display modes for widescreen flat panels for extend, twin, and clone display mode. - Page 26 R19IHAT-66EX User Manual Step.3. Click on “Yes “ to agree License. Step.4. Click on “Next “ to install Driver. Step.5. Click on “Yes, I want to restart this computer now“ to go on.
-
Page 27: Usb 3.0 Driver Installation
Chapter 4: Windows 7 Driver Installation 4.3 USB 3.0 Driver Installation IHAT Motherboard is designed with Intel mobile Core i7, Core i5, Core i3 dual core CPU with the Intel® USB 3.0 eXtensible Host Controller. You need to install the Intel® USB 3.0 eXtensible Host Controller driver to enable the function. - Page 28 R19IHAT-66EX User Manual STEP 3. Click “Next” to continue. STEP4. Read License Agreement and click “Yes” to proceed STEP 5. Review Readme File Information and click “Next” to proceed. Step.6. When the “Setup Progress” is complete click “Next” to proceed.
- Page 29 Chapter 4: Windows 7 Driver Installation STEP 6 .When the “Setup Progress” is complete click “Next” to proceed. STEP 7. Lastly, the “Setup Complete” screen appears so click “Finish” to restart your computer.
-
Page 30: Ethernet Driver Installation
R19IHAT-66EX User Manual 4.4 Ethernet Driver Installation The Users must make sure which operating system you are using in the IHAT Motherboard before installing the Ethernet drivers. Follow the steps below to complete the installation of the Intel® I210IT Gigabit-LAN Controller + I218LM Gigabit-LAN drivers. You will quickly complete the installation. -
Page 31: Audio Driver Installation
Chapter 4: Windows 7 Driver Installation STEP 4. Click on “Next“ to install driver. STEP 5. Click on “Finish“ to complete the driver installation. 4.5 Audio Driver Installation The ALC886 series are high-performance 7.1+2 Channel High Definition Audio Codecs providing ten DAC channels that simultaneously support 7.1 sound playback, plus 2 channels of independent stereo sound output (multiple streaming) through the front panel stereo outputs. -
Page 32: Fintek Com Port Driver Installation
R19IHAT-66EX User Manual STEP 2. Click on “Next“ to install driver. STEP 3. Click on “Yes, I want to restart my computer now” to finish installation. 4.6 Fintek COM Port Driver Installation STEP 1.If the system is WIN7 please first do close UAC.(Refer following “Disabling User Account Control (UAC) in Windows 7”) - Page 33 Chapter 4: Windows 7 Driver Installation After the update and update success. STEP 5 .You will need to restart your computer for driver install success. Type in this command from the Run menu: C:\Windows\System32\UserAccountControlSettings.exe or uac...
- Page 34 R19IHAT-66EX User Manual To turn off UAC, move the slider to the Never notify position, and then click OK. If you're prompted for an administrator password or confirmation, type the password or provide confirmation. To turn UAC back on, move the slider to choose when you want to be notified, and then click OK. If you're prompted for an administrator password or confirmation, type the password or provide confirmation.
-
Page 35: Intel Management Engine Software Installation
Chapter 4: Windows 7 Driver Installation 4.7 Intel Management Engine Software Installation This installation program installs the Intel® ME software components required for the platform on which you are installing, and installs only those components that match your platform’s capabilities. STEP 1. - Page 36 R19IHAT-66EX User Manual STEP 3. Click on “Yes “ to agree License. STEP 4. Click on “Finish“ to complete the software installation.
-
Page 37: Hottab Driver And Ap Installation
Chapter 4: Windows 7 Driver Installation 4.8 HotTab Driver and AP Installation Before install this HotTab Driver, Please install C++ first. To install this HotTab Driver and AP to make the buttons on the front of unit work. Driver Installation 1). - Page 38 R19IHAT-66EX User Manual Select “PortIO Driver” under System devices and right-click it. Use Uninstall selection to remove the driver.
- Page 39 Chapter 4: Windows 7 Driver Installation B. Install the driver 1. Type “cmd” in the run box. 2. The cmd.exe will appear in Programs 3. Right click on the cmd.exe and click on “Run as administrator” to start command prompt. 4.
- Page 40 R19IHAT-66EX User Manual When the driver is successfully installed, you can see “Drivers Updated successfully” message in the dos prompt. And “WMMIO” device also added in the Device Manger under “System devices”...
- Page 41 Chapter 4: Windows 7 Driver Installation Hottab AP Installation Important: Please make sure the Hottab driver (WMMIO) has been installed before you start to install the Hottab application 1. Uninstall the old version Hottab software before start to install the new version Hottab 2.
- Page 42 R19IHAT-66EX User Manual 4. Click "Next", the installation will be started 5. Installation Complete, click "Close" to close the window 6. Yan can find this shortcut on the desktop, double click it to open the Hottab application...
-
Page 43: Hottab Utility
Chapter 4: Windows 7 Driver Installation 4.9 Hottab Utility Hottab ® is a program made by Winmate to control the main functions of the R19IHAT-66EX. In Hottab ®, users can check system information, control function button settings, configure blanking function and settings. -
Page 44: System Information Menu
R19IHAT-66EX User Manual 4.9.1 System information menu 4.9.2 Hottab Shortcut Setting In Function Behavior, submenu users can set up functions. - Page 45 Chapter 4: Windows 7 Driver Installation...
-
Page 46: Touch Lock Setting
R19IHAT-66EX User Manual 4.10 Touch Lock Setting Under the Touch Lock mode, the touchscreen is locked from all touch inputs, while keypad input remains operational. -
Page 47: Brightness Adjustment
Chapter 4: Windows 7 Driver Installation 4.11 Brightness Adjustment... -
Page 48: Appendix
R19IHAT-66EX User Manual Appendix Appendix A: Hardware Specifications Item Specifications Computer Intel i7-4650U, 4M cache, up to 3.30GHz Windows Embedded Standard 7 (Optional) Windows 7 PRO for Embedded System (Optional) Windows Embedded 8.1 Industrial (Optional) Windows 10 IoT Enterprise (Optional) System Chipset Intel®... - Page 50 R19IHAT-66EX User Manual Item Specifications Physical Characteristics Housing Stainless steel Dimensions 396 x 310 x 49mm (W x H x D) Cutout 462 x 386 mm (W x H ) Mounting Mounting hole for VESA 100 x 100, yoke mounting...
-
Page 51: Appendix B: Cleaning The Monitor
Appendix Appendix B: Cleaning the Monitor Before cleaning: • Make sure the device is turned off. • Disconnect the power cable from any AC outlet. When cleaning: • Never spray or pour any liquid directly on the screen or case. •... - Page 52 Winmate Inc. 9F, No.111-6, Shing-De Rd., San-Chung District, New Taipei City 24158, Taiwan, R.O.C www.winmate.com Copyright © Winmate Inc. All rights reserved.
Need help?
Do you have a question about the R19IHAT-66EX and is the answer not in the manual?
Questions and answers