
Related Manuals for Rockwell Automation Kinetix 300


Summary of Contents for Rockwell Automation Kinetix 300
- Page 1 Architecture Scalability Using the Kinetix 300 Indexing Servo Drive For Classroom Use Only! (RA-11-L09) (IA-11-L13) Publication Number -- Date...
-
Page 3: Table Of Contents
Homing the Drive ............................22 Lab 3: Adding a Kinetix 300 in RSLogix5000 ..................24 Lab 4: Configure and Run the Kinetix 300 in Ethernet I/P Mode ............26 Download the Program and Monitor the Kinetix 300 Drive ................. 26 Explanation of the Logic .......................... - Page 4 Lab 6: Create a Blended Index ......................... 40 Explanation of a Blended (or Stitched) Index....................40 Lab 7: Demonstrating the Safe Off feature of the Kinetix 300 Drive ............ 43 About this lab .............................. 43 Understanding the Kinetix 300 Drive Safe Torque-off Feature ..............43 Wiring the Kinetix 300 to Use the Safe Off Function ..................
-
Page 5: Before You Begin
About this lab The versatile Kinetix 300 drive can be used in many ways; the most simplistic of these being as a stand- alone drive. But, where the Kinetix 300 really shines is with its ability to receive motion parameters and configuration information over an Ethernet/IP connection from a Logix controller. -
Page 6: Lab 1: See What The Kinetix 300 Can Do
AOI and then execute them. The following lab steps the user through loading the necessary files to get the Kinetix 300 servo drive up and running to see some of its’ functionality in action. - Page 7 4. Open the file C:\Lab Files\ K300_CMSS_START.ACD 5. Click the Communications menu item and select Who Active. 6. From the dialog navigate to the controller (IP Address 192.168.1.36, slot 0) and click the Download button. 7. When the download warning dialog displays, click the Download button to download the .acd file to the controller.
-
Page 8: Download Configuration File To Kinetix 300
The four character status indicator on the drive should be scrolling the IP address of the drive and ‘diS’, which indicates the drive is disabled. This drive’s IP address is 192.168.1.35. Download Configuration File to Kinetix 300 14. Open Internet Explorer by double-clicking on the desktop shortcut and enter in the IP Address of the drive and press Enter. - Page 9 16. Read the warning dialog window and answer YES, I have prompt. The MotionView OnBoard software window opens. 17. To connect to the drive, click the Connect button. 18. Enter the drive’s IP Address and click Connect. 19. Click on the drive in the organizer panel and then click the Load Configuration button. 20.
-
Page 10: Download Program File To The Controller
21. Once the configuration loads, a dialog will appear informing you that a REBOOT of the drive is necessary. Click OK and Cycle Power to the demo case. Download Program File to the Controller 22. Connect the Ethernet cable going into the Ethernet module on the Compact GuardLogix rack. 23. -
Page 11: Spin The Motor
Two different indexes are sent down to the drive and then executed. The indexes are setup as follows: Review the Index routine (R6_Index_Mode) to see how the code controls the Kinetix 300 drive. 30. Turn the Red switch to the right and back to the left to stop the Index run sequence. - Page 12 Kinetix 300 drive. This concludes Lab 1. The goal was to see how the Kinetix 300 can be controller via Ethernet. The following labs will go into more detail on configuring the drive and program from the ground up.
-
Page 13: Lab 2: Basic Drive Configuration
Open the MotionView OnBoard Configuration Software 4. Open Internet Explorer by double-clicking on the desktop shortcut. 5. Enter in the IP Address of the Kinetix 300 drive and press Enter. 6. From the File Download window select Open. 13 of 51... - Page 14 7. Read the warning dialog window and answer YES, I have prompt. The MotionView OnBoard Software window opens. 8. To attach to your drive, click Connect. 14 of 51...
- Page 15 9. Enter the drive’s IP Address and click Connect. TIP: You could also use the Discover option to locate drives on your subnet. The software uploads the drive information. 15 of 51...
-
Page 16: Motor Selection
10. After the software connects to the drive, click on the Drive Identification in the Drive Organizer to see a system summary. NOTE: The Drive Identification is labeled with the drive name, IP address and status. The system summary displays valuable information such as firmware version, catalog number and serial number. 11. -
Page 17: Choosing The Operating Mode
For Allen-Bradley motors and actuators with incremental encoders, the device would need to be chosen from a listing of available motors. Choosing the Operating Mode The Kinetix 300 drive can operate in one of several modes which are shown below: Auto Tune EtherNet/IP External Reference... -
Page 18: Auto Tune The Drive For Indexing Mode
14. Move to the General branch in the Drive Organizer. 15. Let’s take a look at the General settings. You can see that the Drive Mode is currently set to Auto Tune (this is the default mode after a restore defaults is executed). - Page 19 21. Change the Enable Switch Action back to Inhibit. Note: Since there is no enable switch on the demo unit (24vdc is directly applied to the enable input, pins 26 and 29) it is necessary to control the input through software. Making the change back to Inhibit will not immediately cause the drive to disable, but only on a transition of the physical input.
-
Page 20: Command The Drive In Indexing Mode
In the next lab section we will be Indexing the drive, so we need to tune both the velocity and position loops. The motor will make two short moves, which you should be able to hear, to tune both loops. When it completes the gain values will display in a dialog window. - Page 21 28. Now move to the Indexing branch in the Drive Organizer. 29. Expand Index 00, and set it to make 4 sets of incremental moves, at 10 revs each. Set the other parameters as shown below. 30. Now Enable the drive again by going to the Digital IO branch in the Drive Organizer and change the Enable Switch Action to Run.
-
Page 22: Homing The Drive
34. Click the Abort Indexing button to stop motion. Homing the Drive 35. Navigate to the Homing branch of the Drive Organizer. 36. Set the Homing parameters as shown. 22 of 51... - Page 23 37. For the Homing Method choose Marker – Forward (ID 34) from the drop-down list. 38. Click the Start Homing button to initiate the homing sequence. You should see the motor rotate until it finds the index marker on the encoder and then settle in. The Homing Status should change from Not Homed to Homed.
-
Page 24: Lab 3: Adding A Kinetix 300 In Rslogix5000
Lab 3: Adding a Kinetix 300 in RSLogix5000 In this lab, you will: Open a RSLogix 5000 file and add and configure a Kinetix 300 drive Examine the Input and Output Assembly tag structures 1. Open the file C:\Lab Files\K300_CMSS_LAB_3_START.ACD 2. - Page 25 8. Click the + beside the K300_N1:O, you will see all the attributes that have been created by the Kinetix 300’s AOP(Add On Profile) – this is the output image, or the values that the controller sends to the drive every RPI scan. A few of the more used tags include, DriveEn and the various mode configuration settings that will be explained in the next lab.
-
Page 26: Lab 4: Configure And Run The Kinetix 300 In Ethernet I/P Mode
Lab 4: Configure and Run the Kinetix 300 in Ethernet I/P Mode In this lab, you will: Use the open RSLogix 5000 file and download it to the controller and observe logic running Examine the logic and understand how it executes for the Ethernet IP mode Download the Program and Monitor the Kinetix 300 Drive 1. - Page 27 ActualPosition tag. Important: If your Kinetix 300 drive has a yellow ‘!’ mark next to it, verify the IP address and the Drive model number. If something is not correct, delete the existing drive and repeat the steps in Lab Important: RESETTING DRIVE FAULTS.
-
Page 28: Explanation Of The Logic
9. Double-click on the R5_EnetIP_ExRef_Mode subroutine to open it. Explanation of the Logic Rung 1: Starts the sequence (pushing the Green button DI0/DO1). The sequence will only start if there are no faults on the drive Rung 2: Sets the correct drive mode of operation. In this case, Mode 1 corresponds to EtherNet/IP External Reference. - Page 29 Rung 8: When the first motion profile is finished, the program will dwell for 500ms and load the second motion profile values. Rung 9: Starts executing the second motion profile. Rung 10 & 11: When the second motion Profile is complete, the program will dwell for 500ms and start the first profile again.
-
Page 30: Lab 5: Configure And Run The Kinetix 300 In Indexing Mode
Lab 5: Configure and Run the Kinetix 300 in Indexing Mode In this lab, you will: Use a new RSLogix 5000 file, make some modifications that use an Indexing AOI (Add-On Instruction). Sequence between two indexes, with a delay in between each. - Page 31 A tag named IndexMode (rung 1) will allow us to change modes of operation in the drive. If IndexMode is 0, the Kinetix 300 is in Ethernet/IP External Reference mode If IndexMode is 1, the Kinetix 300 is in Indexing mode 7.
-
Page 32: Explanation Of Indexing Aoi
Explanation of Indexing AOI K300_IndexConfig: a tag of type K300IndexConfig, this tag is created upon the import of the rung and provides the status bits, EN,DN,ER and the ‘holding’ location for move parameters you can enter for the Index. When the instruction enables, the EN bit is set, if the configuration is valid and completes successfully, the DN bit is set, and if the instruction errors because of an invalid parameter or something else, the ER bit is set OutputValues: a tag of type UDT_K300_Index, this is also created upon import and provides a place for... -
Page 33: Add Another Index
Index Decel: The deceleration rate for the index in engineering units. This value is positive and a zero (0) or negative value will result in an error. Index Batch: The number of times to repeat the index. A zero (0) or 1 indicates to execute the index once. - Page 34 2. Right-Click on Rung 4 of R6_Index_Mode subroutine, and select Import Rungs. 3. Navigate to the file C:\Lab Files\Rung_Index_Mode.L5X and click Import. 4. Click on Tags in the organizer. 34 of 51...
- Page 35 Change the three (3) references to Index0, to Index1 by editing the tag changing the 0 to a 1. This is the new index that we will be creating. The changed references should look like this: 6. Click OK to finalize the import. The new rung is imported below Rung 4 (new Rung 5). 7.
- Page 36 Rung 4 before: Rung 4 after: 36 of 51...
- Page 37 Rung 5 before: Rung 5 after: 37 of 51...
- Page 38 Rung 6 before: Rung 6 after: Rung 7 before: Rung 7 after: 38 of 51...
- Page 39 Rung 8 before: Rung 8 after: 8. After making the code changes, check that there are no errors by clicking on the Verify Controller button. 9. If there are no errors to correct, Download the file to the controller. 10. Change the controller to back to Run Mode. 11.
-
Page 40: Lab 6: Create A Blended Index
Lab 6: Create a Blended Index In this lab, you will: Use the existing RSLogix 5000 program and modify it so the 2 indexes represent 1 Blended move Look at the trend to observe how ‘Blending’ is functioning Explanation of a Blended (or Stitched) Index If the indexing configuration Type is set to Blended, the acceleration and deceleration parameters are not programmable. - Page 41 2. Make the following changes to the Indexing AOI’s in the R6_Index_Mode subroutine. Rung 4: Change IndexType to a value of 4 (Blended Index). Rung 5: Change the following; IndexSpeed = 0, IndexDistance = 20, and IndexType = 4. 41 of 51...
- Page 42 3. Download the program to the controller. 4. Make sure the controller is in Run Mode. 5. Make sure the IndexMode bit is ON (Rung 1). 6. The same rules from previous labs apply (i.e. Green button starts the sequence, the Red toggle switch stops the sequence) 7.
-
Page 43: Lab 7: Demonstrating The Safe Off Feature Of The Kinetix 300 Drive
Lab 7: Demonstrating the Safe Off feature of the Kinetix 300 Drive About this lab This lab will demonstrate the use of the Kinetix 300 Safe Off input used in the Safety Task of the 1769- L43S Processor. • Wire up the safe-off connection to the Kinetix 300 to the Logix Controller •... -
Page 44: Explanation Of Safe-Off Function On Demo Box
This lab demonstrates the use of the 1734 Safety Point I/O modules to control the Safe Off input to the Kinetix 300. This lab uses the Red E-Stop Mushroom button, which is internally wired to the 1734-IB8S Safety Input Module. The Safety Program in the Logix controller is used to detect when the E-Stop is pulled out. - Page 45 per the diagram at the start of this lab. Note: There is a Red Mushroom Safe-Off button on this demo unit. It is currently is wired to use the MSR57P smart safety relay to monitor safe speed condition. We do not use this button for this lab. 45 of 51...
- Page 46 Instructions Output bit which is used in Rung 1. Rung 1: When the E-Stop is OK, output points 00 and 01 are energized on the 1734-OB8S module. These are the redundant I/O points that are wired to the Kinetix 300 drive Safe Off Input.
-
Page 47: Appendix A: Configuration/Setup Guide
Appendix A: Configuration/Setup Guide 47 of 51... -
Page 48: Lab Setup And Configuration Information
Lab Setup and Configuration Information Lab Information Lab Name Introduction to Kinetix 300 Indexing Drive Learn to configure a K300 drive and control the K300 over Ethernet I/P Lab Description via RSLogix 5000 Lab Creator Amedeo Rubino / Todd Garski Date Created Sept. -
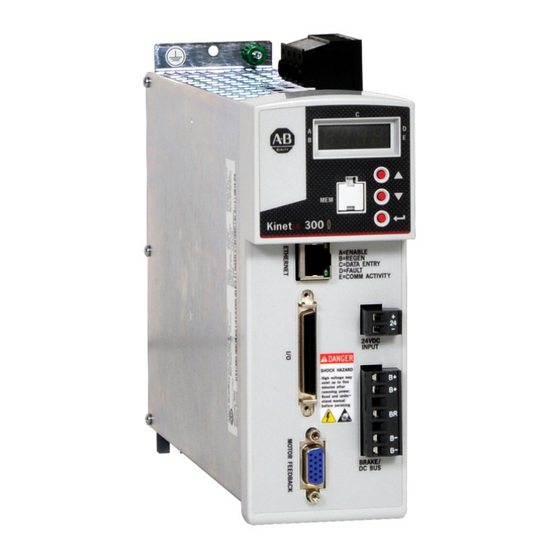
Page 49: Basic Setup Diagram
Photograph of Hardware: Basic Setup Diagram: 49 of 51... - Page 50 Application/Programming Location Files C:\Lab Files K300_CMSS_LAB_1.ACD K300_CMSS_LAB_3_START.ACD K300_CMSS_LAB_5_FINAL.ACD K300_CMSS_LAB_5_START.ACD K300_CMSS_LAB_6_FINAL.ACD K300_CMSS_LAB_7_SAFEOFF.ACD K300_CSMM_LAB_1_CONFIG.dcf.xml Rung_Index_Mode.L5X K300_CMSS_START.ACD Additional Equipment Required Items 6’ Ethernet Cable RSLinx - DDE/OPC Topic Configuration Topic Name Path to Hardware RSLinx - Driver Configuration Topic Name Path to Hardware AB_ETH-1 192.168.1.36 50 of 51...
- Page 51 RSLinx Enterprise - Shortcut Configuration Topic Name Path to Hardware Application Versions Service Version Vendor Software Pack RSLogix 5000 2.55.00.16 CPR9 SR2 RSLinx Classic V6.0 Update 21 Java Java for Windows 51 of 51...
Need help?
Do you have a question about the Kinetix 300 and is the answer not in the manual?
Questions and answers