Table of Contents
Advertisement
Quick Links
Advertisement
Table of Contents
Troubleshooting

Related Manuals for Tvone Edge Blender C2-2450A


Summary of Contents for Tvone Edge Blender C2-2450A
- Page 1 C2-2450A Edge Blender User Guide V3.00 MNL-C2-2450-V3.00 Apr 2019...
-
Page 2: Table Of Contents
In this guide About your C2-2450 .............................. 1 Device capabilities ............................. 1 Device features ..............................1 General topography ............................1 Ultimate flexibility ............................1 Simple control ..............................1 Upgradeability ..............................1 Product image ............................... 2 Front panel controls.............................. 2 Button controls ..............................2 Multi-directional switch............................. - Page 3 Saving and loading configurations ........................ 30 Saving settings to and reading settings from your unit ................31 Creating an edge blend with the edge blend tool ..................31 Adding a logo, still image, or testcard ......................32 To add a still image or testcard ........................32 To add a logo ..............................
-
Page 5: About Your C2-2450
This not only applies to the software used to control the unit, but also to the range of resolutions stored inside the unit, the addition of new features, and upgrades to the heart of the image processing hardware – the CORIO 2 scaling engine. See tvone.com/support for more ® detail. -
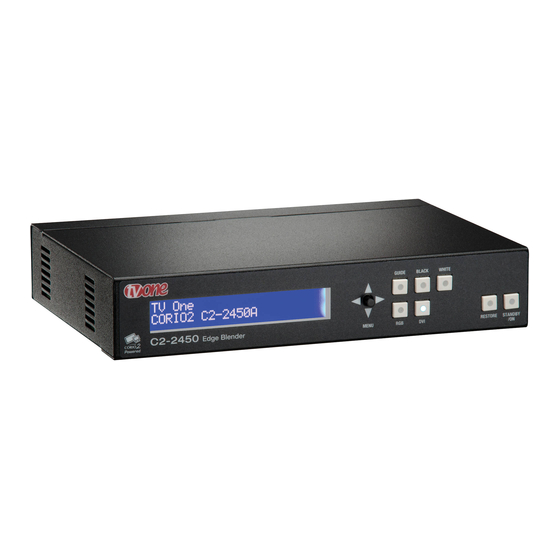
Page 6: Product Image
The OSD is controlled from the front panel by using the multi-directional switch (m/d switch). This switch can be moved left, right, up or down and also pressed in. These functions let the user navigate through the menu structure or change a parameter, and are detailed in a later section. tvONE... -
Page 7: Advanced Menus
Advanced menus System Advanced menus [Off] The above menu item must be ‘On’ to activate certain menu items. These typically control the more advanced items in the menus. Special button combinations and functions In addition to the ability to perform a factory reset and forcing certain output resolutions, other button combinations are available: These button combinations only work when the unit is switched on and active i.e. -
Page 8: Computer Outputs
If you did not receive the correct adaptor, DO NOT attempt to modify it. Instead, immediately contact your dealer or contact tvONE at the sales office nearest to your geographic location and request the proper adaptor. -
Page 9: Serial / Ip Control Specification
Disconnect the cable going from a PC’s Monitor to the PC. Connect the output from the PC video card (the PC connector formerly used by the monitor cable) to the PC/HD input on the rear panel of the unit. Next, take the cable from the PC monitor and connect it to the PC/HD output. Then connect the AC Power Adaptor to a working AC outlet, turn on the PC, monitor and then your unit. -
Page 10: Packet Format
0x10 = RGB1, 0x11 = RGB2, 0x12 = RGB3, etc. 0x30 = CV1, 0x31 = CV2, 0x32 = CV3, etc. 0x40 = YC1, 0x41 = YC2, 0x42 = YC3, etc. 0x50 = SDI1, 0x51 = SDI2, etc. 0xD0 = OUT1, 0xD1 = OUT2, etc. tvONE... -
Page 11: Function List
0xF0 = TC1, 0xF1 = TC2, etc. MACRO Or – for Macro related commands: Bit 7..4 = 0 Reserved Bit 3..0 = Macro number WINDOW / LOGO / Bit 7 = 0 (Reserved). BORDER Bit 6..0 = Represents the window to be adjusted (for multi-channel units only). E.g. - Page 12 0xF0 = TC1, 0xF1 = TC2 Lock method 0 = Off 1 = Genlock 2 = Lock & Mix 3 = DARSlock (some units only) 4 = Frm.lock (some units only) Lock H Shift -4096..4096 Lock V Shift -4096..4096 tvONE...
- Page 13 Menu text FUNC Range of adjustment (decimal) (Hex) Output resolution 1..1000 Output image type 0 = RGBHV 1 = RGBS 2 = RGsB 3 = YUV 4 = tlYUV 7 = tlRGB Output image type digital 0 = RGBHV 3 = YUV HDCP required 0..1, Off, On (if display supports it) HDCP status...
- Page 14 0x30 to 0x3F = CV1 to CV16 0x40 to 0x4F = YC1 to YC16 0x50 to 0x5F = SDI1 to SDI16 0xD0 = OUT1, 0xD1 = OUT2 0xF0 = TC1, 0xF1 = TC2 Select Universal source 0xE0 to 0xEF select universal inputs 1 to 16 tvONE...
- Page 15 Menu text FUNC Range of adjustment (decimal) (Hex) Source resolution Read only – returns # of resolution Window Enable 0..1 = Off, On Zoom level % 100..1000 Zoom level H % 100..1000 (only used in Advanced A/R mode) Zoom level V % 100..1000 (only used in Advanced A/R mode) Aspect ratio in 0.1:1..9.99:1 (read only)
- Page 16 Bit 2 = Top edge active Bit 3 = Bottom edge active E.blnd guides 0..2 = Off, Auto, On E.blnd size V 0.. limited by V height E.blnd gamma H 1..150 1=0.01, 150=1.50 E.blnd gamma V 1..150 1=0.01, 150=1.50 tvONE...
- Page 17 Menu text FUNC Range of adjustment (decimal) (Hex) E.blnd comp cent 0..99 E.blnd comp side 0..99 E.blnd size Left 0.. limited by H width E.blnd size Right 0.. limited by H width E.blnd size Top 0.. limited by V height E.blnd size Bottom 0..
- Page 18 -100..100 BR size adj. (bottom) 10..5F -100..100 Audio input source (internal) 10..FF 0..4 Selects inputs 1 to 4 + Mute. OPTION audio input 10..FF 0..9 = Channels 1 .. 10 on A2-2000 Audio vol 10..FF -16..15 (-16=Mute) 10..FF -15..15 tvONE...
- Page 19 Menu text FUNC Range of adjustment (decimal) (Hex) On source loss 10..5F 0=Show, 1=Freeze, 2=Blue, 3=Black, 4=Remove (was Deglitch) Source stable (read only) 0=Unstable, 1=Stable Input pixel phase 10..5F 0..31 RGB input type 10..1F 8 = Auto 6 = D-RGB 11 = D-YUV 10 = A-RGB 12 = A-YUV...
- Page 20 0 (off) to 50 (5.0 seconds) Wipe type 0 = Left -> Right 1 = Right -> Left 2 = Up -> Down 3 = Down -> Up 4 = Diagonal 5 = Diamond Wipe Size 10..2000 Adjust sources audio Control (C2-8000 Only) tvONE...
- Page 21 Menu text FUNC Range of adjustment (decimal) (Hex) Audio delay 0..200 = delay in ms Audio Control (S2-106AD Only) Sample frequency 0..4 = Bypass, 32, 44.1, 48, 96kHz Audio delay 0..999 = delay in ms (restricted depending on Sample frequency) Adjust tally (on certain models only) Tally mode 0 = Disabled...
- Page 22 Fan 1 status 0=OK 1=Fast Fan 2 status 2=Slow Fan 3 status 3=STOP Fan 4 status PSU 1 status 0=Fault 1=NoPower PSU 2 status 2=OK 3=Missing TAC number 0 Read only TAC number 1 Read only TAC number 2 Read only tvONE...
-
Page 23: Examples
Menu text FUNC Range of adjustment (decimal) (Hex) TAC number 3 Read only TAC number 4 Read only TAC number 5 Read only MAC number (IP port) Read only – bytes reversed! Not part of menu system System STANDBY 0 = Operating, 1 = In STANDBY mode Front panel lock 0 = unlocked, 1 = locked Emulate button press... -
Page 24: Reading And Writing Macros
Macro Restore (CHA=5) is read only, the units restore state is set by sending the Store command (0C8). Menu text FUNC Range of adjustment (decimal) (Hex) Macro Run macro 0..7 0..1 = Run, Erase macro Number of items within macro 0..7 Read Only Function to adjust 0..7 0..4095 tvONE... -
Page 25: Reading A Previously Stored Macro
Value 0..7 Value for Function Reading a previously stored macro In order to read a macro the following commands must be sent in this specific order – no other commands should be sent between these messages. The CHA in these cases relate not to the source but to the macro we are reading. -
Page 26: Run And Restore Macros
0400E1 Power back on – see Reset command. Reset menu settings to power-on values 0100E2 Reset menu settings to factory defaults 2300E2 Lock / unlock front panel buttons 0100E3 Set to NTSC output 0000E7 Set to PAL output 0000E8 tvONE... - Page 27 Button press Payload Set to default output resolution for unit 0000E9 Set to 480p output 0000EA Set to 720p 59.94Hz output 0000EB Set to 720p 60Hz output 0000EC Cycle presets (demo mode) 0100EE Select DVI-I1 as source 000200 Select DVI-I2 as source 000201 Select DVI-I3 as source 000202...
- Page 28 02011D Add to Macro 6 020167 Add to Macro 7 020168 Erase Macro 1 280119 Erase Macro 2 28011A Erase Macro 3 28011B Erase Macro 4 28011C Erase Macro 5 28011D Erase Macro 6 280167 Erase Macro 7 280168 tvONE...
- Page 29 Button press Payload Decrease Horizontal Pan value 00021E Increase Horizontal Pan value 00021F Decrease Vertical Pan value 000220 Increase Vertical Pan value 000221 Select window A 000223 Select window B 000224 Select window C 0002A0 Select window D 0002A1 Select window Z 000225 Select Output 1 000226...
- Page 30 Select DVI12 as source for window B 0002B8 Select CV1 as source for window B 000230 Select CV2 as source for window B 000231 Select CV3 as source for window B 000232 Select YC1 as source for window B 000233 tvONE...
- Page 31 Button press Payload Select YC2 as source for window B 000234 Select YC3 as source for window B 000235 Select TC1 as source for window B 000236 Select TC2 as source for window B 000237 Select TC3 as source for window B 0002BA Select OUT1 as source for window B 000238...
- Page 32 Store Preset 3 020193 Store Preset 4 020194 Store Preset 5 020195 Store Preset 6 020196 Store Preset 7 020197 Store Preset 8 020198 Store Preset 9 020199 Store Preset 10 02019A Erase Preset 1 280191 Erase Preset 2 280192 tvONE...
-
Page 33: Reset Command
Button press Payload Erase Preset 3 280193 Erase Preset 4 280194 Erase Preset 5 280195 Erase Preset 6 280196 Erase Preset 7 280197 Erase Preset 8 280198 Erase Preset 9 280199 Erase Preset 10 28019A Set output to BLACK 00029B Set output to WHITE 00029C Toggle edge blend lines on/off... -
Page 34: Coriotools Suite
CORIOtools suite CORIOtools Suite allows you to simply set up your unit. Download the latest version of CORIOtools Suite from tvONE.com/softwares. CORIOtools Suite runs on Windows XP and above, and requires.NET framework 4.0 or above. Demo mode CORIOtools Suite has a demo mode that allows you to explore the application without connecting to a unit. -
Page 35: Saving Settings To And Reading Settings From Your Unit
Saving settings to and reading settings from your unit You can save specific settings to your unit and read specific settings from your unit. 1. From the CORIOtools Suite home screen, select Configure. 2. Select a unit from the right-hand side. 3. -
Page 36: Adding A Logo, Still Image, Or Testcard
5. If you want to make the dark areas of your logo transparent, select Apply key on black. Transparency is applied on a scale, where darker areas are more transparent and brighter areas are less transparent. Black is completely transparent. Transparency works best when your logo has a low number of colors. 6. Select Program. tvONE... -
Page 37: Troubleshooting And Faqs
Troubleshooting and FAQs There is no picture on the output If no LEDs are on, then ensure that the AC power adaptor is connected properly and the power switch is on at the AC outlet. If the Standby/ON LED on the unit is off but another blue LED is active then check that the monitor output from the computer is connected at both the computer and the unit. -
Page 38: The Picture On The Video Display Is Black And White
Test your display by connecting it directly to a source. Test each cable. Try restoring your product to factory default settings. Note: during factory reset your custom settings are deleted. Try updating your firmware. Note: during a firmware update your custom settings are deleted. tvONE... -
Page 39: Returning A Product For Repair
All customers tvONE support decides if your product needs to return for repair, and, if needed, provide a return authorization number. Send your product to tvONE by insured carrier or registered mail. Write your return authorization number on the outside of the packaging, and on any documents you send with your product. -
Page 40: Connector Pinouts
Green / Y Blue / Pb / B-Y GND on input, pulled high on output (used for auto-termination) ID2 (input & output linked) SDA (input & output linked) H sync(composite sync for RGBS) V sync SCL (input & output linked) tvONE... -
Page 41: Specifications
Specifications Computer input DVI-D (on DVI-I connector) supporting up to 162MHz (1920x1200 @ 60Hz). EDID 1.3 data on DVI-D connector to communicate available resolutions. Analog RGB/YPbPr supporting RGBHV, RGBS, RGsB, YPbPr, auto-terminating into 75 Ohm. Digital sync (in RGBHV or RGBS mode): TTL Level, 10K termination, pos or negative. Analog sync (in RGsB, YPbPr, YUV modes): 0.3v negative. -
Page 42: Regulatory Compliance
Information in this document is subject to change without notice. No part of this publication may be reproduced, stored in a retrieval system, or transmitted in any form or any means electronic or mechanical, including photocopying and recording for any purpose other than the purchaser's personal use without the written permission of tvONE. Copyright © 2019 tvONE™. All rights reserved.
Need help?
Do you have a question about the Edge Blender C2-2450A and is the answer not in the manual?
Questions and answers