
Subscribe to Our Youtube Channel
Related Manuals for Wenglor OY2TA104P0150P


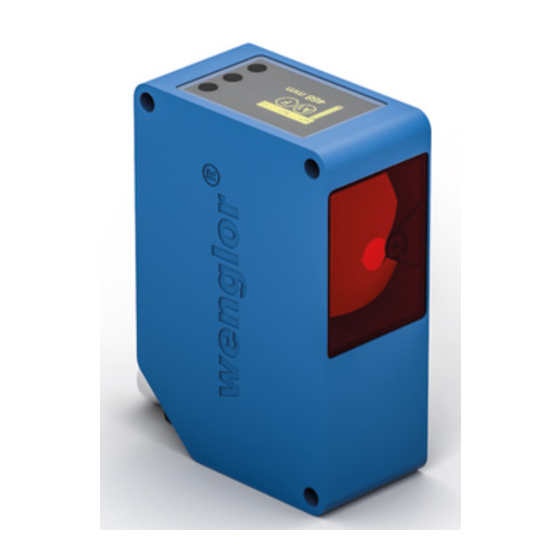
Summary of Contents for Wenglor OY2TA104P0150P
- Page 1 OY2TA104P0150P High-Performance Distance Sensor Operating Instructions Available as PDF only Status: 24.08.2016 wenglor.com...
-
Page 2: Table Of Contents
7.2.2. Display Intensity 7.3. Filter 7.4. Output Rate 7.5. Laser 7.6. I/O Test 7.7. Network 7.8. Language 7.9. Info 7.10. Reset 7.11. Password Information on PROFINET 8.1. Overview of Device Access Point (DAP) 8.2. Overview of modules used in the DAP OY2TA104P0150P... - Page 3 Network Settings 10. Web-based configuration 10.1. Invoking the Management Interface 10.2. Page layout 10.3. Device general 10.4. Device Settings 10.5. Measured Value Settings 10.6. Device Test 11. Maintenance Instructions 12. Proper Disposal...
-
Page 4: Proper Use
2.2. Laser/LED warning Class Laser 1 (EN 60825-1) LASER CLASS 1 Observe all applicable standards EN60825-1 and safety precautions. 2007 3. EU Declaration of Conformity The EU declaration of conformity can be found on our website at www.wenglor.com in download area. RoHS... -
Page 5: Technical Data
4. Technical Data Order Number OY2TA104P0150P Working Range 0,1...10,1 m Linearity Deviation 20 mm Reproducibility 7 mm Light Source Laser (red) Output Rate 330/s Wave Length 660 nm Service Life (Tu = 25 °C) 100000 h Max. Ambient Light 5000 Lux... -
Page 6: Connecting The Sensors
4.1. Connecting the Sensors OY2TA104P0150P Legend Encoder A Platinum measuring resistor Encoder B Supply Voltage + not connected Digital output MIN Supply Voltage 0 V Test Input Supply Voltage (AC Voltage) Digital output MAX Test Input inverted Switching Output (NO) -
Page 7: Housing Dimensions
4.2. Housing Dimensions 1 = Transmitter Diode 2 = Receiver Diode 4.3. Control Panel 20 = Enter Button 22 = Up Button 23 = Down Button 60 = Display 78 = Module Status 84 = Communication Status 85 = Link/Act LED Designation Condition Function... -
Page 8: Complementary Products
6. Initial Operation 6.1. Initial Operation Each Ethernet device has a unique MAC address. With wenglor you can find the MAC address on the type plate of the device. In the default settings, the device has the following IP-Address 192.168.100.1. You can access the website of the device via the IP-Address. -
Page 9: Default Settings
6.2. Default Settings OY2TA104P0150P Mode Process Display Intensity Screensaver Filter Laser IP-Address 192.168.100.1 Subnet Mask 255.255.255.0 Network DHCP DHCP OFF Std Gateway 192.168.100.254 MAC Address (See type plate on the product) Language English Activate Password Change... -
Page 10: Functional Overview Oled-Display
7. Functional Overview OLED-Display Process Text Analyse Mode Network Display Rotate Intensity Medium Power save Screensaver Filter Laser Value in µm Measured Value E/A Test No. of Status Bit Status Bits Warmup Warmup Signal Temperature Too low Too high IP address Network Subnet Mask Std Gateway... - Page 11 Fig. 1: Set language menu Navigation by pressing the button: : Navigation up. : Navigation down. : Enter Button. The selection is confirmed by pressing the Enter button. Meaning of the menu items: : one level higher in the menu. 3Back : Switch to display mode.
-
Page 12: Display
7.1. Run The Sensor switches into display mode. PROFINET device name Bar graph display of the current Status LEDs measured value relative to the measuring range Current measured value in mm Symbol descriptions of status LEDs: Symbol Significance State 1 State 2 State 3 Symbol 1... -
Page 13: Display Intensity
7.2.2. Display Intensity Intensity Set the display intensity Min Min: The intensity of the display is set to a minimum value. Normal Normal: The intensity of the display is set to a medium value. Max Max: The intensity of the display is set to a maximum value. ... -
Page 14: O Test
7.5. I/O Test This function manually changes the output of the Sensor. As a result, it possible to test whether the further pro- cess is working as desired. The test is automatically terminated once you leave the test menu. I/O Test Test of the Sensor outputs Measured value Measured value:... -
Page 15: Network
7.6. Network Network Settings of the Network Parameters IP-Address IP-Address: Display of the set IP-Address Subnet Mask Subnet Mask: Display of the set Subnet Mask DHCP DHCP: Display DHCP ON or DHCP OFF Std Gateway Std Gateway: Display of the set standard gateway MAC Address MAC Address: Display of the default MAC Address... -
Page 16: Reset
• The value range of the password number ranges from 0000…9999 It is necessary to note the newly defined code before changing the password. A forgotten password can only be overwritten by a general password. The general password can be requested by sending an e-mail to support@wenglor.com. -
Page 17: Laser
8. Information on PROFINET You can find the GSDML file for download at www.wenglor.com → Product World → Product search (Enter the product number). 8.1. Overview of Device Access Point (DAP) Modul-ID: Submodul: Parameter: Data Byte Value Change- Name Default Value... - Page 18 Module Distance Value Module ID: Submodule: Slot: Format Cyclical Data: 4 Byte Statusbits (see Module status) Input Output Value Range Data Type Unit Description Measured – – Integer32 Distance Value value Statusbits – Unsigned32 – (see Module status) Parameter: Name Value Range Data Type Index...
- Page 19 Module Filter Module ID: Submodule: Slot: Format Cyclical Data: Input Output Value Range Data Type Unit Description Filter Value Filter Value 0…6 Unsigned8 – 0: filter size 1 1: filter size 2 2: filter size 5 3: filter size 10 4: filter size 20 5: filter size 50 6: filter size 100...
- Page 20 Module Offset Module ID: Submodule: Slot: Format Cyclical Data: Output Value Range Data Type Unit Description 1…5 Unsigned8 – 0x00: Start command 0x01: Learn offset value 0x03: Reset offset value 0x04: Apply offset 0x05: Reset offset Input Value Range Data Type Unit Description 0x00…0x10...
-
Page 21: Network Settings
9. Network Settings To operate the device in an Ethernet LAN, the device and the remote station, for example a computer, must be located in the same network. The IP-Address of the device is set to the IP-Address 192.168.100.1 and to the subnet mask 255.255.255.0 and standard gateway 192.168.100.254. -
Page 22: Page Layout
10.2. Page layout The website is divided into the following 4 areas: 1. Language selection: The website can be changed from English (default setting) to German, French, Span- ish or Italian via the language selection. 2. Display: On each page, the current display is represented exactly like on the device itself. -
Page 23: Device General
10.3. Device general After establishing the connection, the overview page “Device general” is displayed. Device Name: A unique device name can be freely assigned to each device via the PROFINET control. The device name is also displayed in the first line of the display. If no name is assigned, [offline] is displayed here. -
Page 24: Device Settings
10.4. Device Settings Network Settings By clicking on “Send” the settings are saved. After interruption of the power supply, the network settings are applied. Network Reset In a network reset, the network settings are reset to the factory settings. See chapter “6.2. Default Settings” on page 9. -
Page 25: Measured Value Settings
10.5. Measured Value Settings Filter For functional description of filter see chapter “7.3. Filter” on page 13 . Emitted Light For functional description of transmitted light see chapter “7.4. Laser” on page 13. Sensor Settings Reset In a reset, the Sensor settings are reset to the factory setting. The network settings remain unchanged. For functional description of Sensor settings reset see chapter “7.9. -
Page 26: Maintenance Instructions
• Do not use any solvents or cleaning agents to clean the Sensor, which could damage the device. 12. Proper Disposal wenglor sensoric gmbh does not take back unusable or irreparable products. When disposing of the products, the relevant national regulations for waste disposal apply. - Page 27 This operating manual is only a general description of technical processes whose implementation does not apply to every individual application.
Need help?
Do you have a question about the OY2TA104P0150P and is the answer not in the manual?
Questions and answers