
Related Manuals for Wenglor OPT2015


Summary of Contents for Wenglor OPT2015
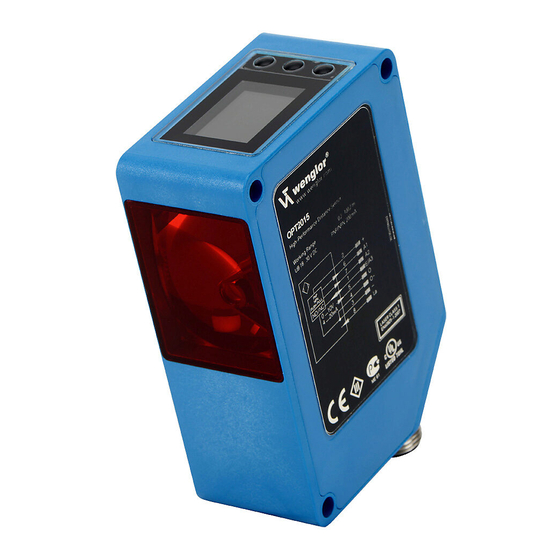
- Page 1 OPT2015 High-performance distance sensor Operating Instructions Available as PDF only Status: 16.08.2018 www.wenglor.com...
-
Page 2: Table Of Contents
Index 1. Proper Use 2. Safety Precautions 2.1. Safety Precautions 2.2. Laser/LED warning 3. EC Declaration of Conformity 4. Technical Data 4.1. Connecting the Sensor 4.2. Housing Dimensions 4.3. The Control Panel 5. Mounting Instructions 6. Initial Start-Up 6.1. Initial Start-Up 6.2. -
Page 4: Proper Use
2.2. Laser/LED warning Laser Class 1 (EN 60825-1) LASER CLASS 1 Observe all applicable standards EN60825-1 and safety precautions. 2007 3. EC Declaration of Conformity The EC declaration of conformity can be found on our website at www.wenglor.com in download area. RoHS... -
Page 5: Technical Data
4. Technical Data Optical Data OPT2015 Working range 0,2…100,2 m Working range analog 0,2…100,2 m Measuring range 100 m Reference reflector/reflector sheet 4 × OPT2030 Linearity 0,05 % Switching hysteresis 13…50 mm Light Source Laser (rot) Wave Length 660 nm Service life (amb. - Page 6 Light Spot Diameter 5 mm < 20 mm < 80 mm < 200 mm Dependence of Hysteresis and Resolution on the Sampling Rate on white (90 % Remission) OPT2015 Selected Default setting for min. Resolution in sampling hysteresis in mm...
-
Page 7: Connecting The Sensor
4.1. Connecting the Sensor Switching laser light off via pin connection: If the “La” pin is open or connected to negative, the laser is on. If positive voltage is applied, the laser is off. Legend Encoder A Platinum measuring resistor Encoder B Supply Voltage + not connected... -
Page 8: Housing Dimensions
Sensor. The Sensor must be protected against mechanical influences. Install the device such that its installation position cannot be inadvertently changed. The wenglor mounting system is recommended for installing the Sensor. Additionally a suiting reflector or reflex foil has to be mounted. -
Page 9: Initial Start-Up
6. Initial Start-Up 6.1. Initial Start-Up Connect the Sensor to supply power (18 to 30 V DC). The display view appears. The Sensor is ready for operation after 2 seconds. The following table provides an overview of typical, addi- tional deviations during the warm-up phase. Time (min.) Deviation (mm) ±10... -
Page 10: Default Settings
6.2. Default Settings OPT2015 A1: Switching output Pin Function A2: Switching output A3: Error output Teach Mode Object Switching threshold 1000 mm Hysteresis 20 mm Window Size 50 mm Outputs PNP/NPN NO/NC ON Delay 0 ms OFF Delay 0 ms... -
Page 11: Functional Overview
7. Functional Overview 1. Run 2. Pin Function 1. Run T Object Switching Output T Backgrnd. 3. A1 Switch 2. Pin Funktion T Window Poti Hysteresis/ Window Size NPN/PNP 4. A2 Switch NO/NC ON Delay OFF Delay Switching Output Impulse 5. -
Page 12: Run
• If necessary, readjust the switching distance with the help Making point Object of the Potentiometer menu item. Hysteresis Breaking point * OPT2015: ( ) + 10 mm Hysteresis Background e. g. conveyor belt... - Page 13 Object Ú The background is suppressed. Background Hysteresis * OPT2015: ( ) + 10 mm e. g. conveyor belt T Window Teach-In a tolerance window A window tolerance is taught in by pressing the T key: • Align the spot to the object.
- Page 14 Designation Function NPN/PNP Configuring the outputs The output is preset to PNP . Pressing the N key sets the output to push-pull. Press- ing the N key again sets the output to NPN. The respective circuit diagram indicates how the output is set: Push-pull NO/NC Configuring the outputs...
-
Page 15: A3 Error /A3 Input
7.4. A3 Error /A3 Input 7.4.1. A3 Error The error output is activated if no light signal is returned to the Sensor. NPN/PNP Configuring the outputs T The error output is set to PNP , push-pull or NPN by pressing the P or the N key. NPN/PNP The respective circuit diagram is displayed. -
Page 16: A1 Analog/Analog
7.5. A1 Analog/Analog The measuring range for the analog output can be feely selected within the specified working range with rising of falling characteristic curve. The adjusted measuring range must have a value of at least 2 % of the total measuring range. Overall measuring range Rising characteristic curve Falling characteristic curve... -
Page 17: Offset
7.6. Offset The function offset serves to change the current measurement value to a certain other value. Here, the switching thresholds and the analog measurement ranges are changed as well. The offset can take place optionally via a menu or externally via Pin A3. Via menu Designation Function... - Page 18 Without Offset equalization: In the diagram, the Sensor measures a distance of 5000 mm. The switching point is located 2000 mm distant, at 7000 mm. Switching Point 5000 mm 7000 mm [Distance measured with a meter ruler(mm)] With application of the offset equalization: Specification offset: 0 mm In the diagram, the Sensor measures a distance of 5000 mm.
-
Page 19: Measure Rate
OFF: Switch transmitted light off Transmitted light is deactivated or activated by pressing the or the key. In case of the OPT2015 the laser diode can be switched off via pin 8, by connecting pin 8 to 24 V. -
Page 20: Run Mode
7.9. Run Mode Which data will be read out to the display as measurement results are selected in the run mode menu. Designation Function Run Mode DispMode: What will appear at the monitor during display mode operation is DispMode selected by pressing the ... -
Page 21: Display
7.10. Display The display can be rotated and brightness can be adjusted with the help of the Display menu. Adjusting the display device Display rotated rotated: The display is rotated 180° by pressing the key. The display can be Intensity returned to its original position by pressing the same key once again. -
Page 22: Reset
7.13. Reset Sensor settings can be returned to their default values with the help of the Reset menu. Default settings are listed in section 6.2. Reset Press All of the selected sensor settings are returned to their default values by pressing the R key. -
Page 23: Maintenance Instructions
• It is advisable to clean the lens and the display, and to check the plug connections at regular intervals. • Do not clean with solvents or cleansers which could damage the device. 9. Proper Disposal wenglor sensoric gmbh does not accept the return of unusable or irreparable products. Respectively valid national waste disposal regulations apply to product disposal.
Need help?
Do you have a question about the OPT2015 and is the answer not in the manual?
Questions and answers