Advertisement
Quick Links
Installation manual / Montageanleitung
ODU2 - splicing version
Content of Assembly Instruction
I.
Required Tools
II.
Required Parts
III. Installation of FiberTray into an ODU2
IV. Mount an ODU2 into a rack
V. Patching FiberTray in an ODU2
I. Required tools:
1.
Screw driver cross recess large
2.
Loose tube cutter 9801.20.C
3.
Wire cutting pliers
4.
Tape measure
Created by: FO R&D
DOC-0000399570 A
uncontrolled copy
www.hubersuhner.com
Inhalt der Montageanleitung
I.
Benötigte Werkzeuge
II.
Benötigte Teile
III. Installation einer FiberTray in einen
Baugruppenträger (ODU2)
IV. Montiere einen Baugruppenträger in einen
Schrank
V. Rangierkabel Verbindungen der
FiberTray im ODU2
I. Benötigtes Werkzeug:
1.
Schraubendreher kreuzschlitz gross
2.
Bündeladerschneider 9801.20.C
3.
Seitenschneider
4.
Massband
1
Advertisement

Related Manuals for HUBER+SUHNER LISA ODU2


Summary of Contents for HUBER+SUHNER LISA ODU2
- Page 1 Installation manual / Montageanleitung ODU2 - splicing version Content of Assembly Instruction Inhalt der Montageanleitung Required Tools Benötigte Werkzeuge Required Parts Benötigte Teile III. Installation of FiberTray into an ODU2 III. Installation einer FiberTray in einen Baugruppenträger (ODU2) IV. Mount an ODU2 into a rack IV.
-
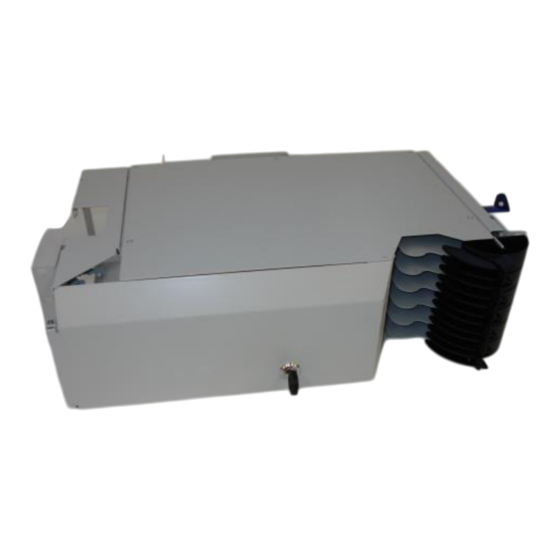
Page 2: Required Parts
Installation manual / Montageanleitung ODU2 - splicing version Benötigte Teile Required parts Picture of an ODU2. Abbildung von einem Baugruppenträger (ODU2). Picture of a FiberTray for splicing. Abbildung von einer FiberTray (Spleissversion). Created by: FO R&D www.hubersuhner.com DOC-0000399570 A uncontrolled copy... - Page 3 Installation manual / Montageanleitung ODU2 - splicing version III. Installation of FiberTray into an ODU2 III. Installation einer FiberTray in einen Baugruppenträger (ODU2) Fit three cable ties to the FiberTray. Montiere drei Kabelbinder an die FiberTray. Run two cable ties in the punched T’s positioned on Fädle zwei Kabelbinder durch die Ausstanzungen auf the ODU’s backside .
- Page 4 Installation manual / Montageanleitung ODU2 - splicing version Remove the cable jacket according the picture. Mark Entferne den Mantel des Kabel gemäss der Abbildung the loose tubes at position M. und markiere die Bündeladern an der Position M. X: cable X: Kabel Y: strength members 0 mm...
- Page 5 Installation manual / Montageanleitung ODU2 - splicing version Cut two conduits over a length of 63 cm with the loose Schneide zwei Schutzrohre auf 63 cm mit dem Bün- tube cutter. deladerschneider zu. run the conduit on the side to the back of the ODU2. Führe die Schutzrohre seitlich auf die Rückseite des Baugruppenträger (ODU2).
- Page 6 Installation manual / Montageanleitung ODU2 - splicing version Finish position of cable and clip. Endposition der Kabel und Klammern. Fixiere die Schutzrohre in der ODU2. Fix the conduits into the ODU2. Created by: FO R&D www.hubersuhner.com DOC-0000399570 A uncontrolled copy...
- Page 7 Installation manual / Montageanleitung ODU2 - splicing version Slide the hinge of the FiberTray into the rails of the Schiebe das Scharnier in die Führungsschienen von ODU2 Unit. der Trägereinheit ein. Pivot the FiberTray down and fix the cable ties so that Kipp die FiberTray nach unten.
- Page 8 Installation manual / Montageanleitung ODU2 - splicing version Feed the loose tube through the cable ties . Fädle die Bündelader durch die Kabelbinder. Attention Achtung Care should be taken not to damage any fibers that are Beachte, dass die Fasern bei diesen Arbeitsschritten exposed during this operation! nicht beschädigt werden! Feed the conduit back into position and fix the cable...
- Page 9 Installation manual / Montageanleitung ODU2 - splicing version Coil the exposed fiber around the mandrel until all of Wickle die exponierten Fasern um den Zylinder des the fiber has been stored neatly in the take-up area. Faserspeichers bis alle Fasern abgelegt sind. Guide the remaining length through the parking posi- Führe die Faserenden durch die Parkposition in den tion into the storage area.
- Page 10 Installation manual / Montageanleitung ODU2 - splicing version Slide back the FiberTray into position until splicing. Schiebe die Spleisskassette zurück in die Parkposition Repeat the procedure with all required FiberTrays until bis gespleisst wird. the ODU2 is fully equipped . Wiederhole die Arbeitsschritte bis alle erforderlichen Spleisskassetten im Baugruppenträger montiert sind.
- Page 11 Installation manual / Montageanleitung ODU2 - splicing version Remove the black mandrels on the fixing position. Entferne die für die Befestigung störenden schwarzen Mount the ODU2 into the rack. Mandrels. Mount the black mandrels back to its position . Befestige den Baugrupenträger (ODU2) in den Schrank.
- Page 12 Installation manual / Montageanleitung ODU2 - splicing version Patching Fiber Tray in an ODU2 Rangierkabel Verbindungen der FiberTray im ODU2 Slide out completely the FiberTray to its end position Ziehe die zu bestückende FiberTray komplett bis zur and fold down. Plug the PatchCord to its needed port Endposition aus der ODU2 heraus und klappe sie nach and guide the cable through the PatchCord Arm (A).
Need help?
Do you have a question about the LISA ODU2 and is the answer not in the manual?
Questions and answers