Table of Contents
Advertisement
Quick Links
Instructions for Use
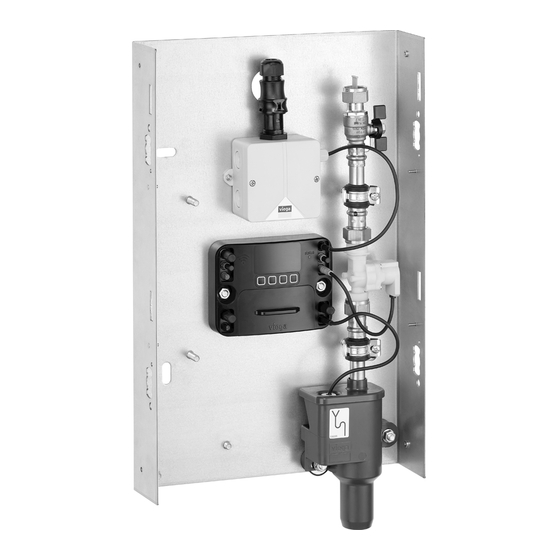
Flushing station with Viega
Hygiene+ technology
for one flushing section, for use in ring and series pipeline instal‐
lation, wall-mounted and concealed installation, and for installa‐
tion in wet and dry construction as well as pre-wall systems
Model
2241.10
Year built (from)
09/2017
INT
Advertisement
Table of Contents

Subscribe to Our Youtube Channel
Related Manuals for Viega 2241.10


Summary of Contents for Viega 2241.10
- Page 1 Instructions for Use Flushing station with Viega Hygiene+ technology for one flushing section, for use in ring and series pipeline instal‐ lation, wall-mounted and concealed installation, and for installa‐ tion in wet and dry construction as well as pre-wall systems...
-
Page 2: Table Of Contents
Connecting the sensor cable 3.3.5 Connecting the flow sensor (optional accesso‐ ries) 3.3.6 Connecting electrical components 3.3.7 Flushing the system 3.3.8 Performing a manual functionality test 3.3.9 Notes on wall construction 3.3.10 Mounting the cover Flushing station with Viega Hygiene+ technology... - Page 3 Log export 3.5.7 Performing software updates 3.5.8 Server mode 3.6 Errors, faults and remedy 3.7 Care and maintenance 3.7.1 Maintenance intervals 3.7.2 Inspection 3.7.3 Perform maintenance 3.8 Accessories and spare parts 3.9 Storage 3.10 Disposal Flushing station with Viega Hygiene+ technology...
-
Page 4: About These Instructions For Use
This restriction does not extend to possible operating instructions. The installation of Viega products must take place in accordance with the general rules of engineering and the Viega instructions for use. -
Page 5: About This Translated Version
German/European directives specified in this manual: The information herein is not binding for other countries and regions; as said above, they should be understood as a recommendation. Flushing station with Viega Hygiene+ technology... -
Page 6: Product Information
Fraunhofer Institut Regulations from section: Mounting conditions Scope / Notice Regulations applicable in Ger‐ many Output times in ring and series VDI 6003 pipeline installations PWH Permitted sealants DIN 30660 Permitted sealants DIN EN 751-2 Flushing station with Viega Hygiene+ technology... - Page 7 Regulations from section: Flushing the system Scope / Notice Regulations applicable in Ger‐ many Flush before leakage test ZVSHK-Merkblatt "Spülen, Desin‐ fizieren und Inbetriebnahme von Information on proper flushing in Trinkwasserinstallationen" drinking water installations Flushing station with Viega Hygiene+ technology...
-
Page 8: Safety Advice
Ensure that there are no persons in the danger zone when a flushing / thermal disinfection is carried out. Flushing station with Viega Hygiene+ technology... - Page 9 Ensure that personal data is processed and used only in compliance with the applicable data protection reg‐ ulations. Flushing station with Viega Hygiene+ technology...
-
Page 10: Intended Use
Regular maintenance is part of running the system properly, see Ä Chapter 3.7.3 „Perform maintenance“ on page 75. Inform the building owner or the operator of the potable water installation of their inspection and maintenance obli‐ gations. Flushing station with Viega Hygiene+ technology... -
Page 11: Product Description
By providing for controlled water exchange, the flushing station helps to ensure that drinking water systems are used as intended. Flushing can be carried out as follows: Start function: pursuant to interval (factory setting) pursuant to time Flushing station with Viega Hygiene+ technology... -
Page 12: Sound Protection
Ä „Regulations from sec‐ tion: Functionality“ on page 6. 2.4.3 Sound protection All components with water contact are mounted on the basic holder system with acoustic insulation. Flushing station with Viega Hygiene+ technology... -
Page 13: Technical Data
The Stuttgart Fraunhofer Institut für Bauphysik tested the flushing sta‐ tion for noise emissions according to the applicable directives when mounted in Viega pre-wall systems, in traditional dry construction, and in solid construction, see Ä „Regulations from section: Sound protec‐... - Page 14 Multi-functional sensor (model: 2241.61 / 2241.62 / 2241.53 / 2241.54) Deviation +/- 1.3°C with 1 m of cable Temperature range -10 °C up to 100 °C Current consumption constant at 2.75 mA Supported operating systems Windows 7 Windows 8.1 Flushing station with Viega Hygiene+ technology...
-
Page 15: Information For Use
Information for use 2.5.1 Installation variants The flushing station is suitable for installation in ring and series pipeline installations. Ring system installation Fig. 2: Example for flushing station PWC in a ring system installation Flushing station with Viega Hygiene+ technology... -
Page 16: Installation Variants
Examples for multi-functional sensor PWC in a series pipeline installa‐ tion. 2.5.2 Installation variants Viega pre-wall installations Viega recommends to use it together with Viega pre-wall systems. Steptec Viegaswift Viega Eco Plus Installation in commercially available pre-wall systems is possible. -
Page 17: Handling
Installation below the backflow level is only permissible if the water is drained by means of a wastewater pump station. Only use DVGW approved sealants in accordance with the appli‐ cable regulations, see Ä „Regulations from section: Mounting condi‐ tions“ on page 6. Flushing station with Viega Hygiene+ technology... -
Page 18: Potential Equalisation
It is the fitter of the electrical system who is responsible for ensuring that the potential equalisation is tested and secured. 3.2.3 Installation dimensions G3/4 10.5 34.5 DN 40 Fig. 5: Dimensions of the flushing station Flushing station with Viega Hygiene+ technology... - Page 19 Handling Fig. 6: Dimensions of the wall-mounting cover Fig. 7: Dimensions concealed-mounting cover Flushing station with Viega Hygiene+ technology...
-
Page 20: Required Accessories
Put the cardboard box in a dry and clean space for interim storage. To give you a better view, an empty base is shown for the following assembly steps. Viega Steptec Use Steptec slot nuts model 8437.90 for assembly. Flushing station with Viega Hygiene+ technology... - Page 21 Viegaswift / Viega Eco Plus The inside dimensions of the base elements Viega Swift (model 8115) and Viega Eco Plus (model 8162.5) are wider than the basic holder system of the flushing station. For this reason, different methods must be used to fasten the two sides of the basic holder system.
- Page 22 Place two washers on each screw and use a nut to hand-tighten them. Be sure to use the second washer so that the nut can be tightened properly. ▶ Align the basic holder system using a spirit level. ▶ Tighten the nut. Flushing station with Viega Hygiene+ technology...
- Page 23 Use suitable fixing material to fasten the basic holder system to the support profile. Further see Ä Chapter 3.3.2 „Connecting the supply and wastewater pipes“ on page 25. Concealing mounting Select the fixing material in accordance with the underground. Flushing station with Viega Hygiene+ technology...
- Page 24 Further see Ä Chapter 3.3.2 „Connecting the supply and wastewater pipes“ on page 25. Wall mounting Select the fixing material in accordance with the underground. ▶ Align the basic holder system using a spirit level. Flushing station with Viega Hygiene+ technology...
-
Page 25: Connecting The Supply And Wastewater Pipes
The general rules of engineering must be observed for the planning, execution, operation and maintenance of pot‐ able water installations, see Ä „Regulations from section: Connecting the supply and wastewater pipes“ on page 7. Flushing station with Viega Hygiene+ technology... -
Page 26: Mounting The Multi-Functional Sensor
The connections must be properly made using wire end ferrules, plastic branches, and cable terminals. Viega recommends to install the connection cables in a protective pipe (model 2004). Flushing station with Viega Hygiene+ technology... - Page 27 ▶ Tighten the multi-functional sensor with a fork spanner. The sensors are supplied with 1 m length of 0.34 mm cables. Exten‐ sions are possible, see Ä Chapter 2.4.4 „Technical data“ on page 13. Flushing station with Viega Hygiene+ technology...
-
Page 28: Connecting The Sensor Cable
Ensure that there is no mechanical load on the plug contacts. You have connected the multi-functional sensor. ▷ 3.3.5 Connecting the flow sensor (optional accessories) ▶ Remove the drainpipe. Flushing station with Viega Hygiene+ technology... -
Page 29: Connecting Electrical Components
To connect the external alarm sensor, refer to Ä „Connecting the external sensor“ on page 33. 3.3.6 Connecting electrical components The device has the following electrical components: Mains plug for power supply Control of the flushing station Flushing station with Viega Hygiene+ technology... - Page 30 De-energise the connection cables before connecting the mains plug. NOTICE! The power pack is intended exclusively for use in closed rooms with the flushing stations models 2241.10 and 2241.20. Fig. 9: Protected zones According to the applicable regulations, installation in the protected zones 0 and 1 of shower rooms and bathrooms is not permitted, see Ä...
- Page 31 You do not need a PE conductor. ▶ Combine the halves of the connector. ▶ Hand-tighten the strain clamp. ▶ Return the plug to the power pack. You have connected the mains plug. ▷ Flushing station with Viega Hygiene+ technology...
- Page 32 Cable terminal / cable entry 11 - Connection for backflow sensor flushing section (red) 12 - Connection for flow sensor flushing section (red) 13 - Terminal with potential-free contacts for alarm devices and reset Flushing station with Viega Hygiene+ technology...
- Page 33 Connect the white cable to terminal 5 for a light signal. ▶ Or connect the red cable to terminal 5 for a light and sound signal. ▶ Connect the black cable to terminal 6. Flushing station with Viega Hygiene+ technology...
-
Page 34: Flushing The System
To start the functionality test, either press the button at the control of the flushing station or execute the respective menu of the Web applica‐ tion. The following components are queried: Magnet valve Backflow sensor Multi-functional sensor (if enabled) Flow sensor (if enabled) Battery Flushing station with Viega Hygiene+ technology... -
Page 35: Notes On Wall Construction
It fulfills the following functions during the construction phase: It protects the flushing station from damage and dirt. The next technical crews (e.g. dry construction, tilers) must work up to the outer edges of the protective cardboard box. Flushing station with Viega Hygiene+ technology... - Page 36 The wall construction from the front edge of the basic holder system until the upper edge of the finished wall must have a maximum thickness of 50 mm. Otherwise, professional mounting of the concealed-mounting cover will be impossible. Flushing station with Viega Hygiene+ technology...
-
Page 37: Mounting The Cover
Screw the wing nuts and washers on the threaded bolts at the side. ▶ Insert the frame and tighten the wing nuts. ▶ Insert the door. If required, replace the screw cap by the cylinder lock model 1294.9. Flushing station with Viega Hygiene+ technology... - Page 38 Screw in the fixing screws and the washers from the outside into the threads at the side. ▶ Cut the bars pursuant to the pipeline dimension and pipe insulation. ▶ Break off the tabs. Flushing station with Viega Hygiene+ technology...
-
Page 39: Commissioning
Ä „Regulations from section: Leakage test“ on page 8. Carry out this test on a system that is finished but not covered yet. The result must be documented. Flushing station with Viega Hygiene+ technology... -
Page 40: Configuring The Control
▶ Use the arrow keys to enter the registration code. ▶ Press ✓ or X to move from digit to digit. ▶ Press ✓ to confirm the entry of the registration code. Flushing station with Viega Hygiene+ technology... -
Page 41: Configuring The Flushing Station
If a flushing is scheduled during a cutoff time, it will be performed after the end of the cutoff time. The interval will start anew at this point in time. Flushing station with Viega Hygiene+ technology... - Page 42 The time of day is the time for the first flushing pursuant to this start condition. Within the interval, the target temperature is compared with the current temperature; flushing is performed if the temperature is in the critical range. Flushing station with Viega Hygiene+ technology...
- Page 43 The flushing station goes to warning status, the status LED emits yellow light. In this case, Viega recommends to adjust the flushing parameters. However, the next flushings are still performed at the set values.
- Page 44 Volume per metre of pipe [litre/m] 16 x 2.2 20 x 2.8 Copper pipes d x s [mm] Volume per metre of pipe [l/m] 12 x 0.8 12 x 1.0 15 x 1.0 18 x 1.0 22 x 1.0 Flushing station with Viega Hygiene+ technology...
-
Page 45: Control
After five minutes of non-use of the control, the system will go to the standby screen. After five more minutes without entry, the display will switch off. To re-enable the display, press any key. [FUNCTIONALITY TEST] Start the functionality test at once. [CONFIRM] Flushing station with Viega Hygiene+ technology... - Page 46 SETTINGS] , [FLUSHING SETTINGS] , and [COMPONENTS] . Under [COMPONENTS] , the currently connected flow and multi-func‐ tional sensors are shown. Component deactivation is not possible via the control but only via the web application. Flushing station with Viega Hygiene+ technology...
- Page 47 After confirming the cutoff time, the current flush actuation is set to [INTERVAL] mode; from the current time, the flushings will be per‐ formed with the previously set values. The start point of the interval is the current point in time. Flushing station with Viega Hygiene+ technology...
- Page 48 Thus, the trade professional on site can check whether they have been properly installed. If the functionality test is started via the Web application, the function of the indi‐ vidual components is shown by means of a status indication. Flushing station with Viega Hygiene+ technology...
-
Page 49: Operation Via Web Application
WIFI of the flushing station on and off. When the blue LED on the left side of the display emits light, the WIFI is switched on, and a mobile end device can be connected to the flushing station. Flushing station with Viega Hygiene+ technology... - Page 50 Setting date and time When the station is connected with the Internet, the time will be updated automatically. If it is not connected with the Internet, set the time of the control manually via the display. Flushing station with Viega Hygiene+ technology...
- Page 51 Set the check marks under [Status / component] to enable the external alarm or the operation via the BMS module. If the multi-functional sensor is essential for the current flushing program, deselection of the sensor is not pos‐ sible. Flushing station with Viega Hygiene+ technology...
- Page 52 Set the target temperature dependent on the set water section. Set the intervals for flushing the system. Cutoff times are taken into consideration. This start condition is only available if the multi-functional sensor has been activated. Flushing station with Viega Hygiene+ technology...
- Page 53 If, after the actual temperature has exceeded the disinfection tempera‐ ture three times, this temperature is not maintained over the whole duration of disinfection, a respective entry is written to the log. Suc‐ cessful disinfection is documented as well. Flushing station with Viega Hygiene+ technology...
- Page 54 Under [Temperature values] , the temperature curve for the last 24 hours is indicated. Each day at midnight, a log entry with the values for this day is generated. The temperature value measured at every full hour is indicated and logged. Flushing station with Viega Hygiene+ technology...
- Page 55 The data of the test flushing are deleted when you exit the screen. Perform the .csv export before adjusting the stop condition. Functionality test Fig. 14: Start function test For a functionality test, only the connected and enabled components are shown. Flushing station with Viega Hygiene+ technology...
- Page 56 When you confirm that the maintenance has taken place, a new mainte‐ nance date is set (current date plus 1 year), and a log entry is generated. When connecting the flushing station to the Viega server, a service for e-mail alerts can be set up which will remind you automatically that maintenance is due soon.
- Page 57 Click on a log entry to see the details further down on the screen. The results are shown in table form in the menu. If you download ▷ a .csv file, it will contain only the contents defined by the previ‐ ously set filter. Flushing station with Viega Hygiene+ technology...
- Page 58 Ä Chapter 3.5.7 „Performing software updates“ on page 66. Information Under [Information] , you will find the contact data of the Viega Service Center and the disclaimer. Password Under [Password] , you can define a password to restrict the access via web application to the flushing station to specific users only.
-
Page 59: Troubleshooting For The Web Application
To delete browser data in Safari, use the key combination cmd + alt + e to open the respective dialogue. Possible errors Website does not react ▶ Check whether the WIFI connection to the control is established. Flushing station with Viega Hygiene+ technology... -
Page 60: Logs
Temperature measurement * Green Date / time updated * Green Maintenance completed Green Initial configuration completed Green Configuration changed * Green Test flushing * Green Weekly functional flushing * Green Firmware update completed Green Flushing station with Viega Hygiene+ technology... - Page 61 Yellow reset * Fault "Flow sensor defective" acknowledged * Fault "Flow sensor defective" acknowl‐ Yellow edged. Initial commissioning cancelled * Initial commissioning incomplete. Yellow Disinfection cancelled * Disinfection flushing was not completed Yellow successfully. Flushing station with Viega Hygiene+ technology...
- Page 62 In the emergency program, the flushing station will perform flushing with a volume of 25 litres each in a 72-hour interval, taking the cutoff time from 22:00 to 6:00 o'clock into consideration. Flushing station with Viega Hygiene+ technology...
-
Page 63: Log Export
After selecting the filter settings, press [REFRESH] . The name of the .csv is generated automatically as follows: Name_Seri‐ alNumber_YYMMDD_HHMMSS_Log.csv. Day and time are those of the time of the export. Flushing station with Viega Hygiene+ technology... - Page 64 Send the file. Saving the file to iOS devices is possible to a limited extent only. If the devices are linked to an e-mail account, the file can be sent attached to an e-mail. Flushing station with Viega Hygiene+ technology...
- Page 65 Editing and evaluating log data To edit the data for statistical evaluation, you need to reformat the cells. The cells are output formatted as text for increased compatibility with various Office programs. Flushing station with Viega Hygiene+ technology...
-
Page 66: Performing Software Updates
3.5.7 Performing software updates All flushing stations must be registered with Viega for initial commis‐ sioning. Flushing stations connected with the server will automatically alert the user in the Web application of any updates. The software version is indi‐... - Page 67 Successful completion of the update is announced by a respec‐ tive message. With iOS devices (iPhone, iPad), updates are generally not possible as the operating system does not allow you to save files to these end devices. Flushing station with Viega Hygiene+ technology...
-
Page 68: Server Mode
Before the flushing station can be used in server mode, the user must register with the server. Register by means of the online form under spuelstation.viega.de. Click [Registration] to see the following menu: Registration: Fill in the registration form. The required information is marked with an asterisk (*). -
Page 69: Errors, Faults And Remedy
If the cause of the fault has not been remedied and no successful functionality test has been per‐ formed, the status LED continues to emit yellow light. ▶ Press the Acknowledge button. ▷ The external alarms are switched off. Flushing station with Viega Hygiene+ technology... - Page 70 Flow limiter not mounted Test flow limiter Ä „Maintenance of the odour trap magnet valve“ on page 75 Odour trap mounted improperly Check the odour trap Ä Chapter 3.7.3 „Per‐ form maintenance“ on page 75 Flushing station with Viega Hygiene+ technology...
- Page 71 Check whether the boiler temperature is suffi‐ was not successful thermal disinfection cient to supply water at the set temperature to the flushing station. If necessary, perform a test flushing to monitor the temperature pro‐ file during thermal disinfection. Flushing station with Viega Hygiene+ technology...
- Page 72 Damage to magnet valve / flow limiter due to incorrect mounting. Do not mount the magnet valve or the flow limiter against the direction of flow. ▶ Close ball valve before the magnet valve. Flushing station with Viega Hygiene+ technology...
- Page 73 Replace multi-functional sensor NOTICE! Damage to multi-functional sensor due to incorrect mounting. Do not subject the plug contacts to any mechanical strain. The replacement of a screw-in piece is described below as an example. Flushing station with Viega Hygiene+ technology...
-
Page 74: Care And Maintenance
Inspection must be carried out by an instructed person. Inspection comprises: Functionality test pursuant to Ä Chapter 3.3.8 „Performing a manual functionality test“ on page 34 Visual inspection of the flushing station and the cable connections Flushing station with Viega Hygiene+ technology... -
Page 75: Perform Maintenance
34. ▶ Via the display on site or via the web application, click [OK] to con‐ firm that maintenance has been carried out. Maintenance of the magnet valve ▶ Close the ball valve. Flushing station with Viega Hygiene+ technology... - Page 76 Re-mount the magnet valve with new seals from the spare part set. NOTICE! Damage to flow limiter due to incorrect mounting. Do not mount the magnet valve or flow limiter against the direction of flow. Flushing station with Viega Hygiene+ technology...
- Page 77 Use a multi-meter to check the electrical continuity at the backflow sensor: Backflow sensor in rest position = electrical continuity Backflow sensor in trigger position = no electrical continuity ▶ Put the cover back on the odour trap. ▶ Re-open the ball valve. Flushing station with Viega Hygiene+ technology...
-
Page 78: Accessories And Spare Parts
Protective cover for concealed mounting 2241.90 689 554 Installation depth 12.5 to 50 mm Protective cover for wall-mounted assembly 2241.91 689 551 Extension cable flushing section (blue) to connect the multi-functional 2241.95 692 612 sensor, length 1 m Flushing station with Viega Hygiene+ technology... -
Page 79: Storage
Electronic components and batteries must not be put in the domestic waste but must be disposed of appropriately in conformity with the applicable directives, see Ä „Regulations from section: Disposal“ on page 8. Flushing station with Viega Hygiene+ technology... - Page 80 Viega Technology GmbH & Co. KG service-technik@viega.de viega.com INT • 2019-10 • VPN180686...
Need help?
Do you have a question about the 2241.10 and is the answer not in the manual?
Questions and answers