Advertisement
Quick Links
Product Instructions
Viega PureFlow Press by
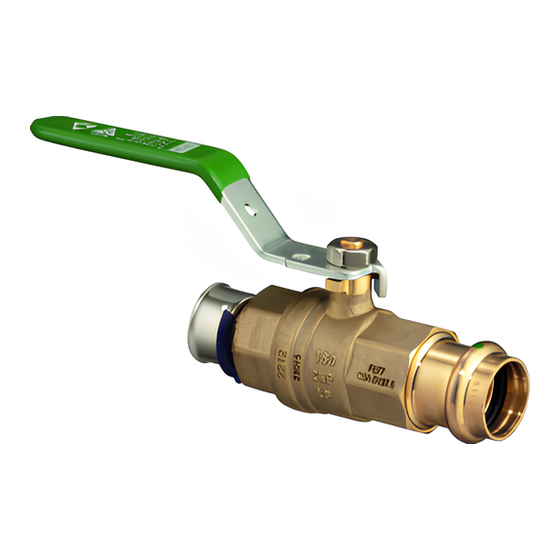
ProPress Ball Valve
Model 2882.1ZL
1
2
7
8
13
14
20
19
EN
Viega PureFlow Press by ProPress
Ball Valve
Viega products are designed to be installed by
licensed and trained plumbing and mechanical
professionals who are familiar with Viega
products and their installation. Installation by non-
professionals may void Viega LLC's warranty.
DANGER!
Read and understand all instructions for
installing PureFlow and ProPress Press
fittings. Failure to follow all instructions may result in
extensive property damage, serious injury, or death.
Viega LLC
585 Interlocken Blvd.
Broomfield, CO 80021
Phone (800) 976-9819
www.viega.us
3
4
9
10
15
16
21
6
22
Making a PureFlow Connection
Square off tubing to proper length. Uneven, jagged, or
1
irregular cuts will produce unsatisfactory connections.
Insert PureFlow valve into tubing and engage fully.
2
Ensure full tubing insertion at view holes in valve. Full
3
insertion means tubing must be completely visible in
at least two view holes and partially visible in the one.
If using hand tools for the PureFlow
connection, continue with steps 4 to 8. If
using power tools skip to steps 9 to 12.
Pressing with a Hand Tool
For the 1" tool, open the tool handles fully (thumb
4
grip is available to maintain open jaw). Then close
tool jaws to engage ratchet (ensure that thumb
grip is returned fully forward before closing jaws).
EN
Product Instructions
Viega PureFlow Press by ProPess
Ball Valve
This document is subject to updates. For the most current Viega
technical literature please visit www.viega.us.
PI-PF 531222 0424 PureFlow Press x ProPress Ball Valve
5
6
11
12
6
17
18
Position the PureFlow press tool perpendicular over the
5
press sleeve, resting it against the tool locator ring. Close tool
jaws to engage ratchet (ensure that thumb grip is returned
fully forward before closing jaws). Make sure the PureFlow
press tool is properly aligned (see step 7 if it is not).
The tool locator ring must be in the factory
installed position while making a press to
ensure a consistent leak-proof connection.
It may be necessary to rotate the tool locator ring
to avoid interference between the ring and tool.
Close handles, using trigger to reduce grip span if desired.
6
If the PureFlow press tool is not properly aligned
7
with the locator ring, use the emergency release
(using a screw driver to turn the emergency release)
to open the press tool. Once released, align the
PureFlow press tool properly and go back to step 5.
WARNING!
The connection is not leak-proof when
the tool has been opened by emergency
release. The tool locator ring must be present to
ensure a proper PureFlow Press connection.
Extend the PureFlow press tool handle and
8
continue ratcheting until automatic tool release
occurs at the proper compression force.
CAUTION!
Do not press twice.
Advertisement

Related Manuals for Viega PureFlow Press by ProPress Ball Valve


Summary of Contents for Viega PureFlow Press by ProPress Ball Valve
- Page 1 Product Instructions Viega PureFlow Press by ProPess Product Instructions Ball Valve Viega PureFlow Press by This document is subject to updates. For the most current Viega technical literature please visit www.viega.us. ProPress Ball Valve Viega LLC 585 Interlocken Blvd. Broomfield, CO 80021 Phone (800) 976-9819 www.viega.us...
- Page 2 Once the assembly is completed, it is recommended that the depth marking still be visible. Insert appropriate Viega ProPress jaw (2) into the press tool and push in holding pin (1) until it locks in place. Open the jaw and place at right angles on the valve.
Need help?
Do you have a question about the PureFlow Press by ProPress Ball Valve and is the answer not in the manual?
Questions and answers