
Related Manuals for Viega 8502


Summary of Contents for Viega 8502
- Page 1 3H concealed cistern Instructions for Use for floor-standing WC, walling in and around, compatible with all WC flush plates for Prevista Model Year built: 8502 from 09/2018 en_INT...
- Page 2 3H concealed cistern 2 from 20...
-
Page 3: Table Of Contents
Table of contents Table of contents About these instructions for use Target groups Labelling of notes About this translated version Product information Standards and regulations Intended use 2.2.1 Areas of use Product description 2.3.1 Overview 2.3.2 Technical data Handling Assembly information 3.1.1 Installation dimensions Assembly... -
Page 4: About These Instructions For Use
This restriction does not extend to possible operating instructions. The installation of Viega products must take place in accordance with the general rules of engineering and the Viega instructions for use. -
Page 5: About This Translated Version
About these instructions for use About this translated version This instruction for use contains important information about the choice of product or system, assembly and commissioning as well as intended use and, if required, maintenance measures. The information about the products, their properties and application technology are based on the current standards in Europe (e.g. -
Page 6: Product Information
Product information 2 Product information Standards and regulations The following standards and regulations apply to Germany / Europe and are provided as a support feature. Regulations from section: Fields of application Scope / Notice Regulations applicable in Ger‐ many Specifications for installations EN 806-2 inside buildings conveying water for human consumption... -
Page 7: Product Description
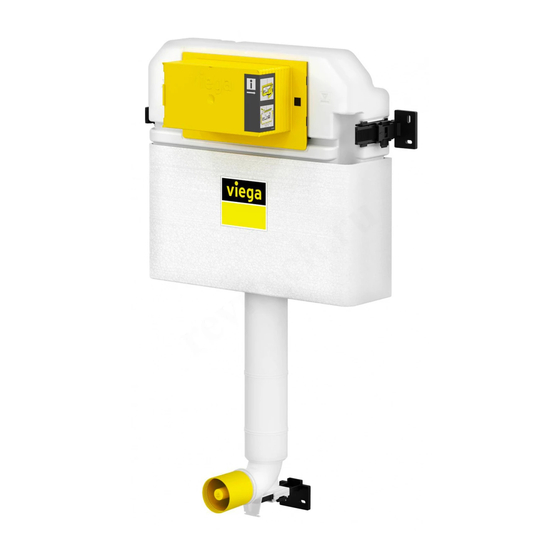
Product information Product description 2.3.1 Overview Fig. 1: Components 3H concealed cistern fixing material dowels and screws flushing pipe Protective plug Revision shaft cover for the cistern Corner valve 2.3.2 Technical data The product has the following technical data: Pre-assembled R½... -
Page 8: Handling
Handling 3 Handling Assembly information 3.1.1 Installation dimensions Fig. 2: Dimensional drawing 1 3H concealed cistern 8 from 20... - Page 9 Handling Fig. 3: Dimensional drawing 2 3H concealed cistern 9 from 20...
-
Page 10: Assembly
Handling Assembly 3.2.1 Mounting concealed cisterns Break the locking clips off the wall mountings. Push the wall mountings into the mounting brackets. Insert the locking clips. Insert the holder into the mounting bracket for the drain elbow. 3H concealed cistern 10 from 20... - Page 11 Handling Grease the flushing pipe. Insert the flushing pipe. Check the seal is located. Adjust the construction height of the concealed cistern in accord‐ ance with the on-site marking of the upper edge of the finished floor. Mark the fixing points. Drill the holes.
- Page 12 Handling Mounting in the wooden support profile Cut out recesses for the drain elbow and the flush plate in the pre- wall finish. Align the concealed cistern on the pre-wall finish. Tighten the concealed cistern via the mounting brackets. ð The concealed cistern is fastened. 3H concealed cistern 12 from 20...
-
Page 13: Connecting Concealed Cistern
Handling 3.2.2 Connecting concealed cistern Turn the cover plate lock 90° in anti-clockwise direction. Remove the cover plate. Place the press connector onto the water supply. Press the connection. Seal the threaded connectors of the corner valve. Screw the corner valve into the thread side of the connector. 3H concealed cistern 13 from 20... - Page 14 Handling Remove the plug. Insert the corner valve into the cistern. INFO! Observe the proper fit of the corner valve. Use the lock nuts to screw the corner valve and the cistern to each other. Remove the protective cap from the water supply hose. Screw the water supply hose and the corner valve to each other.
- Page 15 Handling Turn the cover plate lock by 90° in a clockwise direction. Place the revision shaft on the cover plate. To remove the revision shaft, press in the fixing clips at the side. 3H concealed cistern 15 from 20...
-
Page 16: Setting Up And Bricking In The Concealed Cistern
Handling 3.2.3 Setting up and bricking in the concealed cistern Fit the protective plug of the flushing pipe. Brick in the concealed cistern. NOTICE! Do not load the concealed cistern. 3H concealed cistern 16 from 20... - Page 17 Handling The wall construction must be at least 10 mm. Tile the concealed cistern. 3H concealed cistern 17 from 20...
-
Page 18: Setting The Flush Volume
Handling 3.2.4 Setting the flush volume Requirements: The cistern is freely accessible. The water supply has been shut off. The ceramic has been mounted. Fold the tabs forward. Lift the drain valve. Remove the drain valve through the revision opening. 3H concealed cistern 18 from 20... - Page 19 Handling Set the large flush volume at the drain valve. Set the small flush volume at the drain valve. 3H concealed cistern 19 from 20...
-
Page 20: Cleaning And Maintenance
Handling Setting the flush flow Requirements: The drain valve has been dismounted. The flushing throttle has been removed. Unlock the flushing throttle. Set the flush flow at the throttle. Lock the flushing throttle. Cleaning and maintenance Cleaning and maintenance of the concealed cistern The concealed cistern is constantly under mechanical, chemical, and physical stress.
Need help?
Do you have a question about the 8502 and is the answer not in the manual?
Questions and answers