Advertisement
Quick Links
Product Instructions
Viega ProPress
1/2" to 4"
®
1
2
6
8a
7
9b
9c
EN
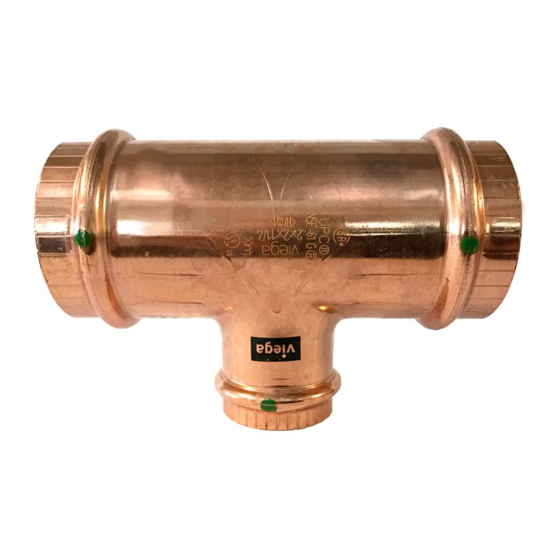
Viega ProPress ½" to 4" Fittings
1/2" to 2" Fittings are for ½" to 2" Hard Copper
Tubing and ½" to 1¼" Soft Copper Tubing. 21/2" to 4"
Fittings are for Hard Copper Tubing only.
Viega products are designed to be installed
by licensed and trained plumbing and
mechanical professionals who are familiar with
Viega products and their installation. Installation by
non-professionals may void Viega LLC's warranty.
DANGER!
Read and understand all instructions for
installing Viega ProPress fittings. Failure
to follow all instructions may result in extensive
property damage, serious injury, or death.
Cut copper tube square using displacement-type
1
cutter or fine-toothed saw.
Cut tube a minimum of 4" away from the contact
2
area of the vise to prevent possible damage to the
tubing in the press area.
Remove burr from inside and outside of the
3
tube and prep to proper insertion depth using a
preparation tool or fine-grit sandpaper.
Check the sealing element for correct fit. Do not
4
use oils or lubricants.
Viega LLC
585 Interlocken Blvd.
Broomfield, CO 80021
Phone (800) 976-9819
www.viega.us
3
4
8b
8c
9d
For applications requiring a different
sealing elements, remove the factory-
installed sealing element and replace with
the applicable sealing element. See
Sealing Elements Product
Instructions.
Mark proper insertion depth as indicated by the Viega
5
ProPress Insertion Depth Chart. Improper insertion depth
may result in improper seal. It is recommended that the
depth marking be visible on the completed assembly.
Viega ProPress Insertion Depth Chart
Tube Size 1/2" 3/ 4 " 1" 11/4" 11/2"
Insertion
3/ 4 " 7/8" 7/8" 1" 17/16" 19/16" 111/16" 115/16" 23/ 8 "
Depth
Copper tube must be free of surface
imperfections, including metal stamped print
lines, before a ProPress valve is installed.
Refer to the following chart for minimum distance
6
between fittings. To ensure a correct press, a
minimum distance between press fittings must be
maintained. Failure to provide this distance may
result in an improper seal.
EN
Product Instructions
Viega ProPress 1/2" to 4"
This document is subject to updates. For the most current Viega
technical literature please visit www.viega.us.
5
8d
Tube Diameter (in)
While turning slightly, slide fitting onto the tube to the
7
marked depth. End of tube must contact stop. Once
the assembly is completed, it is recommended that
the depth marking still be visible.
Changing
Warning!
Keep extremities and foreign objects away
from press tool during pressing operation
to prevent injury or incomplete press.
Pressing 1/2" to 2" Fittings
Insert appropriate Viega ProPress jaw (2) into the press
8a
tool and push in, holding pin (1) until it locks in place.
2"
21/2"
3"
4"
Open the jaw and place at right angle on the fitting.
8b
Visually check insertion depth using mark on tubing.
Hold trigger on press tool until press jaws have
8c
fully engaged the fitting. Jaws will automatically
release after a full press is made.
After pressing, open the jaw and remove the press tool.
8d
Pressing 21/2" to 4" Fittings
ProPress 2½" to 4" connections must be performed
9a
with rings that are compatible. Do not mix actuators
and rings from different manufacturers. Do not use
rings intended for 2½" to 4" bronze fittings. Use of
incompatible rings will result in an improper connection.
PI-PP 531438 1123 ProPress 1/2 to 4
6
d
minimum
distance
9a
d (in)
d (mm)
½
0
¾
0
1
0
1¼
7/16
1½
5/ 8
2
3/ 4
2½
5/ 8
3
5/ 8
4
5/ 8
0
0
0
10
15
20
15
15
15
Advertisement

Related Manuals for Viega ProPress


Summary of Contents for Viega ProPress
- Page 1 Product Instructions Viega ProPress 1/2" to 4" Product Instructions This document is subject to updates. For the most current Viega Viega ProPress 1/2" to 4" technical literature please visit www.viega.us. ® Viega LLC 585 Interlocken Blvd. Broomfield, CO 80021 Phone (800) 976-9819 www.viega.us...
- Page 2 Open XL-C ring and place at right angles on the fitting. XL-C ring must be engaged on the fitting bead. Check insertion depth. With V2 actuator inserted into the tool, open the V2 actuator and connect V2 actuator to the XL-C ring. Hold the trigger until the V2 actuator has fully engaged the XL-C ring.
Need help?
Do you have a question about the ProPress and is the answer not in the manual?
Questions and answers