Table of Contents
Advertisement
Advertisement
Table of Contents

Related Manuals for Atlas BP8000


Summary of Contents for Atlas BP8000
- Page 2 Revised 9/18/2018 Read this entire manual before operation begins. Record below the following information which is located on the serial number data plate. Serial No. Model No. Date of Installation...
-
Page 3: Table Of Contents
Contents Specifi cations ... . . 4 Installation Requirements ..6 Steps Of Installation ..8 Test Run . -
Page 4: Specifi Cations
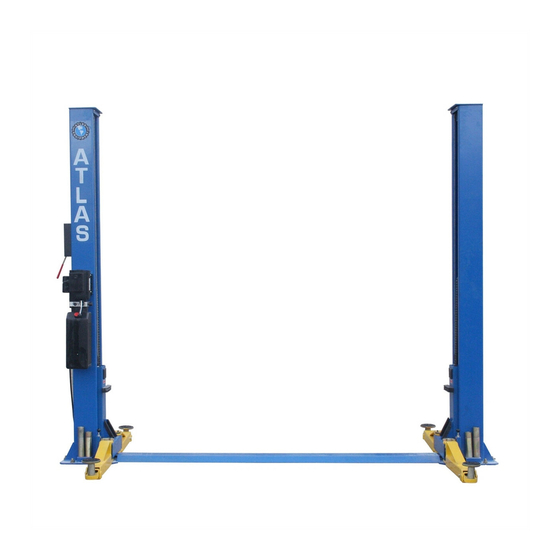
Specifi cations Floorplate Chain-Drive Model Features Model BP8000 (See Fig. 1) • Compact design • Dual hydraulic cylinders designed and made on ANSI standards, utilizing NOK oil seals in cylinders. • Self- lubricating UHMW Polyethylene sliders and bronze bushings • Single-point safety release, and dual lock safety system •... - Page 5 Arm Swing View Fig. 2 BP8000 Specifications...
-
Page 6: Installation Requirements
Carpenter’s Chalk Hammer Screw Drivers Level Bar Tape Measure (25ft) Crescent Wrench (12”) Pliers Ratchet Spanner With Socket (28#) Allen Head Wrench (6#) Wrench set Vise Grips (10#, 13#, 14#, 15#, 17#, 19#, 24#, 27#) Fig. 3 BP8000 Installation Requirements... - Page 7 2. Concrete must be in good condition and must have a test strength 3,000 psi (210kg/cm²) minimum. 3. Floors must be level and no cracks. Fig. 4 Power Supply The capacity of power must be 3 HP minimum. The electrical wire must be a minimum of 10 gauge. BP8000 Installation Requirements...
-
Page 8: Steps Of Installation
Steps Of Installation A. Location of Installation Check the installation location (concrete, layout, space size etc.) so it is suitable for lift installation. B. Use A Carpenter’s Chalk Line To Establish Installation Layout Of Base Plate Fig. 5 BP8000 Steps Of Installation... - Page 9 Fig. 7 Parts box Shipment Parts list Serial No. Floor cover 3. Loosen the screws of the upper package stand, take off the upper column and remove the package stand. BP8000 Steps Of Installation...
- Page 10 4. Move aside the parts and check the parts according to the shipment parts list. Fig. 12: Parts in Fig. 8 the parts box (77) 5. Open the carton of parts and check the parts according to parts box list Model BP8000 Fig. 9 BP8000 Steps Of Installation...
- Page 11 Lay down two posts on the installation site parallel, position the Power side post according to the actual installation environment. Power side column Car-in direction Offside column Assemble top plate using M10*35 hex bolt with nut and lock washer Fig. 10 BP8000 Steps Of Installation...
- Page 12 Pull out cable Fig. 11 2. Push the carriages to the bottom of the columns. Fig. 12 BP8000 Steps Of Installation...
- Page 13 F. Position Columns Check the columns are plumb with level bar, and adjusting with the shims if the columns are not vertical. Model BP8000: Appx. 109 ½” Work Smart not Hard No need to measure. Use the base plate as a distance gauge.
- Page 14 2. Use a hammer drill with a ¾” (19mm) masonry bit and drill all the anchor holes. Install the anchor bolts with a hammer. Tighten the Anchor Bolts between 85 and 110 foot pounds. Fig. 15 BP8000 Steps Of Installation...
- Page 15 H. Lift The Carriages Up By Hand And Rest Them On The First Set Of Locks Fig. 16 BP8000 Steps Of Installation...
- Page 16 I. Install Cable The fi tting of cable passes through the hole on the carriages and is screwed with the two cable nuts. Fig. 17 BP8000 Steps Of Installation...
- Page 17 J. Oil Hose Assembly Fig. 18 BP8000 Steps Of Installation...
- Page 18 Tighten all the hydraulic fi ttings, and fi ll the reservoir with hydraulic oil (Appx. 3 gallons) Note: Use AW32 or AW46 series hydraulic oil Locking the nut using 19# ratchet spanner Fix the oil hose by retainer. Fig. 19 BP8000 Steps Of Installation...
- Page 19 L. Install Safety Device And Safety Cable NOTE: 1. Assemble safety cable from offside safety assembly. 2. Pay attention to the connecting direction of safety cable. View A Safety cable connecting direction View B Fig. 20 BP8000 Steps Of Installation...
- Page 20 M. Assemble Floor Cover And Protective Rubber Sets Protective rubber sets Floor Cover Fig. 21 N. Install Lifting Arms And Adjust The Arm Locks 1. Install the lifting arms Snap Ring Fig. 22 BP8000 Steps Of Installation...
- Page 21 3. Adjust the arm lock. Follow the arrow direction. Arm lock Fig. 24 4. Adjust the teeth of arm lock assembly. Make it mesh with the gear on the lifting arm. Tighten the hex bolts on the arm lock assembly. Fig. 25 BP8000 Steps Of Installation...
- Page 22 O. Install Electrical System Connect the power source as illustrated on the power unit data plate. Note: For operational safety, the electrical wiring must have adequate ground. Atlas Single Phase Motor Single phase Fig. 26 BP8000 Steps Of Installation...
- Page 23 Switch (OS) Terminal 4 Relay Terminal (RT) 7. One wire of Safety Interrupt Switch (SS1) to Operating Switch (OS) Terminal 4 8. One wire of Safety Interrupt Switch (SS2) to Relay Terminal (RT) Installing Safety Interrupt Switch BP8000 Steps Of Installation...
-
Page 24: Test Run
Loosen the jam nut on the higher carriage synchronizing cable and tighten the tension nut until the synchronizing cable has the same tension as the other synchronizing cable. Tighten the jam nut and safety cable. BP8000 Test Run... - Page 25 Fig. 28 Lock the left The right carriage to let carriage and the right carriage arms are higher come down as than the left high as the left Fig. 29 BP8000 Test Run...
- Page 26 Make sure the safety device functions properly. 3. Adjust the lower speed (Only for ATLAS power unit) You can adjust the lowering speed of the lift if needed. Loosen the locking nut on the Throttle Valve and turn the Throttle Valve clockwise to decrease the lowering speed or counterclockwise to increase the lowering speed.
- Page 27 Make sure the lift can raise and lower at the same time. Make sure the safety device can lock and release at the same time. Run the lift to the top completely. Fig. 31 Hydraulic System BP8000 Test Run...
-
Page 28: Operation Instructions
3. Open the arms and position them to the shortest length; 4. Drive the vehicle away. 5. Turn off the power. BP8000 Operation Instructions... -
Page 29: Maintenance Schedule
2. Check and adjust as necessary the equalizing tension of the cables to insure level lifting. 3. Check columns for plumb. 4. Check Rubber Pads and replace as necessary. 5. Check Safety locks for proper operation. BP8000 Maintenance Schedule... -
Page 30: Troubleshooting
1. Safety device is in active. 1. Release the safeties 2. Release valve is damaged 2. Repair or replace Lift cannot lower 3. Safety cable broken 3. Replace 4. Oil system is jammed 4. Clean the oil system BP8000 Troubleshooting... -
Page 31: Exploded View
Exploded View Model BP8000 Car-in direction Fig. 32 BP8000 Exploded View... - Page 32 Cylinders Fig. 33 ATLAS power unit, 220V, 50/60HZ, Single phase (With ETL certifi cate) Fig. 34 BP8000 Exploded View...
- Page 33 Illustration of hydraulic power unit Fig. 35 BP8000 Exploded View...
-
Page 34: Parts Lists
Power side safety lock 209012 Hair pin 203015 Safety block (Main) 209003 Hex bolt 209004 Rubber ring 209005 Self locking nut 205002 Floor cover 209052B Stackable Adapter (2.5”) 209051B Stackable Adapter (1.5”) 205500A Parts box 217048 Retainer BP8000 Parts Lists... - Page 35 203040 Pin for chain pulley 203004A Bronze bush for chain pulley 201006 Chain pulley 201005 Split pin 201004 Chain pulley assembly 205003 Power side Carriage 206044 Slider 209016 Carriage plastic cover 206045 Protective rubber 206046 Self-tapping screw BP8000 Parts Lists...
- Page 36 Moon gear 209032 Socket bolt 209034 Lock washer 209033 Washer 520023 Snap ring 209030A Lifting Arm Pin 205005 Connecting plate 209043 Hex Bolt 209046 Hex Bolt 205006 Top plate 209045 Big Pulley 209057A Bronze bushing for pulley BP8000 Parts Lists...
- Page 37 Oil Hose, Fitting & Cable Item Part# Description Qty. Note 209060 90° Fitting for Power Unit 201081 Oil hose 207024 90° Fitting 201082 Extended Straight Fitting 420097 90° Fitting 207034 Oil Hose 211016 T Fitting 205009 Cable 209066 Cable Nut BP8000 Parts Lists...
- Page 38 Item Part# Description Qty. Note 201-1 81400152 Motor (ETL certifi cate) 201-2 81400209 Cover of Motor Terminal Box 201-3 81400252 Contactor 201-4 81400127 Motor Connecting Shaft 201-5 81100175 Relief Valve 201-6 81400210 Valve Body 201-7 81400143 Plug BP8000 Parts Lists...
- Page 39 Handle For Release Valve 201-26 81400181 Washer 201-27 81400044 Check Valve 201-28 81400182 Hex nut 201-29 81400040 Gear Pump 201-30 81400068 Buffer valve 201-31 81400136 Oil Return Pipe 201-32 81400202 Filler Cap 201-33 81400154 12L white reservoir BP8000 Parts Lists...
-
Page 40: Warranty
Prices do not include any local, state or federal taxes. RETURNS: Products may not be returned without prior written approval from the Manufacturer. DUE TO THE COMPETITIVENESS OF THE SELLING PRICE OF THESE LIFTS, THIS WARRANTY POLICY WILL BE STRICTLY ADMINISTERED AND ADHERED TO. BP8000 Warranty...
Need help?
Do you have a question about the BP8000 and is the answer not in the manual?
Questions and answers