Table of Contents
Advertisement
Advertisement
Table of Contents

Related Manuals for Atlas 414


Summary of Contents for Atlas 414
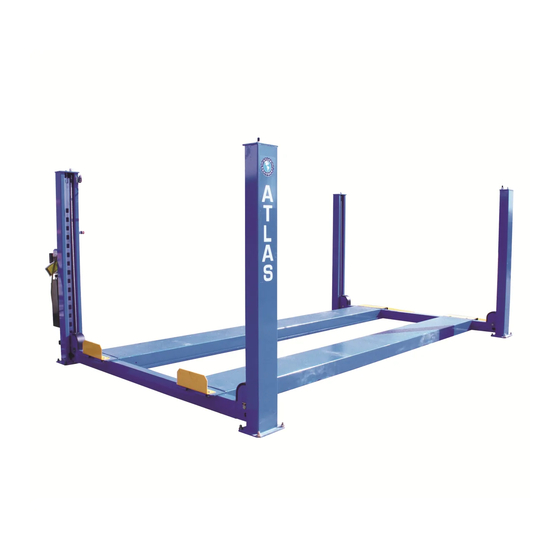
- Page 1 Replace This With Cover PDF...
- Page 2 Read this entire manual before operation begins. Record below the following information which is located on the serial number data plate. Serial No. Model No. Date of Installation...
-
Page 3: Table Of Contents
Contents Specifi cations ... . . 4 Installation Requirement ..5 Steps Of Installation ..7 Exploded View . -
Page 4: Specifi Cations
Specifi cations 414 Features • Manual control air-operated system. • Mechanical self-lock and air-driven safety release. • Manual hydraulic power system, cable-driven. • Sand fi nish platform • Adjustable platform and adjustable safety lock ladders. • Optional Jack: With hand pump/Air-operated hydraulic pump/Controlled by power unit. -
Page 5: Installation Requirement
Installation Requirement Tools Required Rotary Hammer Drill (Φ19) Hammer Level Bar English Spanner (12”) Ratchet Spanner With Socket (28#) Wrench set (10#, 12#, 13#, 14#, 17#, 19#, 24#, 30#) Carpenter’s Chalk Screw Sets Tape Measure (25’) Pliers Socket Head Wrench (3#, 5#, 6#) Lock Wrench Fig. - Page 6 Concrete Specifi cations Specifi cations of concrete must be adhered to the specifi cation as following. Failure to do so may result in lift and/or vehicle falling. Concrete must be thickness 6” minimum and without reinforcing steel bars, and must be dried totally before the installation. Concrete must be in good condition and must be of test strength 3,000psi (220kg/cm ) minimum.
-
Page 7: Steps Of Installation
Steps Of Installation A. Location Of Installation Check and ensure the installation location (concrete, layout, space size etc.) is suitable for lift installation. B. Check The Parts Before Assembly Packaged lift and hydraulic power unit (See Fig. 4). Fig. 4 Open the outer packing carefully (See Fig. - Page 8 Remove the Drive-thru Ramps and Columns (See Fig. 6). Fig. 6 Loosen the screws of the upper package stand, take off the offside platform, take out the parts inside the power side platform, than remove the package stand. Move aside the parts and check the parts according to the shipment parts list.
- Page 9 Open the carton of parts and check the parts according to the parts box list (See Fig. 8). Fig. 8 7. Check the parts of the parts bag according to the parts bag list (See Fig. 9). Fig. 9 Steps Of Installation...
- Page 10 C. Use A Carpenter’s Chalk Line To Establish Installation Layout As Per Table 1 Make sure the size is right and base is fl at (see Fig. 10). Note: Reserve space before and behind the installation site. Car in Direction Use a carpenter’s chalk line to establish installation layout...
- Page 11 D. Install Cross Beams Note: Install the runway platforms on the cross beams prior to drilling the anchor holes. This will help if measurements are incorrect. Do not fully tighten platform bolts. Fig. 11 Fig. 12 Steps Of Installation...
- Page 12 E. Anchor Bolts Prepare the Anchor Bolts (See Fig. 13). Fig. 13 Washer Spring washer Use a the rotary hammer drill with a ¾ inch masonry bit and drill all the anchor holes and install the anchor bolts (See Fig. 14). Fig.
- Page 13 Slack-cable safety lock Primary safety lock Limit Pin Safety Ladder is Limit Pin inserted between Limit Pins Safety Ladder Fig. 15 Install safety ladders (See Fig. 16). This height should be the same for four safety ladders Safety Ladder is adjusted to be parallel to the back side of Column.
- Page 14 G. Put The Cross Beams At The Same Height The four primary safety locks are adjusted so the locks engage at the same time Lift both cross beams to the same height, Fig. 17 about 3 feet high Steps Of Installation...
- Page 15 H. Install Power Side Platform Loosen one side of the pulley (See Fig. 18). Pull the cylinder shaft out to its maximum distance Fig. 18 Steps Of Installation...
- Page 16 Install the platform to Cross Beam with a forklift or other lifting device (See Fig. 19). Fig. 19 Steps Of Installation...
- Page 17 I. Assemble The Pulleys Back To The Power Side Platform Install the offside platform on the cross beams and check the plumb of columns with a level, adjust with the shims and tighten the Anchor Bolts (See Fig. 20). Using the ratchet spanner with socket to tighten the bolts Install the pulley...
- Page 18 J. Install Cables ① ② ③ ④ Cable 4104 mm 11058 mm 5810 mm 9354 mm Length 161 5/8” 435 3/8” 228 3/4” 368 1/4” (inc. connecting fi tting) Fig. 21 Steps Of Installation...
- Page 19 After routing the cables through the pulleys, attach the cables to the connecting plate. (See Fig. 22). Cable 4 Cable 4 Cable 2 Cable 3 Cable 1 Cable 2 Cable 4 Cable 4 Cable 3 Cable 2 Cable 2 Cable 1 Cable 2 Cable 4 Hex Bolt...
- Page 20 The cable passes through Cross Beam and top plate on the column. Install the cable nuts (See Fig. 23). Cable passes through Cable passes through top plate and install the big pulley and the two cable nuts in front of the white on top of each other safety lock pulley Fig.
- Page 21 K. Install The Water Separator, The Manual Control Air Valve, And The Power Unit Note: If after connecting the air valve to an air supply the air constantly leaks from the valve, then the air valve is installed upside down. Remove the air fi...
- Page 22 L. Install Hydraulic System Protective Ring Retainer Fig. 25 Steps Of Installation...
- Page 23 M. Install Air-Line System Connect the front and rear Cross Beam air lock cylinders by using 6mm×4mm black air line (See Fig. 26). Connect manual air control valve using 6mm×4mm black air line. Air cylinder fi tting Air cylinder fi tting Rear Cross Front Cross Beam...
- Page 24 Connect the oil hoses and air lines (See Fig. 27). Accessory Hole Optional air line through this hole Oil return hose passes through this hole Connecting Black air line 6mm × 4mm to Manual control air valve Fig. 27 Connect the water separator and manual control air valve using air line 8mm×6mm (See Fig.
- Page 25 Connect the air 1/4NPT air inlet (not supplied). Adjust the air pressure on the water separator regulator between 75-120 PSI (See Fig. 29). Connecting air inlet Clockwise to increase the air pressure. Counter-clockwise to reduce the air pressure. Adjusting Fig. 29 the air pressure between 75-120 PSI.
- Page 26 Connect the limit switch with the cable wire. Connect wires to terminals #11 & #12 (See Fig. 31). Fig. 31 Install limit switch on the column (See Fig. 32). Insert the limit switch cable through the plastic protective sleeve (See Fig. 33). Fig.
- Page 27 Note: For the safety of operators, the power wiring must contact the fl oor well. Atlas Single Phase Motor (See Fig. 34). Connect the two power supply lines (fi re wire L and zero wire N) to terminals on the AC contactor marked L2, L3.
- Page 28 Motor Line Remove this line before Fig. 35 Fig. 36 connecting the Limit Switch P. Install Spring And Safety Cover Of Cross Beam Fig. 37 Steps Of Installation...
- Page 29 Q. Install Drive-On Ramp, Tire Stop Plate, Platform Locks Plates Install Drive-on ramp Install Tire stop plate The lock plates are used to prevent the turning & slipping of the offside platform. Use the Hex bolts M8×20 for the connection. Bolt the plates to the front and rear on the platform.
-
Page 30: Exploded View
Exploded View Fig. 39 Exploded View... - Page 31 CROSS BEAM Fig. 40 CYLINDERS Fig. 41 Exploded View...
- Page 32 POWER UNIT Fig. 42 Exploded View...
-
Page 33: Test Run
Test Run Fill the reservoir with approximately 3.75 gallons of AW46 Hydraulic Oil. Press button, the cables will tighten up. Make sure the cables are in the pulley grooves. Press the Handle of release valve to lock the Cross-beam to the safety ladders, and then adjust the platforms to be level by adjusting the nuts of Safety Ladders. -
Page 34: Cylinder Bleeding Procedure
Cylinder Bleeding Procedure (Removing air from the hydraulic system) PERFORM THIS PROCEDURE IMMEDIATELY AFTER INSTALLATION and BEFORE YOU PUT A VEHICLE ON THE LIFT Press the UP Button to raise the runways 2 to 3 inches off of the safety locks. DO NOT RAISE THE RUNWAYS TO THE MAXIMUM HEIGHT. - Page 35 Press the UP Button to raise your lift runways about 18 inches from the fl oor and repeat STEPS 1 & 2. Do this at least 2 or 3 more times. This will ensure that any air in the lifts hydraulic system is completely removed. Raised To 18 Inches After doing this procedure the lift runways should travel up and...
-
Page 36: Operation Instructions
Operation Instructions To lift vehicle Keep the work area clean and free of clutter. Drive vehicle to the Platform and put on the brake. Turn on the power and press the button UP, raise the lift to the working position. Note: make sure the vehicle is steady when the lift is raised. -
Page 37: Maintenance Schedule
Maintenance Schedule Monthly: Re-torque the anchor bolts to 850-100 Foot Pounds. Lubricate cable with lubricant. Check all cable connections, bolts and pins. Make a visual inspection of all hydraulic hoses/lines for possible wear or leaks Lubricate all Rollers, Safety devices with 90wt. gear oil or equivalent. Note: All anchor bolts should take full torque. -
Page 38: Trouble Shooting
Trouble Shooting TROUBLE CAUSE REMEDY 1. Button does not work 1. Replace button 2. Wiring connections are not in good 2. Repair all wiring condition connections Motor does not run 3. Motor burned out 3. Repair or replace motor 4. AC contactor burned out 4. -
Page 39: Parts List
Parts List Item Part No. Description QTY. 460020 Power side Platform 460021 Offside Platform 460022 Front Cross Beam 460023 Rear Cross Beam 209059A Anchor Bolt 420028B Safety Ladder 420175A Hex Nut 460024 Power side Platform 460025 Pulley Shaft Weldment 420023A Washer 420024A Pulley... - Page 40 Item Part No. Description QTY. 209005 Nylok Nut 209004 Rubber Ring 209003 Hex Bolt 420152 Washer 206011 Cup Head Bolt 420010 Limit Switch 420010A Fixing Plate For Limit Switch 420156 Protecting Rubber Ring 420045 Washer 420004 Pin for Drive-in Ramp 420005 Fixing Bolt 460028...
- Page 41 Item Part No. Description QTY. 440011 Needle Valve 460038 Fitting Parts For Air Line System (See Fig.25, Fig.26-Fig.28) 420124 T-Fitting For Air Line 420125 T-Fitting For Air Line 420126A Straight Fitting For Air Line 440010 Black Air Line 420167 Black Air Line Parts for Circuit System (See Fig.32, Fig.33) 460053 Wire Cable...
- Page 42 51-6 460048 Piston Rod 51-7 460049 51-8 460050 Support Ring 51-9 460051 Y Ring 51-10 460052 Piston Parts For Atlas Power Unit (See Fig.42) 31-1 440014 Motor 31-2 440039 Capacitor 31-3 440040 AC Contactor 31-4 440015 Motor Connecting Shaft 31-5...
- Page 43 Item Part No. Description QTY. 31-23 440028 Check Valve 31-24 440030 Gear Pump 31-25 440031 Oil Return Pipe 31-26 440032 Filter Cap Parts List...
-
Page 44: Warranty
Warranty This item is warranted for fi ve (5) years on structural components, two (2) years on hydraulic cylinders, and one (1) year on electric or air / hydraulic power units from invoice date. Wear items are covered by a 90 day warranty. This LIMITED warranty policy does not include a labor warranty.
Need help?
Do you have a question about the 414 and is the answer not in the manual?
Questions and answers