Table of Contents
Advertisement
Available languages
Available languages
Quick Links
Advertisement
Chapters
Table of Contents

Related Manuals for ProLights ARCLED1107UV


Summary of Contents for ProLights ARCLED1107UV
-
Page 1: User Manual
ARCLED1107UV ARCHITAINMENT LED PROJECTOR Manuale Utente User Manual... - Page 2 REV.001-04/11...
-
Page 3: Table Of Contents
ARCLED1107UV INTRODUZIONE Vi ringraziamo per aver scelto un prodotto PROLIGHTS. ARCLED1107UV è un proiettore LED DMX. INDICE Sicurezza Avvertenze generali Attenzioni e precauzioni per l’installazione Informazioni generali 1 Descrizione e specifiche tecniche 1. 1 Elementi di comando e collegamenti 1. 2 Descrizione 1. -
Page 4: Sicurezza
ARCLED1107UV ATTENZIONE! Prima di effettuare qualsiasi operazione con l’unità, leggere con attenzione questo manuale e conservarlo accuratamente per riferimenti futuri. Contiene informazioni importanti riguardo l’installazione, l’uso e la manutenzione dell’unità. SICUREZZA Avvertenze generali • I prodotti a cui questo manuale si riferisce sono conformi alle Direttive della Comunità Europea e pertanto recano la sigla . -
Page 5: Descrizione E Specifiche Tecniche
ARCLED1107UV - 1 - DESCRIZIONE E SPECIFICHE TECNICHE 1.1 Elementi di comando e collegamenti DMX INPUT DMX OUTPUT Fig.2 Fig.1 1. STAFFA DI MONTAGGIO; 2. MANOPOLA DI FISSAGGIO per la staffa di montaggio; 3. Connessione XLR a tre poli (fig.2): DMX OUT (XLR a 3 poli): 1= massa, 2 = DMX -, 3 = DMX +;... -
Page 6: Descrizione
(soltanto 17x6,5cm), con una grande efficienza luminosa e dai bassi consumi energetici (<10W). ARCLED1107UV si compone di 7 LED da 1W, della specia- le tecnologia UV, per emulare il funzionamento delle lampade wood attraverso sorgente LED, esaltando i colori bianchi in condizioni di penombra. -
Page 7: Arcled1107Uv
ARCLED1107UV 175mm 110mm 15mm 15mm Photometric data Lux Center 18° 18° Dist.(mt) 60,7 RGBW 2.86 0.71 0.32 0.19 0,25 0,75 1,10 Diam.(mt) 18°... -
Page 8: Installazione
- 2 - INSTALLAZIONE 2.1 Montaggio ARCLED1107UV può essere collocato su un piano solido. Inoltre, grazie alle possibilità di fissaggio sulla dop- pia staffa (fig.2), l’unità può essere montata anche a testa in giù, su una traversa. Per il fissaggio occorrono dei supporti robusti per il montaggio. -
Page 9: Funzioni E Impostazioni
- 3 - FUNZIONI E IMPOSTAZIONI 3.1 Funzionamento Per accendere l’ ARCLED1107UV, inserire la spina del cavo di alimentazione in una presa di rete (230V~ 50Hz). L’unità può essere comandata da un’ unità DMX di comando luce oppure svolgere autonomamente il suo programma. -
Page 10: Funzionamento In Modalità Automatica
Fig.6 Programma Auto [3]: switch [1] e [2] su ON. Valore Fig.7 Programma Auto [9]: switch [1] e [4] su ON. Valore NOTA. Nella modalità automatica l’ ARCLED1107UV è impostato come unità principale (Master), mentre le altre saranno impostate come unità secondarie (Slave). -
Page 11: Modalità Static
• Servirsi dei connettori DMX dell’ ARCLED1107UV e di un cavo XLR per formare una catena di unità. In certe condizioni e lunghezze si consiglia di effettuare una terminazione come mostrato a pagina 12. -
Page 12: Costruzione Del Terminatore Dmx
DMX per il primo canale DMX. Se, per esempio, sull’unità di comando è previsto l’indirizzo 33 per coman- dare la funzione del primo canale DMX, si deve impostare sull’ ARCLED1107UV l’indirizzo di start 33. Le altre funzioni del pannello saranno assegnate automaticamente agli indirizzi successivi. Segue un esempio con... - Page 13 ARCLED1107UV Esempi per gli indirizzi 1, 6 e 104: Fig.8 Indirizzo di start 1: switch [1] su ON. Valore Fig.9 Indirizzo di start 6: switch [2] e [3] su ON. Valore Fig.10 Indirizzo di start 104: switch [4], [6] e [7] su ON.
-
Page 14: Tabella Canali Dmx
ARCLED1107UV 3.10 Tabella canali DMX Channel Function in SV1 mode value DIMMER 000-255 Channel Function in SV1.S mode value DIMMER 000-255 STROBE 000-255... -
Page 15: Manutenzione
ARCLED1107UV - 4 - MANUTENZIONE 4.1 Pulizia sistema ottico e manutenzione • Durante gli interventi, assicurarsi che l’area sotto il luogo di installazione sia libera da personale non qualificato. • Spegnere l’unità, scollegare il cavo di alimentazione ed aspettare finché l’unità non si sia raffreddata. -
Page 17: Arcled1107Uv
ARCLED1107UV INTRODUCTION Thank you for purchasing a PROLIGHTS product. ARCLED1107UV DMX LED projector. TABLE OF CONTENTS Safety General instructions Warnings and installation precautions General information Description and technical specifications 1. 1 Operating elements and connections 1. 2 Description 1. 3 Technical specifications 2 Installation 2. -
Page 18: Safety
ARCLED1107UV WARNING! Before carrying out any operations with the unit, carefully read this instruction manual and keep it with cure for future reference. It contains important information about the installation, usage and maintenance of the unit. SAFETY General instructions • The products referred to in this manual conform to the European Community Directives and are therefore marked with . -
Page 19: Description And Technical Specifications
ARCLED1107UV - 1 - DESCRIPTION AND TECHNICAL SPECIFICATIONS 1.1 Operating elements and connections DMX INPUT DMX OUTPUT Fig.2 Fig.1 1. MOUNTING BRACKET; 2. LOCKING KNOB for the mounting bracket; 3. XLR connection (fig.2): DMX OUT (3-pole XLR): 1= ground, 2 = DMX -, 3 = DMX +;... -
Page 20: Description
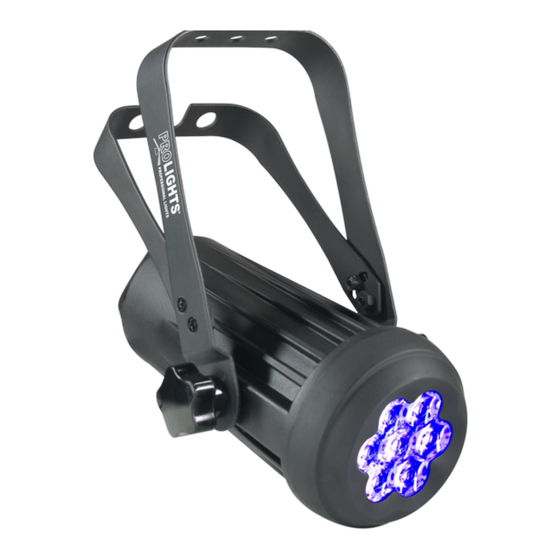
ARCLED1107UV 1.2 Description ARCLED1107UV is an innovative LED luminaire, designed to express a new concept of lighting in indoor location where a compact (only 17x6,5cm), lightweight, powerful and low-consumption (less than 10W) projector is needed. ARCLED1107UV features 7 LEDs, 1W each, with innovative UV technology for repro- duction of wood lamp effect through LED source, exalting white colour in penumbra environments . -
Page 21: Lux Center
ARCLED1107UV 175mm 110mm 15mm 15mm Photometric data Lux Center 18° 18° Dist.(mt) 60,7 RGBW 2.86 0.71 0.32 0.19 0,25 0,75 1,10 Diam.(mt) 18°... -
Page 22: Installation
2.1 Mounting ARCLED1107UV may be set up on a solid and even surface. The unit can also be mounted upside down to a cross arm. For fixing, stable mounting clips are required. The mounting place must be of sufficient stability and be able to support a weight of 10 times of the unit’s weight. -
Page 23: Functions And Settings
3.2 Adjustments of the DIP switches ARCLED1107UV have a basic control panel, which consist of a single 12-switch (fig.4) dual in line package (DIP) switch module. Each of the individual switches has a number (DIP switch [1] through [12]). -
Page 24: Operation In Automatic Mode
ARCLED1107UV 3.3 Operation in automatic mode If no DMX control signal is present at the jack DMX INPUT (3), and the unit independently runs through its show programme. • Set DIP switch [12] to the position ON. • Use DIP switches [1 - 5] to select 10 auto programs Auto [0 - 9]:... -
Page 25: Static Mode
3.6 Operation via a light control unit ARCLED1107UV is equipped with 2 DMX configuration: [SV1] and [SV1.S] The tables on page 12 indicate the operating mode and DMX value. The ARCLED1107UV is equipped with 3-pole XLR connections. 3.7 Connection of the DMX line DMX connection employs standard XLR connectors. -
Page 26: Construction Of The Dmx Termination
3.9 Adjusting the start address To be able to operate the ARCLED1107UV with a light controller, adjust the DMX start address for the first DMX channel. If e. g. address 33 on the controller is provided for controlling the function of the first DMX channel, adjust the start address 33 on the ARCLED1107UV. - Page 27 ARCLED1107UV Examples with the start addresses 1, 6 and 104: Fig.8 Start address 1: switch [1] set to ON. Place Value Fig.9 Start address 6: switches [2] and [3] set to ON. Place Value Fig.10 Start address 104: switches [4], [6] and [7] set to ON.
-
Page 28: Dmx Control
ARCLED1107UV 3.10 DMX control Channel Function in SV1 mode value DIMMER 000-255 Channel Function in SV1.S mode value DIMMER 000-255 STROBE 000-255... -
Page 29: Maintenance
ARCLED1107UV - 4 - MAINTENANCE 4.1 Cleaning the unit and maintenance • Make sure the area below the installation place is free from unwanted persons during setup. • Switch off the unit, unplug the main cable and wait until the unit has cooled down. - Page 31 Place Stamp Here Affrancare Spett.le Music&Lights S.r.l. Via Appia Km 136.200 04020 Itri (LT) Italy "...
- Page 36 Music & Lights S.r.l. entertainment technologies Via Appia km 136,200 - 04020 Itri (LT) ITALY ISO 9001:2008 tel. +39 0771 72190 fax +39 0771 721955 Certified Company www.musiclights.it info@musiclights.it...
Need help?
Do you have a question about the ARCLED1107UV and is the answer not in the manual?
Questions and answers