Table of Contents
Advertisement
Available languages
Available languages
Quick Links
Advertisement
Chapters
Table of Contents

Related Manuals for ProLights ARCLED7307HD


Summary of Contents for ProLights ARCLED7307HD
-
Page 1: User Manual
ARCLED7307HD LED PROJECTOR Manuale Utente User Manual... - Page 2 Music & Lights S.r.l. si riserva ogni diritto di elaborazione in qualsiasi forma delle presenti istruzioni per l’uso. La riproduzione - anche parziale - per propri scopi commerciali è vietata. Al fine di migliorare la qualità dei prodotti, la Music&Lights S.r.l. si riserva la facoltà di modificare, in qualunque momento e senza preavviso, le specifiche menzionate nel presente manuale di istruzioni.
-
Page 3: Table Of Contents
4 Manutenzione 4. 1 Manutenzione e pulizia del sistema ottico 4. 2 Risoluzione dei problemi 5 Appendice 5. 1 Vista esplosa Certificato di garanzia • ARCLED7307HD Contenuto dell'imballo: • Staffa di fissaggio (2pz.) • Cavo di sicurezza • Manuale utente... -
Page 4: Sicurezza
ARCLED7307HD ATTENZIONE! Prima di effettuare qualsiasi operazione con l’unità, leggere con attenzione questo manuale e conservarlo accuratamente per riferimenti futuri. Contiene informazioni importanti riguardo l’installazione, l’uso e la manutenzione dell’unità. SICUREZZA Avvertenze generali • I prodotti a cui questo manuale si riferisce sono conformi alle Direttive della Comunità Europea e per- tanto recano la sigla . -
Page 5: Informazioni Generali
ARCLED7307HD INFORMAZIONI GENERALI Spedizioni e reclami Le merci sono vendute “franco nostra sede” e viaggiano sempre a rischio e pericolo del distributore/clien- te. Eventuali avarie e danni dovranno essere contestati al vettore. Ogni reclamo per imballi manomessi dovrà essere inoltrato entro 8 giorni dal ricevimento della merce. -
Page 6: Introduzione
- 1 - INTRODUZIONE 1.1 DESCRIZIONE L’ ARCLED7307HD è stato disegnato per essere la versione “compact” del popolare fratello maggiore ARCLED7314, che negli anni si è affermato essere un vero standard sul mercato. Equipaggiato con 7x3W CREE LED RGB/FullColor e con un design lenti identico alla versione 7314, ARCLED7307HD rappresenta una soluzione complementare ed adatta per offrire un prodotto di performance professionali anche in applicazioni con budget limitati. - Page 7 ARCLED7307HD Corpo e alimentazione • Corpo in alluminio ad alta resistenza progettato per facilitare la dissipazione termica • Pannello frontale: realizzato in vetro temperato • Grado di isolamento: IP66 (IP) - IP54 (TZ) • Bilanciamento temperatura e pressione attraverso valvole di sfiato GORE micro-forate • Adattatori di alimentazione (shuko) e segnale (xlr-3p) inclusi...
-
Page 8: Elementi Di Comando E Di Collegamento
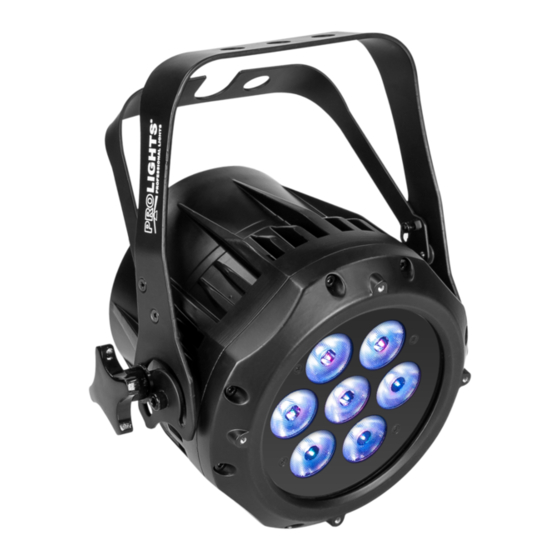
ARCLED7307HD 1.3 ELEMENTI DI COMANDO E DI COLLEGAMENTO Fig.3 1. STAFFA DI MONTAGGIO 2. MANOPOLA DI FISSAGGIO per la staffa di montaggio 3. PANNELLO DI CONTROLLO con display e 4 pulsanti per accesso e gestione delle diverse funzioni. 4. DMX IN (XLR a 3 poli): 1 = massa, 2 = DMX -, 3 = DMX + 5. -
Page 9: Installazione
- 2 - INSTALLAZIONE 2.1 MONTAGGIO L’ ARCLED7307HD può essere collocato su un piano solido. Inoltre, grazie alle possibilità di fissaggio sulla doppia staffa (fig.4), l’unità può essere montata anche a testa in giù, su una traversa. Per il fissaggio oc- corrono dei supporti robusti per il montaggio. -
Page 10: Funzioni E Impostazioni
- 3 - FUNZIONI E IMPOSTAZIONI 3.1 FUNZIONAMENTO Per accendere l’ ARCLED7307HD, inserire la spina del cavo di alimentazione in una presa di rete (100-240V 50/60Hz). L’unità può essere comandata da un unità DMX di comando luce oppure svolgere autonoma- mente il suo programma. -
Page 11: Struttura Menu
ARCLED7307HD 3.3 STRUTTURA MENU R.(000-255) GREN G.(000-255) STAT BLUE b.(000-255) STRB S.(0-20) AT.01 ÷ AT.10 AUTO PR.01 ÷ PR.10 dMX / SLAVE d.(001-512) PERS TOUR / TR16 / ARC.1 / AR1.d / AR1.S / HSV SC.01 RED, GREN, R.(000-255), G.(000-255), EDIT PR.01 ÷... -
Page 12: Modalità Master/Slave
3.7 CONFIGURAZIONI CANALI DMX L’ ARCLED7307HD dispone di 6 configurazioni dei canali DMX a cui si può accedere dal pannello di con- trollo. • Premere il tasto MENU fino a quando sul display non appare [PERS], quindi premere il tasto ENTER. -
Page 13: Collegamenti Della Linea Dmx
ARCLED7307HD DMX Address: 33 DMX Address: 46 DMX Address: 59 DMX Address: 72 ... . DMX512 Controller Esempio di configurazione a 13 canali DMX (modalità TR16) Fig.6 3.10 COLLEGAMENTI DELLA LINEA DMX La connessione DMX è... -
Page 14: Costruzione Del Terminatore Dmx
ARCLED7307HD 3.11 COSTRUZIONE DEL TERMINATORE DMX La terminazione evita la probabilità che il segnale DMX 512, una volta raggiunta la fine della linea stessa venga riflesso indietro lungo il cavo, provocando, in certe condizioni e lunghezze, la sua sovrapposizione al segnale originale e la sua cancellazione. -
Page 15: Tabella Canali Dmx
ARCLED7307HD 3.12 TABELLA CANALI DMX TOUR Ch Function in TOUR mode Value Ch Function in TOUR mode Value MASTER DIMMER 020 - 029 000 - 100% 000 - 255 030 - 039 040 - 049 050 - 059 (CH7 select CUSTOM 01-10, CH2 CONTROL TIME) 000 - 255... - Page 16 ARCLED7307HD TR16 Ch Function in TOUR mode Value Ch Function in TR16 mode Value CUSTOM 10 221 - 220 MASTER DIMMER 000 - 255 No function 221 - 255 MASTER DIMMER FINE 000 - 255 AUTO SPEED Since the walking speed (slow to fast)
- Page 17 ARCLED7307HD Ch Function in TR16 mode Value CH Function in TR16 mode Value CUSTOM 05 161 - 170 No strobe 100 - 109 CUSTOM 06 181 - 190 Lightning strobe (slow to fast) 110 - 179 CUSTOM 07 191 - 200...
- Page 18 ARCLED7307HD ARC.1 CH Function in ARC.1 Value CH Function in HSV Value RED 0 - 100% HUE 0 - 100% 000 - 255 000 - 255 GREEN 0 - 100% SATURATION 0 - 100% 000 - 255 000 - 255...
-
Page 19: Configurazione Static
ARCLED7307HD 3.13 CONFIGURAZIONE STATIC Per impostare il bilanciamento personalizzato del rosso, verde e blu. • Premere il tasto MENU per entrare nel menu principale, quindi premere il tasto UP/DOWN fino a quan- do sul display non appare [STAT], quindi premere il tasto ENTER. -
Page 20: Calibrazione
Quando l’unità è impostata su ON, bisognerà immettere la password per accedere al menu impo- stazioni. STRB • Il proiettore ARCLED7307HD dispone di due differenti impostazioni della strobo: CLAS strobo e SPEC strobo. Tali impostazioni sono valide sono nelle seguenti configurazioni DMX: Tour, AR2.S e TR16. 3.16 CALIBRAZIONE • Premere il tasto MENU e selezionare attraverso i tasti direzionali la voce [CAL];... -
Page 21: Attivazione Password
ARCLED7307HD • Le impostazioni possono essere modificate, intervenendo sui valori (000 - 255) relativi ai canali rosso, verde e blu (Red - Green - Blue), attraverso i tasti UP/DOWN. CALIBRAZIONE BIANCO Per impostare il bilanciamento del bianco intervenendo sui parametri RGB: • Premere il tasto MENU, quindi premere il tasto UP/DOWN fino a quando sul display non appare... -
Page 22: Manutenzione
ARCLED7307HD - 4 - MANUTENZIONE 4.1 MANUTENZIONE E PULIZIA DEL SISTEMA OTTICO • Durante gli interventi, assicurarsi che l’area sotto il luogo di installazione sia libera da personale non qualificato. • Spegnere l’unità, scollegare il cavo di alimentazione ed aspettare finché l’unità non si sia raffreddata. -
Page 23: Appendice
ARCLED7307HD - 5 - APPENDICE 5.1 VISTA ESPLOSA Fig.10 ITEM ITEM Rubber B Display board Glass Button pressed plate 3 in 1 lens frame front cover Display screen lens LED3 in 1 lens Display board rubber 3 in 1 lens frame back cover... - Page 24 All rights reserved by Music & Lights S.r.l. No part of this instruction manual may be reproduced in any form or by any means for any commercial use. In order to improve the quality of products, Music&Lights S.r.l. reserves the right to modify the characteristics stated in this instruction manual at any time and without prior notice.
- Page 25 3. 16 Calibration functions 3. 17 Activate the password 4 Maintenance 4. 1 Maintenance and cleaning the unit 4. 2 Trouble shooting 5 Appendix 5. 1 Exploded view Warranty • ARCLED7307HD Packing content • Mount bracket (2pc.) • Safety cable • User manual...
-
Page 26: Safety
ARCLED7307HD WARNING! Before carrying out any operations with the unit, carefully read this instruction manual and keep it with cure for future reference. It contains important information about the installation, usage and maintenance of the unit. SAFETY General instruction • The products referred to in this manual conform to the European Community Directives and are there- fore marked with . -
Page 27: General Information
ARCLED7307HD GENERAL INFORMATION Shipments and claims The goods are sold “ex works” and always travel at the risk and danger of the distributor. Eventual dam- age will have to be claimed to the freight forwarder. Any claim for broken packs will have to be forwarded within 8 days from the reception of the goods. -
Page 28: Introduction
Its super-compact sizes and the construction made by die-cast aluminium housing with tempered glass (IP66) makes ARCLED7307HD an essential product for the Rental stock, and useful for application in con- certs, architectural lightings, accent lightings and corporate events. - Page 29 ARCLED7307HD • Internal Protection: IP67 (IP) - IP54 (TZ) • Pressure and temperature balance through GORE membrane vents • Power (shuko) and data (xlr-3p) adapter cables included • Double hanging bracket suitable for safe hanging and for floor positioning • Power unit: 100-240V 50/60Hz • Power output to link more units in a chain: up to 24 fixtures at 230V...
-
Page 30: Operating Elements And Connections
ARCLED7307HD 1.3 OPERATING ELEMENTS AND CONNECTIONS Fig.3 1. MOUNTING BRACKET 2. LOCKING KNOB for the mounting bracket. 3. CONTROL PANEL with display and 4 button used to access the control panel functions and manage them. 4. DMX IN (3-pole XLR): 1 = ground, 2 = DMX -, 3 = DMX + 5. -
Page 31: Installation
2.1 MOUNTING ARCLED7307HD may be set up on a solid and even surface. The unit can also be mounted upside down to a cross arm. For fixing, stable mounting clips are required. The mounting place must be of sufficient stabil- ity and be able to support a weight of 10 times of the unit’s weight. -
Page 32: Functions And Settings
ARCLED7307HD - 3 - FUNCTIONS AND SETTINGS 3.1 OPERATION Connect the supplied main cable to a socket (100-240 VAC-50/60 Hz). Then the unit is ready for operation and can be operated via a DMX controller or it independently performs its show program in succession. -
Page 33: Menu Structure
ARCLED7307HD 3.3 MENU STRUCTURE R.(000-255) GREN G.(000-255) STAT BLUE b.(000-255) STRB S.(0-20) AT.01 ÷ AT.10 AUTO PR.01 ÷ PR.10 dMX / SLAVE d.(001-512) PERS TOUR / TR16 / ARC.1 / AR1.d / AR1.S / HSV SC.01 RED, GREN, R.(000-255), G.(000-255), EDIT PR.01 ÷... -
Page 34: Linking
3.9 DMX ADDRESSING To able to operate the ARCLED7307HD with a light controller, adjust the DMX start address for the first a DMX channel. If e. g. address 33 on the controller is provided for controlling the function of the first DMX channel, adjust the start address 33 on the ARCLED7307HD. -
Page 35: Connection Of The Dmx Line
ARCLED7307HD DMX Address: 33 DMX Address: 46 DMX Address: 59 DMX Address: 72 ... . DMX512 Controller Example 13 DMX channels configuration (TR16 mode) Fig.6 3.10 CONNECTION OF THE DMX LINE DMX connection employs standard XLR connectors. -
Page 36: Construction Of The Dmx Termination
ARCLED7307HD 3.11 CONSTRUCTION OF THE DMX TERMINATION The termination avoids the risk of DMX 512 signals being reflected back along the cable when they reach- es the end of the line: under certain conditions and with certain cable lengths, this could cause them to cancel the original signals. -
Page 37: Dmx Control
ARCLED7307HD 3.12 DMX CONTROL TOUR Ch Function in TOUR mode Value Ch Function in TOUR mode Value MASTER DIMMER 020 - 029 000 - 100% 000 - 255 030 - 039 040 - 049 050 - 059 (CH7 select CUSTOM 01-10, CH2 CONTROL TIME) 000 - 255... - Page 38 ARCLED7307HD TR16 Ch Function in TOUR mode Value Ch Function in TR16 mode Value CUSTOM 10 221 - 220 MASTER DIMMER 000 - 255 No function 221 - 255 MASTER DIMMER FINE 000 - 255 AUTO SPEED Since the walking speed (slow to fast)
- Page 39 ARCLED7307HD Ch Function in TR16 mode Value CH Function in TR16 mode Value CUSTOM 05 161 - 170 No strobe 100 - 109 CUSTOM 06 181 - 190 Lightning strobe (slow to fast) 110 - 179 CUSTOM 07 191 - 200...
- Page 40 ARCLED7307HD ARC.1 CH Function in ARC.1 Value CH Function in HSV Value RED 0 - 100% HUE 0 - 100% 000 - 255 000 - 255 GREEN 0 - 100% SATURATION 0 - 100% 000 - 255 000 - 255...
-
Page 41: Static Configuration
ARCLED7307HD 3.13 STATIC CONFIGURATION To set the custom balance of red, blue and green: • Press the button MENU, then press the button UP/DOWN so many times until the display shows [STAT]. Press the button ENTER to confirm. • Select the color red, green or blue (RED - GREN -BLUE) through the buttons UP and DOWN and then press the button ENTER. - Page 42 ARCLED7307HD CURV [CURV] allows the user to adjust the shape of the dimming curve. See the CURV chart to understand more about actual dimming curves. CURV dimming 1: OFF 2: CV1 3: CV3 4: CV4 Fig.9 DERR Enter to [DERR] to control in case of DMX signal errors.
-
Page 43: Activate The Password
ARCLED7307HD WHITE BALANCE Enter the [CAL2] mode to adjust the RGB parameter to make different whites. • Press the button MENU so many times until show [CAL2] and press the button ENTER to confirm. • Select red, green or blue (RED - GREEN -BLUE), through the button UP/DOWN. Press the button ENTER to confirm. -
Page 44: Maintenance
ARCLED7307HD - 4 - MAINTENANCE 4.1 MAINTENANCE AND CLEANING THE UNIT • Make sure the area below the installation place is free from unwanted persons during setup. • Switch off the unit, unplug the main cable and wait until the unit has cooled down. -
Page 45: Appendix 5. 1 Exploded View
ARCLED7307HD - 5 - APPENDIX 5.1 EXPLODED VIEW Fig.10 ITEM ITEM Rubber B Display board Glass Button pressed plate 3 in 1 lens frame front cover Display screen lens LED3 in 1 lens Display board rubber 3 in 1 lens frame back cover... - Page 47 Place Stamp Here Affrancare Spett.le Music&Lights S.r.l. Via Appia Km 136.200 04020 Itri (LT) Italy "...
- Page 52 Music & Lights S.r.l. entertainment technologies Via Appia km 136,200 - 04020 Itri (LT) ITALY ISO 9001:2008 tel. +39 0771 72190 fax +39 0771 721955 Certified Company www.musiclights.it info@musiclights.it...
Need help?
Do you have a question about the ARCLED7307HD and is the answer not in the manual?
Questions and answers