
Related Manuals for Bailey infi 90 IMASI03


Summary of Contents for Bailey infi 90 IMASI03
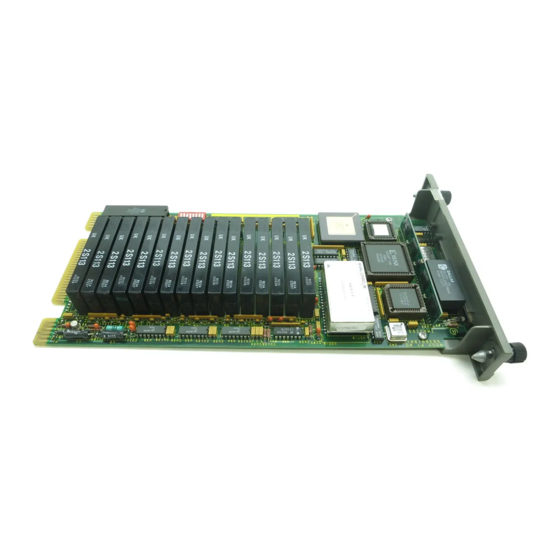
- Page 1 E96-301 ® ® Universal Analog Input Slave Module (IMASI03) Process Control and Automation Solutions from Elsag Bailey Group...
- Page 2 The information contained in this document is subject to change without notice. Elsag Bailey, its affiliates, employees, and agents, and the authors and contributors to this publication specif- ically disclaim all liabilities and warranties, express and implied (including warranties of merchantability and...
- Page 3 In addition, a complete under- standing of the INFI 90 system is beneficial to the user. ® INFI 90 is a registered trademark of Elsag Bailey Process Automation. I-E96-301B1 15 December 1994...
- Page 4 ® List of Effective Pages Total number of pages in this instruction is 102, consisting of the following: Page No. Change Date Preface 15 December 1994 List of Effective Pages 15 December 1994 Original 15 December 1994 v through viii Original 1-1 through 1-11 Original...
- Page 5 Safety Summary GENERAL Equipment Environment WARNINGS All components, whether in transportation, operation or storage, must be in a noncorrosive environment. Electrical Shock Hazard During Maintenance Disconnect power or take precautions to insure that contact with energized parts is avoided when servicing. Special Handling This module uses Electrostatic Sensitive Devices (ESD).
- Page 6 ® Sommaire de Sécurité AVERTISSEMENTS Environnement de l’équipement D’ORDRE Ne pas soumettre les composants à une atmosphère corrosive lors GÉNÉRAL du transport, de l’entreposage ou l’utilisation. Possibilité de chocs électriques durant l’entretien Débrancher l’alimentation ou prendre les précautions pour éviter tout contact avec des composants sous tension durant l’entretien.
-
Page 7: Table Of Contents
Table of Contents Page SECTION 1 - INTRODUCTION ....................1-1 OVERVIEW ........................1-1 INTENDED USER ......................1-1 MODULE DESCRIPTION ....................1-1 FEATURES........................1-2 INSTRUCTION CONTENT .....................1-4 HOW TO USE THIS MANUAL ..................1-4 GLOSSARY OF TERMS AND ABBREVIATIONS .............1-5 REFERENCE DOCUMENTS..................1-7 NOMENCLATURE ......................1-7 SPECIFICATIONS ......................1-8 SECTION 2 - DESCRIPTION AND OPERATION................2-1 INTRODUCTION......................2-1 FUNCTIONAL OPERATION ...................2-1 BLOCK DIAGRAM ......................2-1... - Page 8 ® Table of Contents (continued) Page SECTION 3 - INSTALLATION .....................3-1 INTRODUCTION ......................3-1 SPECIAL HANDLING....................3-1 UNPACKING AND INSPECTION..................3-1 SETUP/INSTALLATION....................3-2 Address Selection Switch (SW1) ................3-2 Configuring Inputs ....................3-3 Termination Module/Unit Configuration ..............3-5 Physical Installation ....................3-5 WIRING CONNECTIONS AND CABLING ...............
- Page 9 Table of Contents (continued) Page SECTION 7 - MAINTENANCE .....................7-1 INTRODUCTION......................7-1 MAINTENANCE SCHEDULE ..................7-1 SECTION 8 - REPAIR/REPLACEMENT PROCEDURES ............8-1 INTRODUCTION......................8-1 MODULE REPAIR/REPLACEMENT ................8-1 SECTION 9 - SUPPORT SERVICES ...................9-1 INTRODUCTION......................9-1 REPLACEMENT PARTS AND ORDERING INFORMATION ..........9-1 TRAINING ........................9-1 TECHNICAL DOCUMENTATION ...................9-1 APPENDIX A - NIAI05 TERMINATION MODULE CONFIGURATION ........
- Page 10 ® List of Tables (continued) Title Page A-2. NIAI05 Jumper Configurations ................A-2 A-3. NIAI05 Input Type Descriptions ................A-3 B-1. NTAI06 Input Types ....................B-2 B-2. NTAI06 Jumper Configurations ................B-2 B-3. NTAI06 Input Type Descriptions ................B-2 C-1. FC 215 Outputs ....................C-2 C-2.
-
Page 11: Section 1 - Introduction
Jumpers configure the type of analog input signals. Refer to Section 3 for the correct setting of these jumpers. Figure 1-1 shows the INFI 90 communication levels. ® INFI 90 is a registered trademark of Elsag Bailey Process Automation. OVERVIEW I-E96-301B 1 - 1... -
Page 12: Features
INTRODUCTION ® COMMUNICATION HIGHWAY (INFI-NET OR PLANT LOOP) COMMUNICATION MODULES CONTROLWAY OTHER MODULES SLAVE EXPANDER BUS IMASI03 IMASI03 OTHER SLAVES NKAS02/12 NKAS01/11 TERMINATION TERMINATION TERMINATION MODULE MODULE UNIT NIAI05 NIAI05 NTAI06 ANALOG ANALOG ANALOG INPUTS INPUTS INPUTS TP35388A Figure 1-1. INFI 90 Communication Levels FEATURES The design of the IMASI03 module, as with all INFI 90 mod- ules, allows for flexibility in creating a process management... - Page 13 INTRODUCTION Each channel is individually programmable for these input • types: E, J, K, L, N (14 AWG), N (28 AWG), R, S, T, U thermocouples. Chinese type E and Chinese type S thermocouples. Millivolt (-100 to +100 mV). 3-wire RTDs (10, 100 U.S., 100 European, 120 and Chinese 53 Ohm).
-
Page 14: Instruction Content
MMU. Support Services Provides a list of information to present when ordering parts from the local Bailey Controls sales office. It explains other areas of support that Bailey Controls provides. Appendix A Shows the jumper settings, terminal wiring for the NIAI05 ter- mination module and the cabling needed for the IMASI03. -
Page 15: Glossary Of Terms And Abbreviations
8. Use Section 9 to order parts. This section also explains some of the many services Bailey offers. GLOSSARY OF TERMS AND ABBREVIATIONS Term Definition Analog-to-digital conversion; process of generating a digital, (numeric) value A/D Conversion representing the magnitude of an analog signal. - Page 16 INTRODUCTION ® GLOSSARY OF TERMS AND ABBREVIATIONS (continued) Term Definition High Level Voltage For IMASI03 applications, high level voltage inputs are values between -10 and +10 Volts. INFI-NET Advanced data communication highway for the INFI 90 system having 250 node capacity.
-
Page 17: Reference Documents
INTRODUCTION GLOSSARY OF TERMS AND ABBREVIATIONS (continued) Term Definition Termination Module; provides input/output connection between plant equipment and the INFI 90 process modules. The termination module slides into the Termination Mounting Unit (TMU). Termination Mounting Unit. Termination Unit; provides input/output connection between plant equipment and the INFI 90 process modules. -
Page 18: Specifications
INTRODUCTION ® SPECIFICATIONS Power Consumption + 5 VDC typical 300 mA, maximum 450 mA + 15 VDC typical 130 mA, maximum 150 mA - 15 VDC typical 35 mA, maximum 50 mA Analog Input Types Analog Input Channels 16 independently configured channels Thermocouples Type E, J, K, L, N (14 AWG), N (28 AWG), R, S, T, U Chinese type E and Chinese type S... - Page 19 INTRODUCTION SPECIFICATIONS (continued) Low Level Voltage Analog Accuracy C Ambient Operating Temperature Power Supplies at Nominal Values Zero Lead Wire Resistance Full Scale Range (FSR) = 200.0 mV Error Typical Noise Resolution (Two Standard Deviations From Mean) (Reading Stability) Bits ±...
- Page 20 INTRODUCTION ® SPECIFICATIONS (continued) Maximum Lead Wire Resistance Effect Voltage Input Uncompensated 1 microvolt of error per Ohm of lead wire resistance Compensated 0.1 microvolt of error per Ohm of lead wire resistance 3-Wire Resistance Inputs Uncompensated 0.020 Ohms of error per Ohm of lead wire resistance Compensated 0.008 Ohms of error per Ohm of lead wire resistance Programmable, 16 to 24 bits, in steps of two...
- Page 21 INTRODUCTION SPECIFICATIONS (continued) Normal Mode Rejection Peak or Continuous Voltage ± 15 VDC (Absolute Maximum) 50/60 Hz AC Rejection -80 dB (Minimum) Environment Electromagnetic No values available at this time. Radio Frequency Keep cabinet doors closed. Do not use communication equipment Interference closer than 2 meters from the cabinet.
-
Page 22: Section 2 - Description And Operation
SECTION 2 - DESCRIPTION AND OPERATION INTRODUCTION This section explains the inputs, control logic, communication and connections for the Universal Analog Input Slave Module (IMASI03). The analog slave interfaces 16 analog inputs to the Multi-Function Processor (MFP). The information in this sec- tion will answer most questions about how the IMASI03 works. -
Page 23: Isolation Amplifier
DESCRIPTION AND OPERATION ® Port RAM) with the current values of the inputs. The MFP can read these values at any time, even if the IMASI03 is simulta- neously writing to the dual port RAM. Figure shows a block diagram of the complete IMASI03 module. -
Page 24: Microcontroller And Memory
DESCRIPTION AND OPERATION Each input channel can be independently configured for reso- lution through individual function code 216 blocks. The reso- lution and approximate conversion speed are shown in Appendix C function code 216. Microcontroller and Memory The on-board microcontroller coordinates IMASI03 functions. The main functions are: Calibrating the A/D converter. -
Page 25: Switch Settings
DESCRIPTION AND OPERATION ® Switch Settings The IMASI03 has one 8-position DIP switch to select the slave address for the slave expander bus. This switch also selects built-in diagnostics for a stand-alone test. On-Board Indicators The IMASI03 has one red/green LED indicator which shows the operating status. -
Page 26: Slave Expander Bus Interface
DESCRIPTION AND OPERATION socket empty or not connecting the MMUs with cables sepa- rates them. Slave Expander Bus Interface The IMASI03 uses a custom gate array for the slave expander bus interface. An integrated circuit holds all the control logic and communication protocol. -
Page 27: Automatic Adjustments And Corrections
DESCRIPTION AND OPERATION ® IMASI03 module and the channel number on the slave module connected to an analog input signal. The type of the input, and the zero and span in engineering units, must also be specified to ensure proper scaling and cor- rections for calibration, cold junction compensation and non- linearity correction. -
Page 28: Input Calibration
DESCRIPTION AND OPERATION Input Calibration Each input channel is calibrated at the factory. During the cal- ibration procedure, any offset, gain and nonlinearity errors are identified and required correction factors are calculated and stored in the slave's nonvolatile memory. These factors are used when the input channel is scanned to correct the reading. -
Page 29: User Gain And Offset Adjustment
DESCRIPTION AND OPERATION ® User Gain and Offset Adjustment A user-specified linear adjustment may be applied to the input signal before it is converted to engineering units. This gain and offset is applied to the value obtained after all compensation and correction operations are performed. -
Page 30: Automatic Calibration
DESCRIPTION AND OPERATION Automatic Calibration Compensation for drift of input channel circuitry is done by periodic automatic calibration of each channel using on-board precision low-drift references. This function is transparent to normal input channel processing. Field Calibration Field calibration is not necessary in normal situations. It is possible to perform calibration procedures in the field if ultra stable, known, precision references are available. -
Page 31: Diagnostics Run In Diagnostic Mode
DESCRIPTION AND OPERATION ® Diagnostics Run in Diagnostic Mode The IMASI03 performs built-in tests in diagnostic mode to check the operation of the module. These tests include: Sixteen channel reference checks. • A/D internal reference checks. • Switch test. • Watchdog timer test. -
Page 32: On-Line Configuration
DESCRIPTION AND OPERATION ON-LINE CONFIGURATION All specifications in function codes 215, 216 and 217 associ- ated with the IMASI03 may be changed during on-line configu- ration. When changes are made to the input channel parameters (function code 216), the channel will hold the last value for a short period, the status remains unchanged during this period. -
Page 33: Section 3 - Installation
IMASI03. SPECIAL HANDLING NOTE: Always use Bailey's Field Static Kit (P/N 1948385A2 - wrist strap, ground cord assembly, alligator clip) when working with mod- ules. The kit connects a technician and the module to the same ground point to prevent damage to the module by electrostatic discharge. -
Page 34: Setup/Installation
INSTALLATION ® 4. Use the original packing material or container to store the module. 5. Store the module in a place with clean air; free of extremes of temperature and humidity. SETUP/INSTALLATION Before applying power to the IMASI03, make these checks: 1. -
Page 35: Configuring Inputs
INSTALLATION through 8) of SW1 set the six bit address. Positions 1 and 2 must remain closed (set to zero) for normal operation. Table lists the binary addresses for setting SW1. Refer to Section 6 for the diagnostic settings for SW1. Table 3-1. -
Page 36: Setup
INSTALLATION ® input. Set both jumpers on each input to pins 1 and 2 for a voltage or current input. Each channel can be configured inde- pendently. The IMASI03 can have any number of inputs config- ured as resistance, low level voltage or high level voltage. Table lists the jumper configurations for the IMASI03. -
Page 37: Termination Module/Unit Configuration
INSTALLATION Termination Module/Unit Configuration Two NIAI05 termination modules or one NTAI06 termination unit connects the field device wiring to the INFI 90 system. The terminal blocks are located on the termination device. Set up the termination device to accept the analog field inputs sent to the IMASI03 module. -
Page 38: Wiring
INSTALLATION ® Wiring Install the module in the MMU to connect the slave module to the voltages (+5, ± 15 VDC), needed to power the circuits. The MMU also connects P2 to the slave expander bus for communi- cation with the master module. P1 and P2 connection require no additional wiring or cabling. -
Page 39: Ntai06 To Imasi03 Cable Connections
INSTALLATION ANALOG SLAVE TERMINATION UNIT CABLE CHANNELS 11-16 FIELD IMASI03 NTAI06 WIRING NKAS01/11 (SEE NOTE) CHANNELS 1-10 NOTE: NKAS01 HAS PVC INSULATION (SPECIFY LENGTH UP TO 200 FT). NKAS11 HAS NON-PVC INSULATION (SPECIFY LENGTH UP TO 200 FT). TP35256A Figure 3-4. NTAI06 to IMASI03 Cable Connections WIRING CONNECTIONS AND CABLING I-E96-301B 3 - 7... -
Page 40: Section 4 - Configuration And Calibration
SECTION 4 - CONFIGURATION AND CALIBRATION INTRODUCTION This section explains the configuration and optional field cali- bration for the field inputs of the Universal Analog Input Slave Module (IMASI03). Function codes in the master MFP configure the IMASI03 and identify the active analog inputs. These function codes specify the slave expander bus address of the IMASI03 module and the number of active channels on the slave module. -
Page 41: Calibrating Inputs
CONFIGURATION AND CALIBRATION ® slave module connected to an analog input signal. The type of the input, as well as the zero and span in engineering units, must also be specified to ensure proper scaling and corrections for field calibration, cold junction compensation or nonlinearity correction. -
Page 42: Field Calibration
CONFIGURATION AND CALIBRATION thermocouple input types. In this case, S4 of function code 216 must be within the following: x01 ≤ S4 < x20 x60 ≤ S4 < x99 Example 2 If calibrating a channel for high level voltage, then S4 of func- tion code 217 must be set to one and S4 of function code 216 must be set to one of the high level voltage ranges (four to 20 milliamps is considered high level input type). - Page 43 CONFIGURATION AND CALIBRATION ® This is an example of a set user gain and offset operation: FC 217 Specifications Function Tune channel 1 offset gain offset and gain correction value value Tune channel 2 offset and gain correction NOTE: 1. S7 and S8 are not used. In this example the specifications have these functions: S1 selects the field calibration operation (5).
- Page 44 CONFIGURATION AND CALIBRATION 3. Calibrate the point with the new value (2 to 11 calibration points per channel and input type). 4. Enable the point to the system. Before beginning calibration, each channel must be configured with one function code 216, and the calibration type defined in S4 of function code 217 must be consistent with the input sig- nal defined in S4 of function code 216.
-
Page 45: Field Calibration Instruction
CONFIGURATION AND CALIBRATION ® Field Calibration Instruction The original slave calibration is done in the factory in a con- trolled, stable environment. Ambient temperature must remain constant at 25 (±1.0) degrees C. The field calibration location must be free from drafts. After each slave is powered-up in its calibration location, allow some warmup time before calibration for the most accurate results. -
Page 46: Individual Channel Calibration
CONFIGURATION AND CALIBRATION -10 V to +10 V range with an accuracy of ±1.0 millivolt (or High-Level Voltage • ±0.005 percent of this range). Source DC output resistance of less than 5.0 Ohms. • 5.0 Ohms to 500 Ohms range with an accuracy of ±25 mil- Resistance Source •... - Page 47 CONFIGURATION AND CALIBRATION ® The following steps field calibrate channel 1 for the low-level voltage range of -100 mV to +100 mV. Change specification 4 and use these steps to configure high level or resistance inputs. Also S4 of function code 216 must be consistent with the type of calibration being performed.
- Page 48 CONFIGURATION AND CALIBRATION 10. Tune the FC 217 block specification 5 to the input voltage resistance value. this example, tune these specifications: a. perform point calibration S1 = 2 b. the slave referenced by FC 215 S2 = 100 at block address 100 c.
- Page 49 CONFIGURATION AND CALIBRATION ® If desired, repeat Steps 7 through 12 for channels 2 through 16 to calibrate all 16 channels on the slave. 14. Enable the point. Tune the FC 217 block specification 1 to enable channel. this example, tune these specifications:...
-
Page 50: Section 5 - Operating Procedures
SECTION 5 - OPERATING PROCEDURES INTRODUCTION This section explains the start-up and operation for the Univer- sal Analog Input Slave Module (IMASI03). START-UP Communication between the IMASI03 slave and MFP master starts when the two modules are configured correctly (refer to Section 4). -
Page 51: On-Board Indicators
OPERATING PROCEDURES ® Blink green if slave expander bus communication is lost (if • the MFP is removed). Show solid red if a fatal failure of the IMASI03 module • occurs. For example, if power up diagnostics fail. Show solid red for a power fail interrupt (PFI). •... -
Page 52: Alarm And Exception Reporting
SECTION 6 - TROUBLESHOOTING INTRODUCTION This section explains the error signs and corrective actions for the Universal Analog Input Slave Module (IMASI03). ON-BOARD INDICATORS The IMASI03 has one red/green LED indicator which shows the operating status. The LED will: Flash red on power-up. •... -
Page 53: Imasi03 Error Types
TROUBLESHOOTING ® Function codes 215 and 216 generate five kinds of error messages. No response/wrong type (error type 1). • Calibration error (error type 2). • Channel failure/out of range (error type 3). • Calibration (error type 14). • Configuration mismatch (error type 7). •... - Page 54 TROUBLESHOOTING Table 6-1. IMASI03 Error Types (continued) Module Problem Report Type 12 Error Error Description Slave Error Corrective Actions Type Channel Failure/Out of Range External Cold Junction Verify quality of block defined for Spec 3. (03H) problem report (from Reference Error FC 216) Channel Failure/Out of Range Channel 1-16 A/D...
-
Page 55: Error Messages And Corrective Actions
FC 215 Spec 1. Insert IMASI03 and verify proper seating. If The indicated FC 215 block detected an error recurs, call Bailey field service. IMASI03 error. (IMASI03 slave firmware has reported an error.) ERROR MESSAGES AND CORRECTIVE ACTIONS... - Page 56 TROUBLESHOOTING Table 6-2. Module Status (Byte 3) Error Codes (continued) Error Error Description Corrective Actions Code Message Configuration The indicated FC 215 or FC 216 Verify FC 215 spec values and all linked Error - detected a function code channel link FC 216s are correct.
-
Page 57: Error Example
TROUBLESHOOTING ® Error Example Function code 215 for the slave and 216 for the active channel need the same address. Check that the address on IMASI03 switch SW1, the address in function code 215 specification 1 and function code 216 specification 1 are the same. If function code 216 slave address is not the same as function code 215 the MFP will go into error mode when put into exe- cute mode. -
Page 58: Switch Sw1 Settings
TROUBLESHOOTING expander bus testing requires a powered MMU slot, an MFP, an MFP interface device, and slave expander bus dipshunts. Switch SW1 Settings Table lists the switch settings used in both parts of the functional test. Table 6-3. Switch SW1 Settings, Operating Modes and Error Messages SW1 Settings Operating Mode... -
Page 59: Continue - Do Not Display Error
TROUBLESHOOTING ® If halt on error with display is selected a nd a specific test fails, an error code will be displayed by the status LED and repeated every six seconds. Refer to Table for all of the error codes. Example: Error Code Green LED Blink Sequence... -
Page 60: All Tests Mode
TROUBLESHOOTING 2. With the slave still plugged into the powered MMU slot, tog- gle each dipswitch position of SW1 individually. As each dipswitch position is toggled (from 0 to 1, and back to 0) indi- vidually, the status LED should change from GREEN to OFF, and back to GREEN again. -
Page 61: Module Pin Connections
TROUBLESHOOTING ® 2. Monitor the function code 217, block number N+4 to deter- mine the status of the slave expander bus. If block N+4 = 0000, the test is successful. If block N+4 = 2000, the test has failed (data passed back was incorrect). -
Page 62: P3 Input Signal Pin Connections
TROUBLESHOOTING Table 6-6. P3 Input Signal Pin Connections Signal Signal RTD- RTD+ IN1+ IN1- COM1 COM2 IN2- IN2+ IN3+ IN3- COM3 COM4 IN4- IN4+ IN5+ IN5- COM5 COM6 IN6- IN6+ IN7+ IN7- COM7 COM8 IN8- IN8+ IN9+ IN9- COM9 COM10 IN10- IN10+ IN11+... -
Page 63: Section 7 - Maintenance
Verify that the switch settings on the replacement module are the same as the failed module. This section contains a sched- ule to help take care of the system hardware. Refer questions to your local Bailey Controls service office. MAINTENANCE SCHEDULE Do the tasks in Table at the times shown. -
Page 64: Section 8 - Repair/Replacement Procedures
SECTION 8 - REPAIR/REPLACEMENT PROCEDURES INTRODUCTION This section explains the replacement steps for a Universal Analog Input Slave Module (IMASI03). There are no special tools required to replace an IMASI03 module. MODULE REPAIR/REPLACEMENT If the IMASI03 is faulty, replace it with a new one. DO NOT try to repair the module;... -
Page 65: Section 9 - Support Services
SECTION 9 - SUPPORT SERVICES INTRODUCTION Bailey Controls is ready to help you use, apply and repair its products. Contact the nearest sales office to request services for sales, repair and maintenance contracts. The sales office can answer your questions on how to apply and install the Bailey Controls INFI 90 system. -
Page 66: Cold Junction Reference Input
APPENDIX A - NIAI05 TERMINATION MODULE CONFIGURATION INTRODUCTION The Universal Analog Input Slave Module (IMASI03) uses two NIAI05 termination modules to connect field wiring (eight inputs each). Jumpers on each NIAI05 configure each of the eight analog inputs for either system powered 4-20 mA, exter- nal powered 4-20 mA, 3-wire RTD, differential or single ended voltage. -
Page 67: Appendix A - Niai05 Termination Module Configuration
NIAI05 TERMINATION MODULE CONFIGURATION ® same temperature around the terminal blocks and the RTD. Maintaining both at the same temperature allows maximum accuracy for thermocouple inputs. To apply the built-in cold junction reference for thermocouple inputs, refer to function code 215 specifications and block out- puts in Appendix Configuring Inputs... -
Page 68: Niai05 Input Type Descriptions
NIAI05 TERMINATION MODULE CONFIGURATION Table A-3. NIAI05 Input Type Descriptions Input Type Input Description Single Ended Volt- This jumper configuration connects the minus (-) input terminal to I/O COM on the NIAI05. The IMASI03 measures the voltage at the plus (+) input terminal with respect to the I/O COM terminal. -
Page 69: Configuring Inputs
NIAI05 TERMINATION MODULE CONFIGURATION ® CONFIGURING INPUTS This section contains figures of revision A and revision B IMASI03 termination modules. Figure shows the jumper locations on a module with • revision A hardware. Check jumpers before installing the NIAI05. Figure shows the jumper locations on a module with revision B hardware. -
Page 70: Configuring Inputs
NIAI05 TERMINATION MODULE CONFIGURATION JUMPER CONFIGURATIONS +24 VDC I/O COM TP35258A Figure A-1. Jumper Locations for Revision A Hardware NIAI05 CONFIGURING INPUTS I-E96-301B A - 5... -
Page 71: Jumper Locations For Revision B Hardware Niai05
NIAI05 TERMINATION MODULE CONFIGURATION ® JUMPER CONFIGURATIONS NIAI05 +24 VDC I/O COM TP35455A Figure A-2. Jumper Locations for Revision B Hardware NIAI05 CONFIGURING INPUTS A - 6 I-E96-301B... -
Page 72: Terminal Assignments For Revision A Hardware Niai05
NIAI05 TERMINATION MODULE CONFIGURATION ANALOG INPUT TERMINAL NUMBER 9 10 11 12 13 14 15 16 17 18 19 20 21 22 23 24 25 26 27 28 29 30 31 CHANNELS – – – – – – – – JUMPER JUMPER JUMPER... -
Page 73: Typical Input Circuit For Revision A Hardware
NIAI05 TERMINATION MODULE CONFIGURATION ® FIELD INPUT J17-J24 150 Ω J1-J8 TO IMASI03 FIELD INPUT –V J25-J32 J9-J16 250 Ω TO IMASI03 –V FIELD INPUT TO IMASI03 SUPPLY +24 V I/O COM INPUT INPUT INPUT INPUT INPUT INPUT INPUT INPUT CHANNEL 1 CHANNEL 2 CHANNEL 3... -
Page 74: Typical Input Circuit For Revision B Hardware
NIAI05 TERMINATION MODULE CONFIGURATION BAILEY REPLACEMENT FUSE PART NUMBER FOR F1-F8: 1945820A10310 FIELD INPUT J17-J24 J1-J8 F1-F8 TO IMASI03 FIELD INPUT –V J25-J32 J9-J16 250 Ω TO IMASI03 –V FIELD INPUT TO IMASI03 SUPPLY +24 V I/O COM INPUT INPUT... -
Page 75: Field Input Termination Examples For Revision A Hardware Niai05
NIAI05 TERMINATION MODULE CONFIGURATION ® JUMPER CONFIGURATIONS CHANNEL 1 (DIFFERENTIAL VOLTAGE) = R +R NIAI05 LTOTA L CHANNEL 3 (3-WIRE RTD) LT OTAL CHANNEL 5 TRANSMITTER (SYSTEM-POWERED 4-20 mA 4-20 mA) CHANNEL 6 -10 V TO +10 V (SINGLE-ENDED – VOLTAGE) EXTERNAL EXTERNAL CURRENT... -
Page 76: Revision A Hardware Imasi03 Input Examples
NIAI05 TERMINATION MODULE CONFIGURATION NIAI05 TERMINATION MODULE TRANSMITTER IMASI03 +24 V NKAS02/12 CABLE – 1-5 V SYSTEM-POWERED – 4-20 mA I/O COM NON-ISOLATED EXTERNAL CURRENT EXTERNAL LIMITING IMASI03 TRANSMITTER +24 V RESISTOR NKAS02/12 CABLE 1-5 V – – EXTERNAL EXTERNALLY-POWERED COMMON 4-20 mA EXTERNAL COMMON... -
Page 77: Revision B Hardware Imasi03 Input Examples
NIAI05 TERMINATION MODULE CONFIGURATION ® NIAI05 TERMINATION MODULE TRANSMITTER IMASI03 +24 V FUSE NKAS02/12 CABLE – 1-5 V SYSTEM-POWERED – 4-20 mA I/O COM NON-ISOLATED EXTERNAL CURRENT EXTERNAL LIMITING IMASI03 TRANSMITTER +24 V RESISTOR NKAS02/12 CABLE 1-5 V – – EXTERNAL EXTERNALLY-POWERED COMMON... -
Page 78: Cable Connections For Revision A And B Hardware Niai05
NIAI05 TERMINATION MODULE CONFIGURATION ANALOG SLAVE TERMINATION CABLE NIAI05 FIELD WIRING CHANNELS 1-8 ON J2 IMASI03 NKAS02/12 (SEE NOTE) NIAI05 FIELD WIRING CHANNELS 9-16 ON J3 NOTE: NKAS02 HAS PVC INSULATION (SPECIFY LENGTH UP TO 200 FT). NKAS12 HAS NON-PVC INSULATION (SPECIFY LENGTH UP TO 200 FT). -
Page 79: Appendix B - Ntai06 Termination Unit Configuration
APPENDIX B - NTAI06 TERMINATION UNIT CONFIGURATION INTRODUCTION The Universal Analog Slave Input Module (IMASI03) uses one NTAI06 Termination Unit for termination. Jumpers on the NTAI06 configure each of the 16 analog inputs for either sys- tem powered 4-20 mA, external powered 4-20 mA, 3-wire RTD, differential or single ended voltage. -
Page 80: Ntai06 Input Types
NTAI06 TERMINATION UNIT CONFIGURATION ® Table B-1. NTAI06 Input Types Input Type Signal Type E, J, K, L, N (14 AWG) Thermocouple N (28 AWG), R, S, T, U Chinese E, Chinese S. -100 to +100 mV Millivolt -10 V to +10 V High Level 4 to 20 mA, external or system powered. - Page 81 NTAI06 TERMINATION UNIT CONFIGURATION CONFIGURING INPUTS This section contains figures of revision A and revision B IMASI03 termination units. Figure shows the jumper locations and terminal • assignments for revision A hardware. Check jumpers before installing the NTAI06. Figure shows the jumper locations and terminal assignments for revision B hard- ware.
-
Page 82: Jumper Locations And Terminal Assignments For Revision A Hardware Ntai06
NTAI06 TERMINATION UNIT CONFIGURATION ® 2 AMP +24V BAILEY REPLACEMENT FUSE PART NUMBER FOR F17: 1948182A32001 TP35263A Figure B-1. Jumper locations and Terminal Assignments for Revision A Hardware NTAI06 CONFIGURING INPUTS B - 4 I-E96-301B... -
Page 83: Jumper Locations And Terminal Assignments For Revision B Hardware Ntai06
NTAI06 TERMINATION UNIT CONFIGURATION 3 2 1 3 2 1 3 2 1 3 2 1 +24V NOTE: ATTACH MOUNTING SCREW TO CONNECT CHASSIS GROUND TP35460A Figure B-2. Jumper Locations and Terminal Assignments for Revision B Hardware NTAI06 CONFIGURING INPUTS I-E96-301B B - 5... -
Page 84: Typical Input Circuit For Ntai06
NTAI06 TERMINATION UNIT CONFIGURATION ® BAILEY REPLACEMENT FUSE PART NUMBER FOR F1-F16: 1945820A10310 FIELD INPUT J33-J48 J1-J16 F1-F16 TO IMASI03 FIELD INPUT –V J49-J64 J17-J32 250 Ω TO IMASI03 –V TO IMASI03 FIELD INPUT SUPPLY +24 V I/O COM INPUT... -
Page 85: Field Input Termination Examples For Revision A And B Hardware Ntai06
NTAI06 TERMINATION UNIT CONFIGURATION CHANNEL 5 (DIFFERENTIAL VOLTAGE) = R +R LTOTAL CHANNEL 6 TRANSMITTER 4-20 mA (SYSTEM-POWERED 3 2 1 3 2 1 3 2 1 3 2 1 4-20 mA) CHANNEL 7 (SINGLE-ENDED -10 V TO +10 V VOLTAGE) –... -
Page 86: Imasi03 Input Examples
NTAI06 TERMINATION UNIT CONFIGURATION ® NTAI06 TERMINATION UNIT TRANSMITTER IMASI03 +24 V FUSE NKAS01/11 CABLE – 1-5 V SYSTEM-POWERED – 4-20 mA I/O COM NON-ISOLATED EXTERNAL CURRENT EXTERNAL LIMITING IMASI03 TRANSMITTER +24 V RESISTOR NKAS01/11 CABLE 1-5 V – – EXTERNAL EXTERNALLY-POWERED COMMON... -
Page 87: Cable Connections For Ntai06
NTAI06 TERMINATION UNIT CONFIGURATION ANALOG SLAVE TERMINATION UNIT CABLE CHANNELS 11-16 FIELD IMASI03 NTAI06 WIRING NKAS01/11 (SEE NOTE) CHANNELS 1-10 NOTE: NKAS01 HAS PVC INSULATION (SPECIFY LENGTH UP TO 200 FT). NKAS11 HAS NON-PVC INSULATION (SPECIFY LENGTH UP TO 200 FT). TP35256A Figure B-6. -
Page 88: Cold Junction Reference Input
APPENDIX C - FUNCTION CODE DEFINITIONS INTRODUCTION The IMASI03 Universal Analog Input Slave Module is config- ured and controlled through function blocks configured on the master MFP. This section describes the three function codes that support the IMASI03. They are FC 215, FC 216 and FC 217. -
Page 89: Enhanced Analog Slave Definition Function Code
FUNCTION CODE DEFINITIONS ® Table C-1. FC 215 Outputs Block No. Data Type Description REAL Cold Junction Reference Temperature (degrees C) BOOLEAN Slave Status: 0 = GOOD; 1 = BAD REAL Input scan cycle time (seconds) Table C-2. FC 215 Output Descriptions Block No. - Page 90 FUNCTION CODE DEFINITIONS Specification S1 is the analog slave expander bus address of the Universal Analog Input Slave Module (IMASI03). This specification contains the block address of the first Enhanced Analog Input Definition (Function Code 216) func- tion block describing one of the channels on the slave module. This specification contains the block address of the cold junc- tion reference temperature used for compensation of thermo- couple inputs.
-
Page 91: Remote Cold Junction Compensation
FUNCTION CODE DEFINITIONS ® (215) REMOTE IMASI03 TERMINATION TERMINAL DEVICE • BLOCK • • Ω R = 30 TYPE S Ω R = 30 (216) THERMOCOUPLE INPUT 1 – Ω R = 20 INPUT 2 TYPE R INPUT 3 Ω R = 20 THERMOCOUPLE –... -
Page 92: Enhanced Analog Input Definition Function Code
FUNCTION CODE DEFINITIONS ENHANCED ANALOG INPUT DEFINITION FUNCTION CODE (FC 216) This function code is used to specify an input to an analog slave module. This must be configured in the same segment as the Enhanced Analog Slave Definition Function Block 215 which references it. -
Page 93: Fc 216 Specifications
FUNCTION CODE DEFINITIONS ® Table C-6. FC 216 Specifications Spec Default Range Tune Data Type Description Value Min. INT(2) 0 to 63 Slave Address INT(2) 0 to 9998 Block Address of next enhanced Analog Input Definition (FC216) INT(2) Full Slave Input Channel Number INT(1) Full Input Signal Type... -
Page 94: Fc 216 Input Signal Types
FUNCTION CODE DEFINITIONS Table C-7. FC 216 Input Signal Types Definition Value Undefined. Do not use. Type S thermocouple Type R thermocouple Type E thermocouple Type J thermocouple Type K thermocouple Type T thermocouple Chinese Type E thermocouple Chinese Type S thermocouple Type L thermocouple Type U thermocouple Type N (14 AWG) thermocouple... - Page 95 FUNCTION CODE DEFINITIONS ® This specification defines the temperature units displayed (degrees Celsius or Fahrenheit) if S4 indicates other than a thermocouple or RTD type. Specification 5 is the type of engi- neering unit conversion to be performed on the input signal. If S4 indicates a thermocouple or RTD type, then S5 is ignored and S6/S7 are used to convert the input signal to engineering units.
-
Page 96: Enhanced Calibration Command Function Code
FUNCTION CODE DEFINITIONS Table C-8. FC 216 Resolution and Scan Time Resolution Resolution Typical A/D Conversion (Bits of A/D) (Percent of A/D Span) Times Per Channel 0.0015 30 ms 0.00038 175 ms 0.000095 175 ms 0.000024 450 ms 0.000006 2000 ms Table gives approximate typical channel A/D conversion rates for each channel. -
Page 97: Fc 217 Outputs
FUNCTION CODE DEFINITIONS ® Errors encountered during calibration of a particular channel are also reported as an output (N + 1) to this function block. This output will reflect the status for the channel referenced in the most recent calibration command. Function code 217 uses 24 bytes of NVRAM and 156 bytes of RAM memory in the MFP module. -
Page 98: Fc 217 Output Descriptions
FUNCTION CODE DEFINITIONS Table C-10. FC 217 Output Descriptions Block No. Description Uncorrected value of input signal. This output gives the value of the input signal without any of the calibration, drift, lead wire, or cold junction compensations applied. The input value is converted to a range of -100 to +100 using an ideal conversion from the digitized value. -
Page 99: Fc 217 Specifications
FUNCTION CODE DEFINITIONS ® Table C-11. FC 217 Specifications Spec Default Range Tune Data Type Description Value Min. INT(1) 0 to 255 Calibration operation code INT(2) 0 to 9998 Block Address of FC 215 used to configure the slave. INT(2) Full Slave channel number INT(1) - Page 100 FUNCTION CODE DEFINITIONS 6 - Reset user gain and offset adjustment. This command cancels any previously entered user gain and offset adjustment for the specified channel. 7 - Display uncorrected point data (percent of positive full scale). This command performs no operation other than to update the uncorrected output data value for the specified input channel (block output N of function code 217).
- Page 101 FUNCTION CODE DEFINITIONS ® For command code 2, point calibration, this parameter speci- fies the true value of the signal applied to the input channel during the calibration operation. Enter S5 for each calibration point (twice if two points on a channel are calibrated). Up to 11 points may be identified for adjustment of input channel non- linearities, resulting in 10 linear segments for correction.
- Page 102 Index Address Switch (SW1)..........3-2 Data on Input Channels ..........6-2 Alarm and Exception Reporting......2-10, 6-1 Data Values ..............2-5 All Tests Mode............6-7 Diagnostics ..............6-7 Analog to Digital Conversion ........2-2 Diagnostics Run During Normal Operation....2-10 Automatic Adjustments and Corrections Diagnostics Run in Diagnostic Mode ......2-10 Automatic Calibration..........
- Page 103 ® Index (continued) Inputs, Configuring the ..........4-1 Isolation Amplifier ............2-2 Gain and Offset Adjustment ........2-8 Glossary of Terms and Abbreviations ......1-5 Jumper Configuration ..........3-4 Jumper Location ............3-4 Halt - Display Error............6-5 Jumpers Used for Each Channel........ 3-4 IMASI03 Lead Wire Resistance ..........
- Page 104 Index (continued) Binary Slave Address ..........3-3 Configuring Inputs ..........3-3 NIAI05 to IMASI03 Cable Connections ...... 3-6 Jumper Configuration..........3-4 Nomenclature ............. 1-7 Jumper Location............3-4 NTAI06 to IMASI03 Cable Connections ..... 3-7 Jumpers Used for Each Channel ......3-4 Physical Installation..........3-5 Termination Module/Unit Configuration....3-5 Slave Expander Bus ...........2-4 Offset and Gain Adjustment ........
- Page 105 Telefax 39-10-6582-941 Telephone 49-69-799-0 Telefax 65-292-9011 Telefax 49-69-799-2406 Form I-E96-301B1 Litho in U.S.A. 1294 Copyright © 1994 by Elsag Bailey Process Automation, As An Unpublished Work ® Registered Trademark of Elsag Bailey Process Automation ™ Trademark of Elsag Bailey Process Automation...
Need help?
Do you have a question about the infi 90 IMASI03 and is the answer not in the manual?
Questions and answers