
Related Manuals for Bailey Infi 90 IMDSM05


Summary of Contents for Bailey Infi 90 IMDSM05
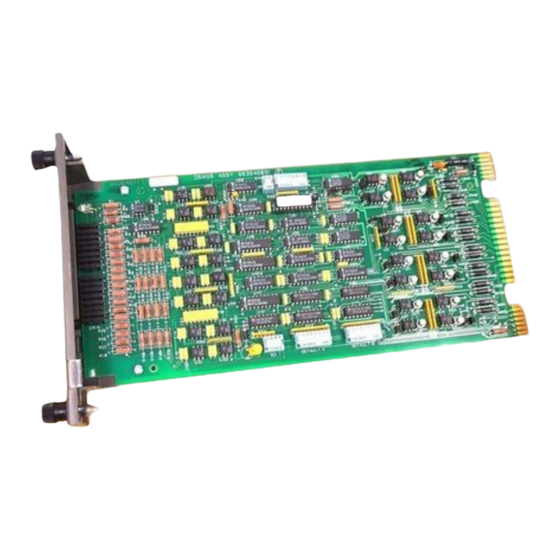
- Page 1 E96-309 ® ® Digital I/O Slave Module (IMDSM05) Process Control and Automation Solutions from Elsag Bailey Group...
- Page 2 The information contained in this document is subject to change without notice. Elsag Bailey, its affiliates, employees, and agents, and the authors and contributors to this publication specif- ically disclaim all liabilities and warranties, express and implied (including warranties of merchantability and...
- Page 3 Preface The Digital Slave Module (IMDSM05) is an interface for up to sixteen digital I/O field signals to the Infi 90 Process Manage- ment System. These digital inputs and outputs are used by master modules to monitor and control a process. The DSM slave module is used with the Multi-Function Proces- sor (MFP) and Logic Master Module (LMM).
- Page 4 ® List of Effective Pages Total number of pages in this manual is 43, consisting of the following: Page No. Change Date Preface Original List of Effective Pages Original iii through vii Original 1-1 through 1-6 Original 2-1 through 2-4 Original 3-1 through 3-10 Original...
- Page 5 ® Safety Summary GENERAL Equipment Environment WARNINGS All components, whether in transportation, operation, or storage must be in a noncorrosive environment. Electrical Shock Hazard During Maintenance Disconnect power or take precautions to ensure that contact with energized parts is avoided when servicing. Special Handling This module uses Electrostatic Sensitive Devices (ESD).
- Page 6 Sommaire de Sécurité AVERTISSEMENTS Environment de l'equipement D’ORDRE Ne pas soumettre les composants a une atmosphere corrosive lors GÉNÉRAL du transport, de l'entreposage ou de l'utilisation. Risques de chocs electriques lor de l'entretien S'assurer de debrancher l'alimentation ou de prendre les precau- tions necessaires a eviter tout conatact avec des composants sours tension lors de l'entretien.
-
Page 7: Table Of Contents
Table of Contents Page SECTION 1 - INTRODUCTION ....................1-1 OVERVIEW ........................1-1 INTENDED USER ......................1-1 MODULE DESCRIPTION ....................1-1 FEATURES........................1-2 INSTRUCTION CONTENT .....................1-3 HOW TO USE THIS MANUAL ..................1-3 GLOSSARY OF TERMS AND ABBREVIATIONS .............1-4 REFERENCE DOCUMENTS..................1-5 NOMENCLATURE ......................1-5 SPECIFICATIONS ......................1-5 SECTION 2 - DESCRIPTION AND OPERATION................2-1 INTRODUCTION......................2-1 INPUTS AND OUTPUTS ....................2-1 Input Circuit ......................2-2... - Page 8 ® Table of Contents (continued) Page SECTION 4 - OPERATING PROCEDURES................4-1 INTRODUCTION ......................4-1 OPERATOR/INTERFACE ..................... 4-1 START-UP........................4-1 SECTION 5 - TROUBLESHOOTING...................5-1 INTRODUCTION ......................5-1 ERROR MESSAGES AND CORRECTIVE ACTION ............5-1 MASTER MODULE ERRORS ..................5-1 MODULE PIN CONNECTIONS ..................5-2 SECTION 6 - MAINTENANCE.....................6-1 INTRODUCTION ......................
- Page 9 List of Figures Title Page 1-1. Infi 90 Communication Levels ................1-2 2-1. DSM Block Diagram....................2-1 2-2. I/O Circuit......................2-3 3-1. Switches and Jumpers ...................3-2 3-2. Address and Enable Switches ................3-3 3-3. Module Configuration Switch .................3-5 3-4. Default Value Switches ..................3-7 3-5. Module Jumper Locations ..................3-7 4-1.
-
Page 10: Section 1 - Introduction
SECTION 1 - INTRODUCTION OVERVIEW The Digital Slave Module (IMDSM05) interfaces process field inputs/outputs with the Multi-Function Processor and Logic Master Module in the Infi 90 Process Management System. There are sixteen I/O circuits on the DSM. These circuits may be input or outputs. -
Page 11: Features
INTRODUCTION ® COMMUNICATION HIGHWAY (INFI-NET) COMMUNICATION MODULES CONTROLWAY OTHER MODULES SLAVE EXPANDER BUS OTHER SLAVES TU/TM DIGITAL I/O TP35718A Figure 1-1. Infi 90 Communication Levels carries digital signals to a Termination Unit (TU) (refer to Table 5-3). The terminal blocks (physical connection points) for field wiring are on the TU. -
Page 12: Instruction Content
Procedures Support Services Provides replacement part ordering information. It explains other areas of support that Bailey Controls provides. HOW TO USE THIS MANUAL Read this manual before handling the DSM module. Refer to the sections in this list as needed for more information. -
Page 13: Glossary Of Terms And Abbreviations
INTRODUCTION ® GLOSSARY OF TERMS AND ABBREVIATIONS Term Definition Configuration A control strategy with function blocks. Controlway A redundant peer-to-peer communication path for point data transfer between intelli- gent modules within a process control unit. Digital A discrete input signal having only two states: on or off. Dipshunt Dual in-line package with shorting bars. -
Page 14: Reference Documents
INTRODUCTION REFERENCE DOCUMENTS I-E96-201 Multi-Function Processor (IMMFP01) I-E96-202 Multi-Function Processor (IMMFP02) I-E96-209 Logic Master Module (IMLMM02) I-E93-911 Termination Unit Manual I-E96-110 Operator Interface Station I-E93-916 Engineering Work Station I-E92-501-2 Configuration and Tuning Terminal I-E93-900-20 Function Code Application Manual NOMENCLATURE The following modules and equipment can be used with a DSM: IMMFP01/02 Multi-Function Processor Module... - Page 15 INTRODUCTION ® SPECIFICATIONS (continued) Outputs 10 V typical (sink current = 120 mA) 24 V Logic Low Level Output Voltage 2.0 V maximum 100 µA maximum 24 V Logic High Level Output Current 120 mA 24 V maximum Sink Current Propagation Delay Times Low to high 50 µsec.
-
Page 16: Section 2 - Description And Operation
SECTION 2 - DESCRIPTION AND OPERATION INTRODUCTION This section explains the input and output circuitry, control logic, power and connections for the Digital Slave Module (DSM). The DSM is a digital input/output interface to a Multi-Function Processor (MFP) module or Logic Master Mod- ule (LMM). -
Page 17: Input Circuit
DESCRIPTION AND OPERATION ® Input Circuit Figure shows the DSM block diagram and signal flow through the module. The input isolation block consists of cur- rent limiters and optocouplers to isolate the sixteen field inputs (or outputs) from the module circuitry. The input circuits pro- vide 150 VDC isolation between input and logic circuits, and other input channels. -
Page 18: Control Logic
DESCRIPTION AND OPERATION +5 VDC +24 VDC 5.36 K 3.52 K 10 K INPUT CIRCUIT 1 2 3 +5 VDC OUTPUT CIRCUIT 220 K 1.5 K TP35714A Figure 2-2. I/O Circuit CONTROL LOGIC Function Code (FC) 84 in the master module configuration accesses the DSM on the slave expander bus. -
Page 19: Logic Power
DESCRIPTION AND OPERATION ® module reads the status byte and compares it to an expected value. If a mismatch occurs, it flags the error and marks the point as bad quality. LOGIC POWER Logic power (+5 VDC) drives the DSM circuits. It connects through the top 12-pin card edge connector (P1) shown in Fig- ure 2-1. -
Page 20: Section 3 - Installation
NOTE: Refer to Product Instruction I-E93-911 for termination device wiring instructions. SPECIAL HANDLING NOTE: Always use Bailey's Field Static Kit (P/N 1948385A2 - con- sists of wrist strap, ground cord assembly, alligator clip) when work- ing with modules. The kit is designed to connect a technician and the static dissipative work surface to the same ground point to pre- vent damage to the modules by electrostatic discharge. -
Page 21: Setup
INSTALLATION ® SETUP Prior to installation, set the address of the DSM and install jumpers to configure the digital outputs and inputs. Be sure you configure the termination unit (TU) or termination module (TM) to accept the field device signals. Figure shows the 5 switches and 18 jumpers to set on the DSM. -
Page 22: Enable Switch (Mfp/Lmm)
INSTALLATION The enable switch allows the DSM to use the address selection switch to set addresses for LMM/MFP operation. The address is set by an eight position address dipswitch shown in Figure 3-2. ENABLE CONTACTS 5-8 ON ADDRESS SWITCH ENABLE CONTACTS 1-4 ON ADDRESS SWITCH SET CONTACTS 3-8 FOR MFP/LMM ADDRESS... -
Page 23: Address Switch Settings (Mfp/Lmm)
INSTALLATION ® The address is set by an eight position address dipswitch. The six right switch positions (3 through 8) of S1 set the six bit address. Positions 1 and 2 are not used and must remain in the closed position (see Figure 3-2). Table is a binary address conversion table for setting the slave address selection switch. -
Page 24: Module Configuration Switch
INSTALLATION Module Configuration Switch The module configuration switch shown in Figure contains four contacts. These contacts: Allow the DSM to interface with a master and field devices. • Allow the DSM to interface with a Digital Logic Station. • Set the operation (input or output) of each point group •... -
Page 25: Default Value Switch
INSTALLATION ® and a Digital Logic Station (DLS), then the contact must be in the 1 or open position. In either of these applications, the first two contacts (1 and 2) of the configuration switch set the oper- ation of two separate point groups in the I/O circuitry. Contact 1 sets the operation of group A. -
Page 26: Default Value Switches
INSTALLATION ADDRESS MASTER ENABLE SELECTION SELECTION JUMPERS SWITCH SWITCH JUMPERS (J1-J16) OPEN OPEN OPEN OPEN OPEN MODULE CONFIGURATION SWITCH DEFAULT VALUE SWITCHES OPEN OPEN GROUP A GROUP B TP35710A Figure 3-4. Default Value Switches MFP/LMM02 OPERATION ADDRESS MASTER SELECTION ENABLE SELECTION JUMPERS JUMPERS... -
Page 27: Master Selection Jumpers
INSTALLATION ® Set the jumpers so they relate to the type of output needed. For common outputs (with an electrically common destination), connect the jumper between posts 1 an 2. For isolated outputs (with no electrically common destination), connect the jumper between posts 2 an 3. -
Page 28: Physical Installation
INSTALLATION Physical Installation NOTE: The Installation section provides instructions pertaining to the physical installation of the slave only. For complete cable and TU/TM information, refer to Termination Unit Manual I-E93-911. The DSM inserts into a standard Infi 90 Module Mounting Unit (MMU) and occupies one slot. -
Page 29: Cable Connections
INSTALLATION ® Installing the module in the MMU connects the slave module to the logic power (+5 VDC), necessary to drive the circuitry, at P1. It also connects P2 to the slave expander bus for communi- cation with the master module. P1 and P2 connection require no additional wiring or cabling. -
Page 30: Section 4 - Operating Procedures
SECTION 4 - OPERATING PROCEDURES INTRODUCTION This section explains the front panel indicators and start-up procedures for the Digital Slave Module (IMDSM05). OPERATOR/INTERFACE The DSM module has point (input/output) status LED indica- tors on the front panel to aid in system test and diagnosis. There are sixteen LEDs divided into two groups of eight (group A and group B). -
Page 31: Section 5 - Troubleshooting
SECTION 5 - TROUBLESHOOTING INTRODUCTION This section explains the error indications and corrective actions for the Digital Slave Module (IMDSM05). ERROR MESSAGES AND CORRECTIVE ACTION You can obtain the status of the DSM by checking the master module for good quality on its input blocks. Use any Infi 90 operator interface (e.g. -
Page 32: Module Pin Connections
TROUBLESHOOTING ® MODULE PIN CONNECTIONS The slave module has three connection points for external sig- nals and power (P1, P2 and P3). Tables 5-1, show the pin connections. Table 5-1. P1 Power Pin Connections Pin(P1) Connection Pin(P1) Connection +5 VDC +5 VDC Power Common Power Common... -
Page 33: Section 6 - Maintenance
SECTION 6 - MAINTENANCE INTRODUCTION The Digital Slave Module (IMDSM05) requires limited mainte- nance. This section contains a maintenance schedule. MAINTENANCE SCHEDULE Perform the tasks in Table at the specified intervals. Table 6-1. Maintenance Schedule Task Interval Clean and tighten all power and Every 6 months or during plant shut- grounding connections. -
Page 34: Section 7 - Repair/Replacement Procedures
SECTION 7 - REPAIR/REPLACEMENT PROCEDURES INTRODUCTION This section explains the replacement steps for an Digital Slave Module (IMDSM05). There are no special tools required to change the DSM. MODULE REPAIR/REPLACEMENT If you determine the DSM is faulty, replace it with a new one. DO NOT try to repair the module;... -
Page 35: Section 8 - Support Services
SECTION 8 - SUPPORT SERVICES INTRODUCTION Bailey Controls is ready to help you use, apply and repair its products. Contact your nearest sales office to request services for sales, repair and maintenance contracts. Your sales office can answer your questions on how to apply and install the Bailey Infi 90 system. -
Page 36: Appendix A - Ntdi01 Termination Unit Configuration
APPENDIX A - NTDI01 TERMINATION UNIT CONFIGURATION INTRODUCTION The Digital Slave Module (DSM) uses a NTDI01 to terminate field wir- ing. Dipshunts on the termination unit configure the digital inputs. CONFIGURING NTDI01 Figure shows the dipshunts and terminal blocks on the ter- mination unit. -
Page 37: Configuring Ntdi01
NTDI01 TERMINATION UNIT CONFIGURATION ® +5 VDC 5.36 K E2 E CO M 10 K 3.52 K – +5 VDC NOTE: JUMPER IS SET FOR INPUT TERMINAL BLOCK DIPSHUNT XU1 (GROUP B) 220 K 1.5 K IMDSM05 I/O CIRCUITRY NKTU01 TERMINATION BOARD (NTDI01) TP35706A Figure A-2. -
Page 38: Dipshunt Xu17
NTDI01 TERMINATION UNIT CONFIGURATION PREPARING DIPSHUNT XU17 Dipshunt XU17 defines a termination unit specifically for the DSM. Figure shows the XU17 dipshunt as it applies to DSM applications. All XU17 dipshunts for termination boards that interface the DSM to field devices must be configured as Figure shows. -
Page 39: Dipshunt Configurations
NTDI01 TERMINATION UNIT CONFIGURATION ® Dipshunt Dipshunt Application Configuration Configuration Signal Type XU1 - XU8 XU17 Dry Contacts or Solid State Switches TP35717A Powering an External Load TP35717A Sinking an External Load TP35717A Isolated Outputs TP35717A Figure A-4. Dipshunt Configurations DIPSHUNT DIPSHUNT DIPSHUNT... -
Page 40: Cable Connections For Ntdi01
NTDI01 TERMINATION UNIT CONFIGURATION NTDI01 NKTU01 IMDSM05 TP35729A Figure A-6. Cable Connections for NTDI01 PREPARING DIPSHUNT XU17 I-E96-309A A - 5... -
Page 41: Introduction
APPENDIX B - NTDO02 TERMINATION UNIT CONFIGURATION INTRODUCTION The Digital Slave Module (DSM) uses a NTDO02 to terminate field wiring from AC or DC loads. The termination unit provides solid state relays for switching. The termination unit (TU) can be daisy-chained to other TUs with solid state relays. Dip- shunts allow the DSM to control any solid state relay with a maximum of 9 per output. -
Page 42: Installation
NTDO02 TERMINATION UNIT CONFIGURATION ® NTDO02 NKTU01 IMDSM05 NTDO02 NKDO01 TP85146A Figure B-1. Cable Connections For NTDO02 – – – – DIGITAL TERMINAL OUTPUT NUMBER NUMBER – – – – TP35753A Figure B-2. Terminal Assignments for NTDO02 INSTALLATION B - 2 I-E96-309A... -
Page 43: Introduction
APPENDIX C - NTLS01 TERMINATION UNIT CONFIGURATION INTRODUCTION The NTLS01 termination module interfaces the NDLS02 to the DSM. A single station requires the NKDS01 cable, using edge connection to the station (P1) and plug connection to the ter- mination unit (P2-P5). Multiple stations are connected together using daisy-chain connection cables (NKDS05). -
Page 44: Cable Connections For Nidio1
APPENDIX D - NIDI01 TERMINATION UNIT CONFIGURATION INTRODUCTION The NIDI01 interfaces the DSM to up to 16 field inputs such as switches, LEDs and solenoids. Change the wire jumpers to configure the NIDI01 for your application. The jumpers needed to select the PCU module are labeled on the NIDI01 circuit board. -
Page 45: Installation
NIDI01 TERMINATION UNIT CONFIGURATION ® TERMINAL NUMBER 9 10 11 12 13 14 15 16 17 18 19 20 21 22 23 24 25 26 27 28 29 30 31 32 – – – – – – – – – –... - Page 46 Telefax 39-10-6582-941 Telephone 49-69-799-0 Telefax 65-292-9011 Telefax 49-69-799-2406 Form I-E96-309A Litho in U.S.A. 690 Copyright © 1990 by Elsag Bailey Process Automation, As An Unpublished Work ® Registered Trademark of Elsag Bailey Process Automation ™ Trademark of Elsag Bailey Process Automation...
Need help?
Do you have a question about the Infi 90 IMDSM05 and is the answer not in the manual?
Questions and answers