
Related Manuals for Bailey infi 90 IMHSS03


Summary of Contents for Bailey infi 90 IMHSS03
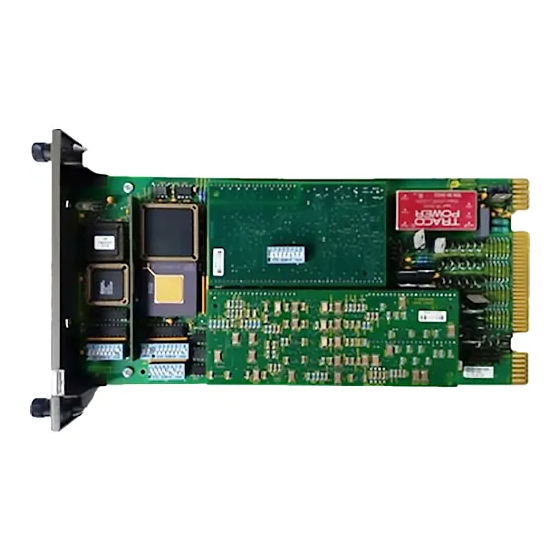
- Page 1 E96-322 ® ® Hydraulic Servo Module (IMHSS03) Process Control and Automation Solutions from Elsag Bailey Group...
- Page 2 The information contained in this document is subject to change without notice. Elsag Bailey, its affiliates, employees, and agents, and the authors and contributors to this publication specif- ically disclaim all liabilities and warranties, express and implied (including warranties of merchantability and...
- Page 3 IMHSS03 module installation, calibration and tuning, opera- tion, maintenance and troubleshooting. Anyone installing, cal- ibrating, tuning or operating the IMHSS03 module should read and understand this instruction. ® INFI 90 is a registered trademark of Elsag Bailey Process Automation. I-E96-322A...
- Page 4 ® List of Effective Pages Total number of pages in this instruction is 90, consisting of the following: Page No. Change Date Preface Original List of Effective Pages Original iii through ix Original 1-1 through 1-8 Original 2-1 through 2-10 Original 3-1 through 3-11 Original...
- Page 5 ® Safety Summary GENERAL Equipment Environment WARNINGS All components, whether in transportation, operation or storage, must be in a noncorrosive environment. Electrical Shock Hazard During Maintenance Disconnect power or take precautions to insure that contact with energized parts is avoided when servicing. Special Handling This module uses electrostatic sensitive devices.
- Page 6 Sommaire de Sécurité AVERTISSEMENTS Environnement de l’équipement D’ORDRE Ne pas soumettre les composants à une atmosphère corrosive lors GÉNÉRAL du transport, de l’entreposage ou l’utilisation. Possibilité de chocs électriques durant l’entretien Débrancher l’alimentation ou prendre les précautions pour éviter tout contact avec des composants sous tension durant l’entretien. Précautions de manutention Ce module contient des composants sensible aux décharges élec- trostatiques.
-
Page 7: Table Of Contents
Table of Contents Page SECTION 1 - INTRODUCTION ....................1-1 OVERVIEW ........................1-1 INTENDED USER ......................1-1 HSS MODULE DESCRIPTION..................1-1 HSS MODULE APPLICATION..................1-1 FEATURES........................1-2 INSTRUCTION CONTENT .....................1-3 HOW TO USE THIS INSTRUCTION ................1-4 REFERENCE DOCUMENTS..................1-4 NOMENCLATURE ......................1-5 GLOSSARY OF TERMS AND ABBREVIATIONS .............1-5 SPECIFICATIONS ......................1-6 SECTION 2 - DESCRIPTION AND OPERATION................2-1 INTRODUCTION......................2-1... - Page 8 ® Table of Contents (continued) Page SECTION 3 - INSTALLATION (continued) FUNCTION CODE 55 CONFIGURATION ..............3-11 FUNCTION CODE 150 CONFIGURATION ..............3-11 SECTION 4 - CALIBRATION.......................4-1 INTRODUCTION ......................4-1 NULL CHECK ......................4-1 AUTOMATIC TUNING (FUNCTION CODE 55) ............... 4-2 Demodulator Gain ....................
- Page 9 Table of Contents (continued) Page SECTION 9 - SUPPORT SERVICES ...................9-1 INTRODUCTION......................9-1 REPLACEMENT PARTS AND ORDERING INFORMATION ..........9-1 TRAINING ........................9-1 TECHNICAL DOCUMENTATION ...................9-1 APPENDIX A - QUICK REFERENCE GUIDE ................A-1 INTRODUCTION......................A-1 IMHSS03 DIPSWITCH AND JUMPER SETTINGS ............A-1 LED STATES .......................
- Page 10 ® List of Figures Title Page 1-1. HSS Module within the INFI 90 Hierarchy .............. 1-2 2-1. Turbine Speed Control Loop .................. 2-2 2-2. Functional Block Diagram ..................2-5 2-3. Position Demand and Output Circuit ..............2-7 2-4. Position Feedback Circuit ..................2-9 2-5.
- Page 11 List of Tables Title Page 1-1. Reference Documents ....................1-4 1-2. Nomenclature ......................1-5 1-3. Glossary of Terms and Abbreviations ..............1-5 1-4. Specifications......................1-6 3-1. Dipswitch S1, I/O Expander Bus Address Example Settings ........3-5 3-2. Dipswitch S2, Demodulator Gain ................3-6 3-3. Dipswitch S3, Controller Gain ................3-6 3-4.
-
Page 12: Section 1 - Introduction
SECTION 1 - INTRODUCTION OVERVIEW The IMHSS03 Hydraulic Servo Module is a valve position con- trol module. It provides an interface through which a processor module can control a hydraulic actuator via a servo valve. By regulating the current to the servo valve, it initiates a change in actuator position. -
Page 13: Features
INTRODUCTION ® INFI-NET NIS NPM CONTROLWAY POSITION DEMAND I/O EXPANDER BUS TURBINE CONTROL FIELD I/O SPEED FREQUENCY COUNTER MODULE HYDRAULIC SERVO MODULE MULTI-FUNCTION PROCESSOR NETWORK INTERFACE MODULE NETWORK PROCESSOR MODULE OPERATOR INTERFACE STATION TP50202B Figure 1-1. HSS Module within the INFI 90 Hierarchy The MFP module uses the data from the FCS module to calcu- late turbine speed. -
Page 14: Instruction Content
Contains procedures that explain how to replace the module, Repair/Replacement Procedures and termination unit and module. It also has a spare parts list with Bailey part numbers for related parts, cables, and fuses. Support Services Explains the services and training that Bailey makes available to their customers. -
Page 15: How To Use This Instruction
INTRODUCTION ® HOW TO USE THIS INSTRUCTION Read this instruction before handling the HSS module. Refer to a specific section for information as needed. 1. Read Section 5 before installing the HSS module. 2. Do the steps in Section 3. Do the steps in Section 4. -
Page 16: Nomenclature
INTRODUCTION NOMENCLATURE Table lists nomenclatures associated with the IMHSS03 module. Table 1-2. Nomenclature Nomenclature Description Module mounting unit: IEMMU01 Rear mount IEMMU02 Front mount IMFCS01 Frequency counter module IMHSS03 Hydraulic servo module IMMFP01/02/03 Multi-function processor modules NIDI01 Digital I/O termination module NKAS02 Termination cable, 2 NIDI01 modules to IMHSS03 NKHS03... -
Page 17: Specifications
4 analog inputs total, 2 LVDT secondary inputs (each with 2 secondaries) inputs 24 Vpp, ±7 VDC common mode, 10 kΩ differential input impedance ® Network 90 is a registered trademark of Elsag Bailey Process Automation. SPECIFICATIONS 1 - 6... - Page 18 INTRODUCTION Table 1-4. Specifications (continued) Property Characteristic/Value I/O requirements (continued) LVDT supply primary 2 analog outputs: LVDT primary 1 and 2 excitation outputs Operating frequency: 400 Hz to 15 kHz LVDT Excitation Min. LVDT Voltage (Vpp) Impedance (Ω) 15.0 18.0 24.0 30.0 36.0...
- Page 19 INTRODUCTION ® Table 1-4. Specifications (continued) Property Characteristic/Value I/O requirements (continued) Test mode output 1 analog output Output Current (mA) Min. Impedance (Ω) 5000 Digital inputs 3 optically isolated (250 VDC) contact inputs (raise, lower and trip bias) State Voltage (VDC) Current 18 min.
-
Page 20: Section 2 - Description And Operation
SECTION 2 - DESCRIPTION AND OPERATION INTRODUCTION This section explains the operation of the IMHSS03 Hydraulic Servo Module. It gives an overview of the hydraulic servo (HSS) module and related modules within a process control system and explains the operation of key module circuitry. CONTROL LOOP OPERATION The HSS module, frequency counter (FCS) module and multi-function processor (MFP) module form the controlling... -
Page 21: Turbine Speed Control Loop
DESCRIPTION AND OPERATION ® SERVO FUEL THROTTLE HYDRAULIC VALVE VALVE ACTUATOR LVDT SECONDARY LVDT MAGNETIC TURBINE PRIMARY PICKUP TURBINE SPEED POSITION FEEDBACK MODULE STATUS DATA POSITION MODULE STATUS ALARMS REQUEST DEMAND MONITOR TURBINE SPEED CONFIGURE SYSTEM MANUAL CONTROL ALARMS OPERATOR INTERFACE TP25013A Figure 2-1. -
Page 22: Fcs Module
DESCRIPTION AND OPERATION differential voltage into actuator position feedback. The HSS module is self-checking and notifies the MFP module if a fail- ure occurs. The HSS module initiates manual control of the turbine throt- tle valve if an HSS module communication failure with the MFP module occurs (or the MFP module goes into configuration mode). -
Page 23: Hss Module Operation
DESCRIPTION AND OPERATION ® HSS MODULE OPERATION The HSS module interfaces the MFP module to a servo valve or I/H converter, providing the MFP module with position control of a fuel throttle valve or steam governor valve. The HSS mod- ule microprocessor carries the workload. -
Page 24: Hss Module Circuitry
HSS module. This com- munication channel is an eight-bit parallel data bus with two control lines. A Bailey designed integrated circuit performs the communications protocol for interfacing the data and status information to the processor module. It performs address com- pare, read/write strobe generation and contains bus drivers and receivers. -
Page 25: Status And Data Buffers
DESCRIPTION AND OPERATION ® The MFP module sends the following information and com- mands to the HSS module by way of the I/O expander bus interface: Position demand. • LVDT frequency. • Controller deadband. • Valve action on LVDT error. •... -
Page 26: Microprocessor
DESCRIPTION AND OPERATION Microprocessor The HSS module uses a 16-bit microprocessor to control board functions and communicate with the MFP module through the I/O expander bus interface. The microprocessor controls the analog-to-digital processing, passes position feedback and sta- tus information to the MFP module, reads control data from the MFP module, writes position demands to the D/A converter and does self checks. -
Page 27: Digital-To-Analog Converter
DESCRIPTION AND OPERATION ® DIGITAL-TO-ANALOG CONVERTER The D/A converter receives the position demand from the microprocessor. It converts the data from a digital word to an equivalent analog signal. The D/A converter outputs the ana- log position demand to the position error circuit. POSITION ERROR The position error circuit compares position demand with posi- tion feedback. -
Page 28: Analog-To-Digital Converter
DESCRIPTION AND OPERATION 400 Hz TO 15 kHz TO POSITION LVDT ERROR CIRCUIT OSCILLATOR (PROPORTIONAL AMP) DEMODULATOR 1 LVDT DEMODULATOR POSITION BUFFER GAIN FEEDBACK – CORE – – TO MICRO- – BUFFER PROCESSOR SUMMING DEMODULATOR 2 ACTUATOR TP25408A Figure 2-4. Position Feedback Circuit and minimum differential voltage indicating a fully open or fully closed valve. -
Page 29: Digital I/O
DESCRIPTION AND OPERATION ® Digital I/O If the HSS module loses communication with the MFP module, the manual control circuitry enables the operator to manually change actuator position. The HSS module provides two 24 VDC isolated digital inputs as raise/lower commands from a manual station (pushbuttons, contacts, etc.). -
Page 30: Section 3 - Installation
The HSS module uses devices susceptible to electrostatic dis- charge. Follow these handling procedures: NOTE: Always use Bailey's field static kit (part number 1948385_1 - consisting of two wrist straps, ground cord assembly, alligator clip, and static dissipative work surface) when working with the modules. -
Page 31: Unpacking And Inspection
1. Examine the hardware immediately to verify that it has not been damaged in transit. 2. Notify the nearest Bailey sales office of any such damage. 3. File a claim for any damage with the transportation com- pany that handled the shipment. -
Page 32: Nths03 Termination Unit Installation
INSTALLATION NTHS03 Termination Unit Installation Use the NTHS03 termination unit to operate the HSS module with full IMHSS03 functionality. This termination unit can also terminate an IMHSS03 module configured for IMHSS02 func- tionality. To install the NTHS03 termination unit: 1. Refer to the THS termination unit product instruction or Appendix C to select the required dipshunt and jumper settings. -
Page 33: Ntdi01 Termination Unit Installation
INSTALLATION ® NTDI01 Termination Unit Installation The NTDI01 termination unit can terminate only an HSS mod- ule having IMHSS02 functionality. To install the NTDI01 termi- nation unit: 1. Refer to the TDI termination unit product instruction or Appendix E to select the required dipshunt settings. 2. -
Page 34: Dipswitch S2 - Demodulator Gain
INSTALLATION for the location of S1 on the HSS module. Record the I/O expander bus address in the user setting column. Table 3-1. Dipswitch S1, I/O Expander Bus Address Example Settings Dipswitch Pole (Binary Value) Example User Address Setting (128) (64) (32) (16) -
Page 35: Dipswitch S3 - Controller Gain
INSTALLATION ® Appendix B to set S2 for manual LVDT calibration . Refer to Table for S2 dipswitch settings. Table 3-2. Dipswitch S2, Demodulator Gain Dipswitch Pole Gain User Setting 10.0 21.1 48.8 72.0 100.9 152.0 NOTE: 0 = CLOSED or ON, 1 = OPEN or OFF. Dipswitch S3 - Controller Gain Dipswitch S3 is an eight-pole dipswitch that sets the controller gain. -
Page 36: Dipswitch S4 - Lvdt Oscillator Frequency
INSTALLATION Dipswitch S4 - LVDT Oscillator Frequency Dipswitch S4 is a two-pole dipswitch that sets the LVDT oscil- lator frequency. This dipswitch is ignored if the module is con- figured as an IMHSS03 module using function code 55. Set all poles to one (open). -
Page 37: Jumper Settings
INSTALLATION ® 3. Refer to the LVDT specifications for the recommended LVDT oscillator amplitude. 4. Refer to Table for dipswitch settings and set poles 5 through 8 accordingly. Table 3-5. Dipswitch S5, Dither Oscillator Frequency/Amplitude and LVDT Oscillator Amplitude Dipswitch Pole Setting User Setting Dither oscillator frequency = 300 Hz... -
Page 38: Jumpers J1 Through J31
INSTALLATION Table 3-6. Jumpers J1 through J31 (continued) Jumper Function Jumper Position 20 - 160 mA I/H converter J9-J13, J18-J21 J14-J17, J22-J25 4 - 20 mA I/H converter J8, J10-J13, J18-J21 J14-J17, J22-J25 ±8 mA servo outputs J10, J18 J8, J9, J11-J14, J19-J22 J15-J17, J23-J25 ±16 mA servo outputs J10, J11, J18, J19... -
Page 39: Imhss03 Module Installation
INSTALLATION ® J27 J29 TP25461A Figure 3-2. IMHSS03 Jumper Layout IMHSS03 MODULE INSTALLATION Disconnect power before installing dipshunts on the module WARNING mounting unit backplane. Failure to do so will result in contact with cabinet areas that could cause severe or fatal shock. Interrompez l'alimentation avate d'installer des dipshunts sur le fond de panier du châssis de montage des modules. -
Page 40: Function Code 55 Configuration
INSTALLATION FUNCTION CODE 55 CONFIGURATION If the jumpers and dipswitches in this section are set up for operation with function code 55: 1. Configure the multi-function processor with function code 55. Refer to the Function Code Application Manual for information on how to configure function code 55. 2. -
Page 41: Section 4 - Calibration
SECTION 4 - CALIBRATION INTRODUCTION This section covers the module calibration procedure, demodu- lator gain tuning procedure, controller gain tuning procedure and automatic tuning procedure. Tuning and calibrating the module insures accurate positioning of the turbine throttle valve and the best possible frequency response. Complete the steps in this section before placing the hydraulic servo (HSS) module in operation. -
Page 42: Automatic Tuning (Function Code 55)
CALIBRATION ® Calibrate mode enable must be set to disable, <S11> = 0. • LVDT status must be good. • To perform the null check: 1. Go to the block address specified in S7. Set the LVDT null check mode to 1 for the primary LVDT transformer. 2. -
Page 43: Demodulator Gain
CALIBRATION Demodulator Gain The HSS module automatically tunes the demodulator gain using the same techniques a technician would use to manually tune the gain. The auto tuning function selects the lowest gain. The actuator moves to the 100 percent and zero percent posi- tions. -
Page 44: Initial Calibration (Function Code 55)
CALIBRATION ® Initial Calibration (Function Code 55) To calibrate the LVDT transformer and actuator with the HSS module, the MFP module must be communicating with the HSS module and the following conditions must be met: Demodulator gain tuning must be complete. •... -
Page 45: Manual Tuning (Function Code 55)
CALIBRATION The 100% to 0% cycle repeats the number of calibration cycles specified in <S9>. After recording the final 0% reading, the actuator moves at the selected stroke time to the position demand from the MFP module. When the calibration cycles are complete, the actuator ramps to the position demand from the MFP module if the IMHSS03 module is in the automatic tuning mode. - Page 46 CALIBRATION ® The servo valve or I/H converter (for turbine hydraulic sys- • tem) must be in the controlling position and functioning properly. The multi-function processor module has function code 55 • in its configuration. To manually tune the demodulator gain: 1.
- Page 47 CALIBRATION and Table for information on correcting the LVDT response. 11. Calibrate the LVDT transformer before tuning the control- ler gain. Refer to Initial Calibration (Function Code 55) the LVDT calibration procedure. Controller Gain To start controller tuning, the MFP module must be communi- cating with the IMHSS03 module and the following conditions must be met: The controller gain must be set to one.
-
Page 48: Section 5 - Operating Procedures
SECTION 5 - OPERATING PROCEDURES INTRODUCTION This section explains how to place the IMHSS03 Hydraulic Servo Module in operation. This section includes information about the hydraulic servo module (HSS) faceplate LEDs, sys- tem start-up and operation, and manual operation. FACEPLATE LEDS There are nine LEDs visible through the faceplate of the IMHSS03 module. -
Page 49: Start-Up And Normal Operation
OPERATING PROCEDURES ® Table 5-1. LED States Red/Green LED 1 LED 4 LED 8 Condition Status LED ATOP/CAL OUT DIS HARD MAN Initial power up. All LEDs are on momentarily. On-board diagnostics during power up. HSS module waiting for MFP initialization data. Green Normal operation. -
Page 50: Turbine Trip
OPERATING PROCEDURES while the lower contact closes the valve. Use the 4 to 20 milli- amp position output to determine the valve position. 4. To return to automatic mode, the MFP module must be communicating with the HSS module. If hard manual mode was selected through function code 55, specification S13 must be returned to auto mode, <S13>... -
Page 51: Section 6 - Troubleshooting
SECTION 6 - TROUBLESHOOTING INTRODUCTION This section provides troubleshooting information for the hydraulic servo (HSS) module. This information includes diag- nostic testing, alarm and exception reporting, problem reports and troubleshooting flowcharts. Additional reference docu- ments that are helpful for troubleshooting are product instruc- tions for the processor module, the operator interface (i.e., OIS, EWS, etc.) and the Function Code Application Manual. -
Page 52: Diagnostics
TROUBLESHOOTING ® DIAGNOSTICS The IMHSS03 module firmware contains diagnostic routines that can be invoked from power up. The diagnostic routines allow verification of the module components and circuitry. When the module is in diagnostic mode, it cannot perform the functions of an IMHSS03 module. Therefore, diagnostics should be used on modules that are off-line. -
Page 53: Diagnostic Dipswitch Settings
TROUBLESHOOTING HSS MODULE ADDRESS DIAGNOSTIC MODE (OFF = ENABLED, ON = DISABLED) TEST ID HALT ON ERROR (ON = DISABLED, OFF = ENABLED) OFF = PASS/FAIL, ON = TEST NUMBER DISPLAY TP25415A Figure 6-2. Diagnostic Dipswitch Settings Table 6-1. Diagnostic Test ID Numbers and Dipswitch S2 Settings Dipswitch S2 Pole Test Name Description... -
Page 54: Alarm And Exception Reporting
TROUBLESHOOTING ® For a group test (nine), tests two through eight run in numeri- cal order. On a failure, the test number that failed is displayed if the test number display mode is selected. A failure of a test within the group terminates the group test at that point if the halt on error feature is selected. -
Page 55: Function Code 55 Module Problem Report
TROUBLESHOOTING or three. Nonfatal errors indicate that the module has discov- ered an error but will continue to function. Nonfatal errors generate module problem reports having error types nine and Table 6-2. Function Code 55 Module Problem Report Error Type Module Error Corrective Action 1 - No response/... -
Page 56: Function Code 150 Problem Reports
TROUBLESHOOTING ® Table 6-2. Function Code 55 Module Problem Report (continued) Error Type Module Error Corrective Action 3 - Channel Any fatal servo output failure: 1. Refer to quality of FC 55 outputs N+2 failure/out of through N+5 to isolate the error. Nonredundant servo 1 outputs (S2=0) and range both servo 1 coils failed. -
Page 57: Function Code 150 Module Problem Report
To avoid creating additional problems while troubleshooting, always use Bailey’s field static kit (part number 1948385_1) when working with the modules. The kit is designed to connect a technician and the static dissipative work surface to the same ground point to pre- vent damage to the modules by electrostatic discharge. -
Page 58: Off-Line Failure
TROUBLESHOOTING ® OFF-LINE FAILURE This part of the troubleshooting section covers off-line failures and how to troubleshoot those failures. Off-line failures occur during module calibration and are a result of improper or incomplete installation or calibration. If the HSS module fails to calibrate after completing the instal- lation procedure: 1. - Page 59 3. If the HSS module continues to fail to calibrate and the failure cannot be located using the troubleshooting flowchart or the steps in Table 6-5, replace the HSS module. If replacing the module does not correct the problem call Bailey technical support for assistance. CORRECTLY EXPANDER INSTALL SLAVE...
- Page 60 CHECK ACTUATOR LVDT AND AND LVDT ACTUATOR INSTALLED INSTALLATION PROPERLY? AND CABLE REPLACE THE HSS OPERATING? MODULE CONTACT BAILEY CONTROLS DONE COMPANY FOR ASSISTANCE TP25256B Figure 6-3. Off-Line Failure Troubleshooting Flowchart (Page 3 of 3) OFF-LINE FAILURE 6 - 10 I-E96-322A...
-
Page 61: Troubleshooting Off-Line Failures
TROUBLESHOOTING Table 6-5. Troubleshooting Off-Line Failures Problem Cause Corrective Action IMHSS03 fails to cal- Configuration Check function code 55 or 150 specifications. Verify that function ibrate. error. code 55 or 150 is set for calibration. IMHSS03 fails to cal- Improper Check the installation of the IMHSS03 and related hardware. - Page 62 LVDT secondaries, check the LVDT and replace if defec- tive. IMHSS03 fails to IMHSS03 Replace IMHSS03. calibrate, all process failure. hardware checks good, there are no configuration errors. Replacing the — Contact Bailey technical support. IMHSS03 fails to correct the problem. OFF-LINE FAILURE 6 - 12 I-E96-322A...
-
Page 63: On-Line Failure
3. If the HSS module continues to fail after completing Steps 1 and 2, replace the module. 4. If replacing the module does not correct the problem, con- tact Bailey technical support for assistance. ON-LINE FAILURE I-E96-322A 6 - 13... -
Page 64: On-Line Failure Troubleshooting Flowchart
LOSS OF RESET HSS POWER? MODULE CHECK SYSTEM POWER CORRECT POWER SYSTEM POWER FAILURE, REFER CHECKS GOOD? TO I-E96-506 REPLACE OPERATING? MODULE OPERATING? CONTACT BAILEY DONE TECHNICAL SUPPORT TP25054A Figure 6-4. On-Line Failure Troubleshooting Flowchart ON-LINE FAILURE 6 - 14 I-E96-322A... -
Page 65: Troubleshooting On-Line Failures
TROUBLESHOOTING Table 6-6. Troubleshooting On-Line Failures Condition LED/State Action Machine fault timer Status LED/red and Reset IMHSS03. time-out. OUT DIS LED/on. 1. Turn the thumbscrews on the faceplate ½-turn to unlock the module. 2. Pull on the module faceplate until the module discon- nects from the MMU backplane connector. -
Page 66: Section 7 - Maintenance
SECTION 7 - MAINTENANCE INTRODUCTION The reliability of any stand-alone product or control system is affected by the maintenance of the equipment. Bailey Controls Company recommends that all equipment users practice a pre- ventive maintenance program that will keep the equipment operating at an optimum level. -
Page 67: Equipment Required
MAINTENANCE ® EQUIPMENT REQUIRED The tools and equipment required for the maintenance proce- dures include: Antistatic vacuum. • Four-inch flat screwdriver (suitable for either termination • unit terminals or termination module terminals). Isopropyl alcohol (99.5 percent electronic grade). • Eberhard Faber (400A) pink pearl eraser. •... -
Page 68: Printed Circuit Board Cleaning
MAINTENANCE NOTE: This preventive maintenance task should be performed while power to the cabinet is off. 1. Check module cable connections. 2. Verify that all power and field wiring connections to the NTHS03 or NTDI01 termination unit, or NIDI01 termination module are secure. -
Page 69: Edge Connector Cleaning
MAINTENANCE ® 2. Remove excess solvent by using compressed air to blow it free of the circuit board. EDGE CONNECTOR CLEANING To clean edge connector contacts: 1. Use a solvent mixture of 80% isopropyl alcohol (99.5% elec- tronic grade) and 20% distilled water. 2. -
Page 70: Section 8 - Repair/Replacement Procedures
Dipshunt cutting tool (Amp Incorporated part number) NOTE: It is impractical to specify a recommended quantity of spare parts because Bailey custom designs every system. Contact Bailey for help determining the quantity of spare parts to keep on hand for your particular system. -
Page 71: Termination Unit/Module Replacement
REPAIR/REPLACEMENT PROCEDURES ® To replace the HSS module: 1. Turn the 2 latching screws on the HSS module ½-turn either way to release the module. 2. Grasp the screws and slide out the module. 3. Set dipswitches S1 through S5 and jumpers J1 through J31 to the proper settings. -
Page 72: Section 9 - Support Services
SECTION 9 - SUPPORT SERVICES INTRODUCTION Bailey Controls Company is ready to help in the use and repair of its products. Contact the nearest sales office to make requests for sales, applications, installation, repair, overhaul and maintenance contract services. REPLACEMENT PARTS AND ORDERING INFORMATION When making repairs at your facility, order replacement parts from a Bailey Controls Company sales office. -
Page 73: Appendix A - Quick Reference Guide
APPENDIX A - QUICK REFERENCE GUIDE INTRODUCTION Appendix A contains a quick reference guide of IMHSS03 dipswitch and jumper settings, and operating LED states. Tables through list the operating options selected by setting the IMHSS03 dipswitches. Table lists operating options selected by setting jumpers. Table lists IMHSS03 LED states. -
Page 74: Imhss03 Dipswitch And Jumper Settings
QUICK REFERENCE GUIDE ® Table A-3. Dipswitch S3, Controller Gain Dipswitch Pole Gain 1.00 2.00 5.00 10.50 13.35 14.46 18.10 20.52 NOTE: 0 = CLOSED or ON, 1 = OPEN or OFF. Table A-4. Dipswitch S4, LVDT Oscillator Frequency Dipswitch Pole Frequency (kHz) 10.0 NOTE: 0 = CLOSED or ON, 1 = OPEN or OFF. - Page 75 QUICK REFERENCE GUIDE Table A-6. Jumpers J1 through J31 Jumper Function Jumper Position Normal LVDT configuration J1-J5 4 - 40 mA input (I/H converter con- tingency error, LVDT 2_1) Servo valve mode J6, J7, J26 I/H converter mode 20 - 160 mA I/H converter J9-J13, J18-J21 J14-J17, J22-J25 4 - 20 mA I/H converter...
-
Page 76: Led States
QUICK REFERENCE GUIDE ® LED STATES Table A-7 lists IMHSS03 LED states under normal operation. Table A-7. LED States Red/Green LED 1 LED 4 LED 8 Condition Status LED ATOP/CAL OUT DIS HARD MAN Initial power up. All LEDs are on momentarily. On-board diagnostics during power up. -
Page 77: Appendix B - Function Code 150 Calibration
APPENDIX B - FUNCTION CODE 150 CALIBRATION INTRODUCTION Appendix B covers the IMHSS03 calibration procedure using function code 150, analog control loop tuning theory and the controller gain tuning procedure. Completing the steps in this appendix insures accurate positioning of the turbine throttle valve and the best possible frequency response. -
Page 78: Initial Calibration
FUNCTION CODE 150 CALIBRATION ® seconds are fast cycle times and are not recommended if the turbine is on-line. 3. Go to the block address specified in S3. Set the calibration command bit to 1. This places the HSS module in the calibrate mode. -
Page 79: Analog Control Tuning Theory
FUNCTION CODE 150 CALIBRATION time. While the actuator is held against the 0% end of travel stop, function code 150 records the LVDT differential voltage at 0% in specification S8. After recording the 0% reading, the actuator moves at the selected stroke time to the position demand from the multi-function processor module. -
Page 80: Tuning The Controller Gain
FUNCTION CODE 150 CALIBRATION ® TUNING THE CONTROLLER GAIN The practical method of setting controller gain requires an indi- vidual with turbine control experience. The individual tuning the system should be familiar with plant operation under nor- mal conditions, know turbine start-up procedures and have experience in tuning control systems. -
Page 81: On-Line Calibration
FUNCTION CODE 150 CALIBRATION 5. Insert the module in the MMU card cage. 6. Repeat Steps 1 through 3. 7. If the valve oscillates at any demand level, remove the HSS module and lower the gain (dipswitch S2) to the next setting. For example, if the gain is 13 (pole 4 is closed), change the gain to 10 (close pole 5, open pole 4). -
Page 82: Controller Tuning Log
FUNCTION CODE 150 CALIBRATION ® Table B-1. Controller Tuning Log Demodulator Controller Date Time Name of Personnel Tuning System Gain Gain ON-LINE CALIBRATION B - 6 I-E96-322A... - Page 83 APPENDIX C - NTHS03 TERMINATION UNIT INTRODUCTION The IMHSS03 module uses an NTHS03 Hydraulic Servo Termi- nation Unit to terminate its I/O connections. Dipshunts and jumpers select the power source (system power or external power) for certain inputs and outputs. The IMHSS03 module has four analog inputs, nine analog outputs, three digital inputs and one digital output that terminate at the NTHS03 termination unit.
- Page 84 NTHS03 TERMINATION UNIT ® unit dipshunt settings. Figure shows terminal assign- ments and I/O signal polarity. Figure shows the termina- tion unit cable connection. Table C-1. NTHS03 Jumper Settings Option Jumper Setting Jumpers IMHSS03 powers LVDT J1-J4 External supply powers LVDT Table C-2.
-
Page 85: Appendix C - Nths03 Termination Unit
NTHS03 TERMINATION UNIT NKHS03 IMHSS03 MODULE NTHS03 TERMINATION UNIT TP25419A Figure C-3. NTHS03 Termination Cable Connection QUICK REFERENCE I-E96-322A C - 3... -
Page 86: Appendix D - Nidi01 Termination Module
APPENDIX D - NIDI01 TERMINATION MODULE INTRODUCTION The IMHSS03 module can use an NIDI01 Digital I/O Termina- tion Module to terminate its I/O connections. Full IMHSS03 functionality requires two NIDI01 modules with an NKAS02 termination cable. One NIDI01 module can terminate the IMHSS03 module, but will only provide IMHSS02 functionality. -
Page 87: Quick Reference
NIDI01 TERMINATION MODULE ® – – – – – – – – – H MAN LOWER RAISE LVDT1 LVDT1 LVDT1 TRIP SERVO1 SERVO1 +24V -24V USED USED USED BIAS USED USED NIDI01 NO. 1 – – – – – – –... -
Page 88: Appendix E - Ntdi01 Termination Unit
APPENDIX E - NTDI01 TERMINATION UNIT INTRODUCTION The IMHSS03 module can use an NTDI01 Digital I/O Termina- tion Unit to terminate its I/O connections, but will only have IMHSS02 functionality. The NTDI01 termination unit does not support the additional features of the IMHSS03 module. Dip- shunts on the termination unit configure the I/O signals. - Page 89 NTDI01 TERMINATION UNIT ® assignment and I/O signal polarity. Figure shows the ter- mination cable connection. Table E-1. NTDI01 Dipshunt Settings Dipshunt Pole Application/Signal Type Dipshunt All applications and signal types XU17 Analog inputs LVDT secondary 1 LVDT secondary 2 Analog outputs LVDT primary drive Simulation mode...
-
Page 90: Ntdi01 Termination Cable Connection
NTDI01 TERMINATION UNIT DIPSHUNT DIPSHUNT DIPSHUNT DIPSHUNT USED USED USED USED SERVO 1 RAISE LOWER LVDT PRI XU13 OUTPUT INPUT INPUT DRV OUT – – – – LVDT SERVO 2 SEC. 1 XU14 OUTPUT INPUT – – – TERMINAL NUMBER TRIP EMER. - Page 91 Index Calibration ..............4-1 I/O expander bus address dipswitch......3-4 Function code 150 ..........B-1 IMFCS01 application..........1-1, 2-3 Function code 55 ..........4-1 IMHSS03..............A-1 Automatic ............4-2 Application............1-1, 2-1 Manual ............4-5 Calibration .............4-1 On-line ..............B-5 Circuit board layout ..........3-5 Control loop ..............
- Page 92 ® Index (continued) NTHS03 ..............C-1 Cable connections..........C-3 Spare parts ..............8-1 Circuit board layout ..........C-1 Special handling ............3-1 Dipshunts ............. C-2 Specifications ............. 1-6 I/O terminal assignments........C-2 Jumpers..............C-2 Null check..............4-1 Termination module replacement ....... 8-2 Termination unit replacment ........
- Page 93 Telefax 39-10-6582-941 Telephone 49-69-799-0 Telefax 65-292-9011 Telefax 49-69-799-2406 Form I-E96-322A Litho in U.S.A. 894 Copyright © 1994 by Elsag Bailey Process Automation, As An Unpublished Work ® Registered Trademark of Elsag Bailey Process Automation ™ Trademark of Elsag Bailey Process Automation...
Need help?
Do you have a question about the infi 90 IMHSS03 and is the answer not in the manual?
Questions and answers