
Related Manuals for Bailey INFI 90 IMCOM03


Summary of Contents for Bailey INFI 90 IMCOM03
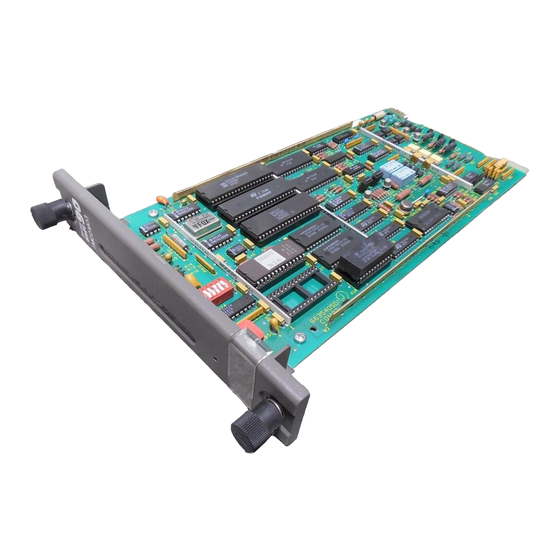
- Page 1 E96-207 ® ® Controller Modules (IMCOM03 and IMCOM04) Process Control and Automation Solutions from Elsag Bailey Group...
- Page 2 The information contained in this document is subject to change without notice. Elsag Bailey, its affiliates, employees, and agents, and the authors and contributors to this publication specif- ically disclaim all liabilities and warranties, express and implied (including warranties of merchantability and...
- Page 3 The system engineer or technician using the COM should read and understand this instruction before installing and operat- ing the module. In addition, a complete understanding of the INFI 90 system is beneficial. ® INFI 90 and Network 90 are registered trademarks of the Elsag Bailey Process Automation. I-E96-207A...
- Page 4 ® List of Effective Pages Total number of pages in this manual is 74, consisting of the following: Page No. Change Date Preface Original List of Effective Pages Original iii through ix Original 1-1 through 1-8 Original 2-1 through 2-12 Original 3-1 through 3-10 Original...
- Page 5 Safety Summary GENERAL Equipment Environment WARNINGS All components, whether in transportation, operation or storage must be in a noncorrosive environment. Electrical Shock Hazard During Maintenance Disconnect power or take precautions to ensure that contact with energized parts is avoided when servicing. Special Handling This module uses Electrostatic Sensitive Devices (ESD).
- Page 6 ® Safety Summary (continued) SPECIFIC Independent of the user-selected default values, it is possible for WARNINGS the analog or digital outputs to fail in the on state. This is character- istic of solid-state circuits. A solid state-circuit failure in the on state (continued) could cause personal injury or significant equipment damage in some applications.
- Page 7 Sommaire de Sécurité AVERTISSEMENTS Environment de l'equipement D’ORDRE Nes pas soumettre les composantes a une atmosphere corrosive GÉNÉRAL lors du transport, de l'entreposage ou de l'utilisation. Risques de chocs electriques lor de l'entretien S'assurer de debrancher l'alimentation ou de prende les precau- tions necessaires a eviter tout contact avec des composants sours tension lors de l'entretien.
-
Page 8: Table Of Contents
Table of Contents Page SECTION 1 - INTRODUCTION ....................1-1 OVERVIEW ........................1-1 INTENDED USER ......................1-1 MODULE DESCRIPTION ....................1-1 FEATURES........................1-2 INSTRUCTION CONTENT .....................1-3 HOW TO USE THIS MANUAL ..................1-3 RELATED EQUIPMENT ....................1-4 GLOSSARY OF TERMS AND ABBREVIATIONS .............1-5 REFERENCE DOCUMENTS..................1-6 NOMENCLATURE ......................1-6 SPECIFICATIONS ......................1-7 SECTION 2 - DESCRIPTION AND OPERATION................2-1 INTRODUCTION......................2-1... - Page 9 ® Table of Contents (continued) Page SECTION 3 - INSTALLATION .....................3-1 INTRODUCTION ......................3-1 SPECIAL HANDLING....................3-1 UNPACKING AND INSPECTION..................3-1 SAFETY RELATED INFORMATION ................3-2 SETUP/PHYSICAL INSTALLATION ................3-2 SETUP ......................... 3-3 Switch Settings...................... 3-3 Analog Outputs (S2 and S3) ................3-6 Module Bus Address Selection/Self-Test Switch (S4) ........
- Page 10 Table of Contents (continued) Page SECTION 8 - REPAIR/REPLACEMENT PROCEDURES ............8-1 INTRODUCTION......................8-1 MODULE REPAIR/REPLACEMENT PROCEDURES............8-1 SECTION 9 - SUPPORT SERVICES ...................9-1 INTRODUCTION......................9-1 REPLACEMENT PARTS AND ORDERING INFORMATION ..........9-1 TRAINING ........................9-1 TECHNICAL DOCUMENTATION ...................9-1 APPENDIX A - TERMINATION UNIT CONFIGURATION (NTCS02)......... A-1 INTRODUCTION......................
- Page 11 ® List of Figures Title Page 1-1. INFI 90 Communication Levels ................1-2 2-1. Controller Module Block Diagram ................2-3 2-2. MCOM03/04 Analog Input and Output Circuits ............ 2-4 2-3. IMCOM03/04 Digital Input and Output Circuits ............ 2-6 2-4. Communication Highway/Module Bus Relationship ..........2-9 3-1.
-
Page 12: Section 1 - Introduction
Module (TM). Two captive latches on the faceplate secure the module to the MMU. A front panel LED indicates the module status. ® INFI 90, Network 90 and INFI-NET are registered trademarks of the Elsag Bailey Process Automation. OVERVIEW I-E96-207A... -
Page 13: Features
INTRODUCTION ® COMMUNICATION HIGHWAY (INFI-NET OR PLANT LOOP) COMMUNICATION MODULES MODULE BUS ANALOG AND ANALOG AND DIGITAL I/O DIGITAL I/O FIELD WIRING FIELD WIRING LEGEND: COM = CONTROLLER MODULE MFC = MULTI-FUNCTION CONTROLLER SAC = CONTROL STATION SLAVE = SLAVE MODULE TCS = CONTROLLER TERMINATION UNIT TU = TERMINATION UNIT T00139A... -
Page 14: Instruction Content
Procedures Support Services Provides replacement part ordering information. It explains other areas of support that Bailey Controls provides. HOW TO USE THIS MANUAL Read this manual before using the COM. Refer to the sections in this list as needed for more information. -
Page 15: Related Equipment
INTRODUCTION ® HOW TO USE THIS MANUAL (continued) 4. Read Appendix A for steps to configure the termination units. 5. Refer to Section 6 for steps to follow to correct error conditions. 6. Refer to Section 2 for more COM theory. 7. -
Page 16: Glossary Of Terms And Abbreviations
INTRODUCTION GLOSSARY OF TERMS AND ABBREVIATIONS Term Definition Analog A continuous time signal with an infinite number of values. Configuration A control strategy with function blocks. Digital A discrete signal having only two states: on or off. Dipshunt Dual in-line package with shorting bars. Dipswitch A dual in-line package that contains single pole switches. -
Page 17: Reference Documents
INTRODUCTION ® GLOSSARY OF TERMS AND ABBREVIATIONS (continued) Term Definition Station for Analog Control. Provides monitoring and allows manipulation of a single process control loop, and communicates with the MFP. It has front panel LED bar graphs that display set point, process variable and control output values. -
Page 18: Specifications
INTRODUCTION SPECIFICATIONS Power Requirements Operating + 5 VDC at 0.75 A (3.75 Watts) maximum + 15 VDC at 89 mA (1.335 Watts) maximum - 15 VDC at 74 mA (1.11 Watts) maximum + 24 VDC at 50 mA (1.2 Watts) maximum Inputs 4 Analog: 1-5 VDC, 4-20mA 3 Digital;... - Page 19 INTRODUCTION ® SPECIFICATIONS (continued) Operating (continued) Digital Outputs 4 Digital Outputs: 24 VDC (Isolated, open-collector type) Maximum on current 150 mA 10 µA Maximum off current Maximum on voltage 1.5 V at 150 mA Analog Outputs 2 Analog Outputs: 1 to 5 VDC, 4 to 20 mA ±...
-
Page 20: Section 2 - Description And Operation
SECTION 2 - DESCRIPTION AND OPERATION INTRODUCTION This section explains the inputs, outputs, logic power and con- nections for the Controller Module (IMCOM03/04). The COM is a process field I/O interface and controller module. DESCRIPTION This board contains the reset switch, status LED, module address/test dipswitch, analog output dipswitches, digital input jumpers, the microprocessor unit (MC68B09), read only memory (ROM), and random accessory memory (RAM). -
Page 21: Microprocessor
DESCRIPTION AND OPERATION ® Analog to digital (A/D) conversion. It changes analog inputs • to digital values the COM can process. Digital to analog (D/A) conversion. It changes the COM dig- • ital values to analog voltage or current signals to control process field devices. -
Page 22: Logic Power
DESCRIPTION AND OPERATION unique in that it retains whatever information it has even when power is lost. This is possible because of the back up batteries that keep the memory active if power is lost. The modules memory is divided as follows: 48K bytes of Read Only Memory (ROM) - 04 version •... -
Page 23: Analog Inputs
DESCRIPTION AND OPERATION ® ANALOG INPUTS 1 AND 2 ARE SIMILAR TO 3 AND 4 WITH THE EXCLUSION OF XU8 (FEEDBACK TO SAC) – ANALOG INPUT IMCOM03/04 ANALOG INPUT 3 +24 V TO IISAC01 IMCOM03/04 ANALOG INPUT 4 TO IISAC01 TERMINATION TERMINATION UNIT CABLE... -
Page 24: Analog Input Circuit Calibration
DESCRIPTION AND OPERATION only. Its termination unit (TU) or termination module (TM) is con- figurable for current or voltage inputs; resistors on the TU/TM convert analog current inputs to voltages that are sent to the COM. The input select block consists of an analog multiplexer and an inverting difference amplifier. -
Page 25: Digital I/O
DESCRIPTION AND OPERATION ® Digital I/O The COM can input three separate digital signals and output four separate digital signals. Digital inputs are voltages of 24 VDC or 125 VDC. These voltages indicate an energized (ON) field device; a 0 Volt input indicates a de-energized (OFF) field device. -
Page 26: Digital Outputs
DESCRIPTION AND OPERATION Digital Outputs The output isolation block consists of optocouplers to isolate the control logic circuits from the process. Four open collector transistors that can sink a 150 mA load make up the driver block. Digital I/O Buffer The digital I/O buffer block is a buffer and register that holds the values of the digital inputs and outputs. -
Page 27: Status Data
DESCRIPTION AND OPERATION ® The COM reads a one byte value that consists of digital output readback values and digital input values. The digital input val- ues indicate the digital input states. Each bit corresponds to one input; the bit value reflects the state of that input, either open (logic 0) or closed (logic 1). -
Page 28: Process Input/Output Interfacing
DESCRIPTION AND OPERATION COMMUNICATION HIGHWAY (INFI-NET OR PLANT LOOP) PROCESS CONTROL UNIT COMMUNICATION MODULES MODULE BUS (32 MODULES MAX) LEGEND: COM = CONTROLLER MODULE TU = TERMINATION UNIT T00112A Figure 2-4. Communication Highway/Module Bus Relationship PROCESS INPUT/OUTPUT INTERFACING The maximum input/output capability of the controller mod- ule from the field (via the termination unit) is four analog inputs, two analog outputs, three digital inputs and four digital outputs. -
Page 29: Analog Control Station Interfacing
DESCRIPTION AND OPERATION ® Another source of inputs is the slave module (analog or digital). The slaves output on the expander bus to their respective mas- ter modules. The controller module can request these inputs from the master modules via a module bus transaction. Valid analog ranges are 1 to 5 VDC or 4 to 20 mA. -
Page 30: Security Functions
DESCRIPTION AND OPERATION SECURITY FUNCTIONS Hardware and software security functions help minimize the impact of errors on the controller process. There are two types of security: module security and control input security. Module Security Module security is provided by a machine fault timer (MFT). The MFT is reset periodically by the processor. -
Page 31: I/O Security
DESCRIPTION AND OPERATION ® The controller is unable to drive analog or digital outputs to • correct values. The controller's own status is bad (the controller is no • longer functioning). An input status is bad. • All I/O points that have any of the preceding errors are tagged by the controller as bad quality. -
Page 32: Section 3 - Installation
ATTENTION eviter les dommages causes par les changes statiques. NOTE: Always use Bailey's Field Static Kit (P/N 1948385A2 - con- sists of wrist strap, ground cord assembly, alligator clip) when work- ing with modules. The kit is designed to connect a technician and the static dissipative work surface to the same ground point to pre- vent damage to the modules by electrostatic discharge. -
Page 33: Safety Related Information
INSTALLATION ® 3. File a claim for any damage with the transportation com- pany that handled the shipment. 4. Use the original packing material and container to store the hardware. 5. Store the hardware in an environment of good air quality, free from temperature and moisture extremes. -
Page 34: Setup
INSTALLATION SETUP NOTE: These procedures must be performed before operating the module. Configure the controller module according to your specific application. Module address, power up voltage levels and time out values for analog outputs, and digital input values are user-configurable, and set by dipswitches S2, S3, S4, and jumpers J1 through J3. -
Page 35: Switch S2/S3 Analog Output Switch
INSTALLATION ® Table 3-1. Switch S2/S3 Analog Output Settings (continued) Analog Output Number 1 Switch S2 Switch Open Closed Function Position (1 - off) (0 - on) Goes to power up value set by SW2-1 on time out. 4, 6 Yields voltage output. -
Page 36: Switch S4 Module Address Switch Settings
INSTALLATION Table 3-2. Switch S4 Module Address Switch Settings Position Address Binary Decimal Closed Closed Closed Closed Closed 00000 Closed Closed Closed Closed Open 00001 Closed Closed Closed Open Closed 00010 Closed Closed Closed Open Open 00011 Closed Closed Open Closed Closed 00100... -
Page 37: Analog Outputs (S2 And S3)
INSTALLATION ® Table 3-3. Switch S4 Normal Mode/Test Mode Settings Position Open (1 - off) Closed (0 - on) Function NORMAL MODE-Switch Position 1 is CLOSED NVRAM initialize. Configuration lockout. DIAGNOSTIC MODE-Switch Position 1 is OPEN Group Test Switch/LED Test 2-6,8 ROM 2 Test ROM 1 Test... -
Page 38: Module Bus Address Selection/Self-Test Switch (S4)
INSTALLATION MODULE BUS ADDRESS SELECTION/SELF-TEST SWITCH (S4) In order to communicate with the system, each module must have a unique address. Switch S4 positions four through eight are used to set the module address and are listed in Table 3-2. The COM can have one of 32 addresses (address 0 to 31) on the module bus. -
Page 39: Termination Module Configuration
INSTALLATION ® will retain data in the event of a power failure. Use the follow- ing sequence for a new unconfigured module. 1. Remove module from the module mounting unit (MMU) rack. 2. Verify that position 1 of switch S4 is CLOSED (Refer to Fig- for switch locations). -
Page 40: Wiring Connections And Cabling
INSTALLATION into the backplane slot in the same slot as the one assigned to the module. The latches should snap securely into place. 3. Align the module with the guide rails in the MMU; gently slide the module in until the front panel is flush with the top and bottom of the MMU frame. -
Page 41: Imcom03/04 Cable Connections And Termination
INSTALLATION ® 4 ANALOG INPUTS (1-5 VDC, 4-20 mA) 3 DIGITAL INPUTS NKTM01 (24/125 VDC) IMCOM03/04 NICS01 NKTU02 2 ANALOG OUTPUTS (1-5 VDC, 4-20 mA) 4 DIGITAL OUTPUTS (24 VDC AT 250 mA) 4 ANALOG INPUTS (1-5 VDC, 4-20 mA) 3 DIGITAL INPUTS (24/125 VDC) NKTU01... -
Page 42: Section 4 - Configuration
SECTION 4 - CONFIGURATION INTRODUCTION This section lists the function codes used by the controller module to control the process. (For complete information about COM function codes, refer to I-E93-900-20, Function Code Application Manual). A variety of control and math functions reside in the module's firmware. -
Page 43: Configuration
CONFIGURATION ® CONFIGURATION The module digital outputs are de-energized (off) during start-up, during operator selected RESET, configure mode and for certain failure conditions. Configure the control strategy to prevent personal injury, equipment damage or damage to the product in case digital outputs de-energize. WARNING Analog outputs always hold last value when the module is put into configure mode and go to user-selected values during... -
Page 44: Function Blocks
CONFIGURATION FUNCTION BLOCKS The IMCOM03/04 has 240 function blocks available for user configuration. Of these, blocks 0 through 9 are fixed (their val- ues are preassigned; you can not alter them), and block 240 is reserved. NOTE: The total number of blocks actually configurable for user selected functions depends on several critical factors: Execution time, memory utilization, degree of complexity, etc. -
Page 45: Function Codes
CONFIGURATION ® b. Multiply 15 Square Root blocks by 12.500 millisec- onds. c. Multiply 1 Executive Block by .000,60 milliseconds. d. Add products: 301.500 000.060 +187.500 489.06 milliseconds of CPU time The result of this calculation gives the amount of CPU time that the control functions use during execution. -
Page 46: Code Specifications
CONFIGURATION Code Specifications The user defines the block address and assigns a function code to it. The output of the block can be referenced as an input to another block. Blocks are executed in sequential order. Each function code has a list of specifications. These specifications apply to input/output coordinates time con- stants and gains, and have default values. -
Page 47: Advanced Control Functions
CONFIGURATION ® Table 4-1. Basic Control Functions (continued) Function Code Definition Function Code Definition Compute Logic Function Generation Lead/Lag Remote Control Memory Pulse Rate Time Delay, Digital High/Low Limit Qualified OR (8 input) Square Root AND - 2 Inputs Rate Limit AND - 4 Inputs Integer Transfer OR - 2 Inputs... -
Page 48: Section 5 - Operating Procedures
SECTION 5 - OPERATING PROCEDURES INTRODUCTION This section explains the front panel indicator and start-up procedures for the Controller Module (IMCOM03/04). IMCOM03 STATUS LED RESET SWITCH T00119A Figure 5-1. IMCOM03/03 Front Panel MODULE STATUS INDICATOR The controller module has a front panel module status LED indicator to aid in system test and diagnosis. -
Page 49: Start-Up Procedures
OPERATING PROCEDURES ® Table 5-1. IMCOM03/04 Status LED Indicator Indication Solid Green Enabled and communicating No power or not enabled Solid Red Bus error START-UP PROCEDURES The controller starts up automatically. The front panel LED (solid green) verifies that the module is enabled and communicating. -
Page 50: Section 6 - Troubleshooting
SECTION 6 - TROUBLESHOOTING INTRODUCTION This section explains the error indications and corrective actions for the Controller Module (IMCOM03/04). ERROR INDICATIONS AND CORRECTIVE ACTION Obtain the status of the COM through an INFI 90 operator interface (e.g. Operator Interface Station, Engineering Work Station, Configuration and Tuning Terminal) or the front panel module status LED indicator. -
Page 51: Status Word Displays
TROUBLESHOOTING ® If the status word indicates an error other than NVRAM the existing configuration will not be erased when the COM is put in the CONFIGURE mode. You can now modify, add, delete, or tune the configuration. NOTE: Make sure that your analog control station (SAC) is in the AUTO BYPASS mode so that you have manual control of the process. -
Page 52: Module Pin Connections
TROUBLESHOOTING Table 6-3. Status Byte Descriptions Field Value Description Bytes — NVRAM Error: Write Failure — Checksum Failure — Bad Data — Reset During Write Analog Input Reference Error: 1 Volt Ref. Analog Input Reference Error: 5 Volt Ref. — Missing I/O Expander Board Configuration Error - Undefined Block (1) = Block making reference... -
Page 53: Termination Unit Connections
TROUBLESHOOTING ® TERMINATION UNIT CONNECTIONS Table lists the P3 connections on the controller module (P1 connections on the termination Unit). Table 6-5. P1 Pin Connections (NTCS02) Cable Connections 1. Digital Output 1- 2. Digital Output 1+ 3. Digital Output 2- 4. -
Page 54: Section 7 - Maintenance
SECTION 7 - MAINTENANCE INTRODUCTION The controller module requires limited maintenance. This sec- tion contains a maintenance schedule. MAINTENANCE SCHEDULE Perform the tasks in Table at the specified intervals. Table 7-1. Maintenance Schedule Task Interval Clean and tighten all power and Every 6 months or during plant shut- grounding connections. -
Page 55: Section 8 - Repair/Replacement Procedures
SECTION 8 - REPAIR/REPLACEMENT PROCEDURES INTRODUCTION This section explains the replacement procedures for a control- ler module. There are no special tools required to replace a controller module. MODULE REPAIR/REPLACEMENT PROCEDURES If you determine the controller module is faulty, replace it with a new one. -
Page 56: Section 9 - Support Services
SECTION 9 - SUPPORT SERVICES INTRODUCTION Bailey Controls is ready to help in the use, application and repair of its products. Contact your nearest sales office to make requests for sales, applications, installation, repair, and main- tenance contract services. REPLACEMENT PARTS AND ORDERING INFORMATION When making repairs at your facility, order replacement parts from a Bailey Controls sales office. -
Page 57: Appendix A - Termination Unit Configuration (Ntcs02
APPENDIX A - TERMINATION UNIT CONFIGURATION (NTCS02) INTRODUCTION The IMCOM03/04 uses an NTCS02 for termination. It handles four analog inputs, two analog outputs, three digital inputs and four digital outputs. Dipshunts on the Termination Unit (NTCS02) configure the I/O. NOTE: There is no dipshunt socket to configure for the digital out- puts on the NTCS02. -
Page 58: Mounting
TERMINATION UNIT CONFIGURATION (NTCS02) ® For example, analog input number 1 field wiring is attached to screw terminals 9 (-) and 10 (+) of terminal block number 1. Dipshunt XU1 conditions analog input number 1. If analog input number 1 is a powered 4-20 mA input, XU1 is configured as follows: straps 2, 4, and 5 are cut, straps 1, 3, 6, 7 and 8 are left intact. - Page 59 TERMINATION UNIT CONFIGURATION (NTCS02) Table A-1. Input/Output Dipshunt Configuration Configuration Application Dipshunts 1 2 3 4 5 6 7 8 ANALOG INPUTS 1 through 4 XU1-XU4 Powered 4-20 mA Input 1 0 1 0 0 1 1 1 Unpowered 4-20 mA Input 0 1 0 1 0 1 0 1 Single-Edged Voltage Input 0 1 0 1 0 0 1 1...
-
Page 60: Dipshunt Assignments
TERMINATION UNIT CONFIGURATION (NTCS02) ® Table A-2. Dipshunt Assignments Terminal Block Terminal Position DipShunt Assignment Fixed Block (TB) Analog Input 1 Analog Input 2 Analog Input 3 Analog Input 4 Digital Input 1 Digital Input 2 Digital Input 3 Electric Drive SAC (Analog Control Station) Position Feedback Analog Output 1... -
Page 61: Introduction
TERMINATION UNIT CONFIGURATION (NTCS02) Table lists the TCS analog output dipshunts. Figures A-3, A-4, show the TCS dipshunts, and the I/O signal path from the field device to the controller module for a termi- nation unit application. Refer to Table to determine the dipshunt strapping to configure your application. - Page 62 TERMINATION UNIT CONFIGURATION (NTCS02) ® +24 V (I/O POWER) XMTTR – – TERMINAL BLOCK FIELD DIPSHUNTS XU1-XU4 CONTROLLER INPUT CIRCUITRY DIFFERENTIAL VOLTAGE INPUT +24 V (I/O POWER) XMTTR – – TERMINAL BLOCK FIELD DIPSHUNTS XU1-XU4 CONTROLLER INPUT CIRCUITRY SINGLE-ENDED VOLTAGE INPUT T00123A Figure A-3.
-
Page 63: Analog Output Dipshunt Configurations
TERMINATION UNIT CONFIGURATION (NTCS02) SAC STATION CONNECTOR – ANALOG OUTPUT 1 OUTPUT 1 – ANALOG SAC STATION CONNECTOR OUTPUT 2 OUTPUT 2 CONTROLLER OUTPUT CIRCUITRY BOTH OUTPUTS IN CURRENT MODE T00124A Figure A-4. Analog Output Dipshunt Configurations INTRODUCTION I-E96-207A A - 7... - Page 64 TERMINATION UNIT CONFIGURATION (NTCS02) ® SAC STATION CONNECTOR – ANALOG OUTPUT 1 OUTPUT 1 – ANALOG SAC STATION CONNECTOR OUTPUT 2 OUTPUT 2 CONTROLLER OUTPUT CIRCUITRY BOTH OUTPUTS IN VOLTAGE MODE T00125A Figure A-4. Analog Output Dipshunt Configurations (continued) INTRODUCTION A - 8 I-E96-207A...
- Page 65 TERMINATION UNIT CONFIGURATION (NTCS02) SAC STATION CONNECTOR – ANALOG OUTPUT 1 OUTPUT 1 – ANALOG SAC STATION CONNECTOR OUTPUT 2 OUTPUT 2 CONTROLLER OUTPUT CIRCUITRY ANALOG OUTPUT 1 IN CURRENT MODE ANALOG OUTPUT 2 IN VOLTAGE MODE T00126A Figure A-4. Analog Output Dipshunt Configurations (continued) INTRODUCTION I-E96-207A A - 9...
- Page 66 TERMINATION UNIT CONFIGURATION (NTCS02) ® SAC STATION CONNECTOR – ANALOG OUTPUT 1 OUTPUT 1 – ANALOG SAC STATION CONNECTOR OUTPUT 2 OUTPUT 2 CONTROLLER OUTPUT CIRCUITRY ANALOG OUTPUT 1 IN VOLTAGE MODE ANALOG OUTPUT 2 IN CURRENT MODE T00127A Figure A-4. Analog Output Dipshunt Configurations (continued) INTRODUCTION A - 10 I-E96-207A...
- Page 67 TERMINATION UNIT CONFIGURATION (NTCS02) DI POWER (24 OR 125 VDC) – +5 V – 24 VDC I/O SUPPLY JUMPER – CONTROLLER DIGITAL INPUT CIRCUITRY DIPSHUNT ON TERMINATION UNIT (XU5-XU7) DI POWER (+24 VDC/+125 VDC) SUPPLY IN SERIES T00128A DI POWER (24 OR 125 VDC) –...
-
Page 68: Digital Output Circuitry
TERMINATION UNIT CONFIGURATION (NTCS02) ® DI POWER (24 OR 125 VDC) – +5 V – 24 VDC I/O SUPPLY JUMPER – CONTROLLER DIGITAL INPUT CIRCUITRY DIPSHUNT ON TERMINATION UNIT (XU5-XU7) FIELD POWERED INPUT T00130A Figure A-5. Digital Input Dipshunt Configurations (continued) +5 V TO FIELD T00131A... - Page 69 TERMINATION UNIT CONFIGURATION (NTCS02) MODULE CONTROLLER MOUNTING UNIT MODULE I/O CABLE PROCESS I/O TERMINATIONS CONTROLLER TERMINATION UNIT (TCS) ANALOG CONTROL STATION STATION CABLE T00132A Figure A-7. COM/TCS Cable Connections INTRODUCTION I-E96-207A A - 13...
- Page 70 TERMINATION UNIT CONFIGURATION (NTCS02) ® IISAC01 NKDS01 NKTU01 IMCOM03/04 NKDS01 IISAC01 NTCS02 IISAC01 NKDS03 NKTU01 IMCOM03/04 NKDS02 IISAC01 NTCS02 T00133A Figure A-8. COM/TCS Cabling Diagram INTRODUCTION A - 14 I-E96-207A...
- Page 71 APPENDIX B - TERMINATION MODULE CONFIGURATION (NICS01) INTRODUCTION The IMCOM03/04 uses a Termination Module (NICS01) for ter- mination. The termination module handles 4 analog inputs, 2 analog outputs, 3 digital inputs and 4 digital outputs. Dipswitches on the termination module configure the I/O. Fig- shows the termination module.
- Page 72 TERMINATION MODULE CONFIGURATION (NICS01) ® Table B-1. NICS01 Dipswitch Configuration Analog Input Application/Signal Type Dipswitch Configuration S1-S4 System powered 4-20 mA 1 2 3 4 5 OPEN Externally powered 4-20 mA 1 2 3 4 5 OPEN Single ended voltage 1 2 3 4 5 OPEN Differential voltage...
- Page 73 TERMINATION MODULE CONFIGURATION (NICS01) TERMINAL NUMBER 9 10 11 12 13 14 15 16 17 18 19 20 23 24 25 26 27 28 29 30 ANALOG INPUT ANALOG DIGITAL INPUT SERIAL DIGITAL OUTPUT OUTPUT LINK T00135A Figure B-2. NICS01 Terminal Assignments NKTM01 NKTD02 NKTU02...
- Page 74 APPENDIX C - TERMINATION MODULE CONFIGURATION (NIDS01) INTRODUCTION The IMCOM03/04 uses a Termination Module (NIDS01) for ter- mination. The termination module connects the NICS01 termi- nation module to a Digital Control Station (NDCS03), Digital Indicator Station (NDIS01), Analog Control Station (IISAC01).
- Page 75 TERMINATION MODULE CONFIGURATION (NIDS01) ® Table C-1. NIDS01 Application Summary Application Interfaces To Connecting Cable Signal Type Control Station NKTD01 24 VDC provides com- NDCS03 or IISAC01 munication between a control module and a Digital Indicator Station NKTD01 control station. NDIS01 Termination Module 6634408 ribbon cable...
-
Page 76: Appendix C - Termination Module Configuration (Nids01
TERMINATION MODULE CONFIGURATION (NIDS01) IISAC01 RIBBON CABLE 6634408 NKDS01 NICS01 NIDS01 IISAC01 NKTD01 NKDS01 RIBBON CABLE 6634408 IISAC01 IISAC01 NKDS02 NKDS03 NICS01 NIDS01 IISAC01 IISAC01 NKTD01 NKDS02 NKDS03 T00138A Figure C-2. NIDS01 Cabling Diagram INTRODUCTION I-E96-207A C - 3... - Page 77 Telefax 39-10-6582-941 Telephone 49-69-799-0 Telefax 65-292-9011 Telefax 49-69-799-2406 Form I-E96-207A Litho in U.S.A. 391 Copyright © 1991 by Elsag Bailey Process Automation, As An Unpublished Work ® Registered Trademark of Elsag Bailey Process Automation ™ Trademark of Elsag Bailey Process Automation...
Need help?
Do you have a question about the INFI 90 IMCOM03 and is the answer not in the manual?
Questions and answers