
Related Manuals for Vertiv NetSure 7200 Series


Summary of Contents for Vertiv NetSure 7200 Series
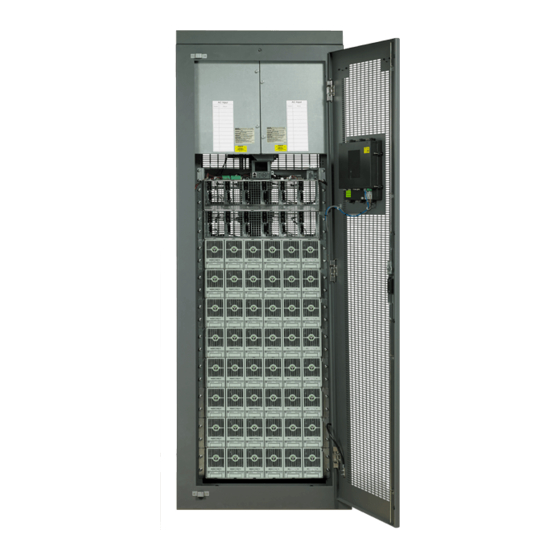
- Page 1 NetSure™ 7200 SERIES -48V DC Power System Installation Manual (IM582127200), Revision K Specification Number: 582127200 Model Number: 7200...
- Page 2 This document may contain confidential and/or proprietary information of Vertiv Group Corp., and its receipt or possession does not convey any right to reproduce, disclose its contents, or to manufacture or sell anything that it may describe. Reproduction, disclosure, or use without specific authorization from Vertiv Group Corp.
-
Page 3: Table Of Contents
Switch Settings on IB2 Interface Board ..................39 Switch Settings on EIB Interface Board (Primary Power Bay Only) ....39 Switch Settings on SM-DU (Primary Power Bay Only) ..........42 Vertiv | NetSure 7200 Series Installation Manual (IM582127200) | Rev. K... - Page 4 Setting the System to Work with Secondary Power Bays ........109 Verifying and Setting the NCU Controller as Required for Your Application ................................111 Checking System Status ..........................116 Final Steps ................................117 Vertiv | NetSure 7200 Series Installation Manual (IM582127200) | Rev. K...
-
Page 5: Admonishments Used In This Document
(ISO) SAFETY! Informs the reader of general safety information, reminders, precautions, or policies not related to a particular source of hazard or to fire safety. (ISO, ANSI, OSHA) Vertiv | NetSure 7200 Series Installation Manual (IM582127200) | Rev. K... -
Page 6: Important Safety Instructions
DANGER! Follow local lockout/tagout procedures to ensure DC branch circuit protection devices remain de-energized during installation at loads, as required. Vertiv | NetSure 7200 Series Installation Manual (IM582127200) | Rev. K... -
Page 7: Battery
Only install in a ventilated environment. • Batteries are an energy source that can produce high amounts of electrical current. Vertiv | NetSure 7200 Series Installation Manual (IM582127200) | Rev. K... -
Page 8: Personal Protective Equipment (Ppe)
NOTE! When performing any step in procedures that requires removal of existing hardware, retain all hardware for use in subsequent steps, unless otherwise directed. Vertiv | NetSure 7200 Series Installation Manual (IM582127200) | Rev. K... -
Page 9: Static Warning
If necessary to repair equipment containing static sensitive components, wear an appropriately grounded wrist strap, work on a conductive surface, use a grounded soldering iron, and use grounded test equipment. Vertiv | NetSure 7200 Series Installation Manual (IM582127200) | Rev. K... - Page 10 This page is intentionally blank. Vertiv | NetSure 7200 Series Installation Manual (IM582127200) | Rev. K...
-
Page 11: Customer Documentation Package
Optional Power Bay 12000 A Internal Top Mount -48 VDC Power and Return Bus Assemblies Installed Optional Distribution Bay 8000 A Internal Top Mount -48 VDC Power Bus Assembly Installed Vertiv | NetSure 7200 Series Installation Manual (IM582127200) | Rev. K... - Page 12 Load Connections Made Power and Distribution Bays Busbars Connections Made Installing the Modules Rectifier Modules Installed Initially Starting the System System Started, Configured, and Checked Vertiv | NetSure 7200 Series Installation Manual (IM582127200) | Rev. K...
-
Page 13: Installing The System
• Torque wrench with a 7/16” deep socket capable of 45 in-lbs. Installing the Bays Ventilation Requirements Refer to the “General Requirements” on page 13. Placing and Securing the Bays to the Floor Refer to ““General Requirements” on page 13. Vertiv | NetSure 7200 Series Installation Manual (IM582127200) | Rev. K... - Page 14 [ ] 1. Remove the shield that covers the top of the -48 VDC busbars. [ ] 2. From inside the bays, loosen the nut plate bolts on the top mount bus assemblies for all bays to be connected. See Figure 4. Vertiv | NetSure 7200 Series Installation Manual (IM582127200) | Rev. K...
- Page 15 Torque to 180 in-lbs. Tighten the floor mounting hardware per hardware manufacturer specifications. Replace power bays top rear shields. Replace -48V top mount bus shields. Close front and rear doors. Vertiv | NetSure 7200 Series Installation Manual (IM582127200) | Rev. K...
- Page 16 Figure 1: Power and Distribution Bay Floor Drilling Dimensions Notes: 1. All dimensions are in inches, unless otherwise specified. Figure 2: Transition Bay Floor Drilling Dimensions Notes: 1. All dimensions are in inches, unless otherwise specified. Vertiv | NetSure 7200 Series Installation Manual (IM582127200) | Rev. K...
- Page 17 3/8-16 x 1-1/4” Bolt (3) Plug (2) Hole Plug (2) 1/2” Flat Bushing/Plug Kit 3/8” Lock Washer (6) (supplied with each bay) Washer (3) Bolting Kit (supplied with each bay) Vertiv | NetSure 7200 Series Installation Manual (IM582127200) | Rev. K...
- Page 18 (both sides) of each bus assembly. Rear If busbars from one bay to next are out of alignment by greater than 1/8”, loosen these bolts on both bus assemblies Vertiv | NetSure 7200 Series Installation Manual (IM582127200) | Rev. K...
-
Page 19: Installing Optional Power Bay 8000 A Internal Top Mount -48 Vdc Power And Return Bus Assemblies, P/N 557824
Components removed in illustrations for clarity only. P/N 557824 (8000A Internal Top Mount Bus Assembly) Orient these pieces with the small hole as shown Power Bay Rear (Assembled View) Vertiv | NetSure 7200 Series Installation Manual (IM582127200) | Rev. K... -
Page 20: Installing Optional Power Bay 12000 A Internal Top Mount -48 Vdc Power And Return Bus Assemblies, P/N 557823
Components removed in illustrations for clarity only. P/N 557823 (12000A Internal Top Mount Bus Assembly) Orient these pieces with the small hole as Power Bay shown Rear (Assembled View) Vertiv | NetSure 7200 Series Installation Manual (IM582127200) | Rev. K... -
Page 21: Installing Optional Distribution Bay 8000 A Internal Top Mount -48 Vdc Power Bus Assembly, P/N 557828
Components removed in illustrations for clarity only. P/N 557828 (8000A Internal Top Mount Bus Assembly) Orient these pieces with the small hole as shown Rear Distribution Bay (Assembled View) Vertiv | NetSure 7200 Series Installation Manual (IM582127200) | Rev. K... -
Page 22: Installing Optional Distribution Bay 12000 A Internal Top Mount -48 Vdc Power Bus Assembly, P/N 557827
Components removed in illustrations for clarity only. Rear P/N 557827 (12000A Internal Top Mount Bus Assembly) Distribution Bay (Assembled View) Orient these pieces with the small hole as shown Vertiv | NetSure 7200 Series Installation Manual (IM582127200) | Rev. K... -
Page 23: Installing Optional Distribution Bay Internal Top Mount Return Bus Assembly, P/N 557829, 557830, 557831
1/4" Flat Washer (Qty. 4) 1/4" Lock Washer (Qty. 4) 1/4-20 Nut (Qty. 4) Torque to 84 in-lbs. Fasten from underneath Sheetmetal panel. Rear Distribution Bay Components removed in illustration for clarity only. Vertiv | NetSure 7200 Series Installation Manual (IM582127200) | Rev. K... -
Page 24: Installing Internal Top Mount -48 Vdc Power And Return Bus Interconnect Links, P/N 558005, 558006, 558007
[ ] 10. If there remains a gap between the insulator and the nut plate or the insulator and the enclosure, loosen the 1/4” nut plate bolts and insert a shim between the insulator and the nut plate. Re-torque the 1/4” nut plate bolts. See Figure 11. Vertiv | NetSure 7200 Series Installation Manual (IM582127200) | Rev. K... - Page 25 -48V DC Busbar. Apply anti-oxidizing compound to busbar mating surfaces. Components removed in illustrations for clarity only. Return Busbar -48V DC Busbar Rear Distribution Bay Power Bay Vertiv | NetSure 7200 Series Installation Manual (IM582127200) | Rev. K...
-
Page 26: Installing Return Bus Load Shunt Monitoring Cable Assembly Kit
[ ] 3. Install the TPL fuse into the fuse carrier. Secure the fuse with the flat washer, lock washer, and nut provided. Recommended torque is 168 in-lbs. Vertiv | NetSure 7200 Series Installation Manual (IM582127200) | Rev. K... - Page 27 [ ] 6. Verify that an alarm fuse is installed on the distribution panel associated with this fuse. Ensure that a plastic safety cover is installed on the alarm fuse. [ ] 7. Close the distribution bay’s front door and secure. Vertiv | NetSure 7200 Series Installation Manual (IM582127200) | Rev. K...
- Page 28 [ ] 4. Verify that an alarm fuse is present in each fuseholder and that a plastic safety cover is installed on this fuse. [ ] 5. Record all fuse sizes. [ ] 6. Close the distribution bay’s front door and secure. Vertiv | NetSure 7200 Series Installation Manual (IM582127200) | Rev. K...
- Page 29 Push distribution device in firmly until fully seated in the distribution panel. [ ] 3. Record all circuit breaker sizes. [ ] 4. Close the distribution bay’s front door and secure. Vertiv | NetSure 7200 Series Installation Manual (IM582127200) | Rev. K...
- Page 30 [ ] 5. Verify that a plastic safety cover is installed on all GMT fuses on the GMT distribution fuse block. [ ] 6. Record all fuse sizes. [ ] 7. Close the distribution bay’s front door and secure. Vertiv | NetSure 7200 Series Installation Manual (IM582127200) | Rev. K...
- Page 31 Refer to the following procedure and install appropriately sized GJ/218 circuit breakers into a List D, E distribution panel. Procedure NOTE! Figure 17 Figure 18 Refer to as this procedure is performed. Vertiv | NetSure 7200 Series Installation Manual (IM582127200) | Rev. K...
- Page 32 Assembly” on page 55 for proper wiring procedure. Leads must be terminated before switching breaker ON to avoid circuit fault. [ ] 10. Close the distribution bay’s front and rear doors and secure the doors. Vertiv | NetSure 7200 Series Installation Manual (IM582127200) | Rev. K...
- Page 33 (8 places) Torque to 225 in-lbs. INSTALLING CIRCUIT BREAKER GUARD ALARM WIRING (BREAKERS WITH SHUNTS) STANDARD TRIP BREAKER (BLACK HANDLE) ELECTRICAL TRIP BREAKER (WHITE HANDLE) ALARM JUMPER: RED ALARM JUMPER: YELLOW Vertiv | NetSure 7200 Series Installation Manual (IM582127200) | Rev. K...
- Page 34 (8 places) Torque to 225 in-lbs. INSTALLING CIRCUIT BREAKER GUARD ALARM WIRING (BREAKERS WITH SHUNTS) STANDARD TRIP BREAKER (BLACK HANDLE) ELECTRICAL TRIP BREAKER (WHITE HANDLE) ALARM JUMPER: RED ALARM JUMPER: YELLOW Vertiv | NetSure 7200 Series Installation Manual (IM582127200) | Rev. K...
-
Page 35: Installing The Optional Sm-Du+ And Shunt/Fa Assembly P/N 557136
WARNING! Damage to the circuit card may result if the next step is not followed. [ ] 1. Connect an approved grounding strap to your wrist. Attach the other end to a suitable ground. [ ] 2. Follow the procedure in Figure 20. Vertiv | NetSure 7200 Series Installation Manual (IM582127200) | Rev. K... - Page 36 Connections” section to route and Connections to connect the P/N 557012 cable between SM-DU+ a power bay and the distribution bay. 8. Close and secure the distribution bay’s front door Vertiv | NetSure 7200 Series Installation Manual (IM582127200) | Rev. K...
- Page 37 M3 flat washer and M3-0.5x12 screw on top of the spade lug. Ensure the ground washer is oriented so the concave side is towards the sheet metal panel. Vertiv | NetSure 7200 Series Installation Manual (IM582127200) | Rev. K...
-
Page 38: Making Switch Settings
(for additional of shunts and FA monitoring of signals located shunts and FA in the various signals located distribution in the various panels) Primary distribution Distribution Power panels) Front Front Vertiv | NetSure 7200 Series Installation Manual (IM582127200) | Rev. K... -
Page 39: Switch Settings On Ib2 Interface Board
[ ] 1. Ensure SW1 is set per Table 2. Refer to Figure 23 for location. Table 2: EIB Interface Board Switch Settings DIP Switch SW1 Setting EIB in Primary Power Bay Vertiv | NetSure 7200 Series Installation Manual (IM582127200) | Rev. K... - Page 40 Setting IB2 in Primary Power Bay IB2 in 1st Secondary NC C NO Power Bay IB2 in 2nd Digital Input Terminal Blocks Relay Output Terminal Blocks Secondary Power Bay Vertiv | NetSure 7200 Series Installation Manual (IM582127200) | Rev. K...
- Page 41 EIB Board. Front Primary Power Bay Optional EIB Board (Top View) In this system, switch settings must be in positions shown. DIP Switch SW1 Setting EIB in Primary Power Bay Vertiv | NetSure 7200 Series Installation Manual (IM582127200) | Rev. K...
-
Page 42: Switch Settings On Sm-Du (Primary Power Bay Only)
Yellow Indicator Green Indicator 1 2 3 4 5 6 7 8 1 2 3 4 5 6 7 8 1 2 3 4 5 6 7 8 SM-DU Vertiv | NetSure 7200 Series Installation Manual (IM582127200) | Rev. K... - Page 43 ON OFF OFF Shunt Current: 400 A ON OFF ON Shunt Current: 1000 A ON OFF Shunt Current: 1500 A ON Shunt Current: 2000 A Note 1: Setting for this system. Vertiv | NetSure 7200 Series Installation Manual (IM582127200) | Rev. K...
- Page 44 OFF OFF Shunt 4 is Disabled OFF ON Shunt 4 is Used for Battery ON OFF Shunt 4 is Used for Load ON Set via Software (Note 1) Note 1: Setting for this system. Vertiv | NetSure 7200 Series Installation Manual (IM582127200) | Rev. K...
- Page 45 Shunt 5 is Disabled (Note 1) Shunt 5 is Used for Battery Shunt 5 is Used for Load Set via Software Operation Mode (Note 1) Calibration Mode Note 1: Setting for this system. Vertiv | NetSure 7200 Series Installation Manual (IM582127200) | Rev. K...
-
Page 46: Only)
Fuse RS485 RS485 RS232 Set each SM-DU+ in the system to a unique address. Vertiv | NetSure 7200 Series Installation Manual (IM582127200) | Rev. K... - Page 47 Address 3# (Setting for 3rd SM-DU+ in System) Address 4# (Setting for 4th SM-DU+ in System) Address 5# (Setting for 5th SM-DU+ in System) Address 6# (Setting for 6th SM-DU+ in System) Vertiv | NetSure 7200 Series Installation Manual (IM582127200) | Rev. K...
- Page 48 Address 7# (Setting for 7th SM-DU+ in System) Address 8# (Setting for 8th SM-DU+ in System) 19200 (note 1) 9600 Note 1: Setting for this system. Vertiv | NetSure 7200 Series Installation Manual (IM582127200) | Rev. K...
-
Page 49: Making Electrical Connections
YA29L-4TCG1 T & B: 256-30695-1880 514873 15514 Burndy: YA31L-4TCG1 The lugs should be crimped to the specifications given in the manufacturer’s instructions furnished with the crimp tool or lug. Vertiv | NetSure 7200 Series Installation Manual (IM582127200) | Rev. K... -
Page 50: Bay Grounding Connection (Frame Ground)
This system is suitable for installation as part of the Common Bonding Network (CBN). Figure 26: Bay Frame Grounding Connection Points Bays Top View Transition Power Distribution Front Frame Ground Connection Point (1/4” clearance holes on 5/8” centers) Torque: 84 in-lbs. Vertiv | NetSure 7200 Series Installation Manual (IM582127200) | Rev. K... -
Page 51: Furnished)
It is recommended that AC input wiring be provided to all rectifier mounting positions, including currently unused positions. This wiring will ease future installation of rectifiers to meet increased load requirements. Vertiv | NetSure 7200 Series Installation Manual (IM582127200) | Rev. K... - Page 52 [ ] 1. Connect equipment grounding leads to the frame ground studs as shown in Figure 27, Figure 28, Figure 29, Figure 30, Figure 31, Figure 32, or Figure 33 using installer-provided ring lugs and factory-supplied mounting hardware. Torque connections to value shown in the appropriate illustration. Vertiv | NetSure 7200 Series Installation Manual (IM582127200) | Rev. K...
- Page 53 (PCU) (PCU) (PCU) (PCU) (PCU) (PCU) Feed #10 Feed #20 Rect. Rect. Rect. Rect. Rect. Rect. Shelf #10 (PCU) (PCU) (PCU) (PCU) (PCU) (PCU) Rectifier Module (PCU) Mounting Slots Vertiv | NetSure 7200 Series Installation Manual (IM582127200) | Rev. K...
- Page 54 Rect. Rect. Shelf #9 (PCU) (PCU) (PCU) (PCU) (PCU) (PCU) Rect. Rect. Rect. Rect. Rect. Rect. Shelf #10 (PCU) (PCU) (PCU) (PCU) (PCU) (PCU) Rectifier Module (PCU) Mounting Slots Vertiv | NetSure 7200 Series Installation Manual (IM582127200) | Rev. K...
- Page 55 Feed #10 Rect. Rect. Rect. Rect. Rect. Rect. Shelf #9 (PCU) (PCU) (PCU) (PCU) (PCU) (PCU) Rect. Rect. Rect. Rect. Rect. Rect. Shelf #10 (PCU) (PCU) (PCU) (PCU) (PCU) (PCU) Vertiv | NetSure 7200 Series Installation Manual (IM582127200) | Rev. K...
- Page 56 (PCU) (PCU) (PCU) (PCU) (PCU) (PCU) Feed #10 Feed #20 Rect. Rect. Rect. Rect. Rect. Rect. Shelf #10 (PCU) (PCU) (PCU) (PCU) (PCU) (PCU) Rectifier Module (PCU) Mounting Slots Vertiv | NetSure 7200 Series Installation Manual (IM582127200) | Rev. K...
- Page 57 (PCU) (PCU) (PCU) (PCU) (PCU) (PCU) Feed #10 Feed #20 Rect. Rect. Rect. Rect. Rect. Rect. Shelf #10 (PCU) (PCU) (PCU) (PCU) (PCU) (PCU) Rectifier Module (PCU) Mounting Slots Vertiv | NetSure 7200 Series Installation Manual (IM582127200) | Rev. K...
- Page 58 Rect. Rect. Shelf #9 (PCU) (PCU) (PCU) (PCU) (PCU) (PCU) Rect. Rect. Rect. Rect. Rect. Rect. Shelf #10 (PCU) (PCU) (PCU) (PCU) (PCU) (PCU) Rectifier Module (PCU) Mounting Slots Vertiv | NetSure 7200 Series Installation Manual (IM582127200) | Rev. K...
- Page 59 Feed #10 Rect. Rect. Rect. Rect. Rect. Rect. Shelf #9 (PCU) (PCU) (PCU) (PCU) (PCU) (PCU) Rect. Rect. Rect. Rect. Rect. Rect. Shelf #10 (PCU) (PCU) (PCU) (PCU) (PCU) (PCU) Vertiv | NetSure 7200 Series Installation Manual (IM582127200) | Rev. K...
-
Page 60: External Alarm, Reference, Monitoring, And Control Connections
(for additional of shunts and FA monitoring of signals located shunts and FA in the various signals located distribution in the various panels) Primary distribution Distribution Power panels) Front Front Vertiv | NetSure 7200 Series Installation Manual (IM582127200) | Rev. K... -
Page 61: Ib2 (Ncu Interface Board) Connections (If Required)
EIB. Any combination of the four (4) temperature probes can be programmed to monitor ambient temperature and/or battery temperature. A temperature probe set to monitor battery Vertiv | NetSure 7200 Series Installation Manual (IM582127200) | Rev. K... - Page 62 The ESTOP alarm from the controller will extinguish. The controller will not issue an alarm for this condition. Wiring for ESTOP Function Wire per Figure 36. Vertiv | NetSure 7200 Series Installation Manual (IM582127200) | Rev. K...
- Page 63 C and NC terminals. Not all I/O points are available for customer connection (some are used for factory system connections). J3-J9: Wire Size Capacity: 16-26 AWG. Recommended Torque: 2.2 in-lbs. Vertiv | NetSure 7200 Series Installation Manual (IM582127200) | Rev. K...
- Page 64 Digital Input #8 function is predefined for ESTOP. For ESTOP, -48V is to be wired to the Digital Input #8 (-) terminal. Customer-furnished system ground applied to terminal Digital Input #8 (+) activates the ESTOP function. See “ESTOP Function” on page 62. Vertiv | NetSure 7200 Series Installation Manual (IM582127200) | Rev. K...
- Page 65 The NCU remaining seven (7) relays energize during an alarm condition, closing the contacts between the C and NO terminals, and opening the contacts between the C and NC terminals. Vertiv | NetSure 7200 Series Installation Manual (IM582127200) | Rev. K...
- Page 66 -48V to DI8 (-) (22 AWG) to DI8 (+) (22 AWG) TB20, TB22 Screw: #6-32 Philslot Recommended Lug: #6 Spade Distance between Barriers: 0.30” Left Side Torque: 9.0 in-lbs. Power Bay Vertiv | NetSure 7200 Series Installation Manual (IM582127200) | Rev. K...
-
Page 67: Eib (Ncu Extended Interface Board) Connections (If Required)
The NCU issues an alarm when any battery midpoint voltage of any battery string has an abnormal value. The alarm is issued when the difference between Vertiv | NetSure 7200 Series Installation Manual (IM582127200) | Rev. K... - Page 68 String 4 String 5 String 6 String 7 String 8 DCV1 DCV2 DCV3 DCV4 DCV5 DCV6 DCV7 DCV8 (J6-1) (J6-2) (J6-3) (J6-4) (J6-5) (J6-6) (J7-1) (J7-3) EIB Board Voltage Inputs Vertiv | NetSure 7200 Series Installation Manual (IM582127200) | Rev. K...
- Page 69 Temperature Probes - EIB Up to two (2) temperature probes can be connected to the EIB (NCU Extended Interface Board). Refer to “Temperature Probes - IB2 and EIB” on page 61. Vertiv | NetSure 7200 Series Installation Manual (IM582127200) | Rev. K...
- Page 70 DO5_COM DCV8 EIB Board Assembly DO5_NC DCV7 DCV6 DCV5 DCV4 DCV3 DCV2 DCV1 SH3+ SH3- SH2+ SH2- SH1+ SH1- J5-J9 Wire Size Capacity: 16-26 AWG. Recommended Torque: 2.2 in-lbs. Vertiv | NetSure 7200 Series Installation Manual (IM582127200) | Rev. K...
- Page 71 J5-3 – J5-6 none J5-5 – Table 9: Voltage Inputs – EIB Default Voltage Input Pin No. Function J6-1 J6-2 J6-3 J6-4 Battery Block Monitoring J6-5 J6-6 J7-1 J7-3 Vertiv | NetSure 7200 Series Installation Manual (IM582127200) | Rev. K...
- Page 72 J7-4 J7-2 NOTE! The relays energize during an alarm condition, closing the contacts between the C and NO terminals, and opening the contacts between the C and NC terminals. Vertiv | NetSure 7200 Series Installation Manual (IM582127200) | Rev. K...
-
Page 73: Remote Assembly)
SM-DU+ information based on the destination of each distribution shunt wire set and fuse alarm wire. Refer to Figure 42. See also “Switch Settings on SM-DU+ (Distribution Bays and Remote SM-DU+ Only)” on page 46. Vertiv | NetSure 7200 Series Installation Manual (IM582127200) | Rev. K... - Page 74 FA signals located in signals located in the various the various distribution panels) distribution panels) Shunt Shunt Interface Interface Assembly Assembly (top board) (top board) SM-DU+ (bottom board) SM-DU+ (bottom board) Vertiv | NetSure 7200 Series Installation Manual (IM582127200) | Rev. K...
- Page 75 Torque to 9 in-lbs. Internal FA Return Lead (black) (factory FA Lead (yellow) connections) List C rear 4 J3 N.O. Customer N.C. External FA (note 1) (resistive battery) Torque to 2.2 in-lbs. Vertiv | NetSure 7200 Series Installation Manual (IM582127200) | Rev. K...
- Page 76 Torque to 9 in-lbs. rear List E ALARM WIRING (BREAKERS WITH SHUNTS) STANDARD TRIP BREAKER (BLACK HANDLE) ELECTRICAL TRIP BREAKER (WHITE HANDLE) ALARM JUMPER: RED ALARM JUMPER: YELLOW Vertiv | NetSure 7200 Series Installation Manual (IM582127200) | Rev. K...
- Page 77 Only Standard SM-DU+ Furnished Standard and Optional SM-DU+ Furnished Distr. Bay #1 Distr. Bay #2 Distr. Bay #1 Distr. Bay #2 SM-DU+ SM-DU+ SM-DU+ SM-DU+ SM-DU+ SM-DU+ Front View Front View Vertiv | NetSure 7200 Series Installation Manual (IM582127200) | Rev. K...
-
Page 78: Sm Du External Shunt Connections
Use shielded Ethernet cable (grounded at both ends). Note that the IB4 board’s RJ-45 jack is connected to chassis ground. Refer to the NCU Instructions (UM1M830BNA) for operational details. Vertiv | NetSure 7200 Series Installation Manual (IM582127200) | Rev. K... - Page 79 USB-A Port (not used) 10M Ethernet Port (RJ-45) Primary LAN Connection Power Front IB4 Board (shield removed) USB-B Port (Factory connected to NCU Controller backplane.) Vertiv | NetSure 7200 Series Installation Manual (IM582127200) | Rev. K...
-
Page 80: Bay-To-Bay Cable Connections
Figure 44. Cut this cable to length and terminate it with the supplied spade lugs. [ ] 5. For each bay in the system, close the bay’s front and rear doors and secure. Vertiv | NetSure 7200 Series Installation Manual (IM582127200) | Rev. K... - Page 81 (see Figure 44 for location). Connect the SM-Temp Module CAN bus to this terminal block. Refer to Table 12 for pin-outs. Ensure the last SM-Temp Module (or if only one) has a CAN termination strap as shown in the SM-Temp Module Instructions (UM547490). Vertiv | NetSure 7200 Series Installation Manual (IM582127200) | Rev. K...
- Page 82 SM-DU+ (for monitoring (for additional of shunts and FA monitoring of signals located shunts and FA in the various signals located distribution in the various panels) distribution panels) Front Vertiv | NetSure 7200 Series Installation Manual (IM582127200) | Rev. K...
- Page 83 Torque: 9.0 in-lbs. 1 CAN_H (BK) 2 CAN_L (R) Ensure the termination resistor 3 GND (G) P/N 561768 is connected between terminals 1 and 2 of TB19. Left Side Vertiv | NetSure 7200 Series Installation Manual (IM582127200) | Rev. K...
- Page 84 Ground: Green Wire (Drain Wire from Cable P/N 557012) Distance between Barriers: 0.30” Torque: 9.0 in-lbs. To avoid ground loops, ground only at the originating end of this cable (closest to power bay). Vertiv | NetSure 7200 Series Installation Manual (IM582127200) | Rev. K...
- Page 85 (closest to power bay). TB22 1 CAN_H 2 CAN_L 3 -48V 4 -48V 5 RTN 6 RTN 7 RTN 8 RTN 9 RTN 10 RTN Left Side (as viewed from front) Vertiv | NetSure 7200 Series Installation Manual (IM582127200) | Rev. K...
- Page 86 Ground: Green Wire (Drain Wire from Cable P/N 557012) Torque: 9.0 in-lbs. To avoid ground loops, ground only at the originating end of this cable (closest to power bay). Vertiv | NetSure 7200 Series Installation Manual (IM582127200) | Rev. K...
- Page 87 To avoid ground loops, 7 RTN 8 RTN assemble shield wire this 9 RTN end only when wiring to 10 RTN distribution bay. Left Side (as viewed from front) Vertiv | NetSure 7200 Series Installation Manual (IM582127200) | Rev. K...
-
Page 88: Bay-To-Bay Rs-485 Connections
Bay RS-485 Connections” cable diagram. Procedure NOTE! Figure 51 Refer to as this procedure is performed. [ ] 1. For each power bay in the system, open the bay’s front door. Vertiv | NetSure 7200 Series Installation Manual (IM582127200) | Rev. K... - Page 89 [ ] 4. Interconnect a second secondary power bay in the above fashion, if furnished. [ ] 5. For each power bay in the system, close the bay’s front door and secure. Vertiv | NetSure 7200 Series Installation Manual (IM582127200) | Rev. K...
- Page 90 Primary Power Bay Secondary Secondary Power Bay #1 Power Bay #2 Front Front Front Secondary Power Bay #2 Primary Power Bay Secondary Power Bay #1 Vertiv | NetSure 7200 Series Installation Manual (IM582127200) | Rev. K...
-
Page 91: Secondary Power Bays To Primary Power Bay Shunt Connections
Figure 52 for a “Secondary Power Bays to Primary Power Bay Shunt Connections” cable diagram. Procedure NOTE! Figure 52 Refer to as this procedure is performed. [ ] 1. For each power bay in the system, open the bay’s front door. Vertiv | NetSure 7200 Series Installation Manual (IM582127200) | Rev. K... - Page 92 [ ] 3. Interconnect a second secondary power bay in the above fashion, if furnished. [ ] 4. For each bay in the system, close the bay’s front door and secure. Vertiv | NetSure 7200 Series Installation Manual (IM582127200) | Rev. K...
- Page 93 Secondary Secondary Power Bay Power Bay Power Bay Shunt Shunt Shunt (factory (Cable P/N (Cable P/N connection) 557011) 557011) Shunt+: Red Wire Shunt-: Black Wire Front Primary Power Bay Vertiv | NetSure 7200 Series Installation Manual (IM582127200) | Rev. K...
-
Page 94: Distribution Bay Sm-Du+ Power Connections
[ ] 6. Repeat this procedure if other distribution bays are present in the system. [ ] 7. For each bay in the system, close the bay’s front door and secure. Vertiv | NetSure 7200 Series Installation Manual (IM582127200) | Rev. K... -
Page 95: Optional Sm-Du+ With Remote Mounting Kit Wiring
RTN: Black Wire Optional SM-DU+ with Remote Mounting Kit Wiring Refer to Figure 54. Switch Settings Refer to “Switch Settings on SM-DU+ (Distribution Bays and Remote SM-DU+ Only)” on page 46. Vertiv | NetSure 7200 Series Installation Manual (IM582127200) | Rev. K... - Page 96 RTN power bay terminal to a RTN terminal here. -48V: Black Wire RTN: Red Wire TB23 Screw: #6-32 Philslot Recommended Lug: #6 Spade Distance between Barriers: 0.30” Torque: 9.0 in-lbs. Vertiv | NetSure 7200 Series Installation Manual (IM582127200) | Rev. K...
-
Page 97: Load Connections
Load Lug Landing Points (-48VDC) WARNING! Top or bottom feed. Observe proper polarity 2-hole lug with 3/8” clearance holes on 1” centers. when making connections. Customer must supply lug mounting bolt and hardware. Vertiv | NetSure 7200 Series Installation Manual (IM582127200) | Rev. K... - Page 98 Figure 58: Optional Bullet Nose 6-Position GMT Distribution Fuse Block Load Return Leads Load Leads (-48VDC) Wire Size Capacity: 24-14 AWG. Torque: 4.5 in-lbs. 35A maximum capacity per block. Maximum GMT fuse size is 15A. Vertiv | NetSure 7200 Series Installation Manual (IM582127200) | Rev. K...
- Page 99 2-hole lug with 3/8” clearance holes on 1” centers. Customer must supply lug mounting bolt and hardware. Rear WARNING! Torque: 31 ft-lbs. Observe proper polarity when making connections. Maximum circuit breaker size is 800A. Rear Vertiv | NetSure 7200 Series Installation Manual (IM582127200) | Rev. K...
- Page 100 Figure 60: -48V Distribution Panel (with Return Busbar), (8) GJ/218 Circuit Breaker Positions Vertiv | NetSure 7200 Series Installation Manual (IM582127200) | Rev. K...
-
Page 101: Power And Distribution Bay Connections To Internal Top Mount
Distribution bay -48 VDC input leads can be connected to the -48 VDC input busbar and optional return busbar located in the distribution bays as shown in Figure 61 and Figure 63 (observe correct polarity). Vertiv | NetSure 7200 Series Installation Manual (IM582127200) | Rev. K... - Page 102 -48V DC Output Busbar Power Bay -48V DC Battery Busbar Rear Rear Optional Return Busbar Distribution Bay WARNING! Observe proper polarity -48V DC Input Busbar when making connections. Rear Rear Vertiv | NetSure 7200 Series Installation Manual (IM582127200) | Rev. K...
-
Page 103: Busbars
Belleville Lock Washer): 180 in-lbs. Torque (1/4” Hardware using Standard Lock Washer): 84 in-lbs. Torque (1/4” Hardware using Belleville Lock Washer): 60 in-lbs. -48V DC Output Busbar -48V DC Battery Busbar Vertiv | NetSure 7200 Series Installation Manual (IM582127200) | Rev. K... - Page 104 Torque (3/8” Hardware using Belleville Lock Washer): 180 in-lbs. Torque (1/4” Hardware using Standard Lock Washer): 84 in-lbs. Torque (1/4” Hardware using Belleville Lock Washer): 60 in-lbs. -48V DC Input Busbar Vertiv | NetSure 7200 Series Installation Manual (IM582127200) | Rev. K...
-
Page 105: Installing Rectifier Modules
[ ] 7. Repeat the above steps for each rectifier module being installed in the system. [ ] 8. After the rectifier modules are physically installed in the mounting shelf(s), they are ready for operation immediately after power is supplied to them. Vertiv | NetSure 7200 Series Installation Manual (IM582127200) | Rev. K... - Page 106 Figure 64: Installing a Rectifier Module Vertiv | NetSure 7200 Series Installation Manual (IM582127200) | Rev. K...
-
Page 107: Initially Starting, Configuring, And Checking System Operation
Place each distribution circuit breaker (if furnished) to the ON position. NCU Controller Initialization The NCU Controller is located inside the primary power bay. Refer to Figure 65 for locations of the NCU local indicators and navigation keys. Vertiv | NetSure 7200 Series Installation Manual (IM582127200) | Rev. K... - Page 108 Press the down arrow key to view the next screen. Press the ESC key to return to the Main Menu. Refer to the following procedures to verify and set the NCU controller as required for your application. Vertiv | NetSure 7200 Series Installation Manual (IM582127200) | Rev. K...
-
Page 109: Setting The System To Work With Secondary Power Bays
“secondary control module”. This is configuration P/N 563198. Connect the USB memory device (with P/N 563198 configuration) supplied with the secondary power bay to the USB port on the front of the bay’s controller. Vertiv | NetSure 7200 Series Installation Manual (IM582127200) | Rev. K... - Page 110 On the primary power bay’s controller, navigate to “Main Menu / Settings Icon / Other Settings / Rect Expansion”. Set to “primary”. NOTE! When primary is selected, the NCU will start auto configure. This process may take more than three (3) minutes. The controller automatically reboots. Vertiv | NetSure 7200 Series Installation Manual (IM582127200) | Rev. K...
-
Page 111: Verifying And Setting The Ncu Controller As Required For Your
NCU Webpages via the front panel touch screen PC’s internet browser. Enter the address 192.168.100.100 in the Web browser of the front panel touch screen PC to access the NCU’s Web Interface. Vertiv | NetSure 7200 Series Installation Manual (IM582127200) | Rev. K... - Page 112 Repeatedly press the “ESC” key to return in reverse order level by level from any submenu until the Main Menu appears. NOTE! Refer also to “NCU Start Wizard” on page 111. Vertiv | NetSure 7200 Series Installation Manual (IM582127200) | Rev. K...
- Page 113 AC input feed voltage(s). The User may reassign the feed to each rectifier per your specific installation by following the procedure below. Procedure (NCU Web Pages) Using the front panel touch screen PC, log into the NCU webpages. Vertiv | NetSure 7200 Series Installation Manual (IM582127200) | Rev. K...
- Page 114 Instructions (UM1M830BNA) for instructions in using this feature. NOTE! The relays may be preprogrammed for specific functions. Refer to the configuration drawing (C- drawing) supplied with your system for your system’s specific configuration. Vertiv | NetSure 7200 Series Installation Manual (IM582127200) | Rev. K...
- Page 115 Local Keypad: Main Menu / Settings Icon / Other Settings / Under Voltage 2 Under Voltage Alarm 2 Web Interface: Settings Menu / System Tab / Under Voltage 2 Vertiv | NetSure 7200 Series Installation Manual (IM582127200) | Rev. K...
-
Page 116: Checking System Status
Table 14. Table 14: Status and Alarm Indicators Component Indicator Normal State Status (Green) Minor (Yellow) Critical or Major Alarm (Red) Power (Green) Rectifier Protection Modules (Yellow) Alarm (Red) Vertiv | NetSure 7200 Series Installation Manual (IM582127200) | Rev. K... -
Page 117: Final Steps
Verify all rectifier modules and the NCU are fully seated, latched, and the latch handle screws secured (if present). Verify there are no external alarms and the local indicators are as shown in Table 14. Ensure all bays’ front and rear doors are closed and secured. Vertiv | NetSure 7200 Series Installation Manual (IM582127200) | Rev. K... - Page 118 Vertiv.com Vertiv Headquarters, 1050 Dearborn Drive, Columbus, OH, 43085, USA IM582127200 (RK 12/19)
Need help?
Do you have a question about the NetSure 7200 Series and is the answer not in the manual?
Questions and answers