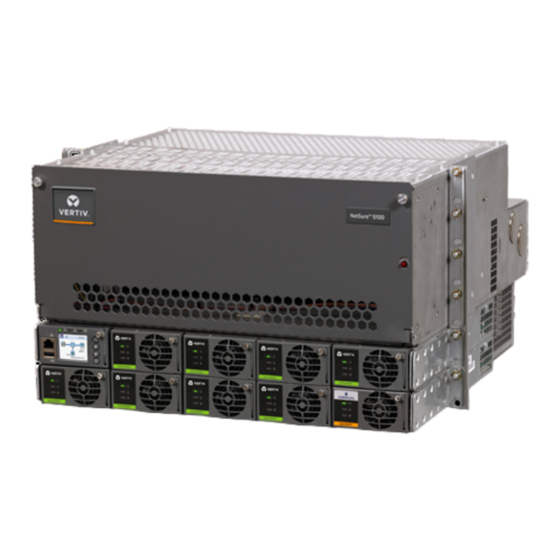
Vertiv NetSure 5100 Series User Manual
48 vdc power system
Hide thumbs
Also See for NetSure 5100 Series:
- Installation manual (178 pages) ,
- User manual (80 pages) ,
- User manual (72 pages)

Related Manuals for Vertiv NetSure 5100 Series


Summary of Contents for Vertiv NetSure 5100 Series
- Page 1 NetSure™ 5100 SERIES -48 VDC Power System User Manual (UM582137100), Revision L Specification Number: 582137100 Model Number: 5100...
- Page 2 Vertiv Group Corporation is strictly prohibited. Vertiv and the Vertiv logo are trademarks or registered trademarks of Vertiv Co. All other names and logos referred to are trade names, trademarks or registered trademarks of their respective owners.
-
Page 3: Table Of Contents
Controller, Rectifiers, Solar Converters, and -48 VDC to +24 VDC Converters ................................. 44 Controller Configuration ..........................44 System Troubleshooting Information .................... 44 Replacement Information ........................... 46 Replacement Procedures ........................... 46 Vertiv | NetSure 5100 Series User Manual (UM582137100) | Rev. L... - Page 4 Replacing a Battery or Load Disconnect Contactor in a List 20, 25 Distribution Cabinet ..............................71 Replacing a Battery or Load Disconnect Contactor in a List 21, 26 Distribution Cabinet ..............................74 Vertiv | NetSure 5100 Series User Manual (UM582137100) | Rev. L...
-
Page 5: Admonishments Used In This Document
(ISO) SAFETY! Informs the reader of general safety information, reminders, precautions, or policies not related to a particular source of hazard or to fire safety. (ISO, ANSI, OSHA) Vertiv | NetSure 5100 Series User Manual (UM582137100) | Rev. L... -
Page 6: Important Safety Instructions
DO NOT apply DC input power to the system until all electrical connections have been completed and checked. Vertiv | NetSure 5100 Series User Manual (UM582137100) | Rev. L... -
Page 7: Dc Output And Battery Voltages
• Dispose of used batteries according to the instructions provided with the batteries. Do not dispose of batteries in a fire. They may explode. • ALWAYS FOLLOW THE BATTERY MANUFACTURER’S RECOMMENDATIONS AND SAFETY INSTRUCTIONS. Vertiv | NetSure 5100 Series User Manual (UM582137100) | Rev. L... -
Page 8: Personal Protective Equipment (Ppe)
Permits as required by the local authority, per NFPA 70E “Standard for Electrical Safety in the Workplace”. Hazardous Voltage DANGER! HAZARD OF ELECTRICAL SHOCK. More than one disconnect may be required to de-energize the system before servicing. Vertiv | NetSure 5100 Series User Manual (UM582137100) | Rev. L... -
Page 9: Handling Equipment Containing Static Sensitive Components
NOTE! When performing any step in procedures that requires removal of existing hardware, retain all hardware for use in subsequent steps, unless otherwise directed. Vertiv | NetSure 5100 Series User Manual (UM582137100) | Rev. L... -
Page 10: Static Warning
If necessary to repair equipment containing static sensitive components, wear an appropriately grounded wrist strap, work on a conductive surface, use a grounded soldering iron, and use grounded test equipment. Vertiv | NetSure 5100 Series User Manual (UM582137100) | Rev. L... -
Page 11: Customer Documentation Package
• -48 VDC to +24 VDC Converter Instructions: UM1C48241500 • Engineering Drawings • Also provided on the USB drive is a controller configuration drawing and the controller configuration files loaded into the controller as shipped. Vertiv | NetSure 5100 Series User Manual (UM582137100) | Rev. L... -
Page 12: System Description
Temperature probe(s) may also be designated to monitor ambient temperature and/or battery temperature. The controller also provides data acquisition, system alarm management, and advanced battery and energy management. The controller Vertiv | NetSure 5100 Series User Manual (UM582137100) | Rev. L... - Page 13 Where +24 VDC load power is also required, converter modules are available (depending on configuration, see SAG582137100). These converters operate from the main -48 VDC system bus to provide +24 VDC load power. Refer to the Converter Instructions (UM1C48241500) for more information. Vertiv | NetSure 5100 Series User Manual (UM582137100) | Rev. L...
-
Page 14: Operating Procedures
OFF, wait 30 seconds or more (until the LEDs on the modules extinguish), then turn input power to the rectifiers and solar converters ON. Vertiv | NetSure 5100 Series User Manual (UM582137100) | Rev. L... -
Page 15: Controller Battery Charge Current Limit Feature
Optional Transient Voltage Surge Suppressor (TVSS) Device An optional Transient Voltage Surge Suppressor (TVSS) device contains an indicator which illuminates when the circuit activates to suppress voltages. See Figure 3. Vertiv | NetSure 5100 Series User Manual (UM582137100) | Rev. L... - Page 16 (1-row cabinet shown, 2-row cabinet similar) Optional Critical Alarm Indicator Figure 2: Indicator Locations (List KG) Front FUSE ALARM Figure 3: Optional Transient Voltage Surge Suppressor (TVSS) Device Indicator TVSS Indicator Vertiv | NetSure 5100 Series User Manual (UM582137100) | Rev. L...
-
Page 17: List 60 Hybrid Connection Cabinet
• Current # Break Value (Device Rating.) • Current # High Current Limit (% of Current # Breaker Value.) • Current # Very High Current Limit (% of Current # Breaker Value.) Vertiv | NetSure 5100 Series User Manual (UM582137100) | Rev. L... - Page 18 A 1Hz flashing indicates a communication failure. Alarm A minor alarm. (Yellow) Alarm A critical or major alarm. (Red) Figure 4: SM-DU Circuit Card in a List 60 Hybrid Connection Cabinet Vertiv | NetSure 5100 Series User Manual (UM582137100) | Rev. L...
-
Page 19: Maintenance
Place the module into an unoccupied mounting position without sliding it in completely. Each module mounting assembly may house rectifier modules, optional solar converter modules, optional -48 VDC to +24 VDC converter modules, and a controller (depending on configuration). Vertiv | NetSure 5100 Series User Manual (UM582137100) | Rev. L... - Page 20 “Configuring the NCU Identification of Rectifiers”, “Configuring the NCU Identification of Solar Converters”, or “Configuring the NCU Identification of -48 VDC to +24 VDC Converters” in the separate Power System Installation Manual (IM582137100). Vertiv | NetSure 5100 Series User Manual (UM582137100) | Rev. L...
- Page 21 Figure 5: Installing Rectifier and Solar Converter Modules (List 20, 25) Vertiv | NetSure 5100 Series User Manual (UM582137100) | Rev. L...
- Page 22 Figure 6: Installing Rectifier, Solar Converter, and -48 VDC to +24 VDC Converter Modules (List 21, 26) Vertiv | NetSure 5100 Series User Manual (UM582137100) | Rev. L...
- Page 23 The distribution panel is shipped configured Latch with all -48 VDC distribution positions. When using converter modules, you MUST change the last four (4) positions to +24 VDC distribution positions in the field. Vertiv | NetSure 5100 Series User Manual (UM582137100) | Rev. L...
- Page 24 Figure 8: Module Position Identification Label Vertiv | NetSure 5100 Series User Manual (UM582137100) | Rev. L...
-
Page 25: Installing A Field Expansion Module Mounting Assembly
Disconnect the cable coming from the distribution cabinet from the connector on the bottom-most existing module mounting assembly and connect this cable to the same connector on the expansion module mounting assembly. Vertiv | NetSure 5100 Series User Manual (UM582137100) | Rev. L... -
Page 26: Installing Field Expansion Module Mounting Assembly Spacer Kit
See PD588705300 for additional acceptable module position details. NOTE! When installing in a data cabinet, refer also to “Installing Field Expansion Module Mounting Assembly Spacer Kit, P/N 560075” on page 29. Vertiv | NetSure 5100 Series User Manual (UM582137100) | Rev. L... - Page 27 Figure 9: Installing a Field Expansion Module Mounting Assembly Vertiv | NetSure 5100 Series User Manual (UM582137100) | Rev. L...
- Page 28 Figure 10: Installing a Field Expansion Module Mounting Assembly - Controller CAN Bus Vertiv | NetSure 5100 Series User Manual (UM582137100) | Rev. L...
-
Page 29: P/N 560075
See Figure 12 for an assembly illustration. Must be assembled prior to installation of expansion module mounting assemblies. Assemble spacer kit to outside front surface of data cabinet front vertical rails using M4 flat washer and M4 Keps nut. Torque = 26 in-lbs. Vertiv | NetSure 5100 Series User Manual (UM582137100) | Rev. L... - Page 30 Figure 12: Installing Field Expansion Module Mounting Assembly Spacer Kit, P/N 560075 Vertiv | NetSure 5100 Series User Manual (UM582137100) | Rev. L...
-
Page 31: Reconfiguring A Dual Voltage Distribution Panel
Close the distribution cabinet’s front door and turn the latch clockwise or close the system’s enclosure door. Ensure that there are no local or remote alarms active on the system. Vertiv | NetSure 5100 Series User Manual (UM582137100) | Rev. L... - Page 32 Removing and Retrieving the Lexan Cover from the Front of the Distribution Panel Lexan Lexan Cover Cover Figure 14: Removing the Shorting Busbar and FA Alarm Strap Detail A Alarm Strap Shorting Busbar Detail A Vertiv | NetSure 5100 Series User Manual (UM582137100) | Rev. L...
- Page 33 Moving the Distribution Device Busbar to the Left Remove screws to release the device busbar. Move Busbar and Alarm Spring to the left by one Circuit Breaker position. After Before Vertiv | NetSure 5100 Series User Manual (UM582137100) | Rev. L...
- Page 34 1/4-20 x 5/8 Bolt 1/4” Lock Washer 1/4” Flat Washer Torque to 75 in-lbs. Apply a thin coating of electrical anti-oxidizing compound to the mating surfaces of the busbars. Vertiv | NetSure 5100 Series User Manual (UM582137100) | Rev. L...
- Page 35 Figure 17: Securing the FA Alarm Strap Before After 6-19 x 1/2 Screw Torque to 9.6 in-lbs Vertiv | NetSure 5100 Series User Manual (UM582137100) | Rev. L...
- Page 36 1. Remove polarity label plug buttons. 2. Remove polarity label. 3.Turn over polarity label so other polarity shows. 4. Replace polarity label. 5. Replace polarity label plug buttons. Before After Vertiv | NetSure 5100 Series User Manual (UM582137100) | Rev. L...
- Page 37 Figure 19: Installing the Lexan Cover (Front) 6-19 x 1/2 Screw Torque to 9.6 in-lbs. both sides Vertiv | NetSure 5100 Series User Manual (UM582137100) | Rev. L...
- Page 38 Figure 20: Reworking the Distribution Panel List DA List DB List DC List DD List DE Vertiv | NetSure 5100 Series User Manual (UM582137100) | Rev. L...
-
Page 39: Reconfiguring The Distribution Voltage On Positions 23 To 26 Of A List Df Distribution Panel Installed In A List 27 Distribution Cabinet
Open the distribution cabinet’s front door by turning the latch in the counterclockwise position or open the system’s enclosure door. Remove the top cover from the distribution cabinet. Figure 21: Removing the Distribution Cabinet Top Cover Remove Top Cover Vertiv | NetSure 5100 Series User Manual (UM582137100) | Rev. L... - Page 40 Figure 22: Bending Shorting Busbar Shield Top Flap Bend Over Top Flap To Access Shorting Busbar Remove the shorting busbar. Figure 23: Removing the Shorting Busbar Remove Shorting Busbar Vertiv | NetSure 5100 Series User Manual (UM582137100) | Rev. L...
- Page 41 Torque to 23 in-lbs. Relocate Shorting Busbar and Install Cable Torque to 23 in-lbs. Remove the shield from the distribution panel. Figure 25: Removing Distribution Panel Shield Remove this Shield Vertiv | NetSure 5100 Series User Manual (UM582137100) | Rev. L...
- Page 42 Disconnect the wire with the tab from the faston connector. Insulate and tie back Figure 27: Disconnecting Alarm Jumper Disconnect the Alarm Jumper by Separating the Tab from the Faston Connector Here Vertiv | NetSure 5100 Series User Manual (UM582137100) | Rev. L...
- Page 43 Ensure that there are no local or remote alarms active on the system. Close the distribution cabinet’s front door and turn the latch clockwise or close the system’s enclosure door. Vertiv | NetSure 5100 Series User Manual (UM582137100) | Rev. L...
-
Page 44: Troubleshooting And Repair
-48 VDC to +24 VDC converters is not sufficient to maintain this current limit point. If that happens, the current limit point will automatically decrease to the maximum (121% of the remaining rectifiers or 116% of the remaining -48 VDC to +24 VDC converters). Vertiv | NetSure 5100 Series User Manual (UM582137100) | Rev. L... - Page 45 If the controller resets while a solar converter communications fail alarm is active, the solar converter communications fail alarm is replaced with a solar converter lost alarm. Refer to the NCU Instructions (UM1M830BNA) for a procedure to clear the alarm. Vertiv | NetSure 5100 Series User Manual (UM582137100) | Rev. L...
-
Page 46: Replacement Information
Safety fuse covers are provided for all Bussmann GMT type fuses installed in the system. These covers snap onto the fuses and provide protection from exposed electrical terminations when a fuse opens. Vertiv | NetSure 5100 Series User Manual (UM582137100) | Rev. L... - Page 47 Push the fuse carrier securely back into the mounted fuseholder body. Note that a polarizing key on the bottom of the carrier prevents the carrier from being inserted upside down. Verify no Fuse Alarms are active. Vertiv | NetSure 5100 Series User Manual (UM582137100) | Rev. L...
- Page 48 Push the fuse carrier securely back into the mounted fuseholder body. Note that a polarizing key on the bottom of the carrier prevents the carrier from being inserted upside down. Verify no Fuse Alarms are active. Vertiv | NetSure 5100 Series User Manual (UM582137100) | Rev. L...
- Page 49 Top Lettering on handle must be Insert these terminals right side up. into corresponding sockets on distribution panel. Turn off before installing. Longer Side to the Bottom Vertiv | NetSure 5100 Series User Manual (UM582137100) | Rev. L...
-
Page 50: Circuit Card Replacement Procedures
The following circuit card replacement procedures can be performed with the system operating. Circuit Card Locations Refer to Figure 33, Figure 34, or Figure 35. Figure 32: GMT Distribution Fuse Replacement (List KG) GMT Fuse Safety Cover Vertiv | NetSure 5100 Series User Manual (UM582137100) | Rev. L... - Page 51 Figure 33: List 20, 25 Circuit Card Locations (1-Row Distribution Cabinet) Vertiv | NetSure 5100 Series User Manual (UM582137100) | Rev. L...
- Page 52 Figure 34: List 21, 26 Circuit Card Locations (2-Row Distribution Cabinet) Vertiv | NetSure 5100 Series User Manual (UM582137100) | Rev. L...
- Page 53 Front (Controller USB-B Port Interface Board) (Factory connected to NCU Controller backplane.) 10M Ethernet Port (RJ-45) Optional IB4 Board LAN Connection USB-A Port (not used) System Interface Board Rear Vertiv | NetSure 5100 Series User Manual (UM582137100) | Rev. L...
- Page 54 After securing the wire, gently tug on the wire to ensure that it cannot be pulled out of the terminal block. Repeat for each wire to be reconnected. Vertiv | NetSure 5100 Series User Manual (UM582137100) | Rev. L...
- Page 55 Remove the grounding wrist strap. Enable the external alarms, or notify appropriate personnel that this procedure is finished. Ensure that there are no local or remote alarms active on the system. Vertiv | NetSure 5100 Series User Manual (UM582137100) | Rev. L...
- Page 56 Jumper J3 on System Interface Board Wire Size Capacity: 16 AWG to 30 AWG. Wire Strip Length: 0.32 inch. Recommended Torque: 2.3 in-lbs. RS485 Connection J3-1: RS485+ J3-2: RS485- Vertiv | NetSure 5100 Series User Manual (UM582137100) | Rev. L...
- Page 57 DANGER! In the next step, external alarm wiring may be energized from an external source. DO NOT allow bare wire ends to contact any grounded or energized object. Vertiv | NetSure 5100 Series User Manual (UM582137100) | Rev. L...
- Page 58 Close the distribution cabinet’s front door. Enable the external alarms, or notify appropriate personnel that this procedure is finished. Ensure that there are no local or remote alarms active on the system. Vertiv | NetSure 5100 Series User Manual (UM582137100) | Rev. L...
- Page 59 J3-J9: IB2 Assembly Wire Size Capacity: 16 AWG to 26 AWG. (exploded view) Wire Strip Length: 0.20 inch. Recommended Torque: 2.2 in-lbs. Vertiv | NetSure 5100 Series User Manual (UM582137100) | Rev. L...
- Page 60 (582137100 List 70) Optional EIB Assembly (582137100 List 70) (exploded view) J5-J9 Wire Size Capacity: 16 AWG to 26 AWG. Wire Strip Length: 0.20 inch. Recommended Torque: 2.2 in-lbs. Vertiv | NetSure 5100 Series User Manual (UM582137100) | Rev. L...
- Page 61 Advance Settings Menu / SW Maintenance Tab / Reboot Controller button. Enable the external alarms, or notify appropriate personnel that this procedure is finished. Ensure that there are no local or remote alarms active on the system. Vertiv | NetSure 5100 Series User Manual (UM582137100) | Rev. L...
- Page 62 Figure 39: Replacing an Optional IB4 Board Vertiv | NetSure 5100 Series User Manual (UM582137100) | Rev. L...
- Page 63 Temporarily remove then re-insert the controller. Wait for the controller to initialize. Enable the external alarms, or notify appropriate personnel that this procedure is finished. Ensure that there are no local or remote alarms active on the system. Vertiv | NetSure 5100 Series User Manual (UM582137100) | Rev. L...
- Page 64 Figure 40: Replacing an SM-DU Circuit Card in a List 60 Hybrid Connection Cabinet Vertiv | NetSure 5100 Series User Manual (UM582137100) | Rev. L...
-
Page 65: Replacing A Distribution Panel In A List 20, 25 Distribution Cabinet
Figure 41 for hardware build-up and torque. Replace the hardware securing the system load distribution device busbar to the distribution panel. Refer to Figure 41 for hardware build-up and torque. Vertiv | NetSure 5100 Series User Manual (UM582137100) | Rev. L... - Page 66 Reconnect the AC and DC power sources to the power system. Start the power system. Refer to the separate Installation Instructions (IM582137100) for a startup procedure. Close the distribution cabinet’s front door. Verify no alarms are active. Vertiv | NetSure 5100 Series User Manual (UM582137100) | Rev. L...
- Page 67 Figure 41: Replacing a Distribution Panel in a List 20, 25 Distribution Cabinet Vertiv | NetSure 5100 Series User Manual (UM582137100) | Rev. L...
-
Page 68: Replacing A Distribution Panel In A List 21, 26 Distribution Cabinet
Refer to Figure 42 for hardware build-up and torque. Replace the hardware securing the sub-system load distribution device busbar to the distribution panel (if present). Refer to Figure 42 for hardware build-up and torque. Vertiv | NetSure 5100 Series User Manual (UM582137100) | Rev. L... - Page 69 Reconnect the AC and DC power sources to the power system. Start the power system. Refer to the separate Installation Instructions (IM582137100) for a startup procedure. Close the distribution cabinet’s front door. Verify no alarms are active. Vertiv | NetSure 5100 Series User Manual (UM582137100) | Rev. L...
- Page 70 Figure 42: Replacing a Distribution Panel in a List 21, 26 Distribution Cabinet Vertiv | NetSure 5100 Series User Manual (UM582137100) | Rev. L...
-
Page 71: Distribution Cabinet
Reconnect the AC and DC power sources to the power system. Start the power system. Refer to the separate Installation Instructions (IM582137100) for a startup procedure. Verify no alarms are active. Vertiv | NetSure 5100 Series User Manual (UM582137100) | Rev. L... - Page 72 Figure 43: Replacing a Battery or Load Disconnect Contactor in a List 20, 25 Distribution Cabinet Vertiv | NetSure 5100 Series User Manual (UM582137100) | Rev. L...
- Page 73 Figure 44: Battery or Load Disconnect Contactor Wiring Vertiv | NetSure 5100 Series User Manual (UM582137100) | Rev. L...
-
Page 74: Replacing A Battery Or Load Disconnect Contactor In A List 21, 26 Distribution Cabinet
Reconnect the AC and DC power sources to the power system. Start the power system. Refer to the separate Installation Instructions (IM582137100) for a startup procedure. Verify no alarms are active. Vertiv | NetSure 5100 Series User Manual (UM582137100) | Rev. L... - Page 75 Figure 45: Replacing a Battery or Load Disconnect Contactor in a List 21, 26 Distribution Cabinet Vertiv | NetSure 5100 Series User Manual (UM582137100) | Rev. L...
- Page 76 VertivCo.com | Vertiv Headquarters, 1050 Dearborn Drive, Columbus, OH, 43085, USA UM582137100 (RL 09/18)
Need help?
Do you have a question about the NetSure 5100 Series and is the answer not in the manual?
Questions and answers