Grundfos CUE Series Installation And Operating Instructions Manual
Hide thumbs
Also See for CUE Series:
- Installation and operating instructions manual (140 pages) ,
- Product manual (64 pages) ,
- Service instructions manual (34 pages)

Related Manuals for Grundfos CUE Series


Summary of Contents for Grundfos CUE Series
- Page 1 GRUNDFOS INSTRUCTIONS Installation and operating instructions Installation and operating instructions Other languages net.grundfos.com/qr/i/96780034...
-
Page 2: Table Of Contents
CONTENTS 1. General information Page 1.1 Hazard statements General information The symbols and hazard statements below may appear in Hazard statements Grundfos installation and operating instructions, safety Notes instructions and service instructions. References Product introduction DANGER Product description Indicates a hazardous situation which, if not avoided, Intended use will result in death or serious personal injury. -
Page 3: Notes
1.2 Notes 2.3 Applications The symbols and notes below may appear in Grundfos The CUE series and Grundfos standard pumps are a supplement installation and operating instructions, safety instructions and to the Grundfos E-pumps range with integrated frequency service instructions. -
Page 4: Receiving The Product
3. Receiving the product 4. Installation requirements WARNING Any installation, maintenance and inspection must be Crushing of feet carried out by trained persons. Death or serious personal injury - Use safety shoes during transport and avoid stacking the boxes. WARNING CAUTION Sharp element Heavy lifting... -
Page 5: Mains
The user is responsible for mounting CUE securely 150 m (500 ft) for screened cables. In case of longer cables, on a firm surface. contact Grundfos. CUE is designed for a motor cable with a maximum cross-section 1. Mark and drill holes. See section 12.5.1 Enclosures A2-A5,... -
Page 6: Mounting On The Floor
5.4 Mounting on the floor 6. Electrical connection WARNING WARNING Crushing of feet Electric shock Death or serious personal injury Death or serious personal injury - CUE is very heavy and may fall if the pedestal is - Before starting any work on the product, make not anchored to the floor. -
Page 7: Emc-Correct Installation
Make the motor cable as short as possible in applications circuit. without output filter to limit the noise level and minimise Grundfos requires that the backup fuses mentioned in section leakage currents. 12.3.3 Cable cross-section to signal terminals are used for •... -
Page 8: Rfi Filters
SP, BM, BMB with motor voltage from 380 V and up 0-300 m* Pumps with Grundfos motor MG71 and MG80 up to and including 1.5 kW (2 hp) 0-300 m* Applications with desired reduction of dU/dt and noise emission, low reduction... -
Page 9: Motor Cable
6.4 Motor cable 6.5 Mains and motor connection To meet EN 61800-3, the motor cable must always Check that the mains voltage and frequency be a screened cable, whether an output filter is correspond to the values on the nameplate of CUE installed or not. - Page 10 6.5.3 Mains connection, enclosures A2 and A3 3. Fix the mains cable to the mounting plate. Check that the mains voltage and frequency correspond to the values on the nameplate of CUE and the motor. Torque Nm [ft (lb)] Enclosure Protective Mains Motor...
- Page 11 6.5.5 Mains connection, enclosures A4 and A5 6.5.7 Mains connection, enclosures B1 and B2 Torque Nm [ft (lb)] Torque Nm [ft (lb)] Enclosure Enclosure Protective Protective Mains Motor Relay Mains Motor Relay earth earth 1.8 (1.3) 1.8 (1.3) 3 (2.2) 0.6 (0.4) 1.8 (1.3) 1.8 (1.3)
- Page 12 6.5.9 Mains connection, enclosures B3 and B4 6.5.11 Mains connection, enclosures C1 and C2 Torque Nm [ft (lb)] Torque Nm [ft (lb)] Enclosure Enclosure Protective Protective Mains Motor Relay Mains Motor Relay earth earth 1.8 (1.3) 1.8 (1.3) 3 (2.2) 0.6 (0.4) 10 (7.4) 10 (7.4)
- Page 13 6.5.14 Motor connection, enclosures C3 and C4 6.5.16 Mains connection, enclosures D1h and D2h 1. Connect the earth conductor to terminal 99 (PE). See figs Torque [ft-lb (Nm)] and 29. Enclosure 2. Connect the motor conductors to terminals 96 (U), 97 (V), 98 Protective Mains Motor...
-
Page 14: Sto Installation, Optional
6.6 STO installation, optional 6.6.1 Restart behaviour after STO activation By default the STO function is set to unintended-restart DANGER prevention behaviour. To terminate STO and resume normal Exposure to high pressure or toxic liquids operation with manual reset, do the following: Death or serious personal injury •... - Page 15 6.7.1 Wiring diagram, signal terminals 0/4-20 mA Terminals 0-10 V Terminals External setpoint, current input External setpoint, voltage input U: 0-10 V U: 0-10 V I: 0/4-20 mA I: 0/4-20 mA 0/4-20 mA 0/4-20 mA Terminals Terminals Three-wire sensor Two-wire sensor U: 0-10 V U: 0-10 V I: 0/4-20 mA...
- Page 16 6.7.2 Connection of a thermistor (PTC) to CUE The connection of a thermistor (PTC) in a motor to CUE requires an external PTC relay. The requirement is based on the fact that the thermistor in the motor only has one layer of insulation to the windings. The terminals in CUE require two layers of insulation since they are part of a PELV circuit.
-
Page 17: Connecting The Signal Relays
Setting the analog inputs, terminals 53 and 54 6.8 Connecting the signal relays Contacts A53 and A54 are positioned behind the operating panel and used for setting the signal type of the two analog inputs. As a precaution, signal cables must be separated The factory setting of the inputs is voltage signal "U". - Page 18 6.8.2 Connecting the MCB 114 sensor input module The MCB 114 is an option offering additional analog inputs for CUE. Configuration of MCB 114 MCB 114 is equipped with three analog inputs for the following sensors: • One additional sensor 0/4-20 mA. •...
-
Page 19: Starting Up The Product
6.8.3 Fitting MCB 114 in CUE 7. Starting up the product Enclosures A2, A3 and B3 1. Switch off the power to CUE. See section 6.5 Mains and Any installation, maintenance and inspection must be motor connection. carried out by trained persons. 2. -
Page 20: Control Functions
8. Control functions Pos. Buttons Description A fault condition causes the red alarm [Alarm] light to flash and an alarm text is The display contrast can be adjusted by pressing displayed. [Status] and then pressing [Up] or [Down]. When warning conditions are met, the [Warn.] yellow warning light comes on and text 8.1 Operating panel... -
Page 21: Operating Modes
8.3 Operating modes Constant The following operating modes are set on the operating panel differential using the [Favourites] menu. pressure, system. The differential Operating mode Description pressure is kept Δp constant, The pump is running in the operating mode Normal independently of selected the flow rate. -
Page 22: Setting The Product
9. Setting the product 9.5 Permanent-magnet motor setup To make a correct programming, it is often necessary to make To set a permanent-magnet motor manually in [Main menu], enter settings in several submenus. The programmed data is saved the motor data available on the motor nameplate. internally in the frequency converter. -
Page 23: Local-Control Test
9.8 Local-control test 10. Servicing the product 1. Press [Hand On] to provide a local start command to the CAUTION frequency converter. Electric shock 2. Accelerate the frequency converter to full speed by pressing Minor or moderate personal injury [Up]. Moving the cursor left of the decimal point provides - Before starting any work on the product, make quicker input changes. -
Page 24: Fault Finding The Product
11. Fault finding the product 11.1 Overview of warnings and alarms Type LED indicator Warning Yellow Alarm Flashing red Trip lock Yellow and red Alarm, trip Number Description Warning Alarm lock 10 V low ● ( ● ) ( ● ) Live zero error ( ●... - Page 25 Alarm, trip Number Description Warning Alarm lock AMA interrupted by user ● AMA timeout ● AMA internal fault ● ● Current limit ● External interlock ● ● ( ● ) ( ● ) Feedback error Output frequency at maximum limit ●...
- Page 26 Alarm, trip Number Description Warning Alarm lock 2017 Limit 2 is exceeded ● ● ( ● )This warning or alarm is programmable. Warnings and alarms depend on the parameter settings. This warning or alarm cannot be auto reset via parameter selection.
-
Page 27: Technical Data
12. Technical data 12.1 Enclosure The individual CUE cabinet sizes are characterised by their enclosures. The table shows the relationship of enclosure class and enclosure type. Example: Read from the nameplate: • Supply voltage = 3 x 380-500 V. • Typical shaft power = 1.5 kW (2 hp). - Page 28 12.3.2 Cable requirements Typical shaft Maximum Fuse Maximum conductor power P2 fuse size type cross-section Maximum length, screened motor cable 150 m (500 ft) [kW (hp)] Maximum length, unscreened motor cable 300 m (1000 ft) Maximum length, signal cable 300 m (1000 ft) 3 x 380-500 V 0.55 (0.75) 0.75 (1)
- Page 29 12.3.5 UL fuses and conductor cross-section to mains and motor, for installations in North America Fuse type Maximum Typical shaft conductor power P2 SIBA RK1/ Littel Fuse cross-section Bussmann Bussmann Bussmann Ferraz-Shawmut Bussmann RK1/SIBA Ferraz-Shawmut RK1/E1958/ J/E4273 T/ T/E4274 H/ CC/Littel Fuse E125085 E180276...
- Page 30 Fuse type Maximum Typical shaft conductor power P2 SIBA RK1/ Littel Fuse cross-section Bussmann Bussmann Bussmann Ferraz-Shawmut Bussmann RK1/SIBA Ferraz-Shawmut RK1/E1958/ J/E4273 T/ T/E4274 H/ CC/Littel Fuse E125085 E180276 RK1/E60314 JFHR2 [kW (hp)] JFHR2 JDDZ JDDZ E71611 JFHR2 [AWG] JFHR2 RKI/JDDZ 3 x 525-690 V 11 (15)
-
Page 31: Electrical Data
12.4 Electrical data Analog inputs Mains supply (L1, L2, L3) Analog input 1, terminal number Voltage signal A53 = "U" Supply voltage 200-240 V ± 10 % Voltage range 0-10 V Supply voltage 380-500 V ± 10 % Input resistance, R Approx. -
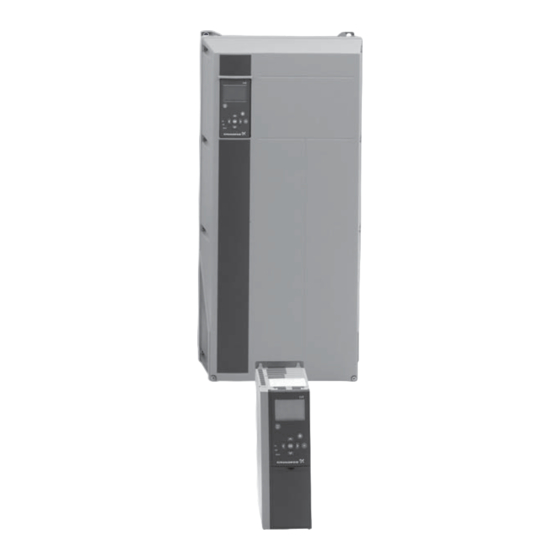
Page 32: Dimensions And Weights
12.5 Dimensions and weights 12.5.1 Enclosures A2-A5, B1-B4 and C1-C4. B4, C3, C4 Fig. 52 Dimensions for enclosures A2 and A3 Fig. 53 Dimensions for enclosures A4, A5, B1, B2, B3, B4, C1, C2, C3 and C4 Height [mm] Width [mm] Depth [mm] Screw holes [mm] Enclosure... - Page 33 12.5.2 Enclosures D1h and D2h Fig. 54 Dimensions for enclosures D1h and D2h Height [mm] Width [mm] Depth [mm] Screw holes [mm] Enclosure Weight [kg] ∅d ∅e 1107 1051 Shipping dimensions Enclosure Height [mm] Width [mm] Depth [mm] Weight [kg] Only 3 x 380-500 V, 110 kW (150 hp) 72 - 124.5...
-
Page 34: Miscellaneous Data
1. Use the public or private waste collection service. The sound pressure level of a motor controlled by a frequency 2. If this is not possible, contact the nearest Grundfos company converter may be higher than that of a corresponding motor or service workshop. - Page 35 GRUNDFOS Pumps (Hong Kong) Ltd. Turkey Norway BOMBAS GRUNDFOS DO BRASIL Unit 1, Ground floor GRUNDFOS POMPA San. ve Tic. Ltd. Sti. Av. Humberto de Alencar Castelo Branco, Siu Wai Industrial Centre GRUNDFOS Pumper A/S Gebze Organize Sanayi Bölgesi 29-33 Wing Hong Street &...
- Page 36 96780034 0919 ECM: 1264572 www.grundfos.com...
Need help?
Do you have a question about the CUE Series and is the answer not in the manual?
Questions and answers