Table of Contents
Advertisement
Advertisement
Table of Contents

Related Manuals for Culligan Premier Series


Summary of Contents for Culligan Premier Series
-
Page 1: Service Instructions
Cat. No. 01024000 Rev. G 09/23/14 DCO # 014570 Installation, Operation, and Service Instructions with Parts List CULLIGAN ® Premier Series Automatic Deionizer Water Treatment Systems Models from 2012 Firmware Version 206LT30 ©2014 Culligan International Com pa ny... - Page 2 Please send any suggestions for improving this manual to productmanuals@culligan.com We encourage Culligan users to learn about Culligan products, but we believe that product knowledge is best obtained by consulting with your Culligan dealer. Untrained individuals who use this manual assume the risk of any resulting property damage or personal injury.
-
Page 3: Table Of Contents
Water Treatment Systems Models from 2012 Firmware Version 206LT30 Contents Introduction ................ Service and Maintenance ..........Premier Series Automatic Deionizer Features ....Diagnostics ..............Basic Principles ..............Errors and Alert Codes ............ Deionizer Specifications ............ Operating Checklist ............Installation ............... - Page 4 This page intentionally left blank. Cat. No. 01024000 Culligan® Premier Series Automatic Deionizer...
-
Page 5: Introduction
Introduction Read this Manual First Before you operate the Culligan Premier Series Automatic Deionizer, read this manual to become familiar with the device and its capabilities. About this Manual This manual: • Familiarizes the operator with the equipment • Explains installation and setup procedures •... -
Page 6: Premier Series Automatic Deionizer Features
Premier Series Automatic Deionizer Features The primary function of the Culligan Premier Series Automatic Deionizer Controller is to initiate and control the regener- ation process via methods that are most convenient and cost effective for the customer while offering many operational features and benefits. - Page 7 DIGBE to the slave DIGBE. In al- ternating mode the system will reset the master unit to service and the slave unit to standby. Optional Premier Series Automatic Deionizer Features Feature Use/Benefit Flow Meter/Sensor Input Supports various types of Hall effect flow sensors using a pro- grammable K factor to initiate a regeneration sequence.
- Page 8 65°F, or when silica removal is a requirement, and warmed caustic is needed. You can order drum heater(s) through Culligan: D1028592 - DPC-S15 Heavy Duty Drum Heater For Plastic 55 gal drum, 120 VAC, 300 Watts.
-
Page 9: Basic Principles
Basic Principles The Deionization Process Deionization or demineralization is the process of removing up to 95 percent of the dissolved minerals such as calcium, magnesium, sodium, manganese, sulfates, chlorides, nitrates and silica from the water supply by way of ion exchange. Dissolved minerals in the water consist of two parts—a metallic part which is a positively charged ion and a non-metal- lic part which is a negatively charged ion. - Page 10 During regeneration the unit does not provide water to service. Resin Types and Uses The Culligan Premier Series Automatic Deionizer is supplied with Strong Acid Cation Resin and Type II Strong Base Anion resin or Weak Base Anion resin. Strong Acid Cation Resin is especially suited for the cation removal in high purity water demineralization. This resin pos- sesses high exchange capacity combined with excellent chemical and physical stability under a wide range of operating conditions.
-
Page 11: Water Quality
Peak Quality Water Quality Length of Service Run Figure 3. Water quality related to length of service run. During normal operation of a two-bed deionizer, after completion of regeneration, the system rinses to a pre-determined quality (usually 50,000 ohms). During operation the quality will continue to climb until the maximum quality is reached. The Sodium Leakage from the Cation resin as previously noted determines the maximum quality of water. - Page 12 500,000 0.046 2.35 200,000 0.117 4.70 100,000 0.234 9.41 50,000 0.467 23.5 20,000 1.17 47.0 10,000 2.34 94.1 5,000 4.68 1,000 1,000 23.4 2,000 46.8 = Typical performance range for two-bed deionizer Cat. No. 01024000 Culligan® Premier Series Automatic Deionizer...
-
Page 13: Deionizer Specifications
Deionizer Specifications Strong Base Systems Model QS-21 QS-24 QS-30 QS-36 QS-42 QS-48 Service Flow Rate Minimum 14.2 19.2 25.1 16.7 23.8 37.1 53.7 72.7 95.1 Nominal GPM@PSI 20@23 30@15 50@22 70@22 100@17 125@21 Drop LPM@Bar 76@1.59 114@1.04 189@1.52 265@1.52 379@1.17 473@1.44 Nominal Capacity Grains... - Page 14 1227 1886 2705 3500 4068 Tank Sizes (DxH) Inches 21"x62" 24"x72" 30"x72" 36"x72" 42"x72" 48"x72" 533x1575 609x1829 762x1829 914x1829 1067x1829 1219x1829 NOTE All dimensions are approximate and subject to change without notice. Cat. No. 01024000 Culligan® Premier Series Automatic Deionizer...
-
Page 15: Installation
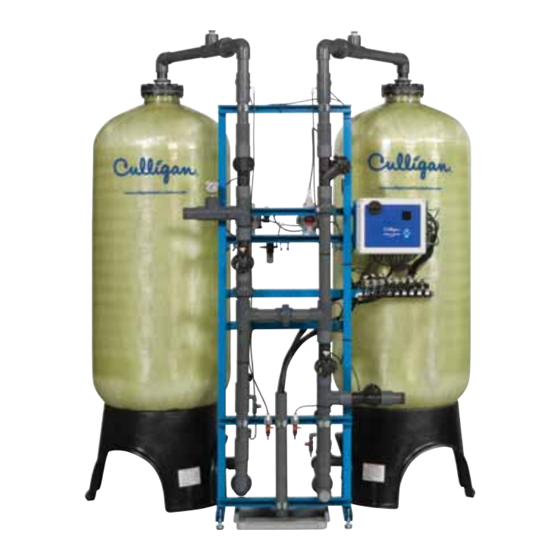
Installation Preinstallation Information Read the entire instruction manual before you begin installation. Failure to install and operate the system as required will void the warranty. The system will perform at maximum efficiency, when installed and operated as designed. Obtain all the materials and tools needed for the installation before beginning. Always use the correct tools to install and maintain the system. - Page 16 42" and 48" systems require larger drawtube assemblies because of the quantities of chemical used for regeneration. Skid mounting and pre-assembly is an available option from the factory. Install vacuum breakers here Figure 4. Premier Series Automatic Deionizer layout. Cat. No. 01024000 Culligan® Premier Series Automatic Deionizer...
- Page 17 Locating the Equipment Locate the mineral tanks on a firm foundation preferably concrete. The system should be located near an electrical outlet. The electrical panel must be supplied with a 120 Volt 15 Amp circuit. Power for the recirculation pump must be run sepa- rately.
- Page 18 QS-42 400 (8 bags) QW-42 400 (8 bags) QS-48 500 (10 bags) QW-48 500 (10 bags) 10. Slowly pressurize the system and check for leaks. If leaks are found repair as needed. Cat. No. 01024000 Culligan® Premier Series Automatic Deionizer...
- Page 19 Pneumatic Diaphragm Valve Locations Figure 5. Deionizer valve locations, front view. Figure 6. Deionizer valve locations, rear view. Valve Sequence Chart Cycle Cation Anion Diaphragm Valve C1 C2 C3 C4 C5 A1 A2 A3 A4 A5 A6 Service Cation Backwash Acid Draw Cation Rinse Pre Cation Fast Rinse...
- Page 20 Anion Rinse Pre Anion Fast Rinse Anion Fast Rinse Quality Purge Error Recirc Pump Relay NOTE E designates solenoid is energized. All solenoid valves NC. Pneumatic Tubing Diagram Figure 7. Deionizer pneumatic tubing. Cat. No. 01024000 Culligan® Premier Series Automatic Deionizer...
- Page 21 Deionizer Typical Installation Deionizers produce low conductivity water usually in the 5-100 ųs/cm range, which means the water is aggressive and wants to dissolve any material with which it comes in contact. Drain lines and product lines must be made of corrosion resistant materials, such as PVC, CPVC, or stainless steel.
-
Page 22: Electrical Installation
Maintain a distance of at least 10 feet between the Smart Controller and any electrical distribution panels, race- ways carrying 300 Volts or more, and electrical motors of 1 horsepower or more. • Use the cabling provided. Failure to do so may effect performance of the Smart Controller adversely. Cat. No. 01024000 Culligan® Premier Series Automatic Deionizer... - Page 23 Cable Routing All input and output connections to the circuit board are 24 Volt or less. Although the cables do not have to be run in conduit, it is necessary that long runs of cable be supported or protected by strapping them to the equipment piping.
- Page 24 Turn power to control box to the On position (I = on, O = off). The display should light up. Complete the controller programming before perform- ing the initial system startup (see “Deionizer Controller Programming” on Power page 29). Knob Display Cat. No. 01024000 Culligan® Premier Series Automatic Deionizer...
-
Page 25: Start-Up Procedures
Chemical Feed Pumps The Premier Series Deionizer is equipped with two (2) air operated diaphragm pumps, which are used to feed the regen- eration chemicals into the system. One pump is for feeding the acid (typically Hydrochloric Acid) for the Cation regenera- tion;... - Page 26 40 – 50 psi. Check the air pressure to the chemical feed pumps; it should be 80 – 85 psi at 8-10 scfm. In this step the chemical feed rate and dosage is being set. Cat. No. 01024000 Culligan® Premier Series Automatic Deionizer...
- Page 27 13. Adjust the air regulator located at the chemical feed pump in a clockwise position to the fully closed position. Open the regulator adjustment valve in a counterclockwise position to increase the pump flow rate. The flow rate for the acid feed for the corresponding model numbers is shown in Table 5 on page 64 Table 6 on page 65.
-
Page 28: Operation
If the quality of the water meets the required quality, the system will return to service mode. NOTE Water quality might be low if there is flow to service while performing the quality purge. Cat. No. 01024000 Culligan® Premier Series Automatic Deionizer... - Page 29 Triggering Regeneration Mode There are four conditions that can trigger a regeneration: If the flow meter keeps flowing at a minimum of 1 ct/second or greater and all of the following conditions occur: • The system detects poor quality water •...
-
Page 30: Deionizer Schematics
PLC Output Optional Modem Connection J22 Connection (Jumper) RS485 Connection (Communication Cable) POWER-24VAC Flow Meter Cable (optional) JLO Connection MT Board/ TDS Probe Figure 12. Smart Controller circuit board layout, rear view. Cat. No. 01024000 Culligan® Premier Series Automatic Deionizer... -
Page 31: Deionizer Wiring
Deionizer Wiring Figure 13. Deionizer wiring, single. Notes Install all black leads from items 13 and 14 (solenoid valves) onto item 9 (screw leads on panel to any terminal as they are all common). Install all white leads from items 13 and 14 onto items 5 and 6 in the locations shown. Install black lead wire from item 14, locations A6, AP, C5, and CP, onto item 17. - Page 32 DI, GBE, PCB 01021263 Disconnect Switch 01023673 Power Supply, PLC, 24V, DC, 1.3A 01025188 CPU, PLC, 6 Outputs 01023675 Output Module, PLC, 8 Outputs 01024109 Cable, TTL 01022143 PCB, MT 01024156 TDS Sensor Cat. No. 01024000 Culligan® Premier Series Automatic Deionizer...
-
Page 33: Deionizer Controller Programming
(You must press prior to programming mode timeout.) Menu Lockout It is possible to lock the keypad of the Premier Series Automatic Deionizer controller so that users will have access only to the MANUAL REGEN, SET DATE/TIME, and DIAGNOSTICS menus. SERVICE 1 LOCKED The system can be locked from the home screen. -
Page 34: Navigating The Menus And Keypad
This is the home screen. Press to display the main menu. JAN-01-13 9:00A 10.0GPM 161PPM >1)INFORMATION 2)MANUAL REGEN This is the main menu. The cursor/pointer (>) shows where you are in the menu. 3)SET DATE/TIME 4)ADV. SETUP Cat. No. 01024000 Culligan® Premier Series Automatic Deionizer... - Page 35 1)INFORMATION to scroll through the menu. The selection cursor scrolls down to the 2)MANUAL REGEN next line or display the next screen. >3)SET DATE/TIME 4)ADV. SETUP Press to select the item next to the cursor. The deionizer controller screen displays a setting title and value. Here we see the MONTH current value for the month setting is January.
-
Page 36: First Time Setup
First Time Setup First Time Setup Procedure After completing the plumbing connections to the Premier Series Automatic Deionizer, turn on the Controller. FIRST TIME SETUP PRESS DOWN ARROW Plug in the wall transformer. When a new controller is first turned on, the screen displays FIRST TIME SETUP. - Page 37 Completed First Time Setup SERVICE When the setup is complete, the screen displays the home screen. Note the new FEB-01-13 12:11P date selected during the setup. 10.0GPM 161PPM >1)INFORMATION 2)MANUAL REGEN Press to display the main menu. 3)SET DATE/TIME 4)ADV. SETUP Cat.
-
Page 38: System Setup
System Setup Single System Setup The Culligan® Premier Series Automatic Deionizer can be configured to operate with one or two deionizer systems. 1)INFORMATION 2)MANUAL REGEN From the main menu screen, press to 4) ADV. SETUP. 3)SET DATE/TIME Press . The screen displays the Advanced Setup menu. - Page 39 SERVICE Press until the deionizer controller displays the home screen. FEB-01-13 12:11P 10.0GPM 161PPM SERVICE 1 NOTE If the system type is ALTERNATING, the screen displays the status of STANDBY 2 each deionizer. The tank that is not in service is either in STANDBY or REGENERATING status.
-
Page 40: Adding And Programming Accessories
Adding and Programming Accessories TDS Probe The standard Premier Series Auto DI ships with a TDS probe installed as shown in Figure 10 on page 19. This probe is connected to the DI GBE controller board as shown in Figure 11 on page 26. -
Page 41: Regeneration
Regeneration The regeneration setup specifies the time interval (in days) and time of day for the deionizer system regeneration. NOTE If the system uses two deionizer tanks, the user-specified settings apply to both tanks. SERVICE From the default home screen, press to display the main menu. -
Page 42: Manual Regeneration
The system status is now REGENERATING, which means that a system regeneration is in FEB-01-13 12:11P progress. 10.0GPM 161PPM NOTE To monitor the regeneration process steps and timing, see "Manual/Motor Control" on page Cat. No. 01024000 Culligan® Premier Series Automatic Deionizer... -
Page 43: Cycle Times
Cycle Times Use the deionizer controller to set the following cycle times for cations and anions: backwash, slow rinse, fast rinse, quali- ty rinse, and quality delay. The default settings should be used for most installations; make changes only if necessary. NOTE If the system uses two deionizer tanks, the user-specified cycle times apply to both tanks. - Page 44 0–600 Seconds Specifies the pause/delay to begin the quality rinse cycle. Press (default=15) then to change the setting. SECONDS SERVICE Press until the deionizer controller displays the home screen. FEB-01-13 12:11P 10.0GPM 161PPM Cat. No. 01024000 Culligan® Premier Series Automatic Deionizer...
-
Page 45: Service And Maintenance
Service and Maintenance Deionizer Information SERVICE From the default home screen, press to display the main menu. FEB-01-13 12:11P 10.0GPM 161PPM >1)INFORMATION 2)MANUAL REGEN Press . The screen displays the deionizer information beginning with the current 3)SET DATE/TIME flow rate. 4)ADV. -
Page 46: Diagnostics
Press The first diagnostic screen displays the current state of the deionizer tank in service. SERVICE The controller automatically returns to the home screen after a few moments. FEB-01-13 12:11P 10.0GPM 161PPM Cat. No. 01024000 Culligan® Premier Series Automatic Deionizer... - Page 47 Check Inputs The Check Inputs diagnostic displays the status of the switch(es) based on water quality. If the water quality meets the minimum requirements then SW1 (and SW2 if duplex alternating) will be open and water will flow through the system. If the water quality does not meet the minimum requirements then SW1 (and SW2) will be closed and water will not flow through the system.
- Page 48 This screen occurs at the same time as the RCVD: 0000 screen in step 4. SERVICE 1 STANDBY 2 The controller automatically returns to the home screen after a few moments. FEB-01-13 12:11P Cat. No. 01024000 Culligan® Premier Series Automatic Deionizer...
-
Page 49: Errors And Alert Codes
Errors and Alert Codes PROBLEM FOUND When the controller identifies that an error has occurred, it is programmed to take steps to attempt to correct the error on its own. If it is unable to correct the prob- FEB-01-13 12:11P lem, the controller will display the message “PROBLEM FOUND.”... -
Page 50: Operating Checklist
31. Record pH of quality deionized water. Take a raw water sample and obtain a Culligan analysis of the raw water (16 ounce sample required). If necessary, collect two 16 oz samples of cation effluent water and two 16 oz samples of anion effluent water. -
Page 51: Troubleshooting
Troubleshooting Problem Cause Solution Low Water Quality Monitor or Cell Malfunction. Check performance and replace. Lower grade chemicals cause resin Verify that the acid and caustic used meets fouling. required specifications. Commercial grade caustic will foul an- Change caustic soda to proper type and ion resin within 2 to 3 regenerations. -
Page 52: Preventive Maintenance
In either case, the resin should be replaced. A sample of the resin may be sent to Culligan for analysis, but there is a fee for this service. Deionizer Systems must be properly maintained in order to provide years of trouble free operation. Using the proper chemicals and maintaining the components that come in contact with the chemicals is a requirement. - Page 53 After the regeneration, if the quality fails to return, the resin may be beyond salvage or it may be past its normal service life of three to five years. In either case, the resin should be replaced. A sample of the resin may be sent to the Culligan...
- Page 54 (1) hour. If a more thorough cleaning is desired, lightly sand the metal pins with very fine sand paper. After cleaning, rinse the probe with tap water and recalibrate the meter. When not is use, the probe should be cleaned prior to storage. Cat. No. 01024000 Culligan® Premier Series Automatic Deionizer...
-
Page 55: Regeneration Flow Diagrams
Regeneration Flow Diagrams Service The deionizer produces quality water during the Service Cycle. Water flows into the cation tank through the Cation Inlet Valve (C2). The water then passes through the cation resin and the cation exchange takes place. The decationized water flows into the distributors and out the bottom of the tank. - Page 56 The Backwash time is usually ten minutes. It takes approximately six of those minutes before the resin has reached full expansion. The backwash cycle flushes the particulate matter collected during the service cycle down the drain, and pre- pares the cation resin for the introduction of the acid regenerant. Cat. No. 01024000 Culligan® Premier Series Automatic Deionizer...
- Page 57 Acid Draw Backwash Inlet (C1), Backwash Outlet (C4) valves and the Cation valve (C2) are now closed. Flow through the pressure regulator directs water to the top of the tank. The acid chemical pump is activated and acid from the chemical container is fed at connection CP.
- Page 58 Feed water flows through the pressure regulator (PR) and is directed to flow down through the resin rinsing away the excess acid and remaining cations. This water takes the same path as in the previous cycle. NEUTRALIZATION TANK Figure 18. Slow Rinse Cation cycle. Cat. No. 01024000 Culligan® Premier Series Automatic Deionizer...
- Page 59 Pre-Fast Rinse Cation The Pre Cation Fast Rinse step rinses the cation solution that has settled in the piping. The Cation Backwash Inlet Valve (C1), Cation fast rinse valve (C5) remains open. NEUTRALIZATION TANK Figure 19. Pre-cation fast rinse cycle. Cat.
- Page 60 When Rinse is complete, the Cation Column returns to the Service Cycle. Water flows into the Cation Column and out the bottom over to the Anion Column. The Anion regeneration will start the Backwash Cycle. Cat. No. 01024000 Culligan® Premier Series Automatic Deionizer...
- Page 61 Backwash Anion The Anion Column uses decationized water for regeneration and is supplied by the Cation Column. The Anion Inlet Valve (A3) is closed and the Backwash Inlet Valve and the Backwash Outlet Valve (A1 and A5) are opened. The decationized water is directed to the bottom of the Anion Column through the Backwash Anion Inlet Valve.
- Page 62 Refer to the specific gravity chart—see "Appendix B Regeneration Specifications" on page 77. The Anion Resin will also remove hardness from the water, but it can not be regenerated off the resin with Sodium Hydroxide (Caustic Soda). Cat. No. 01024000 Culligan® Premier Series Automatic Deionizer...
- Page 63 Slow Rinse Anion The Caustic pump is shut off, stopping the flow of Sodium Hydroxide. The Anion Inlet Valve (A3) and the Rinse Outlet Valve (A4) remain open allowing water to flow down through the resin rinsing away the excess caustic and remaining anions.
- Page 64 The Pre-Anion Fast Rinse step allows the anion to rinse at full flow rate, clearing out the caustic that has settled in the piping. The Cation Backwash Inlet Valve (C1), Backwash Inlet valve (A1), and Anion fast rinse valve (A6) remain open. NEUTRALIZATION TANK Figure 24. Pre-fast rinse anion cycle. Cat. No. 01024000 Culligan® Premier Series Automatic Deionizer...
- Page 65 Fast Rinse Anion The Fast Rinse Anion step allows the anion to rinse at full flow rate clearing out the last of the last of the caustic. Anion Inlet valve (A3) remains open but Cation slow rinse valve (A4) closes and Anion fast rinse valve (A6) opens. During system set-up and first regeneration runs, record the TDS level of the deionized water, exiting the system.
- Page 66 Service Cycle. If the TDS remains above TDS limit, the unit will enter the regeneration cycle. If the TDS remains above TDS limit after a regeneration cycle, the unit will enter error mode. Cat. No. 01024000 Culligan® Premier Series Automatic Deionizer...
- Page 67 Regeneration Time Cycles All the Premier Series Automatic Deionizers are designed to have the same time cycles. The times listed are to be used as initial starting times and may need adjusting based on the water pressure, drain length and height, size and length of draw hose and temperature of chemical.
- Page 68 Premier Series Dual Bed Auto DI Systems Regeneration Flows and Times Table 5. Strong Base Systems Cycle QS-21 QS-24 QS-30 QS-36 QS-42 QS-48 Regeneration Time Flow Total Flow Total Flow Total Flow Total Flow Total Flow Total Process Mins Gal.
- Page 69 Table 6. Weak Base Systems Cycle QW-21 QW-24 QW-30 QW-36 QW-42 QW-48 Regeneration Time Flow Total Flow Total Flow Total Flow Total Flow Total Flow Total Process Mins Gal. Gal. Gal. Gal. Gal. Gal. Cycle Step CATION: Backwash (Flow 10.0 100.0 15.0 150.0...
-
Page 70: Premier Series Automatic Deionizer Parts
Premier Series Automatic Deionizer Parts 21 - 36 Premier Series Automatic Deionizer Assembly Figure 27. 21 - 36 Premier Series automatic deionizer assembly. Cat. No. 01024000 Culligan® Premier Series Automatic Deionizer... - Page 71 21 - 36 Diaphragm Valve Figure 28. 21 - 36 Diaphragm valve. Cat. No. 01024000 Premier Series Automatic Deionizer Parts...
- Page 72 42 - 48 Premier Series Automatic Deionizer Assembly Figure 29. 42 - 48 Premier Series automatic deionizer assembly. Cat. No. 01024000 Culligan® Premier Series Automatic Deionizer...
- Page 73 42 - 48 Diaphragm Valve Figure 30. 42 - 48 Diaphragm valve. Cat. No. 01024000 Premier Series Automatic Deionizer Parts...
- Page 74 Premier Series Automatic Deionizer Assembly Parts Tank Size Item Description Tank, Fiberglass 01023910 01023952 01021892 01021893 01021894 01021895 Solenoid Valve–Rinse 01025149 01025149 01025149 01025149 01025147 01025147 Solenoid Valve–Rinse — — — — 01025147 01025147 Diaphragm Valve–Backwash Drain 01023782 01023782 01023782...
- Page 75 DI Solenoid Assembly Replacement, 3 Way, Normally Closed, Stainless Steel 01024330 DI Solenoid Assembly Replacement (normally closed for air manifold) 01025096 Air Regulator, 1/4" NOTE Use Teflon tape for all threaded connections. Cat. No. 01024000 Premier Series Automatic Deionizer Parts...
-
Page 76: Control Panel
PHIL TYPE 1, 25 PK 01018403 Cord Grip,Liquid Tight,.170/.450 ID — SCREW,MACH,#8-32X3/8,18-8SS,PAN 01020498 Membrane Keypad,Oval w/Connector HD PHIL 01021173 Terminal Block,End Block — NUT,#8-32,HEX,LOCK,18-8SS 01024192 Enclosure, GBE Large 01021261 SHAFT, DISCONNECT SWITCH Cat. No. 01024000 Culligan® Premier Series Automatic Deionizer... -
Page 77: Premier Auto Di Menu Overview
Premier Auto DI Menu Overview FWR***LT30 MON DD YEAR FWR***LT30 MON DD YEAR Cat. No. 01024000 Premier Auto DI Menu Overview... - Page 78 AUX 6 ON DELAY 00000000 AUX 6 ON TIME > AUX 7 CYCLE SERVICE AUX 7 ON DELAY AUX 7 ON TIME AUX 8 CYCLE SERVICE AUX 8 ON DELAY AUX 8 ON TIME Cat. No. 01024000 Culligan® Premier Series Automatic Deionizer...
- Page 79 Cat. No. 01024000 Premier Auto DI Menu Overview...
-
Page 80: Appendix A Duplex Deionizer System
Appendix A Duplex Deionizer System The Premier Series Automatic Deionizer is designed to control either one or two automatic deionizer systems. A two-de- ionizer system consists of two systems, two flow meters, and two switch inputs. See Figure 33. Figure 33. -
Page 81: Appendix B Regeneration Specifications
Appendix B Regeneration Specifications Regenerant Specifications for Hydrochloric (Muriatic) Acid Chemical Specification 18° Baume Technical 20° Baume Technical 22° Baume Technical Strength (% HCl) 27.92% 31.45% 35.21% Sp. Gr. 1.1417 1.1600 1.1789 Wt. Per Gallon 9.5# 9.66# 9.81# Color Yellow Yellow Yellow Sulfate as (H2SO4) - Page 82 1.0869 11.6 0.726 9.057 1.1089 14.2 0.925 9.241 1.1309 16.8 1.333 9.424 1.2191 26.1 2.035 10.159 1.3320 36.2 3.333 11.100 1.5253 49.9 6.365 12.711 NOTE One gallon of water = 8.333 pounds. Cat. No. 01024000 Culligan® Premier Series Automatic Deionizer...
- Page 83 Chemical Usage Conversion Chart The chart shown below converts inches to gallons of chemical removed during regeneration from a 50-gallon drum or 15 gallon carboy. Inches 50-Gallon Drum 15-Gallon Carboy .4125 Gal. .1435 Gal. .825 Gal. 287 Gal. 1.2375 Gal. .4305 Gal.
- Page 84 The availability and usage of acid and caustic soda during regeneration is one of the most important factors affecting the Deionizer’s performance. Exhaustion of either chemical will cause the deionizer to produce a lower quality of treated water than desired. Cat. No. 01024000 Culligan® Premier Series Automatic Deionizer...
-
Page 85: Appendix C Flow Device K-Factor Data
Appendix C Flow Device K-Factor Data Meter Type Installation Fitting Pipe Size Flow Range K-Factor K-Factor Culligan Shaded = Obsolete Type/Material (GPM) Gallons Liters Part No. Culligan Turbine, PVC, NPT 0.5" 21.1 01021033 Tubine, PVC, NPT 0.75" 21.1 01021259 Tee, Stainless Steel, NPT 1.5”... -
Page 86: Appendix D Recirculation Pump
Recirculation pump installation. WARNING! When completing the installation of a recirculation system, verify that the recircu- lation pump turns off automatically if the supply air pressure to the Premier Series Automatic Deionizer drops below 20 psi. WARNING! Air pressure must not exceed the maximum 100 psi. - Page 87 body of the switch to the fully closed position by rotation fully counter clock wise. You need to have the system automatically turn on the recirc pump by waiting 15 minutes with a no flow condition. Temporarily adjust the manifold air pressure to the desired shutoff air pressure. Typically the diaphragm valves are set at 10-15 psi above the inlet water pressure.
-
Page 88: Appendix E Data Port Output
= tank2 status (1, 2, 3 or 4; 1=service, 2=regen, 3=standby, 4=error, U=set up as a single DIGBE) mmddyyhhmm = time stamp; month, day, year, hours, minutes Electrical Connections The Culligan TTL to RS232 Data Cable (P/N 01021508) Connector is terminated with a D-sub9 style female termination. The customer must provide the following RS232 pin connections: Function... - Page 89 AUX:00000 AUX:00000 AUX:00000 AUX:00000 CULL,000005.1,000000.0,0021094,0000000,0021094,0000000,0,2,0104101618 AUX:00000 AUX:00000 AUX:00000 AUX:00000 AUX:00000 AUX:00000 AUX:00000 AUX:00000 AUX:00000 AUX:00000 AUX:00000 CULL,000005.1,000000.0,0021099,0000000,0021099,0000000,0,2,0104101619 AUX:00000 AUX:00000 AUX:00000 AUX:00000 AUX:00000 AUX:00000 Figure 35. Data from DIGBE debug port. Cat. No. 01024000 Data Port Output...
-
Page 90: Appendix F Optional Accessories
AutoDI TDS probe. Any monitor/controller with a dry contact output that signals if the quality is above or below a set point can be used, but Culligan offers optional quality monitior P/N 01023679, which reads 0-200 uS/cm and can be easily installed into the GBE Smart Controller. - Page 91 Installing the Quality Monitor in the Controller Open the controller door and use a sharp knife to cut out the rectangular portion of the front door label that cov- ers the rectangular opening below the power on/off knob. The controller comes with mounting brackets to attach it to the door of the controller and it comes with power supply wiring that can be used to connect the power supply terminals to the connections shown in Figure 38.
- Page 92 Shake briefly and wait for reading to stabilize. Adjust the CAL trimmer pot to read 84.0 uS on the LCD display. NOTE The meter was calibrated at the factory prior to shipment. Cat. No. 01024000 Culligan® Premier Series Automatic Deionizer...
- Page 93 Flow Sensor Meter Connections (Optional) NOTE This accessory is required if the system includes a recirculation pump. The DI Controller is capable of detecting the signal from a Hall effect sensor device to provide flow rate information, total- ization and volume based regeneration initiation. There are several different types of flow measuring devices and differences in the wiring of the devices to the Smart Con- troller circuit board do exist.
- Page 94 The screen displays the flow meter installation settings. FLOW METER The default setting is INSTALLED. Press to change the set- >NOT INSTALLED ting to NOT INSTALLED and return to the Accessories menu. Cat. No. 01024000 Culligan® Premier Series Automatic Deionizer...
- Page 95 Modem Connection NOTE Use of the modem kit requires a one-year subscription to either a Level 1 or Level 2 Telecom package. Self-service registration is available on CPort (www.cport.culligan.com) under the Technical Service Tab on the Telemetry page’s subpage Setup Self-Service.
- Page 96 #, *, - and ,(comma) to the phone number. Refer to your phone service provider to verify how to dial an outside phone line. DEALER ID# The screen displays the Culligan Dealer I.D. number. To change 00000000 0–9 for 8 digits the value, press .
- Page 97 This testing process will also check to see if there is an updated version of firmware available on the Culligan servers. After conducting a phone line test, it is important to verify that the new time and date settings on the controller are correct.
- Page 98 2)REGEN SETUP 3)CYCLE TIMES Press to select 4) AUXOUT SETUP. The screen displays the op- >4)AUXOUT SETUP tion of changing the settings of AUX 6, AUX 7, and AUX 8. 5)MODEM SETUP Cat. No. 01024000 Culligan® Premier Series Automatic Deionizer...
- Page 99 >1)AUXOUT 6 2)AUXOUT 7 Press to select 1) AUXOUT 6 to change the settings of AUX 6. 3)AUXOUT 8 AUX 6 CYCLE Press to change the AUX 6 cycle to Service, Backwash Cat, Acid >SERVICE Draw, Slow Rinse Cat, Pre FR Cat, Fast Rinse Cat, Backwash Ani, Caustic Draw, Slow Rinse Ani, Pre FR Ani, Fast Rinse Ani, or Quality Rinse.
-
Page 100: Index
Electrical Installation Organics Error 25, Vacuum Protection Exit Button Valve 15, 16, Parts Performance Characteristics Fast Rinse 56, Weak Base Systems 10, Features 2, Wiring Pin Connections Feed Pumps Pre-Fast Rinse 55, Cat. No. 01024000 Culligan® Premier Series Automatic Deionizer... - Page 101 Notes Cat. No. 01024000 Notes...
- Page 102 Cat. No. 01024000 Culligan® Premier Series Automatic Deionizer...
Need help?
Do you have a question about the Premier Series and is the answer not in the manual?
Questions and answers