Table of Contents
Advertisement
Quick Links
Connection
Once installed, the basic connection setup should already be done for you. When set up correctly, you should be able to
use programs on your computer AND project from the document camera at the same time. If this doesn't work (or if your
document camera is not yet connected), please use the diagram below as your guide. The video signal (VGA) cables run
from the computer to the input on the splitter box first. From there, the splitter splits the video signal in two:
1) One cable goes through the document camera and on to the LCD projector.
(Into the document camera at the VGA IN port, and then out to the wall plate from the VGA OUT port).
2)
The other cable goes from the splitter directly to your computer monitor.
Document
Camera
VGA IN
VGA OUT
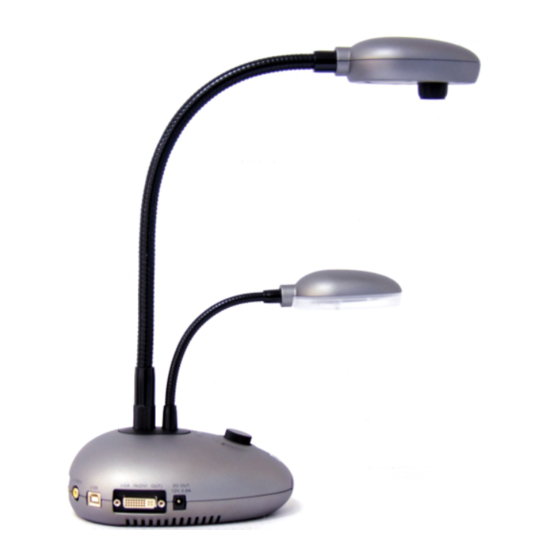
Using the Lumens DC130 Document Camera
Splitter box
Use a VGA cable to connect all
parts of the diagram
(to LCD
projector)
Advertisement
Table of Contents

Subscribe to Our Youtube Channel
Related Manuals for Lumens DC130


Summary of Contents for Lumens DC130
- Page 1 Using the Lumens DC130 Document Camera Connection Once installed, the basic connection setup should already be done for you. When set up correctly, you should be able to use programs on your computer AND project from the document camera at the same time. If this doesn’t work (or if your document camera is not yet connected), please use the diagram below as your guide.
- Page 2 Power Connection The power The power cord runs The document camera cord on the from the AC splitter box and the splitter box connection must also both require power: to your be plugged power strip. into the power strip. Button Overview Control Knob Location Power Button Press the red...
- Page 3 You can zoom in and out two different ways. First, you can move the arm up and down. Or you can press the black knob once and turn it to have it zoom in digitally. Press Move the arm black up and knob down. once and turn Capturing Images with the Lumens Document Camera Put the square end of the USB cable in here:...
- Page 4 Connect the USB cable from the document camera to the computer. Connect the flat end of the USB cable to your computer. (You can use either the USB ports on the front or in the back of the computer.) Document Camera...
- Page 5 Capturing an Image with View II Using the Lumens View II Image Capture software 1. Make sure that the document camera is turned on and connected to the computer using the USB cable. 2. Click From to the Start button, click on Programs and then PSProductUBAP.
- Page 6 3. Browse to your F:\ drive space to choose a Save in… location. Give the picture a name and click Save. The filename and the Save button Inserting/Viewing a Saved Picture The picture files that you capture are saved as images. You can insert them into Word, PowerPoint, Publisher or into many other programs.
Need help?
Do you have a question about the DC130 and is the answer not in the manual?
Questions and answers