Table of Contents
Advertisement
Available languages
Available languages
Quick Links
Advertisement
Chapters
Table of Contents

Subscribe to Our Youtube Channel
Related Manuals for SCHUNK PPU-E


Summary of Contents for SCHUNK PPU-E
- Page 1 Montage- und Betriebsanleitung Assembly and Operating Manual...
- Page 2 Top Performance in the Team Bei Greifsystemen und Spanntechnik ist SCHUNK weltweit SCHUNK is the world’s No. 1 for gripping systems and die Nr. 1 – vom kleinsten Parallelgreifer bis zum größten clamping technology – from the smallest parallel gripper Spannbackenprogramm.
- Page 3 Montage- und Betriebsanleitung PPU-E Elektrische Pick and Place-Einheit Assembly and operating manual PPU-E Electric Pick & Place Unit...
- Page 4 ................english ................04.00 | PPU-E | Montage- und Betriebsanleitung | GAS 363238/389316...
- Page 5 Original Betriebsanleitung Montage- und Betriebsanleitung PPU-E Elektrische Pick and Place-Einheit...
- Page 6 Impressum Impressum Urheberrecht: Diese Anleitung ist urheberrechtlich geschützt. Urheber ist die SCHUNK GmbH & Co. KG. Alle Rechte vorbehalten. Insbesondere ist jegliche – auch auszugsweise – Vervielfältigung, Bearbeitung, Verbreitung (Zugänglichmachung gegenüber Dritten), Übersetzung oder sonstige Verwendung verboten und bedarf unserer vorherigen schriftlichen Genehmigung.
-
Page 7: Table Of Contents
Version mit zusätzlicher C-Achse (C04...C12, E04...E12) ........ 26 Version mit Venturidüse (VAF) ................ 27 Option Federrückstellung (FA)................ 27 Option Haltebremse (BV) ................... 28 Montage ......................... 29 Mechanischer Anschluss .................. 29 04.00 | PPU-E | Montage- und Betriebsanleitung | de | GAS 363238/389316... - Page 8 Wartung PPU-E 30 und PPU-E 50 ............... 65 Fehlerbehebung...................... 67 Produkt bewegt sich nicht .................. 67 Produkt erreicht die Zykluszeiten nicht.............. 67 Produkt wird zu warm .................. 67 Achse fällt nach unten .................. 67 04.00 | PPU-E | Montage- und Betriebsanleitung | de | GAS 363238/389316...
- Page 9 Inhaltsverzeichnis 10 Ersatzteile....................... 68 10.1 Hinweis zur Bestellung von Ersatzteilen............. 68 10.2 Verschleißteile .................... 68 10.3 Hilfsmittel ...................... 69 11 Einbauerklärung...................... 70 11.1 Anlage zur Einbauerklärung................ 71 04.00 | PPU-E | Montage- und Betriebsanleitung | de | GAS 363238/389316...
-
Page 10: Allgemein
Gefahren für Personen! Nichtbeachtung kann zu irreversiblen Verletzungen bis hin zum Tod führen. VORSICHT Gefahren für Personen! Nichtbeachtung kann zu leichten Verletzungen führen. ACHTUNG Sachschaden! Informationen zur Vermeidung von Sachschäden. 04.00 | PPU-E | Montage- und Betriebsanleitung | de | GAS 363238/389316... -
Page 11: Mitgeltende Unterlagen
Für das Produkt wird folgendes Zubehör benötigt, welches separat bestellt werden muss: • Antriebsregler • Kabelsatz • Drehmodule optionales Zubehör • Greifer Für Informationen, welche Zubehör-Artikel mit der entsprechenden Produktvariante verwendet werden können, siehe Katalogdatenblatt. 04.00 | PPU-E | Montage- und Betriebsanleitung | de | GAS 363238/389316... -
Page 12: Grundlegende Sicherheitshinweise
Durch das Verwenden nicht zugelassener Ersatzteile können Gefahren für das Personal entstehen und Beschädigungen oder Fehlfunktionen am Produkt verursacht werden. • Nur Originalersatzteile und von SCHUNK zugelassene Ersatzteile verwenden. 04.00 | PPU-E | Montage- und Betriebsanleitung | de | GAS 363238/389316... -
Page 13: Umgebungs- Und Einsatzbedingungen
Normen und Bestimmungen. Unterwiesene Person Die unterwiesene Person wurde in einer Unterweisung durch den Betreiber über die ihr übertragenen Aufgaben und möglichen Gefahren bei unsachgemäßen Verhalten unterrichtet. 04.00 | PPU-E | Montage- und Betriebsanleitung | de | GAS 363238/389316... -
Page 14: Persönliche Schutzausrüstung
• Bei heißen Oberflächen hitzebeständige Schutzhandschuhe tragen. • Beim Umgang mit Gefahrstoffen Schutzhandschuhe und Schutzbrillen tragen. • Bei bewegten Bauteilen eng anliegende Schutzkleidung und zusätzlich Haarnetz bei langen Haaren tragen. 04.00 | PPU-E | Montage- und Betriebsanleitung | de | GAS 363238/389316... -
Page 15: Schilder Am Antrieb
Restenergie mehr vorhanden ist. • Wenn die Energieversorgung angeschlossen ist, keine Teile von Hand bewegen. • Während des Betriebs nicht in die offene Mechanik und in den Bewegungsbereich des Produkts greifen. 04.00 | PPU-E | Montage- und Betriebsanleitung | de | GAS 363238/389316... -
Page 16: Schutz Bei Handhabung Und Montage
Herabfallende und herausschleudernde Bauteile können zu schweren Verletzungen bis hin zum Tod führen. • Durch geeignete Maßnahmen den Gefahrenbereich absichern. • Während des Betriebs den Gefahrenbereich nicht betreten. 04.00 | PPU-E | Montage- und Betriebsanleitung | de | GAS 363238/389316... -
Page 17: Schutz Vor Gefährlichen Bewegungen
• Den Potenzialausgleich nach den einschlägigen Regeln durch eine Elektrofachkraft unter besonderer Berücksichtigung der tatsächlichen Arbeitsumgebungsbedingungen ausführen lassen. • Die Wirksamkeit des Potenzialausgleichs durch regelmäßige Sicherheitsmessungen nachweisen lassen. 04.00 | PPU-E | Montage- und Betriebsanleitung | de | GAS 363238/389316... -
Page 18: Hinweise Auf Besondere Gefahren
• Bei Ausfall der Energieversorgung kann es zu unkontrollierten Bewegungen kommen. • Mit fehlerhaften Antriebsbewegungen rechnen, insbesondere wenn eingebaute Überwachungen noch nicht wirksam sind. • Produkt auf Transportschäden prüfen. 04.00 | PPU-E | Montage- und Betriebsanleitung | de | GAS 363238/389316... - Page 19 Durch die integrierten Hochleistungsdauermagnete können Gefährdungen für Personen mit aktiven oder passiven Implantaten entstehen! Personen mit Herzschrittmachern, aktiven oder passiven • Implantaten dürfen sich nicht im Bereich des Magnetfeldes aufhalten. 04.00 | PPU-E | Montage- und Betriebsanleitung | de | GAS 363238/389316...
- Page 20 Gefahr durch elektrische Spannung! Auch bei nicht angeschlossener Spannungsversorgung kann am Modul durch Bewegung eine lebensbedrohliche Spannung entstehen Niemals die elektrischen Kontakte berühren. • Schutzkappen auf die elektrischen Kontakte aufsetzen. • 04.00 | PPU-E | Montage- und Betriebsanleitung | de | GAS 363238/389316...
-
Page 21: Produktbeschreibung
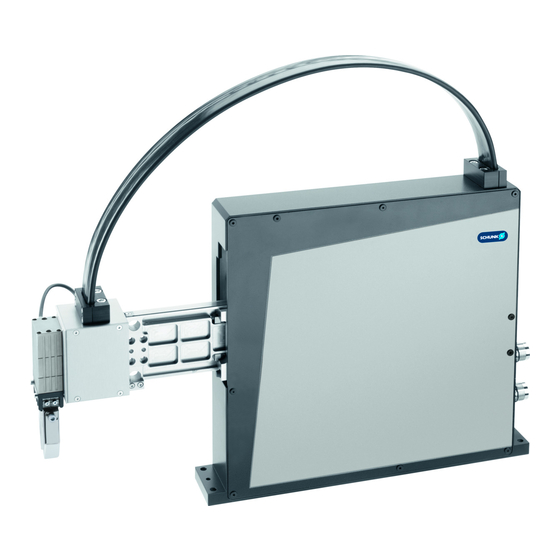
Produktbeschreibung 3 Produktbeschreibung 3.1 Baugrößen PPU-E 50 PPU-E 30 PPU-E 15 04.00 | PPU-E | Montage- und Betriebsanleitung | de | GAS 363238/389316... -
Page 22: Typenschlüssel
Produktbeschreibung 3.2 Typenschlüssel PPU-E 30 - H270-V100 - 03 - PF2 - MS1 - FA - A02 - NNN E-Direktantrieb PPU-E 15 Pick & Place-Einheit Elektrisch - Baugröße 15 PPU-E 30 Pick & Place-Einheit Elektrisch - Baugröße 30 PPU-E 50 Pick &... -
Page 23: Technische Daten
Gewährleistungsdauer [Monate] oder maximale Laufleistung [km] 20.000 20.000 20.000 oder maximale Zyklen [Stück] 50.000.000 50.000.000 50.000.000 Weitere technische Daten enthält das Katalogdatenblatt. Es gilt jeweils die letzte Fassung. 04.00 | PPU-E | Montage- und Betriebsanleitung | de | GAS 363238/389316... -
Page 24: Zulässige Statische Belastung
Fy max. [N] * Fz max. [N] * 1200 Die Werte Fy max. und Fz max. sind nur zeitlich begrenzt verfügbar. Werksseitig werden diese Werte im Bosch Antriebsregler auf 3s beschränkt. 04.00 | PPU-E | Montage- und Betriebsanleitung | de | GAS 363238/389316... -
Page 25: Transport Und Lagerung
Module vor allen äußeren Einflüssen (wie z.B. mechanische Stöße und Feuchtigkeit) schützen. 4.2 Lagerung Die Lagerung muss in sauberer, trockener Umgebung erfolgen. Umgebungstemperatur: 10 – 40°C. Betauung ist nicht zulässig! 04.00 | PPU-E | Montage- und Betriebsanleitung | de | GAS 363238/389316... -
Page 26: Beschreibung Der Versionen Und Optionen
5 Beschreibung der Versionen und Optionen 5.1 Version mit integrierten Ventilen 2x2 (PF2), 2x4 (PF4), 2x6 (PF6) Schnittstelle 2x2 (PF2), 2fach elektrisch, 2fach pneumatisch Schnittstelle 2x4 (PF4), 4fach elektrisch, 4fach pneumatisch 04.00 | PPU-E | Montage- und Betriebsanleitung | de | GAS 363238/389316... - Page 27 Die Sensoren und Aktoren sind an die jeweiligen Anschlüsse am Greiferflansch anzuschließen. Die Belegung der einzelnen Anschlüsse sind im folgenden Kapitel ersichtlich: E/A Schnittstelle für Basis- und Baukasten-Versionen 47]. 04.00 | PPU-E | Montage- und Betriebsanleitung | de | GAS 363238/389316...
-
Page 28: Version Mit Zusätzlicher C-Achse (C04
Die Sensoren und Aktoren sind an die jeweiligen Anschlüsse am Greiferflansch anzuschließen. Die Belegung der einzelnen Anschlüsse sind im folgenden Kapitel ersichtlich: E/A Schnittstelle für Basis- und Baukasten-Versionen 47]. 04.00 | PPU-E | Montage- und Betriebsanleitung | de | GAS 363238/389316... -
Page 29: Version Mit Venturidüse (Vaf)
Z-Achse entgegen der Schwerkraft (Einbaulage beachten) nach oben bewegt wird. • Die Federrückstellung dient nicht als Personenschutz. • Achtung, die Z-Achse kann nach dem Bewegen von Hand unkontrolliert zurückfedern. 04.00 | PPU-E | Montage- und Betriebsanleitung | de | GAS 363238/389316... -
Page 30: Option Haltebremse (Bv)
Im Gefahrenbereich dürfen sich keine Personen aufhalten. • ACHTUNG Beschädigung der Haltebremse Durch gewaltsames Verschieben bei betätigter Haltebremse wird die Haltebremse beschädigt. Die Haltebremse muss beim Stillstand der Achse betätigt werden. • 04.00 | PPU-E | Montage- und Betriebsanleitung | de | GAS 363238/389316... -
Page 31: Montage
Schutzkappen auf die elektrischen Kontakte aufsetzen. • Montieren Die Einheit kann an der Grundplatte verschraubt und verstiftet werden. Mechanischer Anschluss Grundplatte Montageschrauben M6 ISO 4762 (4x) (Anzugsdrehmoment: 10 Nm) Zylinderstift 5 ISO 8734 04.00 | PPU-E | Montage- und Betriebsanleitung | de | GAS 363238/389316... -
Page 32: Mechanischer Anschluss Des Moduls Ppu-E 15
Montage 6.1.1 Mechanischer Anschluss des Moduls PPU-E 15 Anschluss Pick&Place-Einheit Passung für Zylinderstifte Anschluss des Aufbaus Tiefe der Zentrierhülsenbohrung im Gegenstück Referenzpunkt für die Aufbauten 04.00 | PPU-E | Montage- und Betriebsanleitung | de | GAS 363238/389316... -
Page 33: Mechanischer Anschluss Des Moduls Ppu-E 30
Montage 6.1.2 Mechanischer Anschluss des Moduls PPU-E 30 Anschluss Pick&Place-Einheit Passung für Zylinderstifte Anschluss des Aufbaus Tiefe der Zentrierhülsenbohrung im Gegenstück Passung für Zentrierhülse Referenzpunkt für die Aufbauten 04.00 | PPU-E | Montage- und Betriebsanleitung | de | GAS 363238/389316... -
Page 34: Mechanischer Anschluss Des Moduls Ppu-E 50
Montage 6.1.3 Mechanischer Anschluss des Moduls PPU-E 50 Anschluss Pick&Place-Einheit Passung für Zylinderstifte Anschluss des Aufbaus Tiefe der Zentrierhülsenbohrung im Gegenstück Passung für Zentrierhülse Referenzpunkt für die Aufbauten 04.00 | PPU-E | Montage- und Betriebsanleitung | de | GAS 363238/389316... -
Page 35: Mechanischer Anschluss Basisschnittstelle (A02)
Anforderungen an die Ebenheit der Anschraubfläche (Maße in mm) Kantenlängen Zulässige Unebenheit < 100 < 0.02 > 100 < 0.05 Montieren Die Basisschnittstelle bietet eine Anschraubfläche für die vorgesehenen Anbauteile (z.B. Greifer, Drehmodule) Basisschnittstelle 04.00 | PPU-E | Montage- und Betriebsanleitung | de | GAS 363238/389316... -
Page 36: Mechanischer Anschluss Baukastenschnittstelle (A01)
Anforderungen an die Ebenheit der Anschraubfläche (Maße in mm) Kantenlängen Zulässige Unebenheit < 100 < 0.02 > 100 < 0.05 Montieren Die Baukastenschnittstelle bietet eine Anschraubfläche für die vorgesehenen Anbauteile (z.B. Greifer, Drehmodule) Baukastenschnittstelle 04.00 | PPU-E | Montage- und Betriebsanleitung | de | GAS 363238/389316... -
Page 37: Mechanischer Anschluss C-Achse - Schnittstelle (C04
Zulässige Unebenheit < 100 < 0.02 > 100 < 0.05 Montieren Die C-Achse - Schnittstelle bietet eine Anschraubfläche für die vorgesehenen Anbauteile (z.B. Greifer, Drehmodule) C-Achse – Schnittstelle 04.00 | PPU-E | Montage- und Betriebsanleitung | de | GAS 363238/389316... -
Page 38: Elektrischer Anschluss
Auch im Betrieb der Achse über den kompletten Hub darauf • achten, dass die Leitungen nicht gequetscht, abgeschert oder abgerissen werden. Leistungskabel und Messsystemleitungen in getrennten • Schleppketten verlegen. 04.00 | PPU-E | Montage- und Betriebsanleitung | de | GAS 363238/389316... -
Page 39: Erdung Pe
6.5.2 Anschlüsse am Backpanel Anschlüsse am Backpanel Pos. Bezeichnung Y-Achse E / A-Sub-D-Stecker (25-polig) Schnittstelle Z-Achse (15-polig) Messsystem Leistungsstecker Z-Achse Pneumatikanschluss und/oder Vakuumanschluss Schnittstelle Y-Achse (15-polig) Messsystem Leistungsstecker Y-Achse 04.00 | PPU-E | Montage- und Betriebsanleitung | de | GAS 363238/389316... -
Page 40: Anschlüsse Am Backpanel - Option C-Achse (C04
Anschlüsse C-Achse-Schnittstelle Pos. Bezeichnung Schnittstelle C-Achse (15-polig) Messsystem Y-Achse E / A-Sub-D-Stecker (25-polig) Schnittstelle Z-Achse (15-polig) Messsystem Leistungsstecker Z-Achse Leistungsstecker Y-Achse Schnittstelle Y-Achse (15-polig) Messsystem Pneumatikanschluss Leistungsstecker C-Achse 04.00 | PPU-E | Montage- und Betriebsanleitung | de | GAS 363238/389316... -
Page 41: Inkrementelles Messsystem Le 100
Offset Sinus/Cosinus [V] 2,5 ±0,5% Signalperiode [µm] 1000 Referenzsignal periodisch [mm] Abstand Lesekopf – Maßband [mm] 0,05 bis 0,2 Belegung 5VSense 0V Sense ref- ref+ cos- cos+ sin+ sin- 04.00 | PPU-E | Montage- und Betriebsanleitung | de | GAS 363238/389316... -
Page 42: Inkrementelles Messsystem Le200
Offset Sinus/Cosinus [V] 2,5 ±0,5% Signalperiode [µm] 2000 Referenzsignal periodisch [mm] Abstand Lesekopf – Maßband [mm] 0,2 bis 0,4 Belegung 5VSense 0V Sense ref- ref+ cos- cos+ sin+ sin- 04.00 | PPU-E | Montage- und Betriebsanleitung | de | GAS 363238/389316... -
Page 43: Absolutes Messsystem Ttk70
Hiperface / sin / Signalperiode [µm] 1000 Abstand Lesekopf – Maßband [mm] 0.1 bis 0.2 Belegung cos+ cos- GND Encoder sin+ sin- Enc Data + Enc Data - VCC Encoder 04.00 | PPU-E | Montage- und Betriebsanleitung | de | GAS 363238/389316... -
Page 44: Absolutes Messsystem Msa111C
Signalperiode [µm] 1000 Abstand Lesekopf – Maßband [mm] 0,1 bis 0,2 Belegung Clock + Clock - Data - Data + Cos - Cos + Sin + Sin - 04.00 | PPU-E | Montage- und Betriebsanleitung | de | GAS 363238/389316... -
Page 45: Inkrementelles Messsystem Encoder Kit R
Signalamplitude [Vss] 1 ±10% Offset Sinus/Cosinus [V] 2.5 ± 0.5% Strichzahl [TP/umdr.] 2048 Referenzsignal [grad/umdr.] 360° Belegung ref - ref + cos - cos + sin + sin - 04.00 | PPU-E | Montage- und Betriebsanleitung | de | GAS 363238/389316... -
Page 46: Absolutes Messsystem Skm36S
Dieses Messsysten bezieht sich auf eine angebaute C-Achse ERD Beschreibung SKM36S Betriebsspannung [VDC] 7 bis 12 Ausgangssignal Hiperface Strichzahl [TP/umdr.] Belegung cos+ cos- GND Encoder sin+ sin- Enc Data + Enc Data - VCC Encoder 04.00 | PPU-E | Montage- und Betriebsanleitung | de | GAS 363238/389316... -
Page 47: Motor
Montage 6.5.10 Motor Leistungsstecker Y-Achse und Z-Achse Pin-Belegung Leistungsstecker Belegung Bemerkung Phase (Antriebsregler) Schutzleiter (Antriebsregler) Phase (Antriebsregler) Phase (Antriebsregler) n.c. n.c. Temperatur Temperatur 04.00 | PPU-E | Montage- und Betriebsanleitung | de | GAS 363238/389316... -
Page 48: E/A Schnittstelle Grenzbelastbarkeit
• Schaltventil Typ 3/2 bzw. 2/2: – pro Ventil 3W (24V ±10%/125mA) – max. 7 Ventile einbaubar • Sensor - Eingangsstecker: – Sensoren Kundenseitig – max. 24V / 500mA 04.00 | PPU-E | Montage- und Betriebsanleitung | de | GAS 363238/389316... -
Page 49: E/A Schnittstelle Für Basis- Und Baukasten-Versionen
Schaltventil 2 Ventilsteuerung 2 weiß-blau violett Schaltventil 4 Ventilsteuerung 4 braun-blau violett-schwarz Schaltventil 6 Ventilsteuerung 6 weiß-rot violett-weiß Spannungsversor- braun-rot grau gung 0 V Spannungsversor- weiß-schwarz weiß gung 0 V 04.00 | PPU-E | Montage- und Betriebsanleitung | de | GAS 363238/389316... -
Page 50: E/A Schnittstelle Für C-Achse (C04
Schaltventil 2 Ventilsteuerung 2 weiß-blau violett n.c. Reserve braun-blau violett-schwarz n.c. Reserve weiß-rot violett-weiß Spannungsversor- braun-rot grau gung 0 V Spannungsversor- weiß-schwarz weiß gung 0 V 04.00 | PPU-E | Montage- und Betriebsanleitung | de | GAS 363238/389316... -
Page 51: E/A Schnittstelle Für Venturidüse (Vaf)
Schaltventil 2 Option weiß-blau violett Schaltventil 4 Option braun-blau violett-schwarz Schaltventil 6 Vakuum ein weiß-rot violett-weiß Spannungsversor- braun-rot grau gung 0 V Spannungsversor- weiß-schwarz weiß gung 0 V 04.00 | PPU-E | Montage- und Betriebsanleitung | de | GAS 363238/389316... -
Page 52: Sensoreingangsstecker 3Pol Und 4Pol
Immer beginnend mit den 4-poligen Sensoreingängen am Steckplatz 1. Die Signaleingänge werden von Steckplatz 1 bis zum max. Steckplatz 6 durchgezählt. Es können max. 8 Sensoreingänge angeschlossen werden. 04.00 | PPU-E | Montage- und Betriebsanleitung | de | GAS 363238/389316... - Page 53 Montage Signalreihenfolge mit 3-poligem Sensoreingang Signalreihenfolge mit 4-poligem Sensoreingang 04.00 | PPU-E | Montage- und Betriebsanleitung | de | GAS 363238/389316...
-
Page 54: Pneumatikanschluss / Pneumatikpläne
Im Gefahrenbereich dürfen sich keine Personen aufhalten. • ACHTUNG Anforderungen an die Luftversorgung beachten, Technische Daten 21]. Pneumatikanschluss Pneumatikanschluß und/oder Vakuumanschluß Druckbereich Pneumatikanschluss Min.[bar] Max. [bar] Vakuumanschluss Min.[bar] Max. [bar] 04.00 | PPU-E | Montage- und Betriebsanleitung | de | GAS 363238/389316... -
Page 55: Pneumatikplan Version Basis Und Baukasten 2X2 (Pf2), 2X4 (Pf4), 2X6 (Pf6)
6.6.1 Pneumatikplan Version Basis und Baukasten 2x2 (PF2), 2x4 (PF4), 2x6 (PF6) Option Haltebremse (BV) Bremse Schnittstelle 2x6 (PF6) Schnittstelle 2x4 (PF4) Schnittstelle 2x2 (PF2) Pneumatikplan für Basis und Baukasten-Schnittstelle 2x2, 2x4 und 2x6 (PF2, PF4, PF6) 04.00 | PPU-E | Montage- und Betriebsanleitung | de | GAS 363238/389316... -
Page 56: Pneumatikplan Version C-Achse
Montage 6.6.2 Pneumatikplan Version C-Achse Option Haltebremse (BV) Bremse Pneumatikplan für Schnittstelle C-Achse (C04...C12, E04...E12) 04.00 | PPU-E | Montage- und Betriebsanleitung | de | GAS 363238/389316... -
Page 57: Pneumatikplan Version Venturidüse
Montage 6.6.3 Pneumatikplan Version Venturidüse Option Haltebremse (BV) Vakuum Druckluft Bremse Option Option Venturidüse (VAF) Schnittstelle 2x4 (PF4) Schnittstelle 2x2 (PF2) Pneumatikplan für Schnittstelle Vakuumerzeugung (VAF) 04.00 | PPU-E | Montage- und Betriebsanleitung | de | GAS 363238/389316... -
Page 58: Pneumatikplan Version Vakuumpumpe
6.6.4 Pneumatikplan Version Vakuumpumpe Option Haltebremse (BV) Bremse Option Option Schnittstelle 2x4 (PF4) Schnittstelle 2x2 (PF2) ** Option als 2/2 oder 3/2 Ventil Vakuum Pneumatikplan für Schnittstelle Vakuumpumpe (VPF) 04.00 | PPU-E | Montage- und Betriebsanleitung | de | GAS 363238/389316... -
Page 59: Option Haltebremse
Das Klemmen im Bewegungsablauf (Bremsen) ist nicht erlaubt. Der Z-Schlitten darf bei druckloser Bremspatrone nicht bewegt werden. Erhöhter Verschleiß bis hin zum Totalausfall ist möglich. Prinzipskizze Klemmpatrone (Bremse geschlossen, Bremse offen) 04.00 | PPU-E | Montage- und Betriebsanleitung | de | GAS 363238/389316... -
Page 60: Instandsetzung
• einhalten, wenn ein Herzschrittmacher oder ein Hörgerät oder andere Geräte getragen werden. HINWEIS Die Baugrößen PPU-E 30 und PPU-E 50 müssen für Instandsetzungsarbeiten an SCHUNK gesendet werden. 04.00 | PPU-E | Montage- und Betriebsanleitung | de | GAS 363238/389316... - Page 61 Beide Kabel verdrill-frei mit großer Schlaufe auf Abdeckung Ø verlegen und befestigen. ACHTUNG! Kabel müssen frei liegen und dürfen sich nirgends Ø anstoßen beim auf und ab Bewegen der Z-Achse! Deckel montieren Wartung PPU-E 15 63]. 04.00 | PPU-E | Montage- und Betriebsanleitung | de | GAS 363238/389316...
-
Page 62: Wartung
Geräte getragen werden. WARNUNG Verletzungsgefahr durch Quetschen! An den beweglichen Linearachsen können Körperteile gequetscht und Verletzungen verursacht werden. Der Gefahrenbereich muss im Betrieb von einer • Schutzumzäunung umgeben sein. 04.00 | PPU-E | Montage- und Betriebsanleitung | de | GAS 363238/389316... - Page 63 Wenn Verantwortung für die Wartung der Einheit besteht, wird eine Teilnahme an einer Schulung beim Hersteller empfohlen. In dieser Schulung werden Anweisungen auf die korrekte Durchführung der Wartungsarbeiten durchgeführt. 04.00 | PPU-E | Montage- und Betriebsanleitung | de | GAS 363238/389316...
-
Page 64: Pflege
Beschädigungen der Führung kommt. 8.2 Kontrollarbeiten • Alle elektrischen/pneumatischen Anschlüsse regelmäßig auf festen Sitz prüfen. • Kabel/Pneumatikleitungen regelmäßig auf Schadstellen prüfen. Bei Mängel Anlage still legen defekte Teile ersetzen. 04.00 | PPU-E | Montage- und Betriebsanleitung | de | GAS 363238/389316... -
Page 65: Wartung Ppu-E 15
ACHTUNG Um die Betriebssicherheit des Produkts über einen langen Zeitraum hinweg sicherzustellen, ist vom Bedienungspersonal in bestimmten Abständen eine Wartung durchzuführen. Wartung PPU-E 15 Führung Z-Achse Führung Y-Achse 04.00 | PPU-E | Montage- und Betriebsanleitung | de | GAS 363238/389316... - Page 66 (Nr. GAS364056) nach 6 Monaten Schmiervorgang: • Eine dünne Schicht Fett beidseitig mit CleanTips gleichmässig auf die Laufflächen verteilen. • Z-Achse um die maximale Hublänge hin und her verschieben. 04.00 | PPU-E | Montage- und Betriebsanleitung | de | GAS 363238/389316...
-
Page 67: Wartung Ppu-E 30 Und Ppu-E 50
Um die Betriebssicherheit des Produkts über einen langen Zeitraum hinweg sicherzustellen, ist vom Bedienungspersonal in bestimmten Abständen eine Wartung durchzuführen. Wartung PPU-E 30 und PPU-E 50 Schrauben entfernen. Ø Deckel abziehen. Ø 04.00 | PPU-E | Montage- und Betriebsanleitung | de | GAS 363238/389316... - Page 68 Einmal jährlich alle 4 Schmierstellen auf Funktion prüfen, indem in jeden einzelnen Schmiernippel soviel Fett eingepresst wird, dass zwischen Profilschienenführung und Kugelumlaufschuh bzw. Wagen Fett austritt. Überschüssiges Fett danach entfernen. 04.00 | PPU-E | Montage- und Betriebsanleitung | de | GAS 363238/389316...
-
Page 69: Fehlerbehebung
9.4 Achse fällt nach unten Mögliche Ursache Maßnahmen zur Behebung Minimale Bremszeit wurde unterschritten. Bremszeiten (Verzögerung) beachten. Bei Bosch Rexroth Reglern, die Verzögerung für Wartezeit "EIN" / "AUS" beachten. Voreinstellung 300 ms. 04.00 | PPU-E | Montage- und Betriebsanleitung | de | GAS 363238/389316... -
Page 70: Ersatzteile
Austausch nur im Werk Bremse 10.000 Zyklen PPU-E 15 PPU-E 30 PPU-E 50 Austausch nur im Werk Feder 50 Mill. Zyklen PPU-E 15 PPU-E 30 PPU-E50 Austausch nur im Werk 04.00 | PPU-E | Montage- und Betriebsanleitung | de | GAS 363238/389316... -
Page 71: Hilfsmittel
Spezialfett 50gr PPU-E 15 GAS 358951 Spezialfett 250gr PPU-E 30 PPU-E 50 GAS 301478 Spezialöl Flasche 0,05 l PPU-E 30 PPU-E 50 GAS 372148 Wartungsset PPU-E 30 PPU-E 50 04.00 | PPU-E | Montage- und Betriebsanleitung | de | GAS 363238/389316... -
Page 72: Einbauerklärung
Anhang VII, Teil B wurden erstellt. Bevollmächtigter zur Zusammenstellung der technischen Unterlagen: Markus Ganter, Adresse: siehe Adresse des Herstellers St. Georgen, März 2019 i.V. Matthias Heilmann; Leitung Entwicklung 04.00 | PPU-E | Montage- und Betriebsanleitung | de | GAS 363238/389316... -
Page 73: Anlage Zur Einbauerklärung
Bruchrisiko beim Betrieb 1.3.3 Risiken durch herabfallende oder herausgeschleuderte Gegenstände 1.3.4 Risiken durch Oberflächen, Kanten und Ecken 1.3.5 Risiken durch mehrfach kombinierte Maschinen 1.3.6 Risiken durch Änderung der Verwendungsbedingungen 04.00 | PPU-E | Montage- und Betriebsanleitung | de | GAS 363238/389316... - Page 74 Wartung der Maschine 1.6.2 Zugang zu den Bedienungsständen und den Eingriffspunkten für die Instandhaltung 1.6.3 Trennung von den Energiequellen 1.6.4 Eingriffe des Bedienungspersonals 1.6.5 Reinigung innen liegender Maschinenteile 04.00 | PPU-E | Montage- und Betriebsanleitung | de | GAS 363238/389316...
- Page 75 Zusätzliche grundlegende Sicherheits- und Gesundheitsschutzanforderungen an Maschinen, die zum Einsatz unter Tage bestimmt sind Zusätzliche grundlegende Sicherheits- und Gesundheitsschutzanforderungen an Maschinen, von denen durch das Heben von Personen bedingte Gefährdungen ausgehen 04.00 | PPU-E | Montage- und Betriebsanleitung | de | GAS 363238/389316...
- Page 76 Translation of Original Operating Manual Assembly and operating manual PPU-E Electric Pick & Place Unit...
- Page 77 Imprint Copyright: This manual is protected by copyright. The author is SCHUNK GmbH & Co. KG. All rights reserved. Any reproduction, processing, distribution (making available to third parties), translation or other usage - even excerpts - of the manual is especially prohibited and requires our written approval.
- Page 78 Version with additional C-axis (C04...C12, E04...E12)......... 96 Version with Venturi nozzle (VAF).............. 97 Optional spring return (FA)................. 97 Optional holding brake (BV) ................ 98 Assembly ........................ 99 Mechanical connection of the module............... 99 04.00 | PPU-E | Montage- und Betriebsanleitung | en | GAS 363238/389316...
- Page 79 Maintenance of PPU-E 30 and PPU-E 50 ............ 136 Troubleshooting .................... 138 Product does not move .................. 138 Product does not achieve the cycle times ............ 138 Product gets too hot.................. 138 Axis drops down .................... 138 04.00 | PPU-E | Montage- und Betriebsanleitung | en | GAS 363238/389316...
- Page 80 10.1 Note regarding spare part orders.............. 139 10.2 Wearing parts .................... 139 10.3 Aid ........................ 140 11 Translation of original declaration of incorporation .......... 141 11.1 Annex to Declaration of Incorporation............. 142 04.00 | PPU-E | Montage- und Betriebsanleitung | en | GAS 363238/389316...
-
Page 81: General
Dangers for persons! Non-observance can lead to irreversible injury and even death. CAUTION Dangers for persons! Non-observance can cause minor injuries. NOTICE Material damage! Information about avoiding material damage. 04.00 | PPU-E | Montage- und Betriebsanleitung | en | GAS 363238/389316... -
Page 82: Applicable Documents
• Cable set Optional accessories: • Rotary modules • Gripper For information regarding which accessory articles can be used with the corresponding product variants, see catalog data sheet. 04.00 | PPU-E | Montage- und Betriebsanleitung | en | GAS 363238/389316... -
Page 83: Basic Safety Notes
Use of unauthorized spare parts Using unauthorized spare parts can endanger personnel and damage the product or cause it to malfunction. • Use only original spare parts or spares authorized by SCHUNK. 04.00 | PPU-E | Montage- und Betriebsanleitung | en | GAS 363238/389316... -
Page 84: Ambient Conditions And Operating Conditions
Due to its technical training, knowledge and experience, service Service personnel of personnel of the manufacturer is able to perform the delegated the manufacturer tasks and to recognize and avoid possible dangers. 04.00 | PPU-E | Montage- und Betriebsanleitung | en | GAS 363238/389316... -
Page 85: Personal Protective Equipment
2 Warning symbol "magnetic field" 6 symbol "Ground befor use" 3 warning symbol "Hot surface" 7 warning symbol "Electrical voltage" 4 mandatory sign "read manual" 8 seal of quality 04.00 | PPU-E | Montage- und Betriebsanleitung | en | GAS 363238/389316... -
Page 86: Fundamental Dangers
Falling and violently ejected components can cause serious injuries and even death. • Take appropriate protective measures to secure the danger zone. • Never step into the danger zone during operation. 04.00 | PPU-E | Montage- und Betriebsanleitung | en | GAS 363238/389316... -
Page 87: Protection Against Dangerous Movements
• The effectiveness of the potential equalisation must be verified by executing regular safety measurements. 04.00 | PPU-E | Montage- und Betriebsanleitung | en | GAS 363238/389316... -
Page 88: Notes On Particular Risks
• In the event of a power failure, uncontrolled movements may occur. • Expect faulty drive movements especially if the installed monitoring devices are not yet effective. • Check that product for transport damage. 04.00 | PPU-E | Montage- und Betriebsanleitung | en | GAS 363238/389316... - Page 89 Persons with heart pace-makers, active or passive implants are • prohibited from entering the area of the magnetic field. 04.00 | PPU-E | Montage- und Betriebsanleitung | en | GAS 363238/389316...
- Page 90 Even if the voltage supply is not switched on, potentially lethal voltage may occur on the module as a result of movement. Never touch the electric contacts. • Place protective caps onto the electric contacts. • 04.00 | PPU-E | Montage- und Betriebsanleitung | en | GAS 363238/389316...
-
Page 91: Product Description
Product description 3 Product description 3.1 Sizes PPU-E 50 PPU-E 30 PPU-E 15 04.00 | PPU-E | Montage- und Betriebsanleitung | en | GAS 363238/389316... -
Page 92: Type Code
Product description 3.2 Type code PPU-E 30 - H270-V100 - 03 - PF2 - MS1 - FA - A02 - NNN Direct electrical drive PPU-E 15 Pick & Place-Unit Electric - size 15 PPU-E 30 Pick & Place-Unit Electric - size 30 PPU-E 50 Pick &... -
Page 93: Technical Data
[km] 20,000 20,000 20,000 or maximum cycles [piece] 50,000,000 50,000,000 50,000,000 More technical data is included in the catalog data sheet. Whichever is the latest version. 04.00 | PPU-E | Montage- und Betriebsanleitung | en | GAS 363238/389316... -
Page 94: Permissible Static Load
Fz max. [N] * 1200 The values Fy max. and Fz max. are only available for a limited time. By default, these values are limited at Bosch controllers to 3s. 04.00 | PPU-E | Montage- und Betriebsanleitung | en | GAS 363238/389316... -
Page 95: Transport And Storage
(such as mechanical shocks and humidity). 4.2 Storage Store the product in a clean, dry environment. Ambient temperature: 10 – 40°C. No condensation permitted! 04.00 | PPU-E | Montage- und Betriebsanleitung | en | GAS 363238/389316... -
Page 96: Description Of The Versions And Options
5 Description of the versions and options 5.1 Version with integrated valves 2x2 (PF2), 2x4 (PF4), 2x6 (PF6) Interface 2x2 (PF2), 2-fold electric, 2-fold pneumatic Interface 2x4 (PF4), 4-fold electric, 4-fold pneumatic 04.00 | PPU-E | Montage- und Betriebsanleitung | en | GAS 363238/389316... - Page 97 The sensors and actuators must be connected to the respective connections on the gripper flange. Assignment of the individual connections is shown in the following chapter: I/O interface for basic and modular system versions 118]. 04.00 | PPU-E | Montage- und Betriebsanleitung | en | GAS 363238/389316...
-
Page 98: Version With Additional C-Axis (C04
The sensors and actuators must be connected to the respective connections on the gripper flange. Assignment of the individual connections is shown in the following chapter: I/O interface for basic and modular system versions 118]. 04.00 | PPU-E | Montage- und Betriebsanleitung | en | GAS 363238/389316... -
Page 99: Version With Venturi Nozzle (Vaf)
(note the installation position). • The spring return is not for personal protection. • Caution, the Z-axis can spring back in an uncontrolled manner after being moved by hand. 04.00 | PPU-E | Montage- und Betriebsanleitung | en | GAS 363238/389316... -
Page 100: Optional Holding Brake (Bv)
Damage to the holding brake Forced movement when the holding brake is activated will damage it. The holding brake must be actuated when the axis is at a • standstill. 04.00 | PPU-E | Montage- und Betriebsanleitung | en | GAS 363238/389316... -
Page 101: Assembly
The unit can be screwed onto and bolted to the baseplate. Mounting Mechanical connection of the baseplate Four M6 ISO 4762 mounting screws (tightening torque: 10 Nm) Cylindrical pin 5 ISO 8734 04.00 | PPU-E | Montage- und Betriebsanleitung | en | GAS 363238/389316... -
Page 102: Mechanical Connection Of The Ppu-E 15 Module
6.1.1 Mechanical connection of the PPU-E 15 module Connection Pick&Place Unit 73 Fit for cylindrical pins Connection for the assemblies 80 Depth of the centering bore in the counterpart 90 Reference point for the assemblies 04.00 | PPU-E | Montage- und Betriebsanleitung | en | GAS 363238/389316... -
Page 103: Mechanical Connection Of The Ppu-E 30 Module
Connection Pick&Place Unit Fit for cylindrical pins Connection for the assemblies Depth of the centering bore in the counterpart 72 Fit for centering sleeve Reference point for the assemblies 04.00 | PPU-E | Montage- und Betriebsanleitung | en | GAS 363238/389316... -
Page 104: Mechmechanical Connection Of The Ppu-E 50 Module
Fit fFit for cylindrical pinsFit for cylindrical pins Connection for the assemblies Depth of the centering bore in the counterpart 72 Fit for centering sleeve Reference point for the assemblies 04.00 | PPU-E | Montage- und Betriebsanleitung | en | GAS 363238/389316... -
Page 105: Mechanical Connection Of Basic Interface (A02)
Permissible unevenness < 100 < 0.02 > 100 < 0.05 Mounting The basic interface has a mounting surface for the attachments provided (e.g. grippers, rotary modules). Basic interface 04.00 | PPU-E | Montage- und Betriebsanleitung | en | GAS 363238/389316... -
Page 106: Mechanical Connection Of The Modular System Interface (A01)
< 100 < 0.02 > 100 < 0.05 Mounting The modular system interface has a mounting surface for the attachments provided (e.g. grippers, rotary modules). Modular system interface 04.00 | PPU-E | Montage- und Betriebsanleitung | en | GAS 363238/389316... -
Page 107: Mechanical Connection C-Axis Interface (C04
Permissible unevenness < 100 < 0.02 > 100 < 0.05 Mounting The C-axis interface has a mounting surface for the attachments provided (e.g. grippers, rotary modules). C-axis interface 04.00 | PPU-E | Montage- und Betriebsanleitung | en | GAS 363238/389316... -
Page 108: Electrical Connection
During operation of the axes across the full stroke too, make • sure that the lines do not become crushed, sheared or torn off. Install the power cable and measuring system lines in separate • cable tracks. 04.00 | PPU-E | Montage- und Betriebsanleitung | en | GAS 363238/389316... -
Page 109: Pe Ground
Assembly 6.5.1 PE ground M5 grounding screw 04.00 | PPU-E | Montage- und Betriebsanleitung | en | GAS 363238/389316... -
Page 110: Connections On The Back Panel
Item Designation Y-axis I/O sub-D connector (25 pole) Z-axis interface (15-pole) measuring system Z-axis power connector Pneumatic connection and/or vacuum connection Y-axis interface (15-pole) measuring system Y-axis power connector 04.00 | PPU-E | Montage- und Betriebsanleitung | en | GAS 363238/389316... -
Page 111: Connection On The Back Panel - Optional C-Axis (C04
C-axis interface (15-pole) measuring system Y-axis I/O sub-D connector (25 pole) Z-axis interface (15-pole) measuring system Z-axis power connector Y-axis power connector Y-axis interface (15-pole) measuring system Pneumatic connection C-axis power connector 04.00 | PPU-E | Montage- und Betriebsanleitung | en | GAS 363238/389316... -
Page 112: Incremental Measuring System Le100
Signal period [µm] 1000 Periodical reference signal [mm] Distance between reading head and 0.05 to 0.2 measuring tape [mm] assignment 5VSense 0V Sense ref- ref+ cos- cos+ sin+ sin- 04.00 | PPU-E | Montage- und Betriebsanleitung | en | GAS 363238/389316... -
Page 113: Incremental Measuring System Le200
Assembly 6.5.5 incremental measuring system LE200 This measuring system can only be used in the sizes PPU-E 30 and PPU-E 50. Description LE200 Operating voltage [VDC] 5 ± 5% Output signal Sin, Cos Signal amplitude [Vss] 1 ±10% Offset sine/cosine [V] 2.5 ±0.5%... -
Page 114: Absolute Measuring System Ttk70
Signal period [µm] 1000 Distance between reading head and 0.1 to 0.2 measuring tape [mm] assignment cos+ cos- GND Encoder sin+ sin- Enc Data + Enc Data - VCC Encoder 04.00 | PPU-E | Montage- und Betriebsanleitung | en | GAS 363238/389316... -
Page 115: Msa111C Absolute Measuring System
Distance between reading head and 0.1 to 0.2 measuring tape [mm] Assignment Clock + Clock - Data - Data + Cos - Cos + Sin + Sin - 04.00 | PPU-E | Montage- und Betriebsanleitung | en | GAS 363238/389316... -
Page 116: Incremental Measuring System Encoder Kit R
Offset sine/cosine [V] 2.5 ± 0.5% Number of dashes [TP/rev.] 2048 Reference signal [degrees/rev.] 360° assignment ref - ref + cos - cos + sin + sin - 04.00 | PPU-E | Montage- und Betriebsanleitung | en | GAS 363238/389316... -
Page 117: Absolute Measuring System Skm36S
Operating voltage [VDC] 7 to 12 Output signal Hiperface Number of dashes [TP/rev.] assignment cos+ cos- GND Encoder sin+ sin- Enc Data + Enc Data - VCC Encoder 04.00 | PPU-E | Montage- und Betriebsanleitung | en | GAS 363238/389316... -
Page 118: Motor
Power plug for Y-axis and Z-axis Pin allocation for power plug Configuration Note Phase (drive controller) Protective conductor (drive controller) Phase (drive controller) Phase (drive controller) n.c. n.c. temperature temperature 04.00 | PPU-E | Montage- und Betriebsanleitung | en | GAS 363238/389316... -
Page 119: I/O Interface For Critical Load
– per valve 3W (24V ±10%/125mA) – max. 7 valves can be installed • Sensor - input plug: – Sensors on customers' part – max. 24V / 500mA 04.00 | PPU-E | Montage- und Betriebsanleitung | en | GAS 363238/389316... -
Page 120: I/O Interface For Basic And Modular System Versions
22 Switching valve Valve control 4 brown-blue purple-black 23 Switching valve Valve control 6 white-red purple-white Power supply 0 V brown-red gray Power supply 0 V white-black white 04.00 | PPU-E | Montage- und Betriebsanleitung | en | GAS 363238/389316... -
Page 121: I/O Interface For C-Axis (C04
21 Switching valve Valve control 2 white-blue purple n.c. Spare brown-blue purple-black n.c. Spare white-red purple-white Power supply 0 V brown-red gray Power supply 0 V white-black white 04.00 | PPU-E | Montage- und Betriebsanleitung | en | GAS 363238/389316... -
Page 122: I/O Interface For Venturi Nozzles (Vaf)
Option white-blue purple 22 Switching valve Option brown-blue purple-black 23 Switching valve Vacuum on white-red purple-white Power supply 0 V brown-red gray Power supply 0 V white-black white 04.00 | PPU-E | Montage- und Betriebsanleitung | en | GAS 363238/389316... -
Page 123: Sensor Input Plug 3-Pin And 4-Pin
4-pin sensor inputs on slot 1. The signal inputs are counted through from slot 1 to max. slot 6. A maximum of 8 sensor inputs can be connected. 04.00 | PPU-E | Montage- und Betriebsanleitung | en | GAS 363238/389316... - Page 124 Assembly Signal order with 3-pin sensor input Signal order with 4-pin sensor input 04.00 | PPU-E | Montage- und Betriebsanleitung | en | GAS 363238/389316...
-
Page 125: Pneumatic Connection / Pneumatic Diagrams
Observe the requirements for the air supply Technical data 91]. Pneumatic connection Pneumatic connection and/or vacuum connection Pressure range Pneumatic connection Min. [bar] Max. [bar] vacuum connection Min. [bar] Max. [bar] 04.00 | PPU-E | Montage- und Betriebsanleitung | en | GAS 363238/389316... -
Page 126: Pneumatic Diagram For Basic And Modular System Version 2X2 (Pf2), 2X4 (Pf4), 2X6 (Pf6)
Holding brake (BV) Brake Interface 2x6 (PF6) Interface 2x4 (PF4) Interface 2x2 (PF2) Pneumatic diagram for basic and modular system interface 2x2, 2x4 and 2x6 (PF2, PF4, PF6) 04.00 | PPU-E | Montage- und Betriebsanleitung | en | GAS 363238/389316... -
Page 127: Pneumatic Diagram For C-Axis Version
Assembly 6.6.2 Pneumatic diagram for C-axis version Option Holding brake (BV) Brake Pneumatic diagram for C-axis interface (C04...C12, E04...E12) 04.00 | PPU-E | Montage- und Betriebsanleitung | en | GAS 363238/389316... -
Page 128: Pneumatic Diagram For Venturi Nozzle Version
6.6.3 Pneumatic diagram for Venturi nozzle version Option Holding brake (BV) Vacuum Compressed air Brake Option Option Venturi nozzle (VAF) Interface 2x4 (PF4) Interface 2x2 (PF2) Pneumatic diagram for vacuum generation interface (VAF) 04.00 | PPU-E | Montage- und Betriebsanleitung | en | GAS 363238/389316... -
Page 129: Pneumatic Diagram For Vacuum Pump Version
Option Holding brake (BV) Brake Option Option Interface 2x4 (PF4) Interface 2x2 (PF2) ** Optional as 2/2 or 3/2 valve Vacuum Pneumatic diagram for vacuum pump interface (VPF) 04.00 | PPU-E | Montage- und Betriebsanleitung | en | GAS 363238/389316... -
Page 130: Optional Holding Brake
Z-slide must not be moved when the braking cartridge is depressurized. Increased wear up to total failure could be the result. Schematic diagram of clamping cartridge (brake applied, brake released) 04.00 | PPU-E | Montage- und Betriebsanleitung | en | GAS 363238/389316... -
Page 131: Servicing
NOTE The sizes PPU-E 30 and PPU-E 50 must be sent to SCHUNK for servicing work. 04.00 | PPU-E | Montage- und Betriebsanleitung | en | GAS 363238/389316... - Page 132 Ø cover and fasten. NOTICE! Cables must lie freely and must not touch anywhere Ø when the Z-axis moves up and down! Mount cover Maintenance of PPU-E 15 134]. 04.00 | PPU-E | Montage- und Betriebsanleitung | en | GAS 363238/389316...
-
Page 133: Maintenance
Risk of injury due to squeezing! At the moving linear axes, body parts can be squeezed and cause injuries. The danger zone must be surrounded by a safety fence during • operation. 04.00 | PPU-E | Montage- und Betriebsanleitung | en | GAS 363238/389316... - Page 134 In this training course you will be instructed in the correct way to do maintenance work. 04.00 | PPU-E | Montage- und Betriebsanleitung | en | GAS 363238/389316...
-
Page 135: Care
• Regularly check all electrical/pneumatic connections for firm seating. • Regularly check cable/pneumatic lines for damage. Shut down the automated system in the event of defects and replace the defective parts. 04.00 | PPU-E | Montage- und Betriebsanleitung | en | GAS 363238/389316... -
Page 136: Maintenance Of Ppu-E 15
The guides will become damaged if foreign objects find their way into the housing during maintenance work. Always perform maintenance work in a clean environment. • Do not use compressed air. • 04.00 | PPU-E | Montage- und Betriebsanleitung | en | GAS 363238/389316... - Page 137 • Evenly distribute a thin layer of grease on both sides of the running surface using CleanTips. • Slide the Z-axis back and forth through its maximum stroke length. 04.00 | PPU-E | Montage- und Betriebsanleitung | en | GAS 363238/389316...
-
Page 138: Maintenance Of Ppu-E 30 And Ppu-E 50
To ensure the operational safety of the product over a long period of time, the operating personnel must carry out maintenance work in specific intervals. Maintenance of PPU-E 30 and PPU-E 50 Remove screws. Ø Remove cover. Ø 04.00 | PPU-E | Montage- und Betriebsanleitung | en | GAS 363238/389316... - Page 139 Then remove the extra grease. 04.00 | PPU-E | Montage- und Betriebsanleitung | en | GAS 363238/389316...
-
Page 140: Troubleshooting
Corrective action minimum braking time set too short. Observe braking time (delay). For Bosch Rexroth controllers, observe the delay fot waiting period "ON" / "OFF" default setting 300 ms. 04.00 | PPU-E | Montage- und Betriebsanleitung | en | GAS 363238/389316... -
Page 141: Spare Parts
10.000 cycles PPU-E 15 PPU-E 30 PPU-E 50 Replace in production facility only Spring 50 million cycles PPU-E 15 PPU-E 30 PPU-E 50 Replace in production facility only 04.00 | PPU-E | Montage- und Betriebsanleitung | en | GAS 363238/389316... -
Page 142: Aid
50 g 5PPU-E GAS 358951 Special grease 250 g PPU-E30 PPU-E50 GAS 301478 Special oil, 0.05 l bottle PPU-E30 PPU-E 50 GAS 372148 Maintenance set PPU-E30 PPU-E50 04.00 | PPU-E | Montage- und Betriebsanleitung | en | GAS 363238/389316... -
Page 143: Translation Of Original Declaration Of Incorporation
Person authorized to compile the technical documentation: Markus Ganter, Address: see manufacturer's address St. Georgen, March 2019 p.p. Matthias Heilmann; Head of Development 04.00 | PPU-E | Montage- und Betriebsanleitung | en | GAS 363238/389316... -
Page 144: Annex To Declaration Of Incorporation
Risks due to falling or ejected objects 1.3.4 Risks due to surfaces, edges or angles 1.3.5 Risks related to combined machinery 1.3.6 Risks related to variations in operating conditions 04.00 | PPU-E | Montage- und Betriebsanleitung | en | GAS 363238/389316... - Page 145 Risk of slipping, tripping or falling 1.5.16 Lightning Maintenance 1.6.1 Machinery maintenance 1.6.2 Access to operating positions and servicing points 1.6.3 Isolation of energy sources 1.6.4 Operator intervention 1.6.5 Cleaning of internal parts 04.00 | PPU-E | Montage- und Betriebsanleitung | en | GAS 363238/389316...
- Page 146 Supplementary essential health and safety requirements for machinery intended for underground work Supplementary essential health and safety requirements for machinery presenting particular hazards due to the lifting of persons 04.00 | PPU-E | Montage- und Betriebsanleitung | en | GAS 363238/389316...
- Page 148 Jens Lehmann, deutsche Torwartlegende, seit 2012 SCHUNK- Markenbotschafter für sicheres, präzises Greifen und Halten. Folgen Sie uns | Follow us Jens Lehmann, German goalkeeper legend, SCHUNK brand ambassador since 2012 for safe, precise gripping and holding. schunk.com/lehmann...
Need help?
Do you have a question about the PPU-E and is the answer not in the manual?
Questions and answers