Table of Contents
Advertisement
Quick Links
Advertisement
Table of Contents

Related Manuals for Riello Vokera AriaPRO ME Series


Summary of Contents for Riello Vokera AriaPRO ME Series
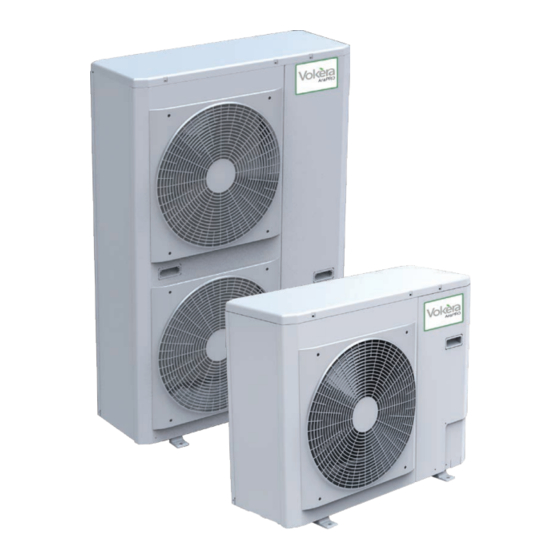
- Page 1 AriaPRO ME High efficiency heat pumps Installation & Servicing Instructions THESE INSTRUCTIONS TO BE RETAINED BY USER Vokèra is a licensed member of the Benchmark scheme which aims to improve the standards of installation and commissioning of domestic hot water systems in the UK.
-
Page 3: Table Of Contents
General Dear Customer, General notices Thank you for choosing a Vokèra AriaPRO. This booklet contains information necessary for the correct installation Check the integrity and completeness of the supplied equipment of this appliance. as soon as you take it out of its packaging. If necessary, consult the Thanks again. -
Page 4: Description
Description Identification AriaPRO Technical Tag The product is characterised by: The technical tag shows all technical and performance data of the PAM and PWN modulation DC-INVERTER control, which allows the unit. Should the tag get lost, please ask for a duplicate tag from the compressor to modulate its performance continuously from 30% up to VOKÈRA’s Technical Service. -
Page 5: Technical Data
Technical Data Model 004 ME 006 ME 008 ME 012 ME 015 ME Performance in heating mode Nominal capacity (1) 5,76 7,16 11,86 14,46 4,07 Power consumption (1) 1,35 1,80 3,00 3,54 0,98 COP (1) 4,28 3,97 3,95 4,09 4,15 Nominal capacity (2) 5,76 7,36... -
Page 6: Performance Based On The Climatic Zone
Performance based on the climatic zone Model 004 ME 006 ME 008 ME 012 ME 015 ME Temperate zone - Average temperature (47 / 55 °C) ŋs SCOP 3,53 3,37 2,84 2,95 3,25 Pdesign 3,28 4,22 4,65 8,68 9,05 Annual consumption * kW/h 1.900 2.571... - Page 7 Operating conditions With models 004 - 006, min. outdoor air temperature must be +5°C if operating in cooling mode. For the optimum working of the heat pump when producing hot water in summer operation, outdoor air temperature should not exceed 30°C.
-
Page 8: Dimensions
Flow-rate/head diagram Flow rate (l/s) Available static pressure (kPa) 12 - 15 Dimensions Model 004 ME 006 ME 008 ME 012 ME 015 ME Overall dimensions Empty weight 1363... -
Page 9: Electrical Diagrams
Electrical diagrams Wiring of the manufacturer Transformer ---- Wiring of the installer Water pump motor Compressor motor E-HTR Electric heater Fan motor Alarm status and defrost Reversing valve (4 way) Outside air probe Temperature probe low pressure pipe Frequency Limiting Temperature probe external unit Domestic water input Temperature probe high pressure pipe... - Page 10 004 ME Control 1LWT 20CF 24CF 26CF J1.1 J5.1 J5.2 J5.3 J5.4 J5.5 J10.1 J10.2 J10.3 J10.4 J10.5 J10.6 J13.1 J13.2 J13.3 J2.1 J2.2 J2.3 J6A.1 22CF J6A.2 15CF J17.1 J6B.1 J17.2 J6B.2 16CF J6B.1 J6B.2 17CF J18.1 1PCB J18.2 18CF J15.1 J11.7...
- Page 11 006 ME Power 1P.C.BOARD CN300 CN700 1PMV CN503 THERMOSTAT FOR COMPRESSOR 10CF CN502 11CF CN501 12CF CN500 CN805 CN701 CN806 P31 P30 P03 P10 P02 1MCC1530 230V 1~ 50Hz...
- Page 12 006 ME Control 1LWT 20CF 24CF 26CF J1.1 J5.1 J5.2 J5.3 J5.4 J5.5 J10.1 J10.2 J10.3 J10.4 J10.5 J10.6 J13.1 J13.2 J13.3 J2.1 J2.2 J2.3 J6A.1 22CF J6A.2 15CF J17.1 J6B.1 J17.2 J6B.2 16CF J6B.1 J6B.2 17CF J18.1 1PCB J18.2 18CF J15.1 J11.7...
- Page 13 008 ME Power 46CF 1P.C.BOARD CN300 47CF 40CF CN700 1PMV 48CF CN503 THERMOSTAT FOR COMPRESSOR 49CF CN502 50CF CN501 41CF 51CF CN500 CN805 CN701 CN806 P31 P30 P33 P32 P10 P02 42CF 45CF 44CF 43CF 1MCC1530...
- Page 14 008 ME Control 1LWT 59CF 63CF 65CF J1.1 J5.1 J5.2 J5.3 J5.4 J5.5 J10.1 J10.2 J10.3 J10.4 J10.5 J10.6 J13.1 J13.2 J13.3 J2.1 J2.2 J2.3 J6A.1 61CF J6A.2 54CF J17.1 J6B.1 J17.2 J6B.2 55CF J6B.1 J6B.2 56CF J18.1 1PCB J18.2 57CF J15.1 J11.7...
- Page 15 012 ME Power P17 P18 CN09 CN01 CN10 1P.C.BOARD CN11 CN02 17CF CN03 CN13 CN05 CN06 CN04 11CF 14CF P R B 20CF 21CF 23CF 12CF 15CF 18CF CN01 CN04 CN800 CN03 CN600 CN605 CN604 CN601 CN700 2P.C.BOARD CN02 CN500 CN606 CN702 CN303...
- Page 16 012 ME Control 1LWT 31CF 35CF 37CF J1.1 J5.1 J5.2 J5.3 J5.4 J5.5 J10.1 J10.2 J10.3 J10.4 J10.5 J10.6 J13.1 J13.2 J13.3 J2.1 J2.2 J2.3 J6A.1 33CF J6A.2 26CF J17.1 J6B.1 J17.2 J6B.2 27CF J6B.1 J6B.2 28CF J18.1 1PCB J18.2 29CF J15.1 J11.7...
- Page 17 015 ME Power 10CM 11CM 63CF 64CF 65CF CN400 CN200 CN201 CN202 1PCB (WHITE) 75CF CN300 (WHITE) CONTROL P.C. BOARD MCC1571 66CF CN609 (BLUE) SW804 SW801 SW800 CN610 (YELLOW) SW803 67CF CN604 T25A,250V~ (WHITE) RY704 68CF CN603 (WHITE) 69CF T10A,250V~ CN602 (YELLOW) SW802...
- Page 18 015 ME Control 1LWT 83CF 87CF 89CF J1.1 J5.1 J5.2 J5.3 J5.4 J5.5 J10.1 J10.2 J10.3 J10.4 J10.5 J10.6 J13.1 J13.2 J13.3 J2.1 J2.2 J2.3 J6A.1 85CF J6A.2 78CF J17.1 J6B.1 J17.2 J6B.2 79CF J6B.1 J6B.2 80CF J18.1 2PCB J18.2 81CF J15.1 J11.7...
-
Page 19: Refrigerating Circuit
Refrigerating circuit Electronic expansion valve TS sensor TO sensor Silencer LWT sensor TD sensor / TD-Fühler 4-way valve TE sensor EWT sensor TR sensor Heat exchanger Silencer Distributor Rotary compressor Installer Product delivery Handling and transportation Preliminary instructions The unit must be handled by skilled technicians, appropriately We suggest to take the equipment out of its packaging only when it equipped and with the appropriate tools to manage the unit’s weight in has been placed in position at the installation point. - Page 20 Preliminary instructions The place of installation must be determined by the system’s designer All installers are asked to follow the Benchmark Scheme by adhe- or by an expert in the field and must take into account the technical ring to the Code of Practise, which can be obtained from www. requirements and the current standards and legislation.
-
Page 21: Hydraulic Connections
Hydraulic connections Preliminary instructions The selection and the installation of the components of the system is referred to the expertise of the installer, who must operate accor- For sealing the threads it is recommended that hemp and green ding to the rules of good technique and current Legislation. paste be used. -
Page 22: Electrical Connections
Electrical connections Connection Preliminary instructions - Punch out the connection points in the pre-cut part. - Remove the pre-cut part. The choice and installation of system components is left to the skilled installer, who shall operate pursuant to the best practices and the - Remove the hole’s cutting edges. - Page 23 012 - 015 004 - 006 - 008 Legend: Position 4 Led/Inverter diagnostics board (12ME - 15ME) LED GMC position/Diagnostic board Installation terminal strip Cable holder Strain relief...
-
Page 24: Control Panel
Control panel Placement The control panel makes it possible to carry out all necessary calibrations - Separate the control panel from the base. to allow the unit to function, and to view the main parameter values and - Mark the fastening points using the base as a template. the alarms. -
Page 25: Technical Service
Adjustment of the circulation pump Model 004 - 006 - 008 The circulation pump features a knob for adjusting the Mode with variable pressure differential head in 2 operating modes with 8 positions each. Deaeration function The factory setting is in Mode with constant pressure differential in position 8. -
Page 26: System's Drainage
% Inhibited ethylene glycol Freezing temperature (*) -4°C -9°C -15°C -23°C Capacity 0,996 0,991 0,983 0,974 Correction factor Input power 0,990 0,978 0,964 1,008 Pressure drop 1,003 1,010 1,020 1,033 (*) Note : the temperature values are approximate Always refer to the temperature values indicated for the specific model Extraordinary maintenance System’s drainage Preliminary instructions... -
Page 27: Control
Control Symbols Control panel Symbols Keys Not used ZONE Not used BLOCK System off METHOD Air temperature inside the room Up arrow ZONE Down arrow Not used Cooling mode night (Touch ‘n’ Go) Time outdoor (Touch ‘n’ Go) Outdoor temperature indoor (Touch ‘n’... -
Page 28: Functions
Functions Time slots. Setting the current date and time. The Control panel can hold up to six time slots, called periods, identified on the display as P1, P2, P3, P4, P5 and P6. Upon first use of the machine, it is necessary to set the current date and time. - Page 29 - The triangular icons are turned on. Installer configuration mode: If the settings are correct: To enter: - Push the OK key to confirm. - Push the Zone key and the Lock key concurrently for 3 seconds. - The number of the parameter starts blinking in the Time area of the screen.
- Page 30 Pre-set curves There are six available curves fro heating and two for cooling, accessible Heating through parameters 112 and 117 in the installer’s configuration table. Cooling The curves are set so as to maintain and indoor temperature of 20°C. Outdoor temperature Water temperature °C °C...
-
Page 31: Fault Signals
Adapting the heating curve. The Control Panel adapts the water’s set-point to the actual temperature See the diagrams of page 22 of this booklet for the positions of the LED in the room, as measured by the Control Panel’s user interface, so as to maintain a constant temperature in the room, for comfort and energy Code Description... - Page 32 Only for AriaPro 12 models In these models, the faults are signalled through the indicators on the inverter board and on the control panel. Before any check, make sure that the DIP micro-switches are set to off. Cycle control P.C. board LED indication LED indication Cause...
- Page 33 User feature and parameters sheet Function Parameter Description Icon Value range value Mode This parameter allows you to select the mode Current mode 0. Off 2. Cooling 3. Heating Homeantifreeze This parameter enables the ambient antifreeze option when the system antifreeze: is off: 1.
- Page 34 Table of functions and installer parameters Default Function Parameter Description Value range value value Code used to set the type of system: 1. Heat pump with fixed water temperature (clean contacts) 2. Heat pump with set-up of the climate curve (clean contacts) 3.
- Page 35 Default Function Parameter Description Value range value value Min heating water Code used to select the minimum outdoor temperature of the heating climate curve. 20°C 60°C 35°C temperature Max heating water Code used to select the maximum outdoor temperature of the heating climate curve. 20°C 60°C 55°C temperature...
- Page 36 Default Function Parameter Description Value range value value External heat source This code is used to set the outside air temperature threshold value below which only -20°C 65°C -20°C air temperature limit the external heat source will be operative as per algorithm. (Heat Pump Stop) Code used to set which temperature the control panel should display in the temperature zone.
- Page 37 AIR TO WATER HEAT PUMP COMMISSIONING CHECKLIST This Commissioning Checklist is to be completed in full by the competent person who commissioned the heat pump and associated equipment as a means of demonstrating compliance with the appropriate Building Regulations and then handed to the customer to keep for future reference. Failure to install and commission this equipment to the manufacturer’s instructions may invalidate the warranty but does not affect statutory rights.
- Page 38 Service Record It is recommended that your heating system is serviced regularly and that the appropriate Service Interval Record is completed. Service Provider Before completing the appropriate Service Interval Record below, please ensure you have carried out the service as described in the manufacturer’s instructions.
- Page 40 F 0844 391 0998 Vokèra Ireland West Court, Callan Co Kilkenny T 056 7755057 F 056 7755060 Vokèra Limited reserve the right to change specification without prior notice Consumers statutory rights are not affected. A Riello Group Company. Company Reg No: 1047779...
Need help?
Do you have a question about the Vokera AriaPRO ME Series and is the answer not in the manual?
Questions and answers