Advertisement
Available languages
Available languages
Table of Contents
- 1 Table of Contents
- 2 General Safety Precautions
- 3 Basic Description and Preparing the Installation
- 4 Assembling the D-Pro Automatic Control Unit
- 5 Hooking up the Mains Cable
- 6 Controls and Connections
- 7 Adjusting the Mechanical Limit Switches
- 8 Adjusting the Digital Limit Switches
- 9 Operating Functions
- 10 D-PRO AUTOMATIC 2.2 Kw SCHEMATIC DIAGRAM
- 11 D-PRO AUTOMATIC 2.2 Kw MOTHERBOARD
- 12 D-PRO AUTOMATIC 2.2 Kw FRONT BOARD
- 13 Technical Data - Specifications
- 14 Declaration of Conformity
- Download this manual
Industrial
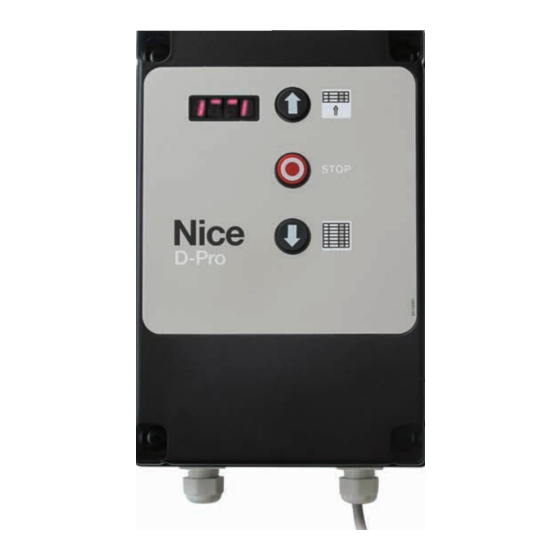
D-Pro Automatic
Control unit
EN - Instructions and warnings for installation and use
Original operating instructions in German: these operating instructions cover series R01 devices (see nameplate)
Nice S.p.A.
Via Pezza Alta, 13
31046 Oderzo TV Italy
www.niceforyou.com
info@niceforyou.com
Advertisement
Table of Contents

Related Manuals for Nice D-Pro Automatic R01 Series


Summary of Contents for Nice D-Pro Automatic R01 Series
- Page 1 Industrial D-Pro Automatic Control unit EN - Instructions and warnings for installation and use Original operating instructions in German: these operating instructions cover series R01 devices (see nameplate) Nice S.p.A. Via Pezza Alta, 13 31046 Oderzo TV Italy www.niceforyou.com info@niceforyou.com...
-
Page 3: Table Of Contents
For this reason, during installation, always strictly observe all instructions in this manual. Do not proceed with the installation if anything is unclear to you; contact Nice customer service for support. WORK SAFELY! CAUTION! – These instructions are critical to your safety. -
Page 4: Assembling The D-Pro Automatic Control Unit
Assembling the D-PRO Automatic control unit Assembling the D-PRO Automatic control unit Proceed follows when installing the control unit: 01. open the cover of the control unit's housing: slacken off the mounting bolts; 02. configure the holes for the cable clamp for the hookup and signal cables on the control unit. -
Page 5: Hooking Up The Mains Cable
10 m F: Spiral cable for safety edge A Nice spiral cable is available as accessory equipment 4 m Note 1 – If the mains cable is longer than 5 m, you must use a larger diameter. Single-phase model hookup... -
Page 6: Controls And Connections
The limit switch adjustments must be done in hold-to-run mode! white - GND/0V If using Nice cables, the terminals in question are pre-assembled. green - output Adjusting the limit switches establishes the top and bottom stop positions of brown - 12VDC the door. -
Page 7: Adjusting The Mechanical Limit Switches
100 to 103. 3 white limit switch CLOSE Hooking up a radio control unit (radio module) The 10 pin slot (OXI receiver) is used for inserting Nice OXI or OXIFM OPERA 2 red safety limit switch OPEN series receivers. -
Page 8: Adjusting The Digital Limit Switches
If the drive has been installed rotated by 180° (upside down), the door must ADJUSTING THE DIGITAL LIMIT SWITCHES nonetheless open when OPEN is pressed; if it does not, set parameter 75 to 2. The two emergency limit switches must be corrected so that they trip after the operating limit switches. -
Page 9: Operating Functions
Automatic Closing OPERATING FUNCTIONS If the automatic close function is enabled, the door closes after the time set in parameter 41 has expired with the door in the end position. Refer to the In normal operation, the display shows the parameters list. -
Page 10: D-Pro Automatic 2.2 Kw Schematic Diagram
Schematic overview - 2.2kW D-PRO Automatic 8 – English... -
Page 11: D-Pro Automatic 2.2 Kw Motherboard
Motherboard - 2.2kW D-PRO Automatic Connection for wire antenna or external antenna Connection with Select lower coax cable. OXI receiver slot sensitive edge Limit switch 1/2 OPEN terminal clamps Sensitive edge terminal clamps Controller Transit photocell board terminal clamps Key switch connector Terminal clamps N.O. -
Page 12: D-Pro Automatic 2.2 Kw Front Board
Front board - 2.2kW D-PRO Automatic Dipswitch Controller board cable OPEN button CLOSE button D-PRO housing, front view, front board with display 10 – English... -
Page 13: Technical Data - Specifications
• All the technical characteristics refer to a temperature of 20°C (±5°C). • Nice reserves the right to modify the product at its own discretion while maintaining its function and intended use. • The full user instructions are composed of the drive user instructions and the user instructions for the associated control unit. - Page 16 البيانات الفنية - المواصفات :مالحظات .ت ُ شير جميع المواصفات الفنية الموضحة إلى درجة حرارة ما بين -5 و+02 درجة مئوية • .تحتفظ نايس بحقها في إجراء جميع التعديالت التي تراها الزمة في أي وقت ٍ مع المحافظة على جميع الوظائف واالستخدام المطلوب دون تغيير •...
- Page 17 اللوحة األمامية لوحدة وحدة التحكم األوتوماتيكية دي-برو – 2,2 كيلو واط المفتاح ثنائي الجوانب ) (الفتحCLOSE زر كابل لوحة التحكم ) (اإلغالقCLOSE زر صندوق تثبيت دي-برو، الغطاء األمامي، اللوحة األمامية مزودة بشاشة عرض 10 – العربية...
- Page 18 – 2,2 كيلو واط اللوحة الرئيسية لوحدة وحدة التحكم األوتوماتيكية دي-برو اختيار الحافة توصيل هوائي سلكي أو هوائي OXI فتحة جهاز االستقبال الحساسة السفلية خارجي باستخدام كابل محوري 2/1 مفتاح نهاية الشوط الماسكات الطرفية الماسكات الطرفية للحافة الحساسة لوحة وحدة التحكم ماسكات...
- Page 19 – 2,2 كيلو واط نظرة عامة على مخطط وحدة التحكم األوتوماتيكية دي-برو 8 – العربية...
- Page 20 ١ ٢ ٣ ٤ اإلغالق األوتوماتيكي وظائف التشغيل عند تفعيل خاصية اإلغالق األوتوماتيكي، ي ُغلق الباب بعد انتهاء الوقت ال م ُحدد للمعامل 14 مع ضبط الباب على الوضع النهائي. ارجع إلى قائمة المعامالت. يساعد تنشيط خاصية اإليقاف على إيقاف الباب أثناء إغالقه في...
- Page 21 ضبط مفاتيح نهاية الشوط الرقمية .يجب تصحيح مفاتيح نهاية الشوط في حاالت الطوارئ لتشغيلها بعد مفاتيح نهاية الشوط ال م ُدارة المحرك السلك األمر :ضبط األوضاع الطرفية X2 - J11/U لهذا الغرض، اضبط المفتاح ثنائي الجوانب رقم 4 على وضع ﺗﺸﻐﻴﻞ...
- Page 22 مفتاح األمان لنهاية الشوط فتح 2 أحمر OXI OPERS أوNice OXI ) في إدخال المستقبالت طرازOXI ت ُ ستخدم فتحة بـ 01 ثقوب (جهاز استقبال 1 أخضر مفتاح نهاية الشوط فتح . الجزء الداخلي لصندوق التثبيتled/وأثناء هذه العملية، يجب أن يواجه جانب زر البرمجة...
- Page 23 J34 J35 J29 8.2k l opto 8.2k l opto RS485 وﺣﺪة اﻟﺘﺮﻣﻴﺰ ﻫﻮاﺋﻲ / ٨٫٢ kOhm ﺑﺼﺮي . "الجهاز البصري" = جاهزة لالستخدام مع الحافة البصريةOpto بـJ1 ضبط وصلة العبور ضبط مفاتيح نهاية الشوط – معلومات عامة عند تثبيت الحافة الحساسة باألرض، ت ُ حيد وظيفة التحويل العكسي عن طريق توصيل مفتاح نهاية الشوط )،...
- Page 24 )2 الجدول 1 - المواصفات الفنية للكابالت الكهربائية (الشكل الحد األقصى للطول نوع الكابل التوصيل )1 1 متر (المالحظة رقم 2محرك < 5,1 كيلو واط، 5 × 57,0 ملم CEE أ: الكابل الرئيسي المزود بموصل 2محرك > 5,1 كيلو واط، 5 × 5,1 ملم 5 –...
- Page 25 تجميع وحدة التحكم األوتوماتيكية دي-برو تجميع وحدة التحكم األوتوماتيكية دي-برو :يجب اتباع اآلتي عند تركيب وحدة التحكم .10 افتح غطاء صندوق تثبيت وحدة التحكم، وفك مسامير التثبيت .20 جهز فتحات لماسكات كابالت التوصيل وكابالت اإلشارة فوق وحدة التحكم ،ولهذا الغرض وللحفاظ على تصنيف آي بي الخاص بالوحدة، يجب عليك استخدام أدوات خاصة (مسمار...
- Page 26 - ال تغمر وحدة التحكم أو النظام في الماء أو أي سوائل أخرى أثناء التركيب. وال تسمح للسوائل بالوصول العربية .إلى النظام أثناء التركيب .- يجب التخلص من مواد تعبئة نظام الدفع وفق ً ا للوائح المحلية تعليمات المستخدم األصلي بالعربية .تنبيه! احتفظ...
- Page 28 Industrial D-Pro Automatic Control unit Original operating instructions in German: these operating instructions cover series R01 devices (see nameplate) Nice S.p.A. Via Pezza Alta, 13 31046 Oderzo TV Italy www.niceforyou.com info@niceforyou.com...
Need help?
Do you have a question about the D-Pro Automatic R01 Series and is the answer not in the manual?
Questions and answers
What does a flashing F and 08 mean