Nice robo, thor, smxi Manual
- Instructions and warnings (88 pages) ,
- Instructions and warnings for the fitter (15 pages) ,
- Original instructions manual and parts (12 pages)
Advertisement

- This manual has been especially written for use by qualified fitters. No information given in this manual can be considered as being of interest to end users!
The control unit has been designed to control electromechanical actuators for automated swing gates ar doors; any other use is considered improper and is consequently forbidden by current laws.
Do not install the unit before you have read all the instructions at least once.
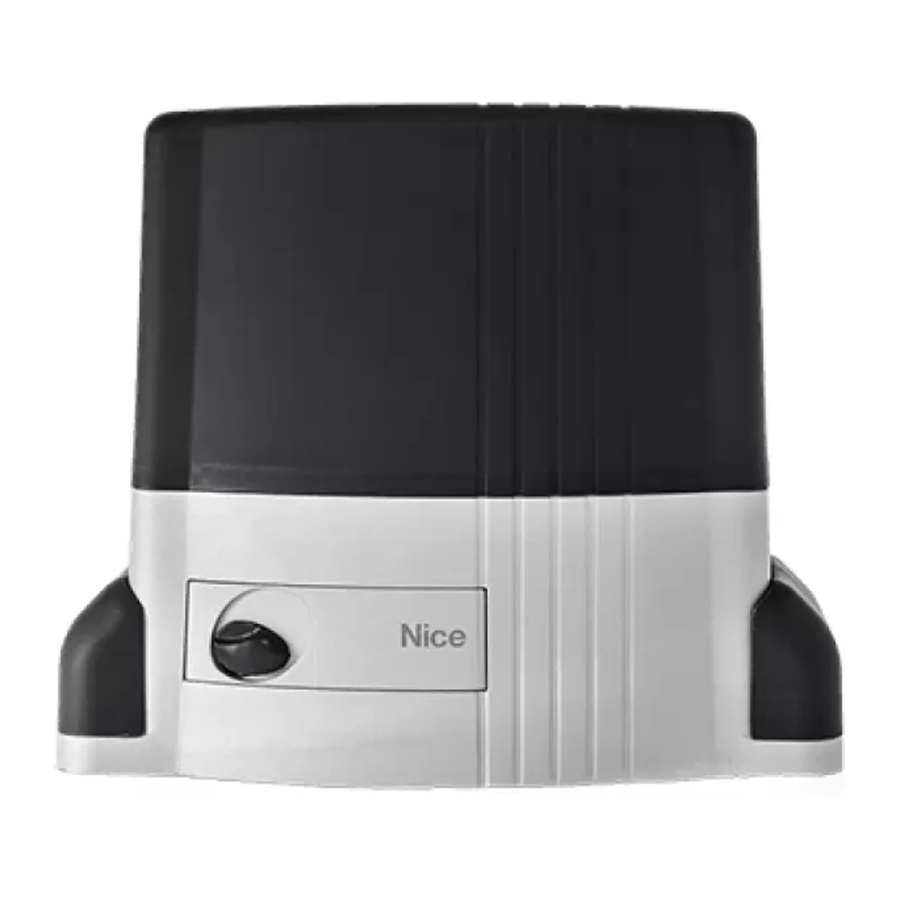
Description of the product:
This gate and door automation unit controls gearmotors with single-phase alternating current. It also features a series of functions that can be selected by Dip- Switch (mini-switches) and adjustments performed by Trimmers.
The control unit features input status Led's located near such inputs, while another Led near the microprocessor indicates that the internal logic works correctly. To make it easier to recognise the various parts, fig.1 shows the main components.

- Terminal board for aerial
- Function selection Dip-Switch
- Step by step button
- Working Time TL adjustment trimmer
- Pause Time Tp adjustment Trimmer
- Input/output control terminal board
- Limit switch input connector
- Flashing light / courtesy light output terminal board.
- Capacitor Connector
- Motor power output connector
- Power input terminal board
- Courtesy light mode selector
- Radio slot
- Microprocessor
- Low voltage rapid fuse (315mA F)
- Force adjustment trimmer (F)
- OK Led
- Transformer
- Triac Open
- Triac Close
- "Common" relay
- "Courtesy light" relay
- Line fuse (5A F)
 If you need to replace a fuse, be careful to use one of the same type and having identical characteristics: Dimensions (5x20), rated current (e.g. 5A), blowout characteristics (T=delayed, F=quick), maximum voltage and breaking capacity.
Installation
Automatic gate and door systems may only be installed by qualified fitters in the full respect of the law. Comply with the warnings shown in the "Warnings for fitters" file.
Typical system layout
In order to explain certain terms and aspects of an automatic door or gate system, we will now illustrate a typical system layout.

- Pair of photocells
- Flashing lamp
- Keylock selector
- Sensitive edge
In particular, please note that:
- All the photocells produced by NICE feature the synchronisation system which eliminates the problem of interference between two pairs of photocells (please consult the photocell instructions for further details).
- The "Photo" pair of photocells have no effect during opening while they reverse movement during closing.
- The triggering of the sensitive edge connected to the "ALT" input causes an immediate stop and a short reverse run.
Electrical connections
To safeguard the operator and avoid damaging the components while you are wiring or plugging in the various cards: under no circumstances may the unit be electrically powered.
- Power the unit using a 3 x 1,5mm2 cable: should the distance between the unit and the earth connection exceed 30m, install an earth plate near the unit.
- Use wires with a minimum cross-section of 0.25mm2 to connect low voltage safety circuits.
- Use shielded wires if the length exceeds 30m and only connect the earth braid to the control unit side.
- Do not make connections to cables in buried boxes even if they are completely watertight.
- If the inputs of the Normally Closed (NC) contacts are not used they should be jumped with the "24V common" terminal except for the photocell inputs if the phototest function is enabled, for further information please see the "Phototest" paragraph.
- If there is more than one (NC) contact on the same input, they must be connected in SERIES.
- If the inputs of the Normally Open (NA) contacts are not used they should be left free.
- If there is more than one (NA) contact on the same input, they must be connected in Parallel.
- The contacts must be mechanical and potential-free; no stage connections are allowed, such as those defined as "PNP", "NPN", "Open Collector" etc.
Electrical diagram

Description of connections
A brief description of the possible control unit output connections follows.
| Terminals | Functions | Description |
| 1-2-3: | Power input | = Mains power Line |
| 4 - 5: | Flashing light | = Output for connecting flashing light to mains voltage (Max. 40W) |
| 6 – 7: | Courtesy light | = Clean contact output for courtesy light connection ( Max. 5A) |
| 8 - 9: | 24 Vac | = 24Vac output to 24Vac +/- 25% services (Max. 150mA) |
| 9: | Common | = Common for all inputs |
| 10: | Phototest | = Phototest output ("TX" power supply to photocells) Max. 50mA |
| 11: | Stop | = Input with "Stop" function (Stop and short reverse run) |
| 12: | Photo | = Input for safety devices |
| 13: | Step by step (PP) | = Input for cyclic functioning ("Open" – "Stop" – "Close" – "Stop") |
 : : | Aerial | = Input for the radio receiver aerial |
Phototest
Phototest" is the best possible solution for safety devices in terms of reliability and it puts the control unit and safety photocells in "category 2" according to UNI EN 954-1 standard (ed. 12/1998). Before every manoeuvre is begun, the relative safety devices are checked and only if everything is in order will the manoeuvre start. Should the test be unsuccessful (the photocell is blinded by the sun, cables have short circuited, etc.) the failure is identified and the manoeuvre is not carried out. To obtain the Phototest function:

- Set Dip-Switch 10 to ON
- Connect the two photocells as shown in fig. 4a (when using a single pair of photocells) or as shown in fig. 4b (when using two pairs of photocells), where the power supply for the photocell transmitters is not taken directly from the service output but from the "Phototest" output between the terminals (8-10). The maximum current available at the "Phototest" output is 50mA (2 pairs of Nice TX)
- Power the receivers directly from the service output of the control unit (terminals 8-9).
When using 2 pairs of photocells which may interfere with each other, activate the synchronisation function as described in the photocell instructions.
 If at a later time the Phototest function is no longer required, set Dip- Switch 10 to the OFF position.
The photocells are tested as follows: when movement is required, it is first checked that all the receivers involved in the movement give their consent, then power to the transmitters is disconnected after which it is checked that all the receivers signal the fact by removing their consent; the transmitters are then powered and the consent of all the receivers is verified once more. Only if this sequence is successfully carried out will the manoeuvre be performed.
Checking connections
The following operations entail working on live circuits; most of these run on extra-low safety voltage so they are not dangerous but some are contain mains voltage which means they are HIGHLY DANGEROUS!
Pay the greatest of attention to what you are doing and NEVER WORK ALONE!
- Power the unit and check that voltage between terminals 8-9 is approx. 24Vac.
- Check that the "OK" Led flashes rapidly for a few moments and then that it flashes at a regular frequency.
- Now check that the Led's relative to the N.C. (Normally Closed) contacts are on (all safety devices active) and that the Led's relative to the N.A. (Normally Open) inputs are off (no command present); if this is not the case, check the connections of the various devices and make sure they are in good working order. The STOP input switches off both FCA and FCC.
- Make sure the limit switches are connected properly; move the limit switch lever and check that the relative limit switch cuts in and switches off the relative Led on the control unit.
- Release the leaf, take it to the halfway point and then block it; it is now free to move in either the opening or closing direction.
- Now make sure that movement occurs in the right direction, that is, see whether the movement set on the unit corresponds to that of the leafs. This check is of paramount importance, if the direction is wrong, in some cases (in the "Semiautomatic" mode, for instance) the "Automatic" system might appear to be working properly; in fact, the "Open" cycle is similar to the "Close" cycle but with one basic difference: the safety devices are ignored in the closing manoeuvre which is normally the most dangerous, and they will trigger in the opening manoeuvre causing the gate to close against the obstacle with disastrous results!
- To see whether or not the direction of rotation is correct, give a short pulse to the Step-by-Step (PP) input; the first manoeuvre the unit will carry out after being powered is always an "Open" one, so simply verify that the automatic system moves in the opening direction; if this movement is incorrect, proceed as follows:
- Turn the power off
- Turn the motor and the limit switch power connectors 180°. (Ref. "L" and Ref. "G" of fig.1)
- Once this has been done, check whether the direction of rotation is now correct by repeating previous point.
The "OK" Led located in the centre of the board has the task of signalling the status of the internal logic: regular flashing at 1 second intervals indicates that the internal microprocessor is active and waiting for commands. When the microprocessor recognises a variation in the state of an input (whether it is a command or a function Dip-Switch input) it generates a rapid double flash even if the variation does not have any immediate effect. Extremely rapid flashing for 3 s means that the control unit has just been powered or is carrying out internal testing. Irregular flashing, lastly, means that the test has been unsuccessful and that a fault has occurred.
Adjustments
Adjustments can be made with the trimmers that modify the following parameters:
Working time (TL):
Adjusts the maximum duration of the opening or closing manoeuvre.
To adjust the working time TL, select the "Semiautomatic" operating mode by moving Dip-Switch 1 to ON and adjust the TL trimmer to halfway along the travel distance. Then run a complete opening cycle followed by a complete closing cycle and readjust the TL trimmer in order to leave enough time for the whole manoeuvre plus a margin of about 2 to 3 s.
If the trimmer is at maximum and there still is not enough time, cut the TLM jumper on the printed circuit near the TL trimmer, in order to provide more working time. If you wish to use the deceleration function, adjust the Trimmer so that the deceleration stage starts 50 - 70cm before the limit switch is triggered. The modification of the working time will be effective starting with the next opening manoeuvre.
Pause Time (TP):
In the "Automatic" mode, this adjusts the delay between the end of the opening manoeuvre and the beginning of the closing manoeuvre.
To adjust Pause Time TP, select the "Automatic" operating mode by moving Dip-Switch 2 to ON and adjust the TP trimmer as required.
Then carry out an opening manoeuvre and check the time elapsed before "Automatic" closing manoeuvre.

Force (F):
Take great care when adjusting the Force (F) trimmer as this may affect the level of safety of the automatic system. Trial by error is required to adjust this parameter, measuring the force applied to the leaf and comparing it with regulatory values.
Testing
After the above checks and adjustments, the system can now be tested.
The automation system must be tested by qualified and expert personnel who must establish what tests to perform according to the relative risk.
Testing is the most important part of the whole installation phase. Each single component, e.g. the gearmotor, emergency stop, photocells, etc., may require a specific test phase; please follow the procedures shown in the respective instructions manuals.
To test the control unit, perform the following operations:
- Function selection:
- Set Dip-Switch 1 to ON ("Semiautomatic" operation)
- Set all the other Dip-Switches to OFF
- Press the "Step-by-Step" button and check that:
- An opening manoeuvre starts
- The flashing lamp activates
- The movement stops when the opening limit switch FCA is reached.
- Press the "Step-by-Step" button again and check that:
- A closing manoeuvre starts
- The flashing lamp activates
- The movement stops when the closing limit switch FCC is reached CC
- Start an opening manoeuvre and check that during the manoeuvre the triggering of a device:
- Connected to the "Stop" input causes an immediate stop and a short reverse run
- Connected to the "Photo" input stops and reverses the manoeuvre
- Start a closing manoeuvre and check that during the manoeuvre the cut-in of a device:
- Connected to the "Stop" input causes an immediate stop and a short reverse run
- Connected to the "Photo" input stops and reverses the manoeuvre
- Press the "Step-by-Step" button and make sure that each activation of the input generates a step in the following sequence: • "Open" – "Stop" – "Close" – "Stop"
- If the "Phototest" function is used, check the test is efficient:
- Interrupt the "Photo" photocell, then start a manoeuvre and check this is not performed
- Short the "Photo" photocell contact, then start a manoeuvre and check this is not performed.
- Perform the tests for detecting Impact Forces as required by EN 12445.
If further functions are activated after testing has finished that could reduce the safety of the system, specific testing of these functions must be performed.
Operating modes
In the manual operating mode, the "Step-by-Step" input enables an alternating closing and opening manoeuvre.
Movement stops as soon as the input command stops. During an opening or closing manoeuvre, movement will stop also when the limit switches are triggered; moreover, during a closing manoeuvre, movement will stop also if the "Photocell" enable signal fails. During both opening and closing manoeuvres, the activation of the "ALT" command will always cause an immediate stopping of movement and a short reverse run. When a movement is stopped, stop the input command before giving a command to start a new movement. When one of the automatic functioning modes ("Semiautomatic", "Automatic" o "Close Always") is operational, a command impulse to the "Step by step" input begins an alternating closing and opening manoeuvre. A second impulse to the "Step by step" will cause it to stop.
Both in the opening and closing phases, the activation of the "ALT" command will cause an immediate stopping of movement and a short reverse run.
If an automatic functioning mode has been chosen, the opening manoeuvre will be followed by a pause and then a closing manoeuvre. If "Photocell" triggers during the pause, the timer will be reset with a new pause time; if, on the other hand, there is a "Stop" during the pause, the closing function will be cancelled and the system will "Stop".
Nothing will happen if "Photocell" triggers during an opening manoeuvre; if "Photocell" triggers during a closing manoeuvre, this will invert the direction of movement followed by a pause and then a closing manoeuvre.
Programmable functions
The unit features a set of microswitches used to operate various functions so as to make the system more suitable to user needs and safer in various conditions of use. All the functions can be activated by moving the relative Dip-Switch to the "On" position and deactivated by moving them to "Off".
Some of the programmable functions are linked to safety aspects; carefully evaluate the effects of a function and see which gives the highest possible level of safety.

Use the Dip-Switches to select the various operating modes and add the functions required according to this table:
| Switch 1-2: | Off-Off | = "Manual" movement (i.e.: man Present) |
| On -Off | = "Semiautomatic" movement | |
| Off-On | = Automatic" movement (i.e.: automatic closing | |
| On -On | = "Automatic + always "Closes" movement | |
| Switch 3: | On | = Condominium operating mode <not available in the manual mode> |
| Switch 4: | On | = Pre-flashing |
| Switch 5: | On | = Close 5" after "Photo" < in "Automatic" > or "Close" after Photo <in "Semiautomatic" > |
| Switch 6: | On | = "Photo" safety also in opening |
| Switch 7: | On | = Gradual departure |
| Switch 8: | On | = Deceleration |
| Switch 9: | On | = Brake |
| Switch 10: | On | = Phototest |
| Selector switch JP1: | = Courtesy light in impulse mode | |
Description of functions
Here is a brief description of the functions that can be added by moving the relative Dip-Switch to "ON".
| Switch 1-2: | Off-Off | = "Manual" movement (man present) |
| On-Off | = "Semiautomatic" movement | |
| Off-On | = "Automatic" movement (automatic closing) | |
| On-On | = "Automatic + Always Closes" movement |
In the "Manual" operating mode, the gate will only move as long as the relative control button is held down.
In the "Semiautomatic" operating mode a command impulse will perform the whole movement until the Working Time limit expires or the mechanical stop is reached. In the "Automatic" operating mode, an opening manoeuvre is followed by a pause and then an automatic closing manoeuvre.
The "Always Closes" function comes into play following a power failure; if the gate is open, a closing manoeuvre takes place, automatically preceded by 5 seconds of pre-flashing.
Switch 3: On = Condominium operating mode (not available in the Manual mode)
In the Condominium operating mode, once an opening manoeuvre has started it cannot be interrupted by other command pulses on "Stepby-Step" until the gate has finished opening.
During a closing manoeuvre, a new command pulse will stop the gate and reverse the direction of movement in order to open the gate.
Switch 4: On = Pre-flashing
A command impulse activates the flashing lamp followed by movement 5 s later (2 s later in the manual mode).
Switch 5: On = "Close" 5 s. after Photo <in the "Automatic" mode > or "Close" after Photo <in the "Semiautomatic" mode >
This function, if in the "Automatic" mode, allows the gate to be kept open only for the time required for transit; when "Photo" finishes, the manoeuvre stops. After 5 s a closing manoeuvre will automatically begin. If "Photo" triggers in the "Semiautomatic" mode during a closing manoeuvre the "Automatic" closing manoeuvre is activated with the adjusted pause time.
Switch 6: On = Safety "Photo" also during the opening manoeuvre
The "Photo" safety device is normally just active during the closing manoeuvre; if Dip-Switch 6 is turned "On" the safety device will also trigger during the opening manoeuvre.
In the "Semiautomatic" or "Automatic" modes, the opening manoeuvre will start again immediately after the photocell has been disengaged.
Switch 7: On = Gradual departure
Starts the manoeuvre gradually, preventing the automatic system from being jolted.
Switch 8: On = Deceleration
Deceleration reduces speed to 30% of rated speed in order to limit the force of the impact in the gate's opening and closing areas.
Once the deceleration function has been activated, it will be necessary to adjust the Working Time Trimmer (TL), since the starting of deceleration is connected with the established working time. Therefore, adjust the working time to ensure that deceleration starts approximately 50-70 cm before the triggering of the limit switch.
 As well as reducing the speed of the manoeuvre, the deceleration function also reduces motor torque by 70%. For systems requiring elevated torque, this decrease may cause the motor to stop immediately.
Switch 9: On = Brake
At the end of the movement a motor brake procedure is performed, initially slight and then more incisive in order to stop the gate rapidly but without jolts.
Switch 10: On = Phototest
This function controls photocell efficiency at the beginning of each manoeuvre. See the "Phototest" chapter.
Courtesy light in impulse mode:
In this mode, the clean contact of the courtesy light output will remain closed for 1 sec. at the starting of each opening or closing manoeuvre, thus enabling a command impulse to be sent to an external timer.

Courtesy light in standard mode:
In this mode, the clean contact of the courtesy light output will remain closed for as long as required by the opening or closing manoeuvre, plus an additional 60 seconds.
How to...
Connect two control units on opposing leaves:
To create an automation system working with 2 opposing leaves:
- Use two motors with the control units connected as indicated in fig.5.

- Connect the flashing light end the "Gate Open Indicator" to any one of the two control units..
- The inputs must be connected in parallel.

- The "Common" of the inputs can be connected to one of the 2 control units.
- Connect the 0Volts (Terminal 8) of the two control units.i.
- The "Phototest" function must not be used.
- The "Condominium" function (Dip-Switch 3) should be fitted as this allows the leaves to be resynchronised if the 2 control units become unsynchronised.
Connect a "gate open" warning light:

Accessories
"RADIO" Card
The control unit features a connector for plugging in a radio card SMXI, which activates the "Step-by-Step" and "Stop" input and allows the control unit to be remote-controlled with a transmitter.
| output 1 | Step by Step |
| output 2 | STOP |
| output 3 | not used |
| output 4 | not used |
Maintenance
The control unit, being electronic, needs no particular maintenance. However, periodically make sure (at least once every six months) that the device adjusting motor force is in perfect working order; adjust with the trimmer if necessary.
Carry out the whole test phase again to check that the limit switches, safety devices (photocells, pneumatic edges, etc.) and the flashing light are in perfect working order.
What to do if....
This section will help fitters to solve some of the most common problems that may arise during installation.
No LED is on
- Check whether the control unit is powered (check mains voltage is present at terminals 1-2 and a voltage of approx. 24 Vac at terminals 8-9)
- Check the 2 mains fuses have not blown; if none of the Led's is on a serious fault has probably occurred and the control unit should therefore be replaced.
The OK LED flashes regularly but the INPUT Led's do not reflect the state of the respective inputs
- Carefully check the connections on input terminals 8÷13.
The manoeuvre does not start
- Check that the Led's of the "Stop" (FCA + FCC) and "Photo" safety device are on and that the relative command Led that is activated ("Step-by-Step") remains on for the whole duration of the command.
The gate changes direction during a manoeuvre
An inversion is caused by:
- The photocell triggering ("Photo" during the closing manoeuvre); in this case, check the connections of the photocells and check the input Led's.
Technical specifications
| Mains power input | 230 Vac 50/60 Hz |
| Versions /V1 | 120 Vac 50/60 Hz |
| Max. current for 24V services | 200mA (the voltage may vary ± 25%) |
| Flashing lamp output | For flashing lamps at mains voltage, maximum power 40 W |
| Courtesy light output | Clean contact max. 5A |
| Operating temperature | -20 ÷ 70°C |
| Working Time | Adjustable from 2.5 to > 40 s., or from < 40 to > 80 s. with TLM |
| Pause Time | Adjustable from 5 to > 80 s |
SMXI
Description of the product
The special thing about this type of radio receiver is that the recognition code is different for each transmitter (it also changes every time it is used).
Therefore, in order to allow the receiver to recognise a determined transmitter, the recognition code must be memorised. This operation must repeated for each transmitter required to communicate with the control unit.
 Up to a maximum of 256 transmitters can be memorised in the receiver. No one transmitter can be cancelled; all the codes must be deleted.
During the transmitter code memorisation phase, one of these options may be chosen:
Mode I. Each transmitter button activates the corresponding output in the receiver, that is, button 1 activates output 1, button 2 activates output 2, and so on. In this case there is a single memorisation phase for each transmitter; during this phase, it doesn't matter which button is pressed and just one memory sector is occupied.
Mode II. Each transmitter button can be associated with a particular output in the receiver, e.g., button 1 activates output 2, button 2 activates output 1, and so on. In this case, the transmitter must be memorised, pressing the required button, for each output to activate. Naturally, each button can activate just one output while the same output can be activated by more than one button. One memory section is occupied for each button.
Installing the aerial
The receiver requires an ABF or ABFKIT type aerial to work properly; without an aerial the range is limited to just a few metres. The aerial must be installed as high as possible; if there are metal or reinforced concrete structures nearby you can install the aerial on top. If the cable supplied with the aerial is too short, use a coaxial cable with 50- Ohm impedance (e.g. low dispersion RG58), the cable must be no longer than 10 m.
If the aerial is installed in a place that is not connected to earth (masonry structures), the braid's terminal can be earthed to provide a larger range of action. The earth point must, of course, be local and of good quality. If an ABF or ABFKIT aerial cannot be installed, you can get quite good results using the length of wire supplied with the receiver as the aerial, laying it flat.
Memorising a remote control
When the memorisation phase is activated, any transmitter correctly recognised within the reception range of the radio is memorised. Consider this aspect with care and remove the aerial if necessary to reduce the capacity of the receiver.
The procedures for memorising the remote controls must be performed within a certain time limit; please read and understand the whole procedure before starting. In order to carry out the following procedure, it is necessary to use the button located on the box of the radio receiver (reference A, Fig. 1b), and the corresponding LED (reference B, Fig. 1b) to the left of the button.

| Table "B1" | Mode I memorising (each button activates the corresponding output in the receiver) | Example |
| 1. | Press and hold down the receiver button for at least 3 seconds |  |
| 2. | Release the button when the Led lights up |  |
| 3. | Within 10 seconds press the 1st button on the transmitter to be memorised, holding it down for at least 2 seconds |  |
| N.B.: If the procedure was memorised correctly, the Led on the receiver will flash 3 times. If there are other transmitters to memorise, repeat step 3 within another 10 seconds The memorisation phase finishes if no new codes are received for 10 seconds. |  | |
| Table "B2" | Mode II memorising (each button can be associated with a particular output) | Example |
| 1. | Press and release the receiver button as many times as the number of the desired output (twice for output no. 2) |  |
| 2. | Make sure the Led flashes as many times as the number of the desired output (2 flashes for output no. 2). |  |
| 3. | Within 10 seconds press the desired button on the transmitter to be memorised, holding it down for at least 2 seconds. |  |
| N.B.: If the procedure was memorised correctly, the Led on the receiver will flash 3 times. If there are other transmitters to memorise, repeat step 3 within another 10 seconds The memorisation phase finishes if no new codes are received for 10 seconds. |  | |
Remote memorising
It is possible to enter a new transmitter in the receiver memory without using the keypad. A previously memorised and operational remote control must be available. The new transmitter will "inherit" the characteristics of the previously memorised one. Therefore, if the first transmitter is memorised in mode I, the new one will also be memorised in mode I and any of the buttons of the transmitter can be pressed. If the first transmitter is memorised in mode II the new one will also be memorised in mode II but the button activating the required output must be pressed on the first transmitter as must the button required to be memorised on the second. You need to read all the instructions in advance so you can perform the operations in sequence without interruptions. Now, with the two remote controls (the NEW one requiring code memorisation and the OLD one that is already memorised), position yourself within the operating range of the radio controls (within maximum range) and carry out the instructions listed in the table.
| Table "B3" | Remote Memorising | Example |
| 1. | Press the button on the NEW transmitter for at least 5 seconds and then release |  |
| 2. | Press the button on the OLD transmitter 3 times slowly |  |
| 3. | TX Press the button on the NEW transmitter slowly and then release |  |
| N.B.: If there are other transmitters to memorise, repeat the above steps for each new transmitter | ||
Deleting all transmitters
All the memorised codes can be deleted as follows:
| Table "B4" | Deleting all transmitters | Example |
| 1. | Press the receiver button and hold it down |  |
| 2. | Wait for the Led to light up, then wait for it to switch off and then wait for it to flash 3 times |  |
| 3. | Release the button exactly during the third flash |  |
| N.B.: if the procedure was performed correctly, the Led will flash 5 times after a few moments. |  | |
Technical characteristics
| Receivers | |||||
| SMXI | SMXIS | SMXIF | |||
| Decoding | Rolling code 52 bit FLOR | Rolling code 64 bit SMILO | 1024 FLO combinations | ||
| Frequency | 433.92MHz | ||||
| Input impedance | 52ohm | ||||
| Outputs | 4 (on connector SMXI) | ||||
| Sensitivity | better than 0.5µV | ||||
| Working temp. | -10°C ÷ + 55°CC | ||||
| Transmitters | |||||
| FLOR | VERY VR | FLO | VERY VE | SMILO | |
| Buttons | 1 – 2 - 4 | 2 | 1 – 2 - 4 | 2 | 2 - 4 |
| Power input | 12Vdc Batt. 23A | 6Vdc lithium batt. | 12Vdc Batt. 23° | 6Vdc lithium batt. | 12Vdc Batt. 23A |
| Absorption | 10mA | 10mA | 15mA | 10mA | 25mA |
| Frequency | 433.92MHz | ||||
| Working temp. | -40°C ÷ + 85°C | ||||
| Radiated power | 100µW | ||||
Documents / ResourcesDownload manual
Here you can download full pdf version of manual, it may contain additional safety instructions, warranty information, FCC rules, etc.
Advertisement


Need help?
Do you have a question about the robo and is the answer not in the manual?
Questions and answers