
Related Manuals for MuxLab Profidigital 500445


Summary of Contents for MuxLab Profidigital 500445
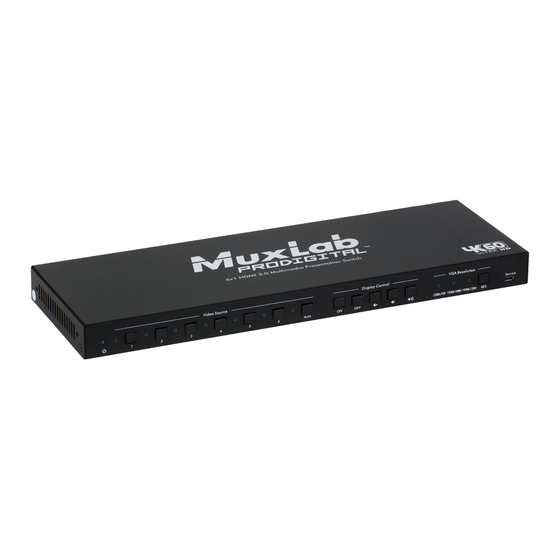
- Page 1 6x1 HDMI Multimedia Presentation Switch Installation Guide 500445 © MuxLab Inc. 2019 94-000915-A / SE-000915-A...
- Page 2 Unpack the equipment carefully and save the original box and packing material for possible future shipment NOTICE: Please read this user manual carefully before using this product. The “far-end” item is the device (e.g. display device, 3 party RS232 device etc.) connected via the 500445. © MuxLab Inc. 2019...
-
Page 3: Table Of Contents
5.2.4 RS232 Communication Commands ............15 6. Web Interface ......................21 6.1 Switching page ....................21 6.2 Display control page ..................22 6.3 Audio page....................... 23 6.4 EDID page ....................... 24 6.5 RS232 page ..................... 24 6.6 Interface page ....................25 © MuxLab Inc. 2019... - Page 4 6x1 HDMI Multimedia Presentation Switch Installation Guide 6.7 Access page ....................26 6.8 Network page ....................26 6.9 Upgrading page ....................27 7. Panel Drawing ......................28 8. Troubleshooting & Maintenance ................29 9. Regulatory Compliance..................... 31 © MuxLab Inc. 2019...
-
Page 5: Introduction
Controllable via “Auto” mode, and manually via push button, IP, RS232 and IR Firmware may be updated over the LAN port 1.3 Package Contents One (1) 6x1 HDMI Multimedia Presentation Switch Two (2) Mounting brackets Four (4) Plastic cushions © MuxLab Inc. 2019... -
Page 6: Specification
Four (4) HDMI connectors; Three (3) Inputs and One (1) Output. One (1) DisplayPort connector (input). One (1) USB Type-C connector (input). One (1) 15 Pin VGA connector (Input). One (1) RJ45 for LAN unit control and firmware updates. © MuxLab Inc. 2019... - Page 7 Humidity: Up to 90% non-condensing Enclosure Metal Dimensions 13.4” x 1.02” x 4.52” (342.5mm x 26mm x 115mm) Weight 14.59lb (620g) Compliance Regulatory: FCC, CE, RoHS Warranty 2 years Order Information 500445 HDMI 2.0 Multimedia Presentation Switch © MuxLab Inc. 2019...
-
Page 8: Panel Description
When the VGA input is selected, press RES repeatedly can set the VGA resolution to 1280x720, 1920x1080 or 1920x1200. The three LEDs illuminate green to indicate the VGA resolution is selected. Micro-USB port for firmware upgrade © MuxLab Inc. 2019... -
Page 9: The 500445 Rear Panel
DC barrel port for power adapter connection 4. System Connection 4.1 Safety Precautions 1) System should be installed in a clean environment with temperature and humidity within the operating levels. 2) All devices should be connected before power on. © MuxLab Inc. 2019... -
Page 10: System Diagram
There are two modes available: auto and manual switching. In manual model you may select a video source by pressing one of the six buttons. If a valid source is detected the LED will illuminate green. Auto Mode LED must be off. © MuxLab Inc. 2019... -
Page 11: Automatic Switching Operation
Input 2 to output when power is restored. 5.1.3 Adjusting the Volume When not in OSD menu, press VOL – to decrease line volume, VOL + to increase line volume; press MIC – to decrease MIC volume, MIC + to increase MIC volume. © MuxLab Inc. 2019... -
Page 12: Display Control
1080p60Hz RGB 4:4:4 12 bit Stereo audio 0100 1080p60Hz RGB 4:4:4 12 bit High Definition Audio 0101 3840x2160p60Hz RGB 4:2:0 12bit Stereo Audio 0110 3840x2160p60Hz RGB 4:2:0 12bit High Definition Audio 0111 3840x2160@60Hz HDR Stereo Audio © MuxLab Inc. 2019... - Page 13 User defined 2 1101 User defined 3 1110 User defined 4 1111 Enable GUI or RS232 EDID management Note Stereo Audio: LPCM 2Ch High Definition Audio: LPCM 8Ch, AC 3 6 Ch, DTS 5.1, Dolby Digital 5.1 © MuxLab Inc. 2019...
-
Page 14: Ir Remote
,,, : UP/DOWN/LEFT/ RIGHT buttons, for value setting or page-turn. Exit Power On/Off OK: confirm button. 4. VGA Resolution buttons Select resolution by pressing the corresponding button. Display buttons Power On/Off Mute/unmute audio Lower Audio volume Increase Audio Volume © MuxLab Inc. 2019... -
Page 15: Operation Of Rs232 Control
SETGUIIP:192.168.0.178. Set GUI IP to [xxx.xxx.xxx.xxx] [xxx.xxx.xxx.xxx] Feedback: SETGUIIP:192.168.0.178! GUI/RS232 QUERY STATUS! SCU61E VERSION V1.0.0 POWER ON! Report system status FRONT PANEL UNLOCK! HDMI OUT SWITCH TO AUTO MODE! HDMI OUT SWITCH TO 2! DIP0000! 5 © MuxLab Inc. 2019... - Page 16 HDMI Out switch to 5 HDMI6 Switch to HDMI input 6 HDMI Out switch to 6 HDMIA Enable auto switching mode HDMI Out switch to auto HDMIA Enable manual switching mode HDMI Out switch to manual © MuxLab Inc. 2019...
- Page 17 EDID Managements Commands Read the preset EDID. [xxxx] EDID_0001! EDIDR[xxxx] represents the 4-pin DIP switch … status Invoke the preset EDID. [xxxx] EDIDUSE0001! EDIDUSE[xxxx] represents the 4-pin DIP switch EDID_RS232&GUI_MODE! status EDID0001! User-define EDID Commands © MuxLab Inc. 2019...
- Page 18 CEC TV volume decrease! TVMUTE Mute/unmute the display CEC TV volume mute/unmute! CEC Commands If the input sources and display support CEC, they can be controlled by sending the below commands to replace IR remote. © MuxLab Inc. 2019...
- Page 19 /-3:1A 2A 3A 4A The “B” represents the baud rate Send the HEX command “1A /-[B]:xx xx xx of third party device. 2A 3A 4A” to the third-party B=1, the baud rate is 2400 whose baud rate is 9600 © MuxLab Inc. 2019...
- Page 20 CMDON/-[B]:xx Send HEX command “xx xx xx” CMDON/-3:1A 2A 3A 4A xx xx to power on the third party device Send ASCII command “xxx” to CMDOFF/+[B]:xxx CMDOFF/+3:abc123 power off the third party device © MuxLab Inc. 2019...
-
Page 21: Web Interface
192.168.0.178. Subnet mask: 255.255.250.0 To log in, open a browser and type the above IP address. The following login screen will appear: Default username and password are: admin 6.1 Switching page Once logged in, the following page appear © MuxLab Inc. 2019... -
Page 22: Display Control Page
Lower Audio volume Increase Audio Volume On the other hand, the VGA resolution page will allow you to select the VGA output resolution. You may select among 1024x768@60Hz, 1280x720@50Hz, 1280x720@60Hz, 1360x768@60Hz, 1600x1200@60Hz, 1920x1080@50Hz, 1920x1080@60Hz (Default) or 1920x1200@60Hz. © MuxLab Inc. 2019... -
Page 23: Audio Page
On the audio page you can control both the digital and analog audio outputs. You may either turn on/off the digital audio or turn on/off the analog audio output. Clicking on the Confirm button will apply the change while the Cancel one will not execute the settings. © MuxLab Inc. 2019... -
Page 24: Edid Page
NULL, CR, LF and CR+LF. In the command box you may type the command to control the third party device that is connected in to the RS232 port of the switcher. © MuxLab Inc. 2019... -
Page 25: Interface Page
6x1 HDMI Multimedia Presentation Switch Installation Guide 6.6 Interface page On the interface page you may modify either the title bar or the button labels. © MuxLab Inc. 2019... -
Page 26: Access Page
The access page allows you to change the default password as well as to lock the front panel buttons 6.8 Network page On the network page you can enter a new IP address, additionally you may select between static or dhcp address. © MuxLab Inc. 2019... -
Page 27: Upgrading Page
To upgrade the unit you may use the web interface, please follow these steps to do so: Open your browser Type the unit IP address and add the port number 100: 192.168.0.178:100 Enter username and password Once logged in, navigate to the Administration folder Upload the file Click on the apply button © MuxLab Inc. 2019... -
Page 28: Panel Drawing
6x1 HDMI Multimedia Presentation Switch Installation Guide 7. Panel Drawing © MuxLab Inc. 2019... -
Page 29: Troubleshooting & Maintenance
Static becomes Bad grounding Check the grounding and stronger when make sure it is well connecting the video connected. connectors © MuxLab Inc. 2019... - Page 30 RS232, IR been broken. for repair. remote, or front panel buttons If you still cannot diagnose the problem, please call MuxLab Customer Technical Support at 877-689-5228 (toll-free in North America) or (+1) 514-905-0588 (International). © MuxLab Inc. 2019...
-
Page 31: Regulatory Compliance
All brand names and product names used in this document are trademarks, or registered trademarks of their respective holders. 2321 Cohen St, Montreal, Quebec, Canada. H4R 2N7 Tel: (514) 905-0588 Fax: (514) 905-0589 Toll Free (North America): (877) 689-5228 E-mail: info@muxlab.com URL: www.muxlab.com © MuxLab Inc. 2019...
Need help?
Do you have a question about the Profidigital 500445 and is the answer not in the manual?
Questions and answers