
Related Manuals for MuxLab 500136-US


Summary of Contents for MuxLab 500136-US
-
Page 1: Installation Guide
Passive CCTV Power Integrator Hub, 24VAC (500136-US, 500136-UK, 500136-Eur) Installation Guide P/N: 94-000668-A, SE-000669-A... -
Page 2: Table Of Contents
© MuxLab Inc . Passive CCTV Power Integrator Hub Installation Guide Table of Contents 1. Overview ..............4 1.1. Description............. 4 1.2. Features............5 2. Technical Specifications..........6 3. Installation Procedure..........8 3.1. Parts List ............8 3.2. Product Overview........... 9 3.3. - Page 3 Passive CCTV Power Integrator Hub Installation Guide Copyright Notice : Copyright © 2011 MuxLab Inc. All rights reserved. Printed in Canada. No part of this publication may be reproduced, stored in a retrieval system, or transmitted in any form or by any means, electronic, mechanical, photocopying, recording, or otherwise without prior written permission of the author.
-
Page 4: Overview
The product features a built-in 16-channel 350VA CCTV power supply that supplies 24Vac or 28Vac power to each CCTV camera and works in conjunction with MuxLab’s 500000R, 500009, 500022, 500023, 500024, 500029, 500120, 500122 and 500130. Each hub port features two slide-switches; one for remote power and one for Power-Thru or Pass-Thru mode according to the application. -
Page 5: Features
© MuxLab Inc . Passive CCTV Power Integrator Hub Installation Guide 1.2. Features Power 350VA; 24Vac or 28 Vac individually selected and protected, transmitted through each port. Slide-switch to set each port to Pass-Thru Mode (500022) or Power-Thru Mode (500024/500029). -
Page 6: Technical Specifications
Voltage Selector Switch Sets port to 24 Vac or 28 Vac or “OFF”. Factory default: “OFF” Maximum Input Voltage 500136-US: 120 Volts ac, 3.5 Amps, 60 Hz & Current rating 500136-UK or 500136-Eur: 240 Volts ac, 1.75 Amps, 50Hz Max Output Voltage per 28 Vac or 24 Vac @ full load;... - Page 7 19” (48.26 cm) W x 3.5” (8.8 cm) H x 9.0” ( 23 cm) D Weight 23 lbs. (11kgs) Regulatory cUL, FCC, CE Warranty 5 years Order Information 500136-US Passive CCTV Power Integrator Hub, US (120V) 500136-UK Passive CCTV Power Integrator Hub, UK (220V) 500136-Eur Passive CCTV Power Integrator Hub, Eur (220V) Page 7...
-
Page 8: Installation Procedure
© MuxLab Inc . Passive CCTV Power Integrator Hub Installation Guide Installation Procedure 3.1. Parts List The Passive CCTV Power Integrator Hub comes with the following parts. Please verify that all pieces are present before proceeding. Base Unit (Factory configuration: Power-Thru Mode (500022), Voltage Selector Switch: “OFF”) -
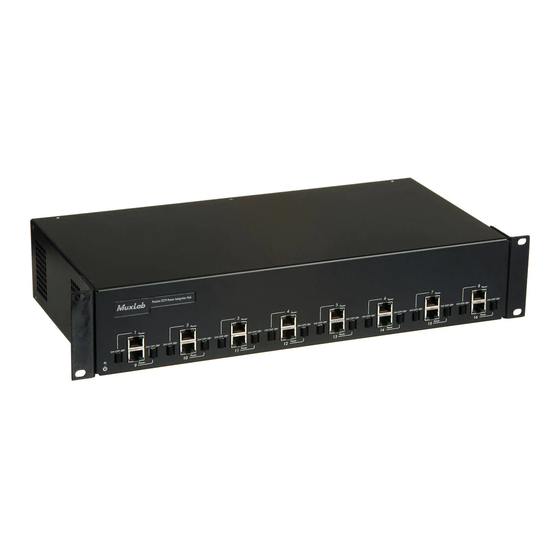
Page 9: Product Overview
© MuxLab Inc . Passive CCTV Power Integrator Hub Installation Guide 3.2. Product Overview The external connections of the Passive CCTV Power Integrator Hub are detailed in the following diagrams. Please familiarize yourself with them before installing the unit. Power... -
Page 10: Pre-Installation Checklist
Mode (500024/500029 compatible) depending on the cabling configuration. 3. The Passive CCTV Power Integrator Hub works in conjunction with MuxLab’s other CCTV products including the 500000R, 500009, 500015, 500022, 500023, 500024, 500029, 500120, 500122 and 500130. The passive CCTV Baluns are connected at the CCTV camera. -
Page 11: Physical Installation
Pass-Thru Mode (500022). The factory default setting for remote power is “OFF” 1. MuxLab’s Passive CCTV Power Integrator Hub comes with two (2) "L" brackets and four (4) Philips 4-40 screws for standard 19” rack mounting. Select the final destination for the product and attach the "L"... - Page 12 © MuxLab Inc . Passive CCTV Power Integrator Hub Installation Guide 2. If the product fits in the relay rack, install the unit using standard rackmount screws. Figure 4: Rack-mount installation Page 12...
-
Page 13: Installation Procedure
1. Install the Passive CCTV Power Integrator Hub in its final location. Please verify that the cable lengths between the hub and cameras are within MuxLab specifications. 2. Ensure that the Passive CCTV Power Integrator Hub is properly grounded in accordance with local safety codes. - Page 14 © MuxLab Inc . Passive CCTV Power Integrator Hub Installation Guide 3. Connect a MuxLab passive CCTV Balun (MuxLab p/n 500000R, 500009, 500022, 500023, 500024 or 500029) to each CCTV camera video output. Please refer to the appropriate CCTV balun installation guide for details.
- Page 15 6. If remote power is being transmitted to the camera, verify that the distance between the camera and the hub is within MuxLab specifications. Please consult the distance charts at the back of the installation guide. When the port switch is set to Pass-Thru Mode (500022), two (2) twisted pairs are used for remote power.
- Page 16 © MuxLab Inc . Passive CCTV Power Integrator Hub Installation Guide Figure 7: Port Setting – Power-Thru Mode (500024/500029) The factory default position of each remote power switch is “OFF”. In order to set a specific port to provide voltage 24Vac to the camera, slide the appropriate switch to left-most position (fig 8).
- Page 17 © MuxLab Inc . Passive CCTV Power Integrator Hub Installation Guide Video Output Connections: 10. Connect one coax cable between each video output port on the hub and the DVR video input (fig 8). Figure 9: Video connection PTZ Control: 11.
- Page 18 © MuxLab Inc . Passive CCTV Power Integrator Hub Installation Guide 12. Connect two (2) wires between the PTZ controller and the “Control” terminals on the hub (fig 9). Figure 10: PTZ control connection 13. Power on the CCTV equipment; cameras, remote power supply, PTZ controller.
-
Page 19: Troubleshooting
The following chart describes some of the problem symptoms, the probable causes and possible solutions. If the information below does not solve the problem, please contact MuxLab Technical Support at 877-689-5228 (North America) or at (+1) 514 905- 0588 (International) or via e-mail at videoease@muxlab.com. - Page 20 PTZ controls not Wrong pin Check wiring. responding configuration When contacting your nearest MuxLab dealer or MuxLab Technical Support please have the following information ready: Unit model number. Cabling layout. Include model of camera and DVR used, power supply voltage, camera wattage, cable length and type.
-
Page 21: Distance Tables
© MuxLab Inc . Passive CCTV Power Integrator Hub Installation Guide Distance Tables The following tables provide the maximum distances for remote power via Cat5e/6 twisted pair when a port on the Passive CCTV Power Integrator Hub is set to Pass-Thru Mode (500022) or Power-Thru Mode (500024/500029). - Page 22 © MuxLab Inc . Passive CCTV Power Integrator Hub Installation Guide Power-Thru Mode (500024/500029) Voltage Pcam Vcam Dist Spec Dist Spec (Feet) 24 Vac (24Vac 21.60 camera) 21.60 21.60 21.60 28 Vac (24Vac 21.60 1382 camera) 21.60 21.60 21.60 Notes: 1.
-
Page 23: Product Warranty Policy
Authorization number (RMA#) issued by its Customer Service Department and a proof of purchase date. If this product is delivered to MuxLab by mail, you agree to assume risk of loss or damage in transit, to prepay shipping charges to the warranty service location, and to use the original shipping container or equivalent. -
Page 24: Muxlab Inc
Product more than six months old, including shelf life. The defective unit must be returned prepaid to MuxLab and then the unit will be repaired or if repair is not possible, replaced by an equivalent unit and returned to the customer within one (1) month of receiving any returned product..
Need help?
Do you have a question about the 500136-US and is the answer not in the manual?
Questions and answers