Table of Contents
Advertisement
Quick Links
Clean Water Made Easy
www.cleanwaterstore.com
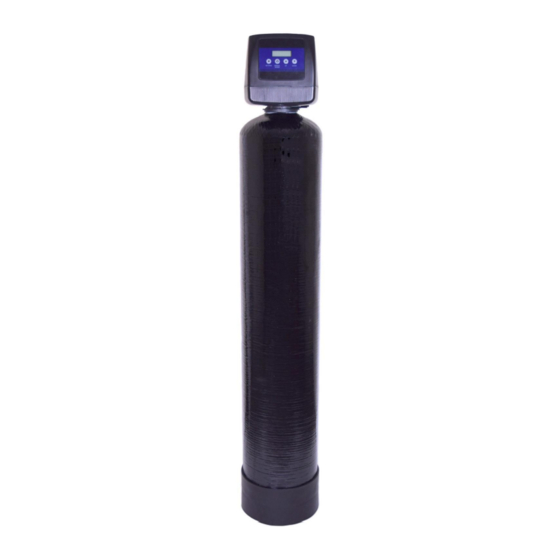
Birm 7800 Iron Filter Installation & Start-Up Guide
Thank you for purchasing a Clean Water System! With proper installation and a
little routine maintenance your system will be providing iron-free water for many
years.
Please review this start-up guide entirely before beginning to install your system
and follow the steps outlined for best results.
BIRM MEDIA CONTAINS DUST.
USE PAPER MASK AND VENTILATE AREA TO AVOID BREATHING DUST DURING
INSTALLATION
IMPORTANT: YOU MAY NOT NEED TO ADD ALL THE FILTER MEDIA YOU
RECEIVED. THE FILTER TANK SHOULD NOT BE FILLED MORE THAN 2/3 FULL.
Questions?
Call us toll-free: 1-888-600-5426 or 1-831-462-8500
Email us:
support@cleanwaterstore.com
See more information on our website:
www.cleanwaterstore.com/resources
Advertisement
Table of Contents

Summary of Contents for Clean Water Systems Birm 7800
- Page 1 Clean Water Made Easy www.cleanwaterstore.com Birm 7800 Iron Filter Installation & Start-Up Guide Thank you for purchasing a Clean Water System! With proper installation and a little routine maintenance your system will be providing iron-free water for many years. Please review this start-up guide entirely before beginning to install your system and follow the steps outlined for best results.
-
Page 2: Table Of Contents
Starting The Initial Backwash ........................9 Maintaining Your Birm Filter System ......................11 Troubleshooting the Birm 7800 Iron Filter System ..................11 What to Do If Your Filter Tank Does Not Sit Level on the Floor ............ 11 How to Remove the Red Clips from the 7800 Control Valves without Breaking Them ......12 Page 1 www.cleanwaterstore.com... -
Page 3: Packing List
Pro-OX 7800 Installation & Startup Guide Packing List by Model Each system comes with the following: 7800 Backwash Control Valve with Pipe connector kit (either 1”or ¾”) Enpress filter tank with distributor tube installed Media funnel In addition, each system comes with the following, depending on the model ordered: 1.0 Cubic Foot Birm: Quantity Description... -
Page 4: Pre-Installation
Pro-OX 7800 Installation & Startup Guide Pre-Installation 1. Review your packing list and make sure you have received all the parts before beginning installation. 2. If you are going to be turning off the water to the house and you have an electric water heater, shut off the power to the water heater before beginning installation in case water heater is accidentially drained. -
Page 5: How Your Birm Filter System Works
Pro-OX 7800 Installation & Startup Guide 6. The drain line tubing (not supplied) is connected to a drain from the drain outlet using flexible ½” ID tubing. Note that the drain can run up above the 7800 control and into a drain, it does not have to drain down, as the filter backwashes under line pressure from your well pump. - Page 6 Pro-OX 7800 Installation & Startup Guide Fig 2 - Typical Birm piping installation with ball valve and hose bib after the filter. Filter strainer is optional, and useful if there is sand or grit in the water. The 25/1 micron filter after is optional, and used when there is very fine sediment or colloidal particles over 1 micron present.
-
Page 7: Assembly And Installation Instructions
Pro-OX 7800 Installation & Startup Guide Assembly and Installation Instructions 1. Unscrew by hand the entire 7800 control valve from top of tank if it was shipped screwed on. The Vortech distributor tube is already installed in the tank. If not already done, make sure blue temporary plug is on top of distributor tube, or wrap the top of distributor tube with electrical or duct tape. - Page 8 Pro-OX 7800 Installation & Startup Guide 8. Make sure the by-pass valve is in the bypass position when starting the installation. Follow the IN and OUT arrows on the bypass valve and control valve for proper connection of in and out water piping.
- Page 9 Pro-OX 7800 Installation & Startup Guide Fig. 5: 7800 Bypass and Service Positions 10. Now install your water pipes to the 7800 bypass end connectors. Our preferred method is to wrap the pipe threads with 2 or 3 wraps of Teflon tape, then apply a thin coating of white non- hardening Teflon joint compound paste (available at all hardware stores) before attaching the pipe fittings.
-
Page 10: Programming Instructions
Pro-OX 7800 Installation & Startup Guide Programming Instructions 12. Plug in your 7800 control valve to an outlet 13. From the display screen, press and hold the settings button for three seconds to access the programming menu. 14. Set Time of Day – Use the up and down arrows to select the proper value. Once the proper value is set, press the Settings button (Enter) to proceed to the next setting. - Page 11 Pro-OX 7800 Installation & Startup Guide 23. Press and hold the Manual Regen button for three seconds which will start a manual backwash, watch the display and wait until it starts counting down. Now unplug the power supply and proceed to step 24. 24.
-
Page 12: Maintaining Your Birm Filter System
There is little or no maintenance required. Every 6 – 10 years the Birm media can be replaced for best results. Troubleshooting the Birm 7800 Iron Filter System One problem that may occur is if you do not have enough backwash flow rate to properly clean the Birm filter. -
Page 13: How To Remove The Red Clips From The 7800 Control Valves Without Breaking Them
Pro-OX 7800 Installation & Startup Guide How to Remove the Red Clips from CWS 7800 Control Valves without Breaking Them The CWS 7800 is a great programmable control valve that lasts many years. While it is easy to install and program, reading this guide prior to installation can save you some time when removing the red clips.


Need help?
Do you have a question about the Birm 7800 and is the answer not in the manual?
Questions and answers