
Related Manuals for CAME ZL92


Summary of Contents for CAME ZL92
- Page 1 QUADRO COMANDO 319 V2 1 PER MOTORIDUTTORI A 24 V MANUALE D’INSTALLAZIONE ZL92 Italiano English Français Русский...
-
Page 2: Installazione
Avvertimento (es. targa cancello). stato espressamente concepito. Ogni altro uso è da conside- Istruzioni e raccomandazioni rarsi quindi pericoloso. La CAME cancelli automatici s.p.a. non particolari per gli utenti è responsabile per eventuali danni causati da usi impropri, er- • Tenete libere da ingombri e pulite le aree di manovra del can- ronei ed irragionevoli •... - Page 3 Destinazione d’uso e limiti di impiego Destinazione d’uso Il quadro comando ZL92 è stato progettato per il comando di automazioni a 24 V DC per cancelli a battente della serie STYLO, MYTO, FROG-J e AMICO. Ogni installazione e uso difformi da quanto indicato nel seguente manuale sono da considerarsi vietate.
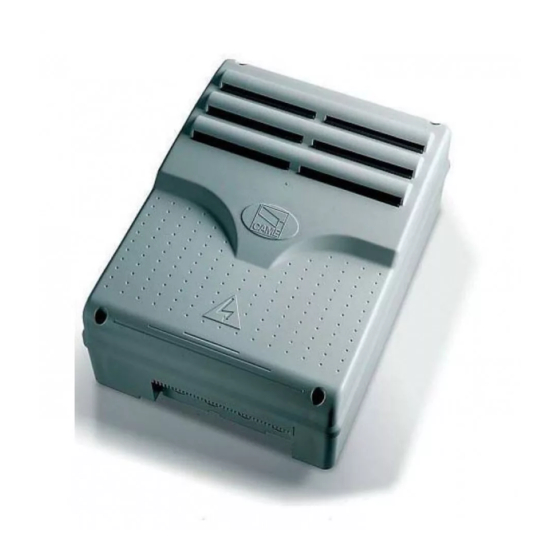
- Page 4 Componenti principali 1 -Trasformatore 2 -Fusibile scheda 3 -Fusibile accessori 4 -Display 5 -Connettore scheda memory roll 6 -Connettore scheda AF 7 -Connettore scheda R700 o R800 230V 8 -Led segnalazione di mancanza taratura 9 -Pulsanti programmazione 10 -Morsettiera di collegamento 11 -Morsettiera di alimentazione 230 V 12-Fusibile di linea 13-Led di segnalazione tensione...
- Page 5 Attrezzi e materiali Assicurarsi di avere tutti gli strumenti ed il materiale necessario, per effettuare l’installazione nella massima sicurezza, secondo le normative vigenti. Ecco alcuni esempi. Fissaggio e montaggio della scatola 1) Fissare la base del quadro in una zona protetta; si consiglia di usare viti di diametro max.
- Page 6 Collegamenti elettrici Tipo e sezione cavi Lunghezza cavo Lunghezza cavo Lunghezza cavo Collegamento Tipo cavo 1 < 10 m 10 < 20 m 20 < 30 m Alimentazione quadro 3G x 1,5 mm 3G x 1,5 mm 3G x 2,5 mm Alimentazione motore con encoder * 3G x 1,5 mm 3G x 1,5 mm...
- Page 7 Dispositivi di comando N.B.: inserire la scheda di codifi ca (R800) per far riconoscere il selettore a tastiera 001S7000 - Selettore a tastiera (S7000). R800 CANCELLI AUTOMATICI 001LT001 - Lettore tessere A B S1 GND magnetiche 00TSP00 - Sensore transponder Rosso Nero N.B.: inserire la scheda di codi-...
- Page 8 Dispositivi di segnalazione Lampadina spia cancello aperto (Portata contatto: 24 V - 3 W max.). Segnala la posizione dell’anta aperta, si spegne quando l’anta è chiusa (vedi funzione “F 10”). Lampeggiatore di movi- Lampada ciclo o cortesia (portata contatto: mento (portata contatto: 24 V - 25 W max) 24 V - 25 W max.) - Collegamento ausiliario di una lampada...
- Page 9 Confi gurare il contatto CX o CY (N.C.), DF con scheda di control- ingresso per dispositivi di sicurezza tipo bordi lo dei collegamenti DFI sensibili, conformi alle normative EN 12978. Vedi funzioni ingresso CX (Funzione F2) o CY (Funzione F3) in: - C7 «riapertura durante la chiusura», in fase di chiusura del cancello, l’apertura del contatto provoca l’inversione del movimento...
- Page 10 Programmazione Descrizione comandi Display Il tasto ESC serve per: Il tasto ENTER serve per: - uscire dai menu; < > ENTER - entrare nei menu; - annullare le modifiche. - confermare e memorizzare il valore impostato. I tasti < > servono per: - spostarsi da una voce di menu a un’altra;...
- Page 11 Struttura menu - Funzione “stop totale” - Funzione associata all’ingresso CX - Funzione associata all’ingresso CY - Funzione test sicurezza - Funzione azione mantenuta - Modalità comando su 2-7 - Modalità comando su 2-3p - Funzione rilevazione ostacolo a motore fermo F 10 - Funzione lampadina spia F 11...
- Page 12 IMPORTANTE! prima di impostare le funzioni, definire i motoriduttori presenti nell’impianto (A 1 - Tipo motore), verificare il corretto senso di marcia dei motoriduttori (A 2 - Test motori) ed eseguire la taratura della corsa (A 3 - Taratura corsa) Nota: confermare con il tasto ENTER dopo aver scelto il valore per ogni funzione.
- Page 13 Menu funzioni F 1 (Stop Totale) : ingresso N.C.: arresto del cancello con conseguente esclusione dell’eventuale ciclo di chiusura automatica; per ri- prendere il movimento bisogna agire sulla pulsantiera o sul trasmettitore. Inserire dispositivo di sicurezza su [1-2]; se non utilizzato, selezionare la funzione “0”.
- Page 14 F 7 (Comando 2-7) : impostazione del contatto su 2-7 in passo-passo (apre-chiude) o sequenziale (apre-stop-chiude-stop). 0 = passo-passo (di default); 1 = sequenziale. ENTER ENTER > > >...> F 8 (Comando 2-3P) : impostazione del contatto su 2-3P in apertura pedonale (apertura totale della seconda anta) o parziale (apertu- ra parziale della seconda anta a seconda dell’impostazione sulla percentuale tra 10 e 80 della corsa, funzione “F 36”).
- Page 15 F 13 (Spinta in chiusura) : a finecorsa in chiusura, i motoriduttori eseguono una breve spinta in battuta delle ante. 0 = Disattivata (di default); 1 = Spinta minima; 2 = Spinta media; 3 = Spinta massima. ENTER >...> ENTER >...
- Page 16 F 20 (Tempo chiusura automatica dopo apertura parziale o pedonale) : tempo di chiusura automatica dell’anta dopo un comando di apertura parziale o pedonale. Trascorso questo tempo, viene effettuata automaticamente una manovra di chiusura ed è comunque condizionato dall’eventuale intervento dei dispositivi di sicurezza e si disattiva dopo uno «stop» totale di sicurezza o in mancanza di energia elettrica.
- Page 17 F 25 (Tempo lampada di cortesia) : lampada supplementare collegata su (10-E), rimane accesa per un tempo necessario durante le manovre di apertura/chiusura del cancello. Il tempo può essere regolato da 60” a 180” 60 = 60 secondi (di default); 61 = 61 secondi ....;...
- Page 18 F 31 (Velocità rallentamento del motore M2) : impostazione della velocità durante i rallentamenti del motore M2, calcolata in percentuale. 20 = 20% velocità di rallentamento del motore (minima); ....50 = 50% velocità di rallentamento del motore (di default);....60 = 60% velocità...
- Page 19 F 37 (Punto rallentamento apertura del motore M1) : regola il punto di inizio del rallentamento del motore (M1) prima del finecorsa di apertura. Il punto di inizio rallentamento è calcolato in percentuale sulla corsa completa dell’anta (vedi par. illustrazione delle aree e punti di rallentamento e di accostamento) 10 = 10% della corsa;...
- Page 20 F 43 (Punto accostamento apertura del motore M2) : regola il punto di inizio dell’accostamento del motore (M2) prima del finecorsa di apertura. Il punto di inizio accostamento è calcolato in percentuale sulla corsa completa dell’anta (vedi par. illustrazione delle aree e punti di rallentamento e di accostamento) 1 = 1% della corsa;...
- Page 21 Menu utenti U 1 (Inserimento utente con comando associato) : inserimento utente (max. 25 utenti) associato ad un comando mediante trasmettito- re o altro dispositivo (vedi pararagrafo inserimento utente con comando associato). 1 = comando passo-passo (apre-chiude); 2 = comando sequenziale (apre-stop-chiude-stop); 3 = comando solo apre; 4 = 5 = uscita contatto B1-B2.
- Page 22 Schede di codifi ca Per inserire, modificare e rimuovere gli utenti o comandare l’automazione mediante comando radio, inserire la scheda AF43S. Se si utilizza il transponder o il lettore di tessere, inserire la scheda R700 o, in alternativa, la scheda R800 per il selettore a tastiera. Inserire la memory roll per salvare e caricare gli utenti registrati in un’altra scheda.
- Page 23 Inserimento utente con comando associato Utente Comando associato N.B.: prima di procedere, togliere la scheda memory roll. 1) Selezionare “U 1”. Premere ENTER per confermare. < > ENTER 2) Scegliere il comando (1=passo-passo, 10 - 2=sequenziale, 3=apre, 4=apertura 11 - pedonale/parziale, 5=uscita contatto B1- B2) da associare all’utente mediante i tasti 12 -...
- Page 24 Test motori 1) Selezionare “A 2”. Premere ENTER per confermare. < > ENTER 2) Selezionare 1 per attivare il test. Premere ENTER per confermare... < < < < > > > > ENTER 3) ... verrà visualizzata la dicitura “---” in - - - attesa del comando ...
- Page 25 Taratura corsa N.B.: prima di eff ettuare la taratura della corsa, controllare che l’area di manovra sia libera da qualsiasi ostacolo e verifi care la presenza di una battuta d’arresto meccanico in apertura e una in chiusura. Importante! Durante la taratura, tutti dispositivi di sicurezza saranno disabilitati fi no al termine della taratura escluso quello per lo “stop totale”.
- Page 26 Illustrazione delle aree e punti di rallentamento e di accostamento Nota: le aree della corsa e i punti di rallentamento e di accostamento sono testati secondo i parametri delle Norme Tecniche EN12445 e EN12453 per la compatibilità delle forze di impatto generate dall’anta in movimento. A = Area di movimento a velocità...
- Page 27 UNI EN ISO 14001 a garanzia del rispetto e della tutela dell’ambiente. Vi chiediamo di continuare l’opera di tutela dell’ambiente, che CAME considera uno dei fondamenti di sviluppo delle proprie strategie operative e di mercato, semplicemente osservando brevi indicazioni in materia di smaltimento: SMALTIMENTO DELL’IMBALLO...
- Page 28 HR • Za sve dodatne informacije o poduzeću, proizvodima i tehničkoj podršci: UK • Для отримання будь-якої іншої інформації про компанію, продукцію та технічну підтримку: www. came.com www. came.com CAME Cancelli Automatici S.p.A. CAME Cancelli Automatici S.p.A. Via Martiri Della Libertà, 15 31030 Dosson Di Casier...
- Page 29 CONTROL PANEL 31 9 V2 1E N FOR 24 V GEARMOTORS INSTALLATION MANUAL ZL92 English...
-
Page 30: Read Carefully
Warning Sings (e.g. gate plate). (i.e. that for which it was expressly built for). Any other use is Special instructions and to be considered dangerous. Came Cancelli Automatici S.p.A. advice for users is not liable for any damage resulting from improper, wrongful •... - Page 31 Intended use and limitations of use Intended use The ZL92 control panel is engineered to command 24 V DC operators for swing gates of the STYLO, MYTO, FROG-J and AMICO series. Any installation and use other than that explained in this manual are forbidden.
- Page 32 Main component parts 1 -Transformer 2 -Card fuse 3 -Accessories fuse 4 -Display 5 -Memory roll card connector 6 -AF card connector 230V 7 -R700 or R800 card connector 8 -Lack of calibration warning LED indicator 9 -Programming buttons 10 -Terminal boards 11 -230 V power terminal boards 12 -Line fuse 13 -Current on-line warning LED indicator...
- Page 33 Tools and equipment Make sure you have all of the tools and materials you will need to proceed with the installation in total safety, according to current rules and regulations. Here are some examples. Anchoring and mounting the box 1) Secure the base of the panel to a protected area; we suggest using cross slot Phillips head bolts of max.
- Page 34 Electrical connections Cable types and sections Length of cable Length of cable Length of cable Connections Type of cable 1 < 10 m 10 < 20 m 20 < 30 m Control panel power supply 3G x 1,5 mm 3G x 1,5 mm 3G x 2,5 mm Power supply to motor* with encoder 3G x 1,5 mm...
- Page 35 Command devices N.B. : insert the (R800) decoder card to have the (S7000) keypad selector recognised. 001S7000 – Keypad selector R800 CANCELLI AUTOMATICI 001LT001 - Magnetic card reader A B S1 GND 001TSP00 - Transponder sensor Black N.B. : insert the (R700) decoder card to have the (TSP00) sensor or (LT001) card reader recognised.
- Page 36 Warning devices Open gate indicator-light (So- cket rating: 24 V – 3 W max.). It turns on when the gate is open. It turns off when the gate is closed (see function “F10”). Flashing light (socket Courtesy or cycle light (contact rated up to: rating: 24 V DC - 25 W 24V –...
- Page 37 Confi gure either (N.C.) contacts CX or CY, DF with monitoring card input for safety devices such as sensate for DFI connections. edges, that comply with EN 12978 standards. See CX (F2 Function) or CY(F3 Function) input functions in: - C7 «re-open while closing», during gate closing, opening the contact causes inver- sion of movement until gate is fully open;...
- Page 38 Programming Description of commands Display The ESC key is for: The ENTER key is for: - exiting the menu; < > ENTER - entering the menu; - cancelling modifications. - confirming and memorising set value. The < > keys are for: - shifting from one menu item to another;...
- Page 39 Menu structure – “Total stop” Function – function assigned to CX input – function assigned to CY input – Safety test function – maintained action function – Command mode on 2-7 – Command mode on 2-3p – Obstacle detection function when motor is stopped F 10 –...
- Page 40 IMPORTANT! Before setting adjusting any functions, set which gearmotors are installed in the system (A 1 – Motor type), check the gate’s proper direction of travel of (A 2 – Motors test) and calibrate the gate run (A 3 – Gate run calibration) Note: press ENTER to confirm after choosing each function value.
- Page 41 Functions menu F 1 (Total Stop) : this function stops the gate and consequently excludes any automatic closing cycle; for movement to resume, you need to use the keypad or transmitter. Insert the safety device on [1 -2]; if unused, select “0” function. 0 = Deactivated;...
- Page 42 F 7 (2-7Command) : setting the contact on 2-7 to step-by-step (open-close) or sequential (open-stop-close-stop). 0 = step-by-step (default setting); 1 = sequential. ENTER ENTER > > >...> F 8 (2-3P Command) : setting the 2-3P contact to pedestrian opening (second gate leaf opens fully) or partial (second gate leaf opens partially depending on the time setting of the percentage between 10 and 80 of the gate run, function “F36”).
- Page 43 F 13 (closing thrust) : at the closing endpoint, the gearmotors give the gate leaves a brief final-closing thrust. 0 = Deactivate (default setting); 1 = 1. = Minimum thrust 2. = Medium thrust 3. = Maximum thrust ENTER >...> ENTER >...
- Page 44 F20 (Automatic closing time after partial or pedestrian opening) : Automatic closing time of the gate leaf after a partial opening or pedestrian command. Once this time has elapsed, the gate automatically closes and it is in any case conditioned by any safety devices that may be triggered, and is deactivated after a total safety “stop”...
- Page 45 F 25 ( Courtesy light time) : supplementary light connected on (10-E), stays on while gate is opening and closing. The time can be set to between 60” and 180”. 60 = 60 seconds (default setting); 61 = 61 seconds ....; 180 = 180 seconds.
- Page 46 F 31 (Slow-down speed of M2 motor) : setting the speed of the M2 motor during slow downs, calculated as a percentage. 20 = 20% motor slow-down speed (minimum); ....50 = 50% motor slow-down speed (default setting); ....60 = 60% motor slow-down speed (maximum). >...
- Page 47 F 37 (Slow-down point when opening the M1 motor) : adjusts the point at which the M1 motor begins to slow down when opening. The beginning slow-down point is calculated as a percentage of the full gate run (see paragraph illustrating the slow-down areas and points) 10 = 10% of the gate run;...
- Page 48 F 43 (Point when M2 motor draws fully open) : adjusts the point at which the M2 motor begins drawing to the fully-open position. This point is calculated as a percentage of the full gate run (see paragraph illustrating the slow-down areas and points at which gate draws fully open or closed) 1 = 1% of the gate run;...
- Page 49 User Menu U 1 (add user with assigned command) : add user (max. 25 users) assigned to a command via transmitter or other device (see para- graph on adding users with assigned command). 1 = step-by-step command (open-close); 2 = sequential command (open-stop-close-stop); 3 = open only command;...
- Page 50 Decoding cards To insert, change, remove users or to command the operator via radio command, insert the AF43S card. If using the transponder or card reader, insert the R700 card or, alternatively, the R800 card for the keyboard selector. Insert the memory roll to save and load all settings including users registered by another card. R700 R700 CANCELLI AUTOMATICI...
- Page 51 Adding users with an assigned command Assigned Command user N.B.: Before proceeding, remove the memory roll card. 1) Select “U 1”. Press ENTER to confirm. < > ENTER 2) select command (1=step-by-step, 10 - 2=sequential, 3=open, 4=pedestrian / 11 - partial opening, 5= B1-B2 output contact) to assign to user via the greater-than and 12 -...
- Page 52 Motor tests 1) Select “A2”. Press ENTER to confirm. < > ENTER 2) Select 1 to activate test. Press ENTER to confirm... < < < < > > > > ENTER 3) … “---” will be displayed, standing by - - - for a command…...
- Page 53 Gate run calibration N.B: before proceeding with the calibration of the gate run, check that the area of movement is free of any obstacles and check that there is a mechanical stop or both opening and closing. Important! While calibrating, all safety devices will be disabled until the end of the calibration excluding the “total stop” 1) Select “A3”.
- Page 54 Illustration of the slow-down areas and points at which gate draws to the fully open or closed position Note: the slow-down areas and points at which the gate draws to the fully open or closed position are tested according to the parameters set forth by Technical Norms EN12445 and EN12453 regarding compatibility of impact forces generated by moving gate leaves.
-
Page 55: Disposal Of Packaging
UNI EN ISO 14001 standard to ensure environmental protection. Please continue our efforts to protect the environment - which CAME considers one of the cardinal elements in the development of its operational and market strategies - simply by observing brief recommendations as regards disposal: DISPOSAL OF PACKAGING The packaging components (cardboard, plastic, etc.) are all classifiable as solid urban waste products and may be disposed of easily,... - Page 56 HR • Za sve dodatne informacije o poduzeću, proizvodima i tehničkoj podršci: UK • Для отримання будь-якої іншої інформації про компанію, продукцію та технічну підтримку: www. came.com www. came.com CAME Cancelli Automatici S.p.A. CAME Cancelli Automatici S.p.A. Via Martiri Della Libertà, 15 31030 Dosson Di Casier...
-
Page 57: Manuel D'installation
ARMOIRE DE COMMANDE 31 9V2 1 FR POUR MOTOREDUCTEURS EN 24 V MANUEL D’INSTALLATION ZL92 Français... - Page 58 été spécifi quement conçu. Tout autre usage sera • Conservez la zone de manœuvre du portail propre et sans rien donc considéré comme dangereux. La société CAME Cancelli qui risque de l’encombrer. Retirez la végétation se trouvant dans le rayon d’action des photocellules •...
- Page 59 Usage prévu et mode d’emploi Usage prévu L’armoire de commande ZL92 a été conçue pour la commande d’automatismes en 24 V DC pour portails battants de la série STYLO, MYTO, FROG-J et AMICO. Toute installation ou utilisation qui diffèrent de ce qui est indiqué dans le manuel suivant sont considérées interdites.
- Page 60 Composants principaux 1-Transformateur 2-Fusible carte 3-Fusible accessoires 4-Afficheur 5-Connecteur carte memory roll 6-Connecteur carte AF 7-Connecteur carte R700 ou R800 230V 8-Led de signalisation absence de calibrage 9-Boutons de programmation 10-Bornier de raccordement 11-Bornier d’alimentation 230V 12-Fusible de ligne 13-Led de signalisation tension présente 14-Fusible moteur 1 15-Fusible moteur 2...
- Page 61 Outils et matériels Assurez-vous d’avoir tous les outils et le matériel nécessaires, pour effectuer l’installation en toute sécurité, selon les normes en vigueur. Voici quelques exemples. Fixation et montage de la boîte 1) Fixez la base de l’armoire dans une zone protégée ; il est conseillé...
- Page 62 Raccordements électriques Type et section des câbles Longueur du câble Longueur du câble Longueur du câble Raccordement Type câble 1 < 10 m 10 < 20 m 20 < 30 m Alimentation armoire 3G x 1,5 mm 3G x 1,5 mm 3G x 2,5 mm Alimentation moteur avec encodeur * 3G x 1,5 mm...
- Page 63 Dispositifs de commande N.B.: introduisez la carte de décodage (R800) pour faire reconnaître le sélecteur à clavier à code (S7000). 001S7000 – Sélecteur à clavier à code R800 CANCELLI AUTOMATICI 001LT001 – Lecteur de A B S1 GND cartes magnétiques 00TSP00 –...
- Page 64 Dispositifs de signalisation Lampe témoin portail ouvert (Portée contact : 24V - 3W max.). Elle signale la position du vantail ouvert, elle s’éteint quand le vantail est fermé (voir fonction ’’F10’’). Lampe de mouvement Lampe cycle ou de courtoisie (portée contact (portée contact : 24 V –...
- Page 65 Confi gurez le contact CX ou CY (N.C.), DF avec carte de contrôle entrée pour dispositifs de sécurité type bords des raccordements DFI sensibles conformes à la norme EN 12978. Voir fonctions entrée CX (Fonction F2) ou CY (Fonction F3) en : - C7«réouverture pendant la fermeture», en phase de fermeture du portail, l’ouverture du contact provoque l’inversion du mouvement...
- Page 66 Programmation Description des commandes Afficheur La touche ESC sert pour : La touche ENTER sert pour : - sortir des menus ; < > ENTER - entrer dans les menus ; - annuler les modifications - confirmer et mettre en mémoire la valeur configurée.
- Page 67 Structure menu – Fonction “stop total” – Fonction associée à l’entrée CX – Fonction associée à l’entrée CY – Fonction test de sécurité – Fonction action continue – Modalité commande sur 2-7 – Modalité commande sur 2-3p – Fonction détection d’obstacles avec le moteur à l’arrêt F 10 –...
- Page 68 IMPORTANT ! avant de configurer les fonctions, définissez les motoréducteurs présents dans l’installation (A 1 - Type moteur), vérifiez si le sens de marche des motoréducteurs est correct (A 2 - Test moteurs) et effectuez le calibrage de la course ( A 3 - Calibrage course) N.B.
- Page 69 Menu fonctions F 1 (Stop Total) : entrée N.C. : arrêt du portail avec exclusion consécutive du cycle éventuel de fermeture automatique ; pour reprendre le mouvement il faut appuyer sur les touches ou sur l’émetteur. Introduisez le dispositif de sécurité sur [1-2] ; si vous ne l’utilisez pas, sélectionnez la fonction ’’0’’.
- Page 70 F 7 (Commande 2-7) : configuration du contact sur 2-7 en pas-à-pas (ouverture-fermeture) ou séquentielle (ouverture-stop-fermetu- re-stop). 0 = pas-à-pas (par défaut); 1 = séquentielle. ENTER ENTER > > >...> F 8 (Commande 2-3P) : configuration du contact sur 2-3P en ouverture pour piétons (ouverture totale du deuxième vantail) ou par- tielle (ouverture partielle du deuxième vantail selon la configuration entre 10 et 80 % de la course, fonction ’’F 36’’).
- Page 71 F 13 (Poussée en fermeture) : en fermeture, en fin de course les motoréducteurs effectuent une brève poussée en butée des vantaux. 0 = Désactivée (par défaut) ; 1 = Poussée minimale 2 = Poussée moyenne 3 = Poussée maximale ENTER >...>...
- Page 72 F 20 (Temps de fermeture automatique après ouverture partielle ou pour piétons) : temps de fermeture automatique du vantail après une commande d’ouverture partielle ou pour piétons. Ce temps écoulé, une manœuvre de fermeture est automatiquement effec- tuée et de toute façon il est conditionné par l’intervention éventuelle des dispositifs de sécurité et il se désactive après un «stop total»...
- Page 73 F 25 (Temps lampe de courtoisie) : lampe supplémentaire raccordée sur (10-E), elle reste allumée pendant le temps nécessaire au cours des manœuvres d’ouverture/fermeture du portail. Le temps peut être réglé de 60’’ à 180’’ 60 = 60 secondes (par défaut) ; 61 = 61 secondes ....;...
- Page 74 F 31 (Vitesse de ralentissement du moteur M2) : configuration de la vitesse pendant les ralentissements du moteur M2, calculée en pourcentage. 20 = 20% de la vitesse de ralentissement du moteur (minimum) ; ..50 = 50% de la vitesse de ralentissement du moteur (par défaut) ; ..60 = 60% de la vitesse de ralentissement du moteur (maximum).
- Page 75 F 37 (Point de ralentissement ouverture du moteur M1) : elle règle le point de début du ralentissement du moteur (M1) avant le fin de course d’ouverture. Le point de début du ralentissement est calculé en pourcentage sur la course complète du vantail (voir par. illustration des zones et des points de ralentissement et de déplacement) 10 = 10% de la course ;...
- Page 76 F 43 (Point de déplacement ouverture du moteur M2) : elle règle le point de début du déplacement du moteur (M2) avant le fin de course d’ouverture. Le point de début du déplacement est calculé en pourcentage sur la course complète du vantail (voir par. illustration des zones et des points de ralentissement et de déplacement) 1 = 1% de la course ;...
- Page 77 Menu usagers U 1 (Introduction usager avec commande associée) : introduction usager (max. 25 usagers) associé à une commande par émetteur ou un autre dispositif (voir paragraphe introduction usager avec commande associée). 1 = commande pas-à-pas (ouverture-fermeture) ; 2 = commande séquentielle (ouverture-stop-fermeture-stop) ; 3 = com- mande seulement ouverture ;...
- Page 78 Carte de décodage Pour introduire, modifier et supprimer les usagers ou pour commander l’automatisme par radio commande, introduisez la carte F43S. Si vous utilisez le transpondeur ou le lecteur de cartes, introduisez la carte R700 ou, dans l’alternative, la carte R800 pour le sélecteur à...
- Page 79 Introduction usager avec commande associée Usager Commande associée N.B.:avant de procéder, enlevez la carte memory roll. 1) Sélectionnez “U 1”. Appuyez sur ENTER pour confirmer. < > ENTER 2) Choisissez la commande (1= pas-à-pas, 10 - 2= séquentielle, 3=ouverture, 4=ouverture 11 - pour piétons/partielle, 5=sortie contact B1-B2)
- Page 80 Test moteurs 1) Sélectionnez “A 2”. Appuyez sur ENTER pour confirmer < > ENTER 2) Sélectionnez 1 pour activer le test. Appuyez sur ENTER pour confirmer ... < < < < > > > > ENTER 3) … l’indication ’’---’’ s’affichera en atten- - - - te de la commande…...
- Page 81 Calibrage de la course N.B. : avant d’eff ectuer le calibrage de la course, contrôlez s’il n’y a pas d’obstacle dans la zone de manœuvre et assurez-vous de la présence d’une butée d’arrêt mécanique en ouverture et une en fermeture. Important ! Pendant le calibrage, tous les dispositifs de sécurité...
- Page 82 Illustration des zones et des points de ralentissement et de déplacement Note : les zones de la course et les points de ralentissement et de déplacement sont testés selon les paramètres des Normes Techniques EN 12445 et EN 12453 pour la compatibilité des forces d’impact engendrées par le vantail en mouvement. A = Zone de mouvement à...
-
Page 83: Élimination De L'emballage
Led rouge clignote : carte de commande non encore calibrée pour la course. Démolition et élimination Pour garantir le respect et la sauvegarde de l’environnement CAME cancelli automatici S.p.A. dispose, au sein de son éta- blissement, d’un Système de Gestion de l’environnement, certifié conforme à la norme UNI EN ISO 14001. - Page 84 HR • Za sve dodatne informacije o poduzeću, proizvodima i tehničkoj podršci: UK • Для отримання будь-якої іншої інформації про компанію, продукцію та технічну підтримку: www. came.com www. came.com CAME Cancelli Automatici S.p.A. CAME Cancelli Automatici S.p.A. Via Martiri Della Libertà, 15 31030 Dosson Di Casier...
- Page 85 БЛОК УПРАВЛЕНИЯ 319V21 RU ЭЛЕКТРОПРИВОДАМИ 24 В ИНСТРУКЦИЯ ПО УСТАНОВКЕ ZL92 Русский...
-
Page 86: Instalación
Símbolos de Advertencias cual ha sido expresamente fabricado. Cualquier uso diferente, (ej. placa cancela). se debe considerar impropio y por lo tanto peligroso. CAME Instrucciones y recomendaciones particulares cancelli automatici s.p.a. no se hace responsable por eventuales para los usuarios daños causados debido a una utilización inadecuada, errónea o... - Page 87 Назначение и ограничения в использовании Назначение Блок управления ZL92 предназначен для управления автоматикой 24 В для распашных ворот серий STYLO, MYTO, FROG-J и AMICO. Запрещается использовать устройство не по назначению и устанавливать его вразрез с указаниями, содержащимися в настоящей инструкции.
- Page 88 Основные компоненты 1. Трансформатор 2. Предохранитель платы 3. Предохранитель аксессуаров 4. Дисплей 5. Разъем для карты памяти 6. Разъем для платы 230V радиоприемника AF 7. Разъем для карты R700 или R800 8. Светодиодный индикатор отсутствия регулировки 9. Кнопки программирования 10. Колодка подключений 11.
- Page 89 Инструменты и материалы Перед началом монтажных работ убедитесь в наличии всех необходимых инструментов и материалов, которые позволят произвести установку системы в полном соответствии с действующими нормами безопасности. Вот несколько примеров. Крепление и монтаж корпуса 1) Установите основание корпуса в защищенном месте.
- Page 90 Электрические подключения Тип и сечение кабелей Длина кабеля Длина кабеля Длина кабеля Подключение Тип кабеля 1 < 10 м 10 < 20 м 20 < 30 м Питание блока управления 3G x 1,5 мм 3G x 1,5 мм 3G x 2,5 мм Питание...
- Page 91 Устройства управления Важное примечание: вставьте плату R800 для обнаружения кодонаборной 001S7000 – Кодонаборная клавиатура клавиатуры S7000. R800 CANCELLI AUTOMATICI 001LT001 – Считыватель A B S1 GND магнитных карт 00TSP00 - Проксимити-считыватель Красный Черный Важное примечание: Для подключения считывателя TSP00 или LT001 вставьте плату...
- Page 92 Устройства сигнализации Лампа-индикатор "Ворота открыты" (Нагрузка контакта: 24 В, макс. 3 Вт). Указывает на то, что створка ворот открыта; выключается, когда ворота закрыты (см. функцию “F 10”). Сигнальная лампа Лампа цикла (макс. нагрузка контакта: 24 (макс. нагрузка В, макс. 25 Вт) контакта: 24 В, макс.
- Page 93 Выберите конфигурацию контакта CX Чувствительные или CY (НЗ), к которому могут быть профили DF с платой подключены устройств безопасности, самодиагностики DFI например, чувствительные профили, соответствующие требованиям норматива EN 12978. Режим работы контактов CX (функция F2) или CY (функция F3) выставляется в меню "Функции". Могут быть...
- Page 94 Программирование Описание команд Дисплей Кнопка ESC служит для: Кнопка ENTER служит для: - выхода из меню; < > ENTER - входа в меню; - отмены внесенных изменений. - подтверждения и сохранения значения выбранного параметра. Кнопки < > служат для: - навигации; - увеличения...
- Page 95 Структура меню - Функция СТОП. – Выбор режима работы контакта CX. – Выбор режима работы контакта CY. - Функция проверки безопасности. - Функция ПРИСУТСТВИЕ ОПЕРАТОРА. - Выбор функции контактов 2-7. - Выбор функции контактов 2-8р. - Функция обнаружения препятствия при остановленном приводе. F 10 - Функция...
- Page 96 ВАЖНО! Перед установкой функций укажите сведения об используемых в системе приводах (A 1 – Модель привода), проверьте правильность направления движения приводов (A 2 – Проверка приводов) и отрегулируйте движение (A 3 – Калибровка приводов) Примечание: выбрав значение для каждой функции, нажмите на кнопку ENTER для подтверждения внесенных изменений.. Меню...
- Page 97 Меню «Функции» F 1 (СТОП) : контакт Н.З. Данная функция позволяет остановить ворота, в том числе и при автоматическом закрывании. Для возобновления движения ворот необходимо нажать на соответствующую кнопку брелока-передатчика или кодонаборной клавиатуры. Команда подается устройством безопасности, подключенным к контактам [1-2]. Если контакты не используются, выберите 0 (выкл.). 1 = Вкл.
- Page 98 F 7 (устройство управления, подключенное к 2-7) : выбор режима работы контакта 2-7 между ОТКРЫТЬ-ЗАКРЫТЬ или ОТКРЫТЬ-СТОП-ЗАКРЫТЬ-СТОП. 0 = ОТКРЫТЬ-ЗАКРЫТЬ (по умолчанию); 1 = ОТКРЫТЬ-СТОП-ЗАКРЫТЬ-СТОП. ENTER ENTER > > >...> F 8 (устройство управления, подключенное к 2-3Р) : установка контакта 2-3P в режим пропуска пешехода (полное открывание...
- Page 99 F 13 (Дожим при закрывании) : при закрывании створок приводы выполняют дожим в течение нескольких секунд. 0 = Выкл. (по умолчанию); 1 = Минимальное нажатие 2 = Среднее нажатие 3 = Максимальное нажатие ENTER >...> ENTER > > > > F 14 (Тип...
- Page 100 F 20 (Время автоматического закрывания после частичного открывания или пропуска пешехода) : время автоматического закрывания створки после получения команды частичного открывания или пропуска пешехода.. По прошествии этого времени происходит автоматическое закрывание, которое тем не менее зависит от возможного срабатывания устройств безопасности; после полной остановки системы или при отключении электроснабжения таймер выключается.
- Page 101 F 25 (Время работы лампы вспомогательного освещения) : дополнительная лампа, подключенная к контакту (10-E), остается включенной в течение всего времени, необходимого для открывания/закрывания ворот. Это время может составлять от 60 до 180 секунд. 60 = 60 секунд (по умоланию); 61 = 61 секунда....; 180 = 180 секунд.
- Page 102 F 31 (Скорость замедления привода M2) : установка скорости при замедлении привода М2, выраженной в процентах. 20 = 20% от скорости замедления привода (минимальная); ....50 = 50% от скорости замедления привода (по умолчанию);....60 = 60% от скорости замедления привода (максимальная). >...
- Page 103 F 37 (Место замедления во время открывания для привода M1) : регулирует начальную точку замедления привода (М1) перед механическим упором открывания. Начальная точка замедления выражена в процентном отношении участка ко всей пройденной траектории (см. раздел "Иллюстрация участков и мест замедления и остановки). 10 = 10% от...
- Page 104 F 43 (Место остановки во время открывания для привода M2) : регулирует начальную точку остановки для привода (М2) перед механическим упором открывания. Начальная точка остановки выражена в процентном отношении участка ко всей пройденной траектории (см. раздел "Иллюстрация участков и мест замедления и остановки"). 1 = 1% от...
- Page 105 Меню пользователей U 1 (Создание учетной записи пользователя с присвоенной командой) : создание пользователя (макс. 25 пользователей), которому присвоена команда с помощью передатчика или другого устройства управления (см. раздел «Создание учетной записи пользователя с присвоенной командой»). 1 = команда ОТКРЫТЬ-ЗАКРЫТЬ; 2 = команда ОТКРЫТЬ-СТОП-ЗАКРЫТЬ-СТОП; 3 = ТОЛЬКО ОТКРЫТЬ; 4 = 5 = подключение...
- Page 106 Платы кодирования Чтобы создать, изменить или удалить пользователей или управлять автоматикой с помощью радиоуправления, вставьте плату AF43S. Если используется прокисимити-считыватель или считыватель магнитных карт, вставьте плату R700 или, в качестве альтернативы, плату R800 для кодонаборной клавиатуры. Вставьте карту памяти для сохранения зарегистрированных пользователей на другой плате и их загрузке. R700 R700 CANCELLI AUTOMATICI...
- Page 107 Создание учетной записи пользователя с присвоенной командой Пользователь Присвоенная Важное примечание: перед выполнением процедуры вытащите карту памяти. команда 1) Выберите “U 1”. Подтвердите, нажав на кнопку ENTER. < > ENTER 2) Выберите ту команду (1=пошаговый режим, 2=последовательный режим, 10 - 3=открыть, 4=пропуск...
- Page 108 Проверка приводов 1) Выберите “A 2”. Подтвердите, нажав на кнопку ENTER. < > ENTER 2) Выберите 1, чтобы начать проверку. Подтвердите, нажав на кнопку ENTER. < < < < > > > > ENTER 3) ... на дисплее появится надпись “---” - - - в...
- Page 109 Регулирование движения Важное примечание: перед тем как отрегулировать движение створок, убедитесь в отсутствии каких-либо препятствий и наличии механических упоров открывания и закрывания. Важно! Все устройства безопасности будут отключены до полного завершения регулировки движения, за исключением устройства для функции СТОП. 1) Выберите “A 3”. Подтвердите, нажав...
- Page 110 Иллюстрация участков и мест замедления и остановки Примечание: участки движения и места замедления и остановки створок были испытаны на соответствие параметрам технических нормативов EN 12445 и EN 12453 в отношении толкающего усилия движущейся створки. A = Участок движения с нормальной скоростью B* = Участок...
-
Page 111: Утилизация Упаковки
Мигает красный светодиодный индикатор: плата управления еще не отрегулирована для движения ворот. Утилизация отходов В качестве гарантии защиты и охраны окружающей среды компания CAME CANCELLI AUTOMATICI S.p.A внедряет на территории своих учреждений систему управления окружающей средой, сертифицированную и полностью соответствующую международному стандарту UNI EN ISO 14001. - Page 112 HR • Za sve dodatne informacije o poduzeću, proizvodima i tehničkoj podršci: UK • Для отримання будь-якої іншої інформації про компанію, продукцію та технічну підтримку: www. came.com www. came.com CAME Cancelli Automatici S.p.A. CAME Cancelli Automatici S.p.A. Via Martiri Della Libertà, 15 31030 Dosson Di Casier...
Need help?
Do you have a question about the ZL92 and is the answer not in the manual?
Questions and answers