CAME ZLJ24 Installation Manual
Control panel for 24 v gearmotors
Hide thumbs
Also See for ZLJ24:
- Installation manual (37 pages) ,
- Original-spare parts (11 pages) ,
- Installation manual (32 pages)

Related Manuals for CAME ZLJ24


Summary of Contents for CAME ZLJ24
- Page 1 Quadro comando per motoriduttori a 24 V FA01571M04 ZLJ24 ZLJ24Z Italiano English Français MANUALE DI INSTALLAZIONE Pусский...
-
Page 2: Avvertenze Generali Per L'installatore
fi nale in accordo alla Direttiva Macchine 2006/42/CE ed agli standard tecnici armonizzati di riferimento sono identifi cati nel catalogo generale dei prodotti CAME oppure nel sito internet www.came.com. • Verifi care che il range di temperature indicato sia adatto al luogo di installazione. •... - Page 3 • Si raccomanda di utilizzare adeguate protezioni per evitare possibili pericoli meccanici dovuti alla presenza di persone nel raggio d’azione dell'automazione. • I cavi elettrici devono passare attraverso apposite tubazioni, canaline e passacavi al fi ne di garantire un'adeguata protezione contro il danneggiamento meccanico. •...
- Page 4 UNI EN ISO 14001 a garanzia del rispetto e della tutela dell’ambiente. Vi chiediamo di continuare l’opera di tutela dell’ambiente, che CAME considera uno dei fondamenti di sviluppo delle proprie strategie operative e di mercato, semplicemente osservando brevi indicazioni in materia di smaltimento: SMALTIMENTO DELL’IMBALLO...
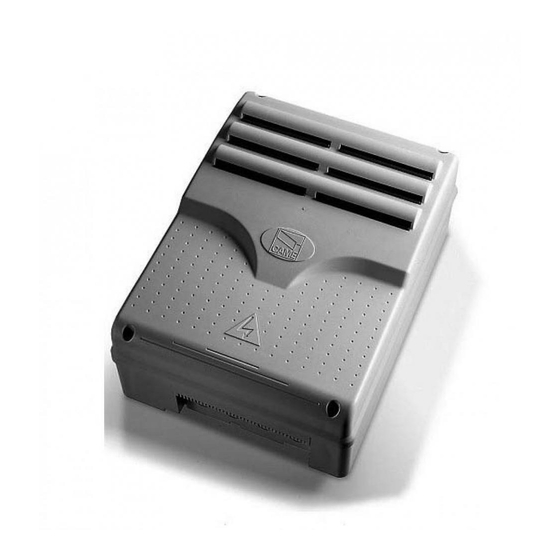
- Page 5 002ZLJ24Z Quadro comando multifunzioni per cancelli a due ante battenti, con display grafi co di programmazione e segnalazione e autodiagnosi dei dispositivi di sicurezza. Dati tecnici MODELLI ZLJ24 Alimentazione motore (V) 24 DC Alimentazione scheda (V) 24 AC Consumo in stand-by (W) Potenza (W) Termo-protezione trasformatore (°C)
-
Page 6: Descrizione Delle Parti
Descrizione delle parti Trasformatore Morsettiera per il collegamento dei fi necorsa LED di segnalazione tensione presente Morsettiera per il collegamento dei dispositivi di comando Display e di sicurezza Tasti per la programmazione Morsettiera per il collegamento del motoriduttore Trimmer per la regolazione dell'illuminazione del display Morsettiera per il collegamento dell'Encoder LED di segnalazione stato programmazione Morsettiera per l'alimentazione... - Page 7 Per i collegamenti di prodotti non contemplati in questo manuale fa fede la documentazione allegata ai prodotti stessi. Per il collegamento dell'Encoder, utilizzare un cavo tipo FRORPU 3 x 0,5mm2 o un cavo fornito da CAME su richiesta (codice articolo 801XA-0020).
-
Page 8: Installazione
INSTALLAZIONE Preparazione del quadro comando Separare le parti del quadro comando che lo compongono. Assemblare le cerniere a pressione. Inserire le cerniere nella scatola (sul lato destro o sinistro a scelta) e fermarle con le viti e le rondelle fornite. Le cerniere scorrono per ruotare. - Page 9 Fissaggio del quadro comando Forare i punti di fi ssaggio del quadro comando in una zona protetta. Fissare la base con viti e tasselli. Si consiglia di usare viti a testa bombata con impronta a croce (diametro massimo di 6 mm). Inserire i pressacavi con i tubi corrugati per il passaggio dei cavi elettrici...
-
Page 10: Collegamenti Elettrici
COLLEGAMENTI ELETTRICI Predisposizione dei cavi elettrici Eseguire i collegamenti elettrici secondo le disposizioni vigenti. Utilizzare dei pressacavi per collegare i dispositivi al quadro comando. Uno di questi deve essere destinato esclusivamente per il cavo di alimentazione. 230V 230V 24 12 0 24 12 0 S1 GND B1 B2... - Page 11 Alimentazione Collegamento alla rete elettrica (230/120 V AC - 50/60 Hz) Uscita alimentazione per accessori L'uscita eroga normalmente 24 V AC. L'uscita eroga 24 V DC quando intervengono le batterie, se presenti. La somma degli assorbimenti degli accessori connessi non deve superare i 50 W. Collegamento elettroserratura 12 V AC - max 15 W 10 11 TS E ES 1 2 3 3P 4 5 7 CX CY CZ Portata massima dei contatti...
- Page 12 Motoriduttore con finecorsa Motoriduttore ritardato in apertura Motoriduttore ritardato in chiusura M1 N1 E1 M2 N2 E2 2 FA1 FC1 FA2 FC2 Motoriduttore con Encoder Motoriduttore ritardato in apertura Motoriduttore ritardato in chiusura M1 N1 E1 M2 N2 E2 AMICO-AXO-FROG-J-MYTO-ATS M1 N1 E1 + E - M2 N2 E2 + E - F4000-FAST-FERNI-FROG Cavo verde...
-
Page 13: Dispositivi Di Comando
Dispositivi di comando Pulsante di STOP (contatto NC) Arresta il cancello ed esclude l’eventuale chiusura automatica. Usare un dispositivo di comando per riprendere il movimento. Se il contatto non viene utilizzato, deve essere disattivato in fase di programmazione. Dispositivo di comando (contatto NO) Funzione SOLO APRE Con funzione [AZIONE MANTENUTA] attiva, è... -
Page 14: Dispositivi Di Segnalazione
Dispositivi di segnalazione Lampeggiatore Lampeggia durante le fasi di apertura e chiusura dell'automazione. Lampada supplementare Aumenta l'illuminazione nella zona di manovra. Spia stato automazione Segnala lo stato dell'automazione. 10 11 TS E ES 1 2 3 3P 4 5 7 CX CY CZ Dispositivi di sicurezza In fase di programmazione, confi... - Page 15 Fotocellule DIR / DELTA-S Fotocellule DIR / DELTA-S Collegamento standard Collegamento con test di sicurezza Vedi funzione [Test sicurezze]. 10 11 TS E ES 1 2 3 3P 4 5 7 CX CY CZ 10 11 TS E ES 1 2 3 3P 4 5 7 CX CY CZ 2 TX C NC TX 2 2 TX C NC...
-
Page 16: Messa In Funzione
PROGRAMMAZIONE Funzione dei tasti di programmazione Tasto ESC Il tasto ESC permette di eseguire le operazioni di seguito descritte. Uscire dal menu Annullare le modifi che Tornare alla schermata precedente Tasti < > I tasti < > permettono di eseguire le operazioni di seguito descritte. Navigare attraverso le voci del menu Incrementare o decrementare un valore Tasto ENTER... - Page 17 Chiusura automatica Permette di attivare la chiusura automatica. [FUNZIONI] [Ch. Automatica] [Disattivato] [Attivato] (Default) Azione mantenuta Con la funzione attiva, il movimento dell’automazione in apertura (comando 2-3) o in chiusura (comando 2-4) si interrompe quando il dispositivo di comando viene rilasciato. L'attivazione della funzione esclude tutti gli altri dispositivi di comando.
- Page 18 Stop totale Arresta il cancello ed esclude l’eventuale chiusura automatica. Usare un dispositivo di comando per riprendere il movimento. [FUNZIONI] [Stop Totale] [Disattivato] [Attivato] (Default) Ingresso CX Associa una funzione all’ingresso CX. [FUNZIONI] [Ingresso CX] [Disattivato] [C1] = Riapertura durante la chiusura (Fotocellule) [C2] = Richiusura durante l'apertura (Fotocellule)
- Page 19 Ingresso CZ Associa una funzione all’ingresso CZ. [FUNZIONI] [Ingresso CZ] [Disattivato] [C1] = Riapertura durante la chiusura (Fotocellule) (Default) [C2] = Richiusura durante l'apertura (Fotocellule) [C3] = Stop parziale Solo con [Ch. automatica] attivata. [C4] = Attesa ostacolo (Fotocellule) [C7] = Riapertura durante la chiusura (Bordi sensibili) [C8] = Richiusura durante l'apertura (Bordi sensibili)
- Page 20 Comando 2-7 Per l'associazione di un comando al dispositivo collegato su 2-7. [FUNZIONI] [Comando 2-7] [Apre-Chiude] (Default) [Ap. Stop Ch.] Comando 2-3P Per l'associazione di un comando al dispositivo collegato su 2-3P. [FUNZIONI] [Comando 2-3P] [Parziale] Il grado di apertura dell'anta viene impostato con la funzione [Ap.
- Page 21 Baudrate CRP Imposta la velocità di comunicazione del sistema di connessione remota. [FUNZIONI] [Baudrate CRP] [1200] [2400] [4800] [9600] [19200] [38400] (Default) [57600] [115200] Libera ostacolo In caso di ostacolo rilevato dal bordo sensibile o dal sensore amperometrico della scheda elettronica, avviene l'inversione di marcia per uno spazio suffi ciente a liberare l'ostacolo.
- Page 22 Partenza rallentata Per impostare un rallentamento di qualche secondo dopo ogni comando di apertura e di chiusura. [IMP. CORSA] [Partenza Rall] [Disattivato] (Default) [Attivato] Sensibilità amperometrica La funzione appare solo se viene disattivata la funzione [Encoder]. Con funzione disattivata, arresto delle in caso di ostacolo. Per la gestione della sensibilità...
- Page 23 Sensibilità rallentamento Regolazione della sensibilità di rilevazione degli ostacoli durante la fase di rallentamento. Questa funzione compare solo se sono attive le funzioni [Sensibilità] e [Rallent. Enc]. [ENCODER] [Sensib. Rall] Questa funzione compare solo se è attivo il parametro [ENCODER] dalla funzione [Confi...
- Page 24 Punto di accostamento in chiusura di M1 Imposta il punto di inizio dell'accostamento in chiusura di M1 (percentuale della corsa totale). [ENCODER] [M1 Acc. CH %] Da 1% a 15% (Default 15%) Questa funzione compare solo se è attivo il parametro [ENCODER] dalla funzione [Confi...
- Page 25 Tempo di chiusura automatica pedonale Imposta il tempo che deve trascorrere prima che si attivi la chiusura automatica, una volta che è stato raggiunto il punto di fi necorsa in apertura pedonale (apertura completa solo di una delle due ante) o parziale (apertura parziale solo di una delle due ante).
- Page 26 L’operazione può essere svolta mediante un trasmettitore o altro dispositivo di comando. Le schede che gestiscono i dispositivi di comando (AF - R700 - R800) devono essere innestate nei connettori. Scaricare dal portale docs.came.com il modulo ELENCO UTENTI REGISTRATI, digitando L20180423. [UTENTI]...
- Page 27 Rimuovi tutti Rimuove tutti gli utenti registrati. [UTENTI] [Rimuovi TUTTI] [Confermi? (no)] [Confermi? (si)] Salva memoria Salva gli utenti e le impostazioni dell'impianto nella Memory Roll. [UTENTI] [Salva Memoria] [Confermi? (no)] [Confermi? (si)] Premere ENTER per confermare. Carica memoria Carica gli utenti e le impostazioni dell'impianto dalla Memory Roll. Le schede devono avere la stessa versione, altrimenti sarà...
- Page 28 Messaggio iniziale Per modifi care il messaggio iniziale. [INFO] [Msg. iniziale] [WWW.CAME.COM] (Default) Premere ENTER per modifi care il messaggio iniziale. Usare il tasto ENTER per spostare il cursore in avanti. Usare il tasto ESC per spostare il cursore indietro.
- Page 29 Cambia password Permette di modifi care la password. [Password] [Cambia PSW] [Confermi? (no)] [Confermi? (si)] Usare le frecce per selezionare un numero. Premere ENTER per confermare. Ripetere la password. Rimuovi password Permette di rimuovere la password. [Password] [Rimuovi PSW] [Confermi? (no)] [Confermi? (si)]...
-
Page 30: Messaggi Di Errore
MESSAGGI DI ERRORE Encoder - ERRORE L'Encoder è scollegato. L'Encoder è rotto. Errore! L'Encoder è scollegato. L'Encoder è rotto. Test Sicurezze - ERRORE Le fotocellule non sono collegate o confi gurate correttamente. Fine corsa - ERRORE Malfunzionamento sui contatti di fi necorsa. Tempo Lavoro - ERRORE Terminato il tempo massimo del lavoro impostato. -
Page 31: Operazioni Finali
OPERAZIONI FINALI Prima di chiudere il coperchio, verifi care che l’ingresso dei cavi sia sigillato per evitare l'entrata di insetti e la formazione di umidità. - Page 32 CAME S.p.A. Via Martiri della Libertà, 15 31030 Dosson di Casier Treviso - Italy Tel. (+39) 0422 4940 Fax (+39) 0422 4941...
- Page 33 Control panel for 24 V gearmotors FA01571-EN ZLJ24 ZLJ24Z INSTALLATION MANUAL English...
- Page 34 fi nal installation to comply with the Machinery Directive (2006/42/EC) and with the reference harmonised technical standards are specifi ed in the general CAME product catalogue or on the website www.came.com. • Check that the temperature ranges given are suitable for the installation site.
- Page 35 • Use suitable protection to prevent any mechanical hazards due to persons loitering within the operating range of the operator. • The electrical cables must pass through special pipes, ducts and cable glands in order to guarantee adequate protection against mechanical damage. • The electrical cables must not touch any parts that may overheat during use (such as the motor and transformer).
-
Page 36: Dismantling And Disposal
UNI EN ISO 14001 standard to ensure that the environment is respected and safeguarded. Please continue safeguarding the environment. At CAME we consider it one of the fundamentals of our operating and market strategies. Simply follow these brief disposal guidelines: DISPOSING OF THE PACKAGING The packaging materials (cardboard, plastic, etc.) can be disposed of easily as solid urban waste, separated for recycling. - Page 37 002ZLJ24Z Multifunction control panel for swing gates with two leaves. Graphic programming display and signalling and self-diagnostics using safety devices. Technical data MODELS ZLJ24 Motor power supply (V) 24 DC Board power supply (V) 24 AC Standby consumption (W) Power (W) Transformer thermal protection (°C)
-
Page 38: Description Of Parts
Description of parts Transformer Terminal board for connecting the limit switches Power LED Terminal board for connecting control and safety devices Display Terminal board for connecting the gearmotor Programming buttons Terminal board for connecting the encoder Trimmer to adjust the display lighting Power supply terminal board Programming status warning LED Line fuse... - Page 39 For information on connecting products not covered in this manual, please see the documentation accompanying the products themselves. To connect the encoder, use a FRORPU 3 x 0.5 mm² cable or a cable supplied by CAME on request (item code 801XA-0020).
-
Page 40: Installation
INSTALLATION Preparing the control panel Separate the parts of the control panel. Assemble the pressure hinges. Insert the hinges into the box (either on the left or the right) and fasten them using the screws and washers supplied. The hinges slide to rotate. Drill the pre-marked holes. - Page 41 Fastening the control panel Drill the fi xing points in the control panel in a protected area. Fasten the base using screws and plugs. Use Phillips round head screws (maximum diameter 6 mm). Insert the cable gland with the corrugated tubes for threading the electrical cables...
-
Page 42: Electrical Connections
ELECTRICAL CONNECTIONS Preparing the electrical cables Connect all wires and cables in compliance with the law. Use cable glands to connect the devices to the control panel. One of these must be used exclusively for the power supply cable. 230V 230V 24 12 0 24 12 0... -
Page 43: Power Supply
Power supply Connecting to the mains (230/120 V AC - 50/60 Hz) Power supply output for accessories The output normally delivers 24 V AC. The output delivers 24 V DC when the batteries start operating, if they are installed. The sum of the power draw for the connected accessories must not exceed 50 W. Connection for the 12 V AC electric lock - 15 W max. - Page 44 Gearmotor with limit switch Gearmotor delayed while opening Gearmotor delayed while closing M1 N1 E1 M2 N2 E2 2 FA1 FC1 FA2 FC2 Gear motor with encoder Gearmotor delayed while opening Gearmotor delayed while closing M1 N1 E1 M2 N2 E2 AMICO-AXO-FROG-J-MYTO-ATS M1 N1 E1 + E - M2 N2 E2 + E - F4000-FAST-FERNI-FROG...
- Page 45 Command and control devices STOP button (NC contact) Stop the gate and exclude automatic closing. Use a control device to resume movement. If the contact is not used, it must be deactivated during programming. Control device (NO contact) OPEN ONLY function When the [HOLD-TO-RUN] function is active, the control device must be connected during OPENING.
-
Page 46: Signalling Devices
Signalling devices Flashing beacon It fl ashes when the operator opens and closes. Additional light It increases the light in the manoeuvring area. Operator status warning light It notifi es the user of the operator status. 10 11 TS E ES 1 2 3 3P 4 5 7 CX CY CZ Safety devices During programming, confi... - Page 47 DIR / DELTA-S photocells DIR / DELTA-S photocells Standard connection Connection with safety test See [Safety devices test] function. 10 11 TS E ES 1 2 3 3P 4 5 7 CX CY CZ 10 11 TS E ES 1 2 3 3P 4 5 7 CX CY CZ 2 TX C NC TX 2 2 TX C NC...
-
Page 48: Getting Started
PROGRAMMING Programming button functions ESC button The ESC button is used to perform the operations described below. Exit the menu Delete the changes Go back to the previous screen < > buttons The <> buttons are used to perform the operations described below. Navigate the menu Increase or decrease values ENTER button... - Page 49 Automatic closure Activate automatic closing. [FUNCTIONS] [Automatic close] [Deactivated] [Activated] (Default) Hold-to-run With the function active, the operator opening movement (command 2-3) or closing movement (command 2-4) is interrupted when the control device is released. When the function is active, it excludes all other control devices. [FUNCTIONS] [Hold-to-run] [Deactivated] (Default)
- Page 50 Total stop Stop the gate and exclude automatic closing. Use a control device to resume movement. [FUNCTIONS] [Total stop] [Deactivated] [Activated] (Default) CX input Associate a function with the CX input. [FUNCTIONS] [CX input] [Deactivated] [C1] = Reopen while closing (photocells) [C2] = Reclose while opening (Photocells)
- Page 51 CZ input Associate a function with the CZ input. [FUNCTIONS] [CZ input] [Deactivated] [C1] = Reopen while closing (Photocells) (Default) [C2] = Reclose while opening (Photocells) [C3] = Partial stop Only with [Automatic close] activated. [C4] = Obstacle standby (Photocells) [C7] = Reopen while closing (sensitive edges) [C8] = Reclose while opening (sensitive...
- Page 52 Command 2-7 Associate a command with the device connected to 2-7. [FUNCTIONS] [Command 2-7] [Open-Close](Default) [Op. Stop Cl.] Command 2-3P Associate a command to the connected device on 2-3P. [FUNCTIONS] [Command 2-3P] [Partial] The degree of opening of the leaf is set with the [Part.
- Page 53 CRP Baud rate Set the communication speed of the remote connection system. [FUNCTIONS] [CRP Baud rate] [1200] [2400] [4800] [9600] [19200] [38400] (Default) [57600] [115200] Removing obstacles If an obstacle is detected by the sensitive edge or by the amperometric sensor on the electronic board, movement is inverted to create a space suffi cient to clear the obstacle.
- Page 54 Soft start Set a slowdown of a few seconds after each opening and closing command. [SET TRAVEL] [Soft Start] [Deactivated] (Default) [Activated] Amperometric sensitivity This function only appears if the [Encoder] function is deactivated. With the function deactivated, the leaves stop if an obstacle is detected. Manage the sensitivity of obstacle detection.
- Page 55 Slowdown sensitivity Adjust the obstruction detection sensitivity during slowdown. This function appears only if the [Sensitivity] and [Enc. Slow.] functions are active. [ENCODER] [Slow. sens.] This function appears only if the [ENCODER] parameter is activated from the [Confi g] function Opening slowdown point for M1 Set the opening slowdown starting point for M1 (percentage of the total travel).
- Page 56 M1 closing approach point Set the closing approach starting point for M1 (percentage of the total travel). [ENCODER] [M1 Appr. CL. %] From 1% to 15% (Default 15%) This function appears only if the [ENCODER] parameter is activated from the [Confi g] function Closing approach point for M2 Set the closing approach starting point for M2 (percentage of the total travel).
- Page 57 Pedestrian automatic closing time Set the time that must pass before automatic closing is activated, once the limit switch has been reached for a pedestrian opening (complete opening of only one of the two leaves) or partial opening (partial opening of only one of the two leaves). [SET TIME] [Pedestrian ACT] from 0 to 300 seconds (Default 10...
- Page 58 The operation can be carried out by using a transmitter or another control device. The boards that manage the control devices (AF - R700 - R800) must be inserted into the connectors. Download the LIST OF REGISTERED USERS form from the docs.came.com portal by typing in L20180423. [USERS]...
- Page 59 Remove all Remove all registered users. [USERS] [Delete all users] [Confi rm? (No)] [Confi rm? (Yes)] Save memory Save the system users and settings in the Memory Roll. [USERS] [Save memory] [Confi rm? (No)] [Confi rm? (Yes)] Press ENTER to confi rm. Load the memory Load the users and system settings from the Memory Roll.
- Page 60 Initial message Change the initial message. [INFO] [Initial msg] [WWW.CAME.COM] (Default) Press ENTER to change the initial message. Use the ENTER key to move the cursor forwards. Use the ESC key to move the cursor backwards. Use the arrows to select a letter or a number.
- Page 61 Change password Change the password. [Password] [Change PSW] [Confi rm? (No)] [Confi rm? (Yes)] Use the arrows to select a number. Press ENTER to confi rm. Enter the password again. Remove password Remove the password. [Password] [Delete PSW] [Confi rm? (No)] [Confi...
-
Page 62: Error Messages
ERROR MESSAGES Encoder - ERROR The Encoder is disconnected. The Encoder is broken. Error! The Encoder is disconnected. The Encoder is broken. Safety test - ERROR The photocells are not correctly connected or confi gured. Limit-switch - ERROR Malfunctioning limit-switch contacts. Operating time - ERROR Finished the maximum work time set. -
Page 63: Final Operations
FINAL OPERATIONS Before closing up the casing, check that the cable inlets are sealed to stop insects getting in and to prevent damp. - Page 64 CAME S.p.A. Via Martiri della Libertà, 15 31030 Dosson di Casier Treviso - Italy Tel. (+39) 0422 4940 Fax (+39) 0422 4941...
-
Page 65: Manuel D'installation
Armoire de commande pour motoréducteurs 24 V FA01571-FR ZLJ24 ZLJ24Z MANUEL D'INSTALLATION Français... - Page 66 à la mise en conformité de l'installation fi nale selon la directive Machines 2006/42/CE et les normes techniques harmonisées de référence sont identifi és dans le catalogue général des produits CAME ou sur le site www.came. com. • S'assurer que la température du lieu d'installation correspond à celle indiquée sur l'automatisme.
- Page 67 • Adopter des mesures de protection adéquates contre tout danger mécanique lié à la présence de personnes dans le rayon d’action de l’automatisme. • Les câbles électriques doivent passer à travers des tuyaux, des goulottes et des passe- câbles appropriés pour assurer une protection adéquate contre les dommages mécaniques.
- Page 68 MISE AU REBUT ET ÉLIMINATION CAME S.p.A. adopte dans ses établissements un Système de Gestion Environnementale certifi é et conforme à la norme UNI EN ISO 14001 qui garantit le respect et la sauvegarde de l'environnement. Nous vous demandons de poursuivre ces eff orts de sauvegarde de l'environnement, que CAME considère comme l'un des fondements du développement de ses propres...
- Page 69 002ZLJ24Z Armoire de commande multifonctions pour portails battants à deux vantaux avec affi cheur de programmation et de signalisation, et autodiagnostic des dispositifs de sécurité. Données techniques MODÈLES ZLJ24 Alimentation moteur (V) 24 DC Alimentation carte (V) 24 AC Consommation en stand-by (W) Puissance (W) Thermo-protection transformateur (°C)
-
Page 70: Description Des Parties
Description des parties Transformateur Bornier de connexion des butées de fi n de course Voyant de signalisation led de présence de tension Bornier de connexion des dispositifs de commande et Affi cheur de sécurité Touches de programmation Bornier de connexion du motoréducteur Trimmer pour le réglage de l'éclairage de l'affi cheur Bornier de connexion de l’encodeur LED de signalisation état programmation... - Page 71 être réévaluées en fonction des absorptions et des distances eff ectives. Pour les connexions de produits non indiqués dans ce manuel, considérer comme valable la documentation jointe à ces derniers. Pour connecter l’encodeur, utiliser un câble type FRORPU 3 x 0,5 mm² ou un câble fourni par la société CAME (code article 801XA-0020).
- Page 72 INSTALLATION Préparation de l’armoire de commande Séparer les parties de l’armoire de commande qui la composent. Assembler les charnières à pression. Introduire les charnières dans le boîtier (du côté droit ou gauche) et les fi xer à l'aide des vis et des rondelles fournies. Les charnières coulissent pour tourner.
- Page 73 Fixation de l’armoire de commande Percer les points de fi xation de l'armoire de commande dans une zone protégée. Fixer la base à l'aide de vis et de chevilles. Il est conseillé d’éviter d'utiliser des vis avec tête bombée cruciforme (diamètre maximal de 6 mm). Introduire les passe-câbles avec tuyaux ondulés pour le passage des câbles électriques...
-
Page 74: Branchements Électriques
BRANCHEMENTS ÉLECTRIQUES Position des câbles électriques Eff ectuer les branchements électriques selon les dispositions en vigueur. Utiliser des passe-câbles pour connecter les dispositifs à l’armoire de commande. Un de ces passe-câbles ne doit être destiné qu’au câble d'alimentation. 230V 230V 24 12 0 24 12 0 S1 GND... - Page 75 Alimentation Branchement au secteur (230/120 VAC - 50/60 Hz) Sortie alimentation pour accessoires La sortie alimente normalement en 24 VAC. La sortie fournit 24 VDC en cas d’intervention des éventuelles batteries. La somme des absorptions des accessoires connectés ne doit pas dépasser 50 W. Connexion serrure de verrouillage électrique 12 V AC - max.
- Page 76 Motoréducteur avec fin de course Motoréducteur retardé durant la phase d’ouverture Motoréducteur retardé durant la phase de fermeture M1 N1 E1 M2 N2 E2 2 FA1 FC1 FA2 FC2 Motoréducteur avec Encodeur Motoréducteur retardé durant la phase d’ouverture Motoréducteur retardé durant la phase de fermeture M1 N1 E1 M2 N2 E2 AMICO-AXO-FROG-J-MYTO-ATS M1 N1 E1 + E - M2 N2 E2 + E -...
-
Page 77: Dispositifs De Commande
Dispositifs de commande Bouton d'ARRÊT (contact NF) Arrête le portail et désactive l’éventuelle fermeture automatique. Utiliser un dispositif de commande pour reprendre le mouvement. Si le contact n'est pas utilisé, il doit être désactivé pendant la programmation. Dispositif de commande (contact NO) Fonction OUVERTURE SEULEMENT Avec fonction [ACTION MAINTENUE] activée, la connexion du dispositif de commande en OUVERTURE est obligatoire. -
Page 78: Dispositifs De Signalisation
Dispositifs de signalisation Clignotant Clignote durant les phases d'ouverture et de fermeture de l’automatisme. Lampe supplémentaire Permet d’augmenter l'éclairage de la zone de manœuvre. Témoin état automatisme Signale l'état de l’automatisme. 10 11 TS E ES 1 2 3 3P 4 5 7 CX CY CZ Dispositifs de sécurité... - Page 79 Photocellules DIR / DELTA-S Photocellules DIR / DELTA-S Connexion standard Connexion avec test de sécurité Voir fonction [Test sécurité]. 10 11 TS E ES 1 2 3 3P 4 5 7 CX CY CZ 10 11 TS E ES 1 2 3 3P 4 5 7 CX CY CZ 2 TX C NC TX 2 2 TX C NC...
-
Page 80: Mise En Fonction
PROGRAMMATION Fonction des touches de programmation Touche ESC La touche ESC permet d’eff ectuer les opérations décrites ci-après. Sortir du menu Annuler les modifi cations Revenir à la page-écran précédente Touches < > Les touches <> permettent d’eff ectuer les opérations décrites ci-après. Naviguer dans les options du menu Augmenter ou diminuer une valeur Touche ENTER... - Page 81 Fermeture automatique Permet d’activer la fermeture automatique. [FONCTIONS] [Ferm. Automatique] [Désactivée] [Activée](par défaut) Action maintenue Avec la fonction activée, le mouvement de l'automatisme en ouverture (commande 2-3) ou fermeture (2 -4) est interrompu au relâchement du dispositif de commande. L’activation de cette fonction désactive tous les autres dispositifs de commande. [FONCTIONS] [Act.
- Page 82 Arrêt total Arrête le portail et désactive l’éventuelle fermeture automatique. Utiliser un dispositif de commande pour reprendre le mouvement. [FONCTIONS] [Arrêt Total] [Désactivée] [Activée](par défaut) Entrée CX Associe une fonction à l’entrée CX. [FONCTIONS] [Entrée CX] [Désactivée] [C1] = Réouverture durant la fermeture (Photocellules) [C2 ]= Refermeture durant l’ouverture (Photocellules)
- Page 83 Entrée CZ Associe une fonction à l’entrée CZ. [FONCTIONS] [Entrée CZ] [Désactivée] [C1 ]= Réouverture durant la fermeture (Photocellules)(par défaut) [C2 ]= Refermeture durant l’ouverture (Photocellules) [C3 ]= Arrêt partiel Uniquement avec [Ferm. automatique] activée. [C4 ]= Attente obstacle (Photocellules) [C7 ]= Réouverture durant la fermeture (bords sensibles) [C8 ]= Refermeture durant l’ouverture...
- Page 84 Commande 2-7 Pour l’association d’une commande au dispositif connecté sur 2-7. [FONCTIONS] [Commande 2-7] [Ouverture-Fermeture](Par défaut) [Ouv. Arr. Ferm.] Commande 2-3P Pour l’association d’une commande au dispositif connecté sur 2-3P. [FONCTIONS] [Commande 2-3P] [Partielle] Le degré d’ouverture du vantail est confi...
- Page 85 Baudrate CRP Confi gure la vitesse de communication du système de connexion à distance. [FONCTIONS] [Baudrate CRP] [1200] [2400] [4800] [9600] [19200] [38400] (par défaut) [57600] [115200] Mode sans obstacle En cas de détection d’un obstacle par le bord sensible ou par le capteur ampérométrique de la carte électronique, il y a inversion du sens de marche de manière à...
- Page 86 Départ ralenti Pour confi gurer un ralentissement de quelques secondes après chaque commande d'ouverture et de fermeture. [INST. COURSE] [Départ Ral.] [Désactivée](par défaut) [Activée] Sensibilité ampérométrique Cette fonction n'apparaît qu'en cas de désactivation de la fonction [Encodeur]. Avec la fonction désactivée, arrêt en cas d’obstacle. Pour la gestion de la sensibilité...
- Page 87 Sensibilité ralentissement Réglage de la sensibilité de détection des obstacles durant la phase de ralentissement. Cette fonction n'apparaît qu'en cas d'activation des fonctions [Sensibilité] et [Ral. Enc.] [ENCODEUR] [Sensib. Ral.] Cette fonction n'apparaît qu'en cas d'activation du paramètre [ENCODEUR] par la fonction [Confi g] Point de ralentissement en ouverture de M1 Confi...
- Page 88 Point de rapprochement en fermeture de M1 Confi gure le point initial de rapprochement à la fermeture de M1 (pourcentage de la course totale). [ENCODEUR] [M1 Rapp. FER. %] De 1 % à 15 % (par défaut 15 %) Cette fonction n'apparaît qu'en cas d'activation du paramètre [ENCODEUR] par la fonction [Confi...
- Page 89 Temps de fermeture automatique piétonne Confi gure le temps qui doit s’écouler avant l’enclenchement de la fermeture, une fois que le point de fi n de course en ouverture piétonne (ouverture complète d’un seul des deux vantaux) ou partielle (ouverture partielle d’un seul des deux vantaux) a été...
- Page 90 Cette opération peut être eff ectuée par le biais d’un émetteur ou d’un autre dispositif de commande. Les cartes qui gèrent les dispositifs de commande (AF - R700 - R800) doivent être enfi chées dans les connecteurs. Télécharger sur le portail docs.came.com le formulaire LISTE UTILISATEURS ENREGISTRÉS en tapant L20180423. [UTILISATEURS] [Nouvel Utilisateur] [Désactivée]...
- Page 91 Supprimer tous Permet d'eff acer tous les utilisateurs enregistrés. [UTILISATEURS] [Supprimer TOUS] [Confi rmer ? (non)] [Confi rmer ? (oui)] Sauvegarder mémoire Sauvegarde les utilisateurs et les confi gurations de l'installation dans la mémoire. [UTILISATEURS] [Sauvegarder Mémoire] [Confi rmer ? (non)] [Confi...
- Page 92 Message initial Permet de modifi er le message initial. [INFOS] [Msg. initial] [WWW.CAME.COM] (par défaut) Appuyer sur ENTER pour modifi er le message initial. Utiliser la touche ENTER pour déplacer le curseur vers l’avant. Utiliser la touche ESC pour déplacer le curseur vers l’arrière.
- Page 93 Modifi er mot de passe Permet de modifi er le mot de passe. [Mot de passe] [Modifi er MdP] [Confi rmer ? (non)] [Confi rmer ? (oui)] Utiliser les fl èches pour sélectionner un numéro. Appuyer sur ENTER pour confi rmer. Répéter le mot de passe.
-
Page 94: Messages D'erreur
MESSAGES D'ERREUR Encodeur - ERREUR L’encodeur est déconnecté. L’encodeur est cassé. Erreur ! L’encodeur est déconnecté. L’encodeur est cassé. Test Sécurités - ERREUR Les photocellules ne sont pas connectées ou confi gurées correctement. Fin de course - ERREUR Mauvais fonctionnement sur les contacts de fi n de course. Temps Fonction. -
Page 95: Opérations Finales
OPÉRATIONS FINALES Avant de fermer le couvercle, s'assurer que l'entrée des câbles est bien scellée de manière à éviter la pénétration d'insectes ainsi que la formation d'humidité. - Page 96 CAME S.p.A. Via Martiri della Libertà, 15 31030 Dosson di Casier Treviso - Italy Tél. (+39) 0422 49 40 Fax (+39) 0422 49 41...
-
Page 97: Руководство По Монтажу
Блок управления для приводов 24 В FA01571-RU ZLJ24 ZLJ24Z РУКОВОДСТВО ПО МОНТАЖУ Русский... - Page 98 необходимые для обеспечения соответствия конечной установки Директиве о безопасности машин и оборудования 2006/42/CE и гармонизированным техническим стандартам, указаны в общем каталоге продукции CAME или на сайте www.came.com. • Убедитесь в том, что указанный диапазон температур соответствует температуре окружающей среды в месте установки. • Убедитесь...
- Page 99 • Рекомендуется использовать надлежащие средства защиты во избежание возникновения опасности механического повреждения, связанной с присутствием людей в зоне работы устройства. • Электрические кабели должны быть проложены в специальных трубопроводах, каналах и через сальники, чтобы обеспечить надлежащую защиту от механических повреждений. • Электрические кабели не должны соприкасаться с деталями, которые...
- Page 100 эксплуатации изделий, из которых состоит конечная машина. УТИЛИЗАЦИЯ CAME S.p.A. имеет сертификат системы защиты окружающей среды UNI EN ISO 14001, гарантирующий экологическую безопасность на ее заводах. Мы просим вас прилагать максимальные усилия по защите окружающей среды. Компания САМЕ считает одним из фундаментальных пунктов стратегии рыночных отношений выполнение этих...
- Page 101 самодиагностики устройств безопасности. 002ZLJ24Z Многофункциональный блок управления для двустворчатых распашных ворот с дисплеем и функцией самодиагностики устройств безопасности. Технические характеристики МОДЕЛИ ZLJ24 Электропитание привода (В) Электропитание блока управления (В) Потребление в режиме ожидания (Вт) Мощность (Вт) Термозащита трансформатора (°C) 120°...
-
Page 102: Описание Компонентов
Описание компонентов Трансформатор Клеммная панель для подключения концевых Светодиодный индикатор наличия напряжения выключателей электропитания Клеммная панель для подключения устройств Дисплей управления и безопасности Кнопки программирования Клеммная панель для подключения электропривода Подстроенный конденсатор для регулировки яркости Клеммная панель для подключения энкодера дисплея... -
Page 103: Габаритные Размеры
в таблице должны быть пересмотрены с учетом реальных показателей потребления и фактических расстояний. При подключении устройств, не рассматриваемых в этой инструкции, следует руководствоваться технической документацией на соответствующее изделие. Для подключения энкодера используйте кабель типа FRORPU 3 x 0,5 мм2 или кабель, предоставляемый компанией CAME (артикул изделия 801XA-0020). - Page 104 МОНТАЖ Подготовка блока управления к монтажу Разделите блок управления на части, из которых он состоит. Соберите нажимные петли. Вставьте петли в корпус (справа или слева по выбору) и закрепите их прилагаемыми винтами и шайбами. Петли скользят для вращения. Рассверлите предварительно размеченные отверстия. Диаметр отверстий должен составлять 20 мм.
- Page 105 Монтаж блока управления Просверлите отверстия для крепления блока управления в защищенном месте. Закрепите основание прилагаемыми дюбелями и винтами. Рекомендуется использовать винты с выпуклой головкой под крест (макс. диаметром 6 мм). Вставьте в отверстия гермовводы с гофрированными трубами для прокладки электрических кабелей...
-
Page 106: Электрические Подключения
ЭЛЕКТРИЧЕСКИЕ ПОДКЛЮЧЕНИЯ Подготовка электрокабелей Выполните электрические подключения в соответствии с действующими нормами. Для подключения устройств к блоку управления используйте гермовводы. Один из гермовводов должен быть предназначен непосредственно для кабеля электропитания. 230V 230V 24 12 0 24 12 0 S1 GND B1 B2 ENC1 ENC2... - Page 107 Электропитание Подключение к сетевому электропитанию (~120/230 В, 50/60 Гц) Выход электропитания аксессуаров Выход стандартного питания ~24 В. Выход =24 В при электропитании от аккумуляторов (если установлены). Суммарное потребление подключенных аксессуаров не должно превышать 50 Вт. Подключение электрозамка ~12 В, макс. 15 Вт 10 11 TS E ES 1 2 3 3P 4 5 7 CX CY CZ Максимальная...
- Page 108 Привод с концевыми выключателями Привод с задержкой при открывании Привод с задержкой при закрывании M1 N1 E1 M2 N2 E2 2 FA1 FC1 FA2 FC2 Мотор-редуктор с энкодером Привод с задержкой при открывании Привод с задержкой при закрывании M1 N1 E1 M2 N2 E2 AMICO-AXO-FROG-J-MYTO-ATS M1 N1 E1 + E - M2 N2 E2 + E - F4000-FAST-FERNI-FROG...
- Page 109 Устройства управления Кнопка «СТОП» (нормально-замкнутые контакты) Останавливает ворота и отменяет последующий цикл автоматического закрывания. Для возобновления движения необходимо использовать соответствующее устройство управления. Если этот контакт не используется, его следует отключить на этапе программирования. Устройство управления (нормально-разомкнутые контакты) Функция «ТОЛЬКО ОТКРЫТЬ» При...
-
Page 110: Устройства Безопасности
Устройства сигнализации Сигнальная лампа Мигает во время открывания и закрывания автоматики. Вспомогательная лампа Увеличивает освещенность зоны проезда. Лампа-индикатор состояния автоматики Обозначает состояние автоматики. 10 11 TS E ES 1 2 3 3P 4 5 7 CX CY CZ Устройства безопасности На... - Page 111 Фотоэлементы DIR / DELTA-S Фотоэлементы DIR / DELTA-S Стандартное подключение Подключение с диагностикой См. функцию [Диагностика устройств безопасности]. 10 11 TS E ES 1 2 3 3P 4 5 7 CX CY CZ 10 11 TS E ES 1 2 3 3P 4 5 7 CX CY CZ 2 TX C NC TX 2 2 TX C NC...
-
Page 112: Ввод В Эксплуатацию
ПРОГРАММИРОВАНИЕ Функции кнопок программирования Кнопка ESC Кнопка ESC позволяет выполнить нижеописанные действия. Выйти из меню Отменить изменения Вернуться на предыдущую страницу Кнопки < > Кнопки < > позволяют выполнить нижеописанные действия. Навигация по пунктам меню Увеличение или уменьшение значения выбранного параметра Кнопка... - Page 113 Автоматическое закрывание Позволяет активировать функцию автоматического закрывания. [FUNCTIONS] (ФУНКЦИИ) [Automatic Cls.] [Deactivated] (Отключено) (Автоматическое закрывание) [Activated] (Default) (включено, по умолчанию) Присутствие оператора Если эта функция включена, движение автоматики при открывании (команда 2–3) или закрывании (команда 2–4) прерывается, когда прекращается нажатие соответствующей кнопки управления. Активация...
- Page 114 Функция «Молоток» Прежде чем выполнить команду на открывание или закрывание, ворота давят на механический упор в течение нескольких секунд, помогая тем самым открыть электрозамок. Время дожима настраивается с помощью функции [Jolt stop T.] (Время включения функции «Молоток») [FUNCTIONS] (ФУНКЦИИ) [Jolt stop] (функция «Молоток») [Deactivated] (Default) (Отключено, по...
- Page 115 Входные контакты CY Позволяет закрепить за входными контактами CY одну из доступных функций. [FUNCTIONS] (ФУНКЦИИ) [CY input] (Вход CY) [Deactivated] (Default) (Отключено, по умолчанию) [C1] = Открывание в режиме закрывания (фотоэлементы) [C2] = Закрывание в режиме открывания (фотоэлементы) [C3] = Частичная остановка Только при...
- Page 116 Замок Позволяет назначить команду для разблокировки электрозамка. [FUNCTIONS] (ФУНКЦИИ) [Lock] (Замок) [Deactivated] (Default) (Отключено, по умолчанию) [Close] (Закрывание) [Open] (Открывание) [Open-Close] (Открывание- Закрывание) Конфигурации Позволяет настроить замедление и конечные положения. [Slwdwn] (Замедл.) и [OpLs-ClSloDwn] (КВ откр.-Замедл. закр.) должны настраиваться с помощью функции...
- Page 117 Режим управления для контактов 2-3Р Присваивает режим управления устройству, подключенному к контакту 2-3Р. [FUNCTIONS] (ФУНКЦИИ) [2-3P command] (Команда 2-3Р) [Partial] (Частичное) Степень открывания створки настраивается с помощью функции [Partial open] (Частичное открывание) в меню [SET TIMES] (РЕГУЛИРОВКА ВРЕМЕНИ). [Pedestrian] (Default) (Для пешеходов, по...
- Page 118 Освобождение от препятствия В случае обнаружения препятствия чувствительным профилем или амперометрическим датчиком электронной платы направление движения изменяется для обеспечения пространства, достаточного для устранения препятствия. При отключенной функции направление движения изменяется, пока не будет достигнуто крайнее положение. [FUNCTIONS] (ФУНКЦИИ) [[Obstruction free] (Препятствия [Deactivated] (Default) (Отключено, по...
- Page 119 Чувствительность токовой системы обнаружения препятствий Функция доступна только в том случае, если функция [Энкодер] выключена. Если функция отключена, автоматика останавливается при обнаружении препятствия. Для регулировки чувствительности системы обнаружения препятствий. В зависимости от параметра, установленного для функции [Confi g] (Конфиг.), возможны различные действия при обнаружении...
- Page 120 Чувствительность при замедлении движения Эта настройка позволяет отрегулировать чувствительность системы защиты на этапе замедления. Эта функция доступна только в том случае, если активированы функции [Sensitivity] (Чувствительность) и [Enc. Slwdwn] (Замедление энкодера) [ENCODER] (ЭНКОДЕР) [Slodwn. Sens.] (Чувствительность замедления) Эта функция доступна только в...
- Page 121 Точка замедления при закрывании М2 Настройка точки начала замедления при закрывании М2 (в процентном отношении к общему ходу). Эта функция доступна только в том случае, если активирована функция [Enc. Slwdwn] (Замедление энкодера) [ENCODER] (ЭНКОДЕР) [M2 CL. Slwdwn %] (Замедление От 1 % до 60 % (по умолчанию 10 %) М2 при...
- Page 122 Калибровка движения Запускает автоматическое определение параметров хода. [ENCODER] (ЭНКОДЕР) [Calibrate Gate-Swing] [Confi rm? (no)] (Подтвердить? (нет)) (Калибровка движения) [Confi rm? (yes)] (Подтвердить? (да)) Эта функция доступна только в том случае, если включен параметр [ENCODER] (ЭНКОДЕР) функции [Confi g] (Конфиг.). Время автоматического закрывания Устанавливает...
- Page 123 Добавление осуществляется с помощью пульта ДУ или другого устройства управления. Платы, контролирующие устройства управления (AF - R700 - R800), должны быть вставлены в соответствующие разъемы. Загрузите с сайта docs.came.com модуль «СПИСОК ЗАРЕГИСТРИРОВАННЫХ ПОЛЬЗОВАТЕЛЕЙ», набрав L20180423. [USERS] (ПОЛЬЗОВАТЕЛИ) [New User] (Новый...
- Page 124 Связанная функция Связывает функцию управления с пользователем. [USERS] (ПОЛЬЗОВАТЕЛИ) [Associated Funct.] (Связанная [2-7] (Пошаговый или функция) последовательный режим) [Opens] (Открыть) [B1-B2] [2-3P] (Пропуск пешехода или частичное открывание) Удаление пользователя Удаляет одного из зарегистрированных пользователей. [USERS] (ПОЛЬЗОВАТЕЛИ) [Remove Usr] (Удалить пользователя) Удалить всех пользователей Удаляет...
- Page 125 [INFO] (ИНФО) [Number of Runs] (Количество циклов) Начальное сообщение Позволяет изменить начальное сообщение. [INFO] (ИНФО) [Open. Msg.] (Начальное [WWW.CAME.COM] (по умолчанию) сообщение) Нажмите ENTER, чтобы изменить начальное сообщение. Используйте кнопку ENTER, чтобы перемещать курсор вперед. Используйте кнопку ESC, чтобы перемещать курсор назад.
- Page 126 Проверка приводов Проверка направления открывания створок ворот. [MOT TEST] (ПРОВЕРКА [<=M1 M2=>] Нажмите и удерживайте кнопку <. ПРИВОДОВ) Убедитесь в том, что M1 выполняет открывание. Нажмите и удерживайте кнопку >. Убедитесь в том, что M2 выполняет открывание. Если створка движется в неправильную...
-
Page 127: Сообщения Об Ошибках
СООБЩЕНИЯ ОБ ОШИБКАХ Энкодер - ОШИБКА Энкодер отсоединен. Энкодер неисправен. Ошибка! Энкодер отсоединен. Энкодер неисправен. Тестирование Фотоэлементы не подключены или настроены неправильно. безопасности - ОШИБКА Концевые Неисправность контактов концевого выключателя. выключатели - ОШИБКА Время работы - Максимальное установленное рабочее время истекло. ОШИБКА... - Page 128 CAME S.p.A. Via Martiri della Libertà, 15 31030 Доссон-ди-Казьер Treviso - Italy (Италия) Тел.: (+39) 0422 4940 Факс: (+39) 0422 4941...
Need help?
Do you have a question about the ZLJ24 and is the answer not in the manual?
Questions and answers