Table of Contents
Advertisement
Quick Links
Advertisement
Table of Contents

Related Manuals for Elcometer 456 3


Summary of Contents for Elcometer 456 3
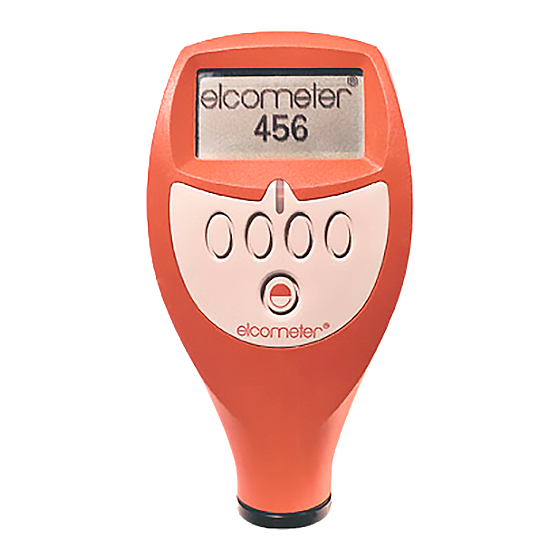
- Page 1 Elcometer 456 Coating Thickness Gauge Basic Models Operating Instructions...
- Page 2 (electronic, mechanical, magnetic, optical, manual or otherwise) without the prior written permission of Elcometer Ltd. A copy of this Instruction Manual is available for download on our Website via www.elcometer.com/downloads. Doc.No. TMA-0422 Issue 04...
-
Page 3: Table Of Contents
CONTENTS Section Page About your gauge ............. . . 4 1.1 Features . - Page 4 The reading screen and menus ........... 13 4.1 Reading screen .
- Page 5 Probes ............... . 33 Personalised welcome screen .
-
Page 6: About Your Gauge
Thank you for your purchase of this Elcometer 456 The gauge is available in Coating Thickness Gauge. Welcome to Elcometer. three versions; Basic, Standard and Top. This Elcometer are world leaders in the design, manual describes manufacture and supply of coatings inspection operation equipment. -
Page 7: Features
1.1 FEATURES 1.2 STANDARDS • A range of smooth and rough surface The Elcometer 456 can be used in accordance with calibration adjustments. the following National and International Standards: • Menu driven backlit graphical user interface. FERROUS (F) • Interchangeable probes (separate versions ASTM B 499, ASTM D 1186-B, ASTM G 12, only). -
Page 8: What This Box Contains
Operating Instructions. Do not hesitate to your gauge - see page 18. contact Elcometer or your Elcometer supplier if As an example, the LANGUAGES option which is in you have any questions. -
Page 9: Getting Started
2 GETTING STARTED 2.2 BATTERY CONDITION. Symbol Battery condition/action required 2.1 FITTING THE BATTERIES 1. Open battery compartment cover; press down 100% in direction of arrow using thumb nail. 2. Insert 2 x LR03 (AAA), alkaline dry batteries 66% to 100% taking care to ensure correct battery polarity 33% to 66%, replacement (Figure 2). -
Page 10: Fitting Probes
2.3 FITTING PROBES To release the probe (separate versions only) Grasp knurled section and pull gently away from the gauge. The To ensure correct transfer of data from the connection will unlock and the probe and detection of the new probe, the probe will release. -
Page 11: The Controls
STAT S MENU Press switch on gauge, or place the probe on a surface. Softkeys On/Off key Note: Before switching the gauge on for the first Figure 3. Elcometer 456 control keys time read “Selecting a language” on page 11. -
Page 12: Switching The Gauge Off
(Figure 5). To maximise character size, switch off statistics (see Stats on LCD, 2.7 THE SCREEN page 30) and unlock the softkeys (see SOFTKEYS Familiarise yourself with the Elcometer 456 screen. LOCKED:, page 21). The screen displays: •... -
Page 13: Selecting A Language
1. Switch gauge off. When the gauge is switched on for the first time 2. Press and hold left hand softkey. after dispatch from the Elcometer factory the 3. Press key to switch on gauge. display will show the language selection screen The display will show language selection (Figure 6). -
Page 14: Interfaces
2.9 INTERFACES 3 TAKING A READING An RS232 5-pin connector is located on the side of your gauge. Use this connector and the optional PC 3.1 BEFORE YOU START connection cable to connect your gauge to a PC to • Are you using the correct type of probe? enable you to create personalised ‘welcome’... -
Page 15: Procedure
3.2 PROCEDURE 4 THE READING SCREEN AND MENUS 1. Press key to switch on gauge. 4.1 READING SCREEN 2. Place probe on surface to be measured. The reading may be inaccurate if the probe is The content of the reading screen (Figure 10, not held as shown in Figure 8. -
Page 16: Main Menu
18. page 22. Menu title Menu contents Softkey functions Figure 12. Typical Elcometer 456 menu Figure 11. Reading screen in extended mode Some screens allow the status of a feature to be and showing full set of statistical values. -
Page 17: Main Menu - Extended Menu Off
• Extended menu off (simple menu mode): BACKLIGHT The gauge is shipped from the Elcometer Switches backlight on and off. Toggle tick box to factory with EXTENDED MENU turned off. In activate/deactivate. With BACKLIGHT activated this simple menu mode the gauge can be the display is illuminated for approximately 5 calibrated and used to take measurements. - Page 18 INTL GAUGE : Resets gauge to International Supplier or Local Distributor. default settings e.g. DD/MM/YY date format and HELP: Explains symbols used on Elcometer 456 metric units. display screens. Figure 14. About menu International settings can also be activated at switch...
- Page 19 USA GAUGE : Resets gauge to USA default settings e.g. MM/DD/YY date format and imperial units. Figure 15. Reset menu A confirmation screen will be displayed. Press YES to reset, NO to cancel. USA settings can also be activated at switch on. Press and hold softkey 4 and switch on gauge.
-
Page 20: Main Menu - Extended Menu On
4.4 MAIN MENU - EXTENDED MENU ON To toggle EXTENDED MENU on/off select MENU/EXTENDED MENU/SEL... - Page 21 The following features are added to the MENU If there is no reading to delete, the gauge displays: when EXTENDED MENU is active: PRINT/OUTPUT Outputs individual readings or a statistical summary via the RS232 interface. Figure 17. Delete last reading not available To use this function, first setup using: screen MENU/SETUP/OUTPUT - see “OUTPUT:”...
- Page 22 This • Default = 1 minute allows printing on the Elcometer Miniprinter (see Auto switch off may be disabled by selecting ‘off’ (In “Miniprinter” on page 42). this case, switch off using On/Off key...
- Page 23 RS 232 printers or PC via Elcometer software or via SOFTKEYS LOCKED: When ticked, the softkey HyperTerminal. functions will always be displayed. BEEP VOLUME: Changes volume. • 0 = off • 5 = loudest • Default = 3 Figure 20. Softkeys locked/unlocked LANGUAGES: Allows selection of language.
-
Page 24: Calibration Adjustment
5 CALIBRATION ADJUSTMENT measured and is indicated on the screen by a symbol (Figure 21): Calibration adjustment is the process of setting the gauge to known values of thickness to ensure accuracy on different substrate types, shapes and surface finishes. Note: When using an FNF probe it must be Figure 21. -
Page 25: Calibration Foils And Standards
ZERO OFFSET: This is the method described in Note: When the calibration method is changed, e.g. ISO 19840 coatings steel surfaces from Smooth to Rough, the gauge will display a roughened by blast cleaning. The calibration uses message (Figure 22). the smooth surface technique, and a correction value (zero offset) is applied to each reading to account for the effect of the roughened surface;... -
Page 26: Calibration Adjustment Procedure
): These coating thickness avoid errors due to placing the foil labels between OILS SHIMS standards which have been measured using the foils. techniques independent of the gauge. They are ideal for calibration because they provide a known Serial no. TK1009 Inspected by value of thickness on the actual substrate to be... - Page 27 adjustment the CAL softkey can be locked Step 1 (MENU/CALIBRATION LOCKED). 1. Hold probe in air and press CAL softkey (Figure 24). The user is guided through the operation of the chosen calibration procedure means instructions and illustrations on the graphics screen.
- Page 28 these readings and the last reading. Repeat Note: - - - indicates over-range (Figure 26). this action until a stable reading is obtained. Taking a reading within range clears this Average screen. Last First reading Second reading Figure 26. Over-range reading Figure 25.
- Page 29 reading. Repeat this action until a stable The gauge will display the option to test the reading is obtained. calibration of the gauge. First reading Second reading Figure 29. TEST READINGS screen Figure 27. Step 2 - Calibration adjustment on 5.
- Page 30 Taking test readings readings to be taken on a thin standard value Press YES softkey (see previous section) to take instead of on an uncoated base. test readings. This allows the calibration of the gauge to be tested without contributing to the statistical calculations.
-
Page 31: Statistics
Calibrating High Temperature PINIP™ Probes 6 STATISTICS Special thickness standards are supplied with The Elcometer 456 Basic has a Simple Statistics F1 2 High Temperature PINIP™ Probes - see feature (STATS) which calculates and displays a page 35. These thickness standards should be statistical analysis of readings as they are taken. -
Page 32: Enlarge Stats
Combined statistics readings, Elcometer 456 models Standard and Top symbol provide this facility. Contact Elcometer or your local Elcometer supplier for more details. 6.1 ENLARGE STATS Figure 35. Reading screen with all statistics Displays the chosen statistical values as double- height characters. -
Page 33: Select Stats
6.4 SELECT STATS 6.5 SET NDFT Allows the user to chose which statistical values are The factory default value for NDFT is 320 µm displayed. The default condition is all values except (12.6 mils). PSPC readings (Figure 36). If you need to adjust this value, select ‘SET NDFT’, use the Up/Down softkeys to adjust the value and then press OK. -
Page 34: Display
• none of the remaining measurements shall be When PSPC statistics are selected the standard below 0.9 x NDFT. statistics displayed on the screen are replaced by those for PSPC (Figure 38): To PASS 90/10 90/10 FAILED if Figure 38. PSPC statistics - selected and At least 90% of Less than 90% displayed on reading screen... -
Page 35: Probes
An extensive range of probes is available for the less nickel applied to steel or iron. Elcometer 456 Coating Thickness Gauge. Probes ferrous (F), non-ferrous dual 7.2 NON-FERROUS (N) PROBES... - Page 36 7.4 PROBE INTERCHANGEABILITY Probe type Gauge Type The following table shows which probes can be used in the three types of Elcometer 456 Gauge. Probe type Gauge Type N1 right angle N1A anodiser’s N1 PINIP™ F1 2 NM3 miniature straight NM3 miniature 45°...
-
Page 37: Personalised Welcome Screen
(MENU/SETUP/PROBE). 8.1 CREATING THE SCREEN 2. Zero and calibrate the gauge on a sample of the coated steel - see “Calibration adjustment” 1. Download Elcometer ‘Welcome Screen on page 22. Wizard’ software. This software is available... -
Page 38: Storage And Transit
Follow the remaining on-screen instructions to The gauge does not contain any user-serviceable delete the welcome screen. components. In the unlikely event of a fault, the gauge should be returned to your local Elcometer supplier or directly to Elcometer. The warranty will... - Page 39 Contact details are stored in the gauge - MENU/ABOUT/CONTACT. Worldwide: sales@elcometer.com Or USA/Canada: inc@elcometer.com Note: Probes will eventually wear. Probe life will depend on the number of measurements taken and how abrasive the coating is. Probe life can be prolonged by careful positioning of the probe on the surface.
-
Page 40: Statistics Terminology
11 STATISTICS TERMINOLOGY Term Meaning Coefficient of Variation. The standard deviation divided by the mean for a group COEF OF VARIAT’N of readings, expressed as a percentage. The value of the maximum thickness in a group of readings. HIGHEST READING The value of the minimum thickness in a group of readings. -
Page 41: Technical Data
12 TECHNICAL DATA Miniature probes without outer sleeve: 150°C (300°F) All other probes: 80°C (176°F) 12.1 MEASUREMENT SPEED 12.4 PHYSICAL >60 readings per minute. When measuring high temperature materials Weight Separate Probe (FNF1), 190g measurement speed must be reduced to prevent (including (6.7oz) overheating... -
Page 42: Accessories
Consult your Local Environmental or your local Elcometer supplier. At time of ordering Authority for further guidance. please quote the sales part number which follows the description of each accessory. 13.1 PROBES Full details of the extensive range of 456 probes... - Page 43 13.6 PROBE PLACEMENT JIG this range are also available. Consult your local To aid probe positioning on small components a Elcometer supplier. probe placement jig is available and an adapter suitable for use with the full range of miniature 13.3 CALIBRATION CERTIFICATES FOR FOILS probes is also available as an accessory.
- Page 44 13.9 BENCH STANDS V Adapter for pipes (FNF probes): T99913133 Integral Probe Version: T45616161 13.8 Miniprinter Integral/Separate Probe Version: T45616162 column, rechargeable battery powered Miniprinter complete with charger. Three charger 13.10 PC CONNECTION CABLE options: 456 to PC Connection Cable (9- T99916217 230V (UK Plug): X4569964B...
-
Page 45: Related Equipment
14 RELATED EQUIPMENT 15 FITTING THE WRIST HARNESS Elcometer produces a wide range of coating 1. Pass harness thickness gauges and associated paint inspection round pin equipment. Users of the Elcometer 456 may also benefit from the following Elcometer products: •... -
Page 46: Probe Measurement Performance
16 PROBE MEASUREMENT PERFORMANCE Scale Total range Resolution in range Accuracy 0 µm to 1500 µm ±1% to ±3% or ±2.5 µm 0.1 µm 0 µm to 99.9 µm F1 2 1.0 µm 100 µm to 1500 µm (F1 mode) FNF1 0 mil to 60 mils ±1% to ±3% or ±0.1 mil... -
Page 47: Probe Capabilities
17 PROBE CAPABILITIES 17.1 INTEGRAL PROBES Minimum Minimum Minimum Probe type convex surface concave Headroom sample Cal foil value diameter surface radius diameter 4 mm (0.16”) 25 mm (0.98”) 130 mm (5.1”) 4 mm (0.16”) 250 µm (10 mil) (or F1 2 set for F1 operation) F1 2 4 mm (0.16”) - Page 48 17.2 SEPARATE FERROUS PROBES Minimum Minimum Minimum Probe type convex surface concave Headroom sample Cal foil value diameter surface radius diameter 4 mm (0.16”) 25 mm (0.98”) 85 mm (3.35”) 4 mm (0.16”) 250 µm (10 mil) (or F1 2 set to F1) F1 2 4 mm (0.16”) 25 mm (0.98”)
- Page 49 17.3 SEPARATE NON-FERROUS PROBES Minimum Minimum Minimum Probe type convex surface concave Headroom sample Cal foil value diameter surface radius diameter 35 mm (1.38”) 25 mm (0.98”) 85 mm (3.35”) 6 mm (0.24”) 250 µm (10 mil) N1 Right Angle 35 mm (1.38”) 25 mm (0.98”) 28 mm (1.10”) 6 mm (0.24”)
- Page 50 17.4 SEPARATE DUAL FNF Minimum Minimum Minimum Probe type convex surface concave Headroom sample Cal foil value diameter surface radius diameter FNF1 (N) 38 mm (1.50”) 25 mm (0.98”) 88 mm (3.46”) 8 mm (0.32”) 250 µm (10 mil) FNF1 (F) 4 mm (0.16”) 25 mm (0.98”) 88 mm (3.46”) 4 mm (0.16”)
- Page 51 17.5 PINIP™ PROBES Minimum Minimum Minimum Probe type convex surface concave Headroom sample Cal foil value diameter surface radius diameter 4 mm (0.16”) 60 mm (2.36”) 155 mm (6.10”) 4 mm (0.16”) 250 µm (10 mil) (or F1 2 set to F1) F1 2 4 mm (0.16”) 60 mm (2.36”)
- Page 52 17.6 SEPARATE MINIATURE FERROUS PROBES Minimum Minimum Minimum Minimum Minimum convex concave Overall length Probe Type sample access access surface surface (headroom) diameter height width diameter radius F, Straight, 1.5 mm (0.06”) 6.5 mm (0.26”) 3 mm (0.12”) 6 mm (0.24”) 150 mm (5.91”) 45 mm (1.77”) F, Straight,...
- Page 53 17.7 SEPARATE MINIATURE NON-FERROUS PROBES Minimum Minimum Minimum Minimum Minimum Overall length Probe Type convex concave sample access access (headroom) diameter radius diameter height width NF, Straight, 3 mm (0.12”) 25 mm (0.98”) 4 mm (0.16”) 6 mm (0.24”) 150 mm (5.91”) 45 mm (1.77”) NF, Straight, 3 mm (0.12”)
-
Page 54: Error Messages
Error message Causes Action to take #1 - PROBE Probe-to-gauge communication failure. Integral gauge - return to Elcometer*. Separate gauge - remove probe and refit. If error persists, return to Elcometer*. #2 - PROBE Corrupt data output from probe. Integral gauge - return to Elcometer*. - Page 55 Incorrect calibration calculation. Re-calibrate. If error persists, return to Elcometer*. LANGUAGE Software error. Return to Elcometer*. MEMORY * Contact Elcometer or your local Elcometer Supplier to arrange return. Figure 39. Example error message - no probe is connected to gauge...
-
Page 56: Index
Locking Character size ASTM G 12 Methods Locking softkeys Shims Calibration Adjustment Batteries Procedure, 2Point ECCA T1 Fitting Procedure, Rough Elcometer 456 Life of Procedure, Smooth Features Precautions Procedure, Special substrate Overview Rechargeable Calibration certificates EN 13523-1 Charging Calibration methods... - Page 57 Ordering Maintenance SET OFFSET Mean SETUP Measurement speed SMOOTH Menu items SOFTKEYS LOCKED Galvanised steel 2-POINT SPECIAL SUB Gauge information ABOUT STATISTICS AUTO SWITCH OFF STATS MENU BACKLIGHT STATS ON LCD High temperature BAUD RATE UNITS Highest reading BEEP VOLUME USA GAUGE CAL METHOD ZERO OFFSET...
- Page 58 Fitting of About High temperature MENU Power supply Printer 26, 27 Quick-start Miniprinter TEST Printing UP/DOWN Statistical summary ZERO Reading screen Printing readings Special sub calibration method Typical Probe positioning jig SSPC-PA2 (2004) Reading, taking Probes Standard deviation Resetting the gauge Adapters Standards Rough calibration method...
- Page 59 Probes, maximum Test certificates Test readings Testing calibration of gauge Tick box Units Automatic setting of Manual setting of Up/Down US gauge settings US NAVY NSI 009-32 US NAVY PPI 63101-000 Weight Welcome screen Creating Disabling Wrist harness, fitting of Zero offset calibration method...
Need help?
Do you have a question about the 456 3 and is the answer not in the manual?
Questions and answers