Table of Contents
Advertisement
Quick Links
Advertisement
Table of Contents

Subscribe to Our Youtube Channel
Related Manuals for BYD MINI ES-P30B3-AU-R2


Summary of Contents for BYD MINI ES-P30B3-AU-R2
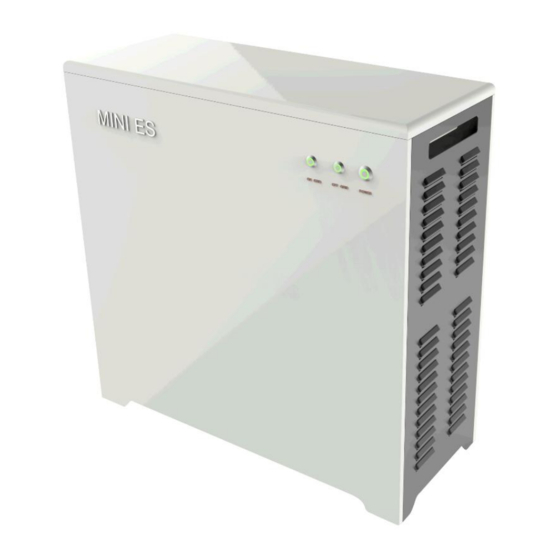
- Page 1 Installation manual MINI ES-P30B3-AU-R2 V1.1...
-
Page 2: Table Of Contents
4.5 System transportation ..................22 4.6 Remove the packing ..................... 22 4.7 MINIES fixing ......................25 4.8 Wiring ........................32 4.9 APP instruction for customers ................44 4.10 Trial operation of device ..................46 4.11 Finishing off ......................49 5. About BYD ........................53... -
Page 3: Introduction
1. Introduction Dear customer: Thank you very much for purchasing the MINI energy storage system supplied by BYD Auto Industry Company Limited. We sincerely believe that our products meet your needs. We value your feedback on the product performance and function and we strive to continually improve our product. -
Page 4: Product Composition
Number Name Description demand Used to connect general load, grid, PV inverter and the “GRID” terminal of the MINI General load distribution board Connects to “LOAD” terminal in MINI ES Essential load distribution board General load High power electric appliances Essential single phase electric appliance ... - Page 5 AC grid Voltage 230V Maximum Discharge Current AC grid frequency 50HZ Nominal Voltage 230V Total Harmonic Distortion <4% Topology Transformer IP Grade IP20 Size (W×H×D) 26KG Weight(Net Weight) 204.5 x 231 x 578.8mm Operation Temperature -25~+45℃ Storage Temperature -40~+70℃ Battery Battery Parameters Nominal Voltage 25.6V...
-
Page 6: Functions
1.3Functions Functions of the MINI ES system are shown as below: 1. Remote function enable 2.Received 485 control command; The above two conditions are satified。 Macth Load 1.Remote function prohibition Remote control 2.Did not receive 485 control command within 1 minute; Meet any of the above Protection Power and Remote... - Page 7 Electric curve of household load PV power generation curve Power P Time T Daytime Evening Night Morning Night MINI ES working Discharging/ Discharging/ Discharging/ Discharging Charging condition standby Standby Standby Power source for Self-consumption MINI ES, MINI ES, MINI ES MINI ES/grid mode single phase load...
-
Page 8: Standards And Directives
supported by the MINIES.(DRM3 and DRM7 will supply or skin reactive power) The MINIES is in the state of “Key-stop” DRM0 DRM1 The import power from the grid is 0. DRM2 The import power from the grid is no more than 50% of the rated power. DRM3 The import power from the grid is no more than 75% of the rated power. -
Page 9: About This Manual
1.3 About this manual Declaration This manual is applicable to the MINI ES and instructs the operation and functions of product. The manual is applicable to transportation, assembling, installation and commissioning. This manual is intended to be used by the accredited installer. ... -
Page 10: Abbreviations
1.5 Abbreviations Abbreviation Description Application software Current transducer 1.6 Attached list Tool list Tool name Tool type Functions Stanley knife Phillips head screwdriver Flat-bladed screwdriver Small flat-bladed screwdriver CT terminal Sleeve and loop bar Fix anchor bolts Electric drill and drill bit NO.10 drill Punch anchor bolts Hammer... -
Page 11: Specification
Scissors Tape Other auxiliary tools that might be used (for example: All installation Insulating gloves, insulating process shoes, insulating tape, etc.) 1.7 Specification Parameters MINIES-P30B3-AU-R2 On-grid Parameters Nominal Voltage 240V AC/1Phase Maximum Discharge Current Nominal Frequency 50HZ Maximum Power 3KVA Total Harmonic Distortion <5% Island detection... -
Page 12: Safety Requirements
Parameters MINIES-P30B3-AU-R2 Weight(Net Weight) 96kg Operation Humidity 5%~95% IP Grade IP32 (recommended indoor use) Noise <45dB Nominal Operation Altitude <2000m Cooling Mode Fan cooling RS485*1/Ethernet (RJ45) *1/Instrument Communication Interface (function) transducer (CT) Sampling port *3 Operation Temperature 0℃~40℃ Storage Temperature -10℃~40℃... - Page 13 When the device is not used for a long time, it is recommended to charge the battery once every six months to ensure that the battery can work normally. Ensure reliable grounding. Battery maintenance must be carried out by professionals or under their direction; ...
-
Page 14: Requirements For The Installation Location
Qualification A qualified electrician is a person who possesses the required knowledge, technical training and experience, to conduct the following: Setting up, activating, deactivating, disconnecting, grounding, short-circuiting and repairing electrical circuits and devices. Standard maintenance and use of protective devices defined in the safety standards. ... -
Page 15: Safety Signs On The Device
2.4 Safety signs on the device Item Description Be aware of dangerous voltage/ electric shock ISO 7000-1641 The product should not be disposed of together with household waste at the end of its life.Please send it to a proper institution for recycle and reuse Point of connection for grounding protection Hot surface... -
Page 16: Basic Safety Information
CAUTION! Leakage protection According to different countries and areas, choose appropriate current leakage protection breaker. 2.6 Basic safety information This chapter contains the basic safety instructions. Fail to follow the safety instructions in this manual can lead to accidents which can cause serious injury and/or death, as well as serious components damage. - Page 17 DANGER! Risk of fatal injury from arcing Arcing may occur in the event of faults or if fuses and plugs are not properly connected. · Always use components in accordance with the instructions of the respective manual Risk of fatal injury due to residual voltages The inverter capacitors may still discharge even after the device is switched off.
- Page 18 · Check with the manufacturer before installation. Risk of injury General Risk of injury due to unauthorized installation Installation and commissioning of this storage system requires BYD authorized training and relevant accreditation. · Installation 、cabling and commissioning must only be carried out by authorized、trained electricians.
-
Page 19: Other Safety Instructions
WARNING! Risk of injury due to sharp edges The components have sharp edges, which can cause injury if they are not handled carefully. · Wear protective equipment. · Install the system with a minimum of two people. Risk of incorrect use of the batteries Eye and skin injuries can be caused by opening or damaging the batteries. - Page 20 WARNING! · Do not climbing on equipment and place accessories on or inside the device. · Do not disassemble, reconstruct, repair equipment without the manufacture permission . · Do not allow any non-professional to do maintenance for internal electrical equipment . When maintenance is needed, please contact the authorized provider.
-
Page 21: Transporting To The Installation Location
· Please keep the system fully charged if prepare to leave the device unused for a long time,. · Please contact with BYD authorized service provider when the device needs to be relocated. · This equipment is allowed to be installed indoors only, please do not install outdoors. -
Page 22: Installation
CAUTION! Material damage due to crash Electronic equipment can be damaged due to improper transportation . · Be gentle and careful during transportation and installation. 4. Installation 4.1 Safety instructions WARNING! Risk of injury due to lack of experience Installing and commissioning the storage system requires training, as well as accreditation. -
Page 23: Installation Site Safety Check
Risk of injure due to heavy weight The weight of the components may cause injury during installation, disassembling and transportation. · Please remove tripping hazard before installation. · Transport and install the components by minimum two people. · Transport the device with appropriate lifting device. Risk of injury due to electric shock Batteries may has high short-circuit current due to incorrect operation ,which can cause electric shock and lead to serious injury and/or death. -
Page 24: System Transportation
DANGER! If the external package has been damaged, it is possible the device or the internal components have also be damaged during the transportation. · Make a record and check the packing list carefully after removing the external package. · If the component is lost or damaged, the customer has the right to reject or ask for replacement. - Page 25 figure4. Buckles position Make the buckles straight, shown as below. figure5. Make the buckles straight Remove the upper cover of the wooden package and take out the auxiliary goods. It is shown as below: figure6. Sketch map 1 The list of auxiliary goods is shown as below:...
- Page 26 MINI ES User Manual Installation manual Factory Inspection Report Current Transducer(CT,2pcs) Remove the external cover and lift up the wooden shell. figure7. Sketch map 2 Take out the MINI ES figure8. Sketch map 3...
-
Page 27: Minies Fixing
Check out the packing list The MINI ES is enclosed in a wooden case which includes other goods to be delivered. It is forbidden to open the wooden case during transportation to the installation site. If components are lost or damaged, the customer has the right to reject or ask for a replacement. - Page 28 Installation of fixed bolts Identifying the holes for fixing on the bottom of the device, they are located on the four corner of the device. The diameter of the hole is 9mm. the detail is as below: figure9. Distance of bottom bolts ...
- Page 29 Fix the MINI ES Lift the device into the position above the expansion bolts, make sure the bolt holes on the device corresponding with the bolts on the ground, as shown below. figure13. Fixing There are six screws on the left side need to be removed with Philips head screwdriver, the direction of rotation as shown.
- Page 30 figure15. Remove side cover figure16. Remove grounding cable There are six screws on the other needed to be removed. Remove these six screws with Phillips head screwdriver, the direction of rotation as shown.
- Page 31 figure17. Remove side cover Firstly slid down the side cover, then pull out from right side , as shown figure18. Remove side cover...
- Page 32 figure19. Remove grounding cable At the bottom of MINIES, there are nut holes with a protective cover for convenient fixing at the top of the fixed bolt. Remove the protective cover and use a socket (M14) to fix the nut (M8) and the torque standard is 20N/m. figure20.
- Page 33 figure21. Fixing...
-
Page 34: Wiring
4.8 Wiring Wiring order PV panel Grid ③ MINIES wiring ②Essential load ②general load MINIES PV inverter distribution board distribution board QF(16A) Grid Essential load ① PV current transducer (25A) ①Grid current transducer RJ45 Router Ethernet ④Ethernet cable RJ45 DRED RS485 Direction of Power cable... - Page 35 MINES(Battery Energy Systerm) Battery1 GRID fuse Battery2 LOAD K0: Battery breaker. Type: NDB3-100-Z2-F100/1MUL1A0; Nominal Voltage: 80Vdc, Nominal Current: 100A,Capacity of circuit breaker: 7500A,Number of poles: 1 Wiring specification When laying the cables, they need to be perpendicular to each other to minimize interference.
- Page 36 4 mm load) Communication From MINI ES to current cable for Current 1.5 mm (10M) transducers (BYD supplied) transducer(CT) Communication Connect MINI ES to network cable for network (refer to below detailed CAT5 UTP or CAT 6 connection requirement) ...
- Page 37 Wiring of general & essential load distribution Board Please follow the below wiring diagram of the distribution board. Related tools: Phillips head screwdriver, side cutter pliers, stripping pliers Note: Position Breaker Specification Circuit between general distribution Max. current limit is 25A board(grid) and MINI ES Circuit between MINI ES and essential load , Max.
- Page 38 DANGER! Risk of injury due to electric shock Loose connection may cause danger of abnormal operation and electric shock. · Check the main switch board before connecting cables, ensure that grid is disconnected. · Cables shall be arranged with trunking or PE plastic conduit or approved cables supporting methods.
- Page 39 Debugging tool MINIES Installation of the CT figure23. CT Physical diagram Installation steps: Open the buckle of the CT, then lay cable inside, then close the buckle. Identifying the direction shown at the bottom: K → L, from the grid/PV to the load. ...
- Page 40 Explanation for external connection ports Related tools: a spanner figure26. Explanation for external connection hole Item Remark ① Reserved ( BYD authorized products can access) ② Reserved ( BYD authorized products can access) ③ 12V POWER Reserved (Prohibition of use) ④...
- Page 41 Item Remark ⑨ LOAD Load inlet port ⑩ PV INVENTER Reserved (Prohibition of use) The internal connection Please wire according to the interface instructions below. Related tools: a small screwdriver, side cutters, stripping pliers, wire crimpers, Cable connection of grid Connect a circuit breaker (with Max.
- Page 42 Risk of injury due to electric shock Loose connection may causes danger and electric shock. · Check the main switch board before connecting cables, ensure that grid is disconnected. · Cables shall penetrate trunking or PE plastic conduit. · Avoid damaging the insulation skin of cables ·...
- Page 43 MINI ES Connect to the circuit breaker on the essential ⑫ LOAD AC PORT distribution board Reserved interfaces ① DC+/ DC- Reserved ( BYD authorized products can access) ② 12V power Reserved ( BYD authorized products can access)
- Page 44 Number Name Description ③ RS485#2 Reserved ( BYD authorized products can access) ⑤ FOR DRED ⑦ Reserved ( BYD authorized products can access) Explanation for connection of “wago connectors” which used for connect grid and load figure29. the position of wago connectors on MINI ES ...
- Page 45 NOTICE! · Please ensure buckles are not under strain to avoid bad connection. A comprehensive checking is required after completing the connection. Connecting cable to the client router Plug one end of the RJ45 to the MINI ES network port, and another end to the router’s port, check the connection.
-
Page 46: App Instruction For Customers
After the completion of the wiring, installer shall introduce the APP to the customer APP download Android phone user: APP by searching “BYD storage system” on “Google Market”. Download the IOS phone user APP by searching “Energy storage monitoring” on the APP store. - Page 47 3. Fill out the required information and submit. Notice: a. Items marked with (*) are required. b. Item “Product serial number” is the number shown in the nameplate. c. This user name only applies to APP. For Australia and New Zealand, different grid parameters are configured according to the order when the product is factory set.
-
Page 48: Trial Operation Of Device
The App searches storage system data through accessing the data server to look at the corresponding energy storage system upload data. · Ensure energy storage system cable interface is connected to the router before using the APP. · Ensure the router is connected to the energy storage system cable interface can access the Internet before using the APP. - Page 49 are as follows: Check items before trial operation Steps Contents Reference value Results More than 100KΩ Grid L line and N line More than 5MΩ Grid L line and PE line More than 5MΩ Grid L line and load L line More than 5MΩ...
- Page 50 MINI ES internal cable connection check According to the internal connection port instructions, visually check if the location of the connections and schematics correspond. Check as below: Internal cable connection check Contents Requirements Results Connection locations of active Grid cable line, neutral line and PE line correspond to the schematic Connection locations of L line,...
-
Page 51: Finishing Off
POWER keep on LOCAL keep on On-grid forced charge Close the MINI ES circuit breaker for the AC grid to supply power to the MINI ES. Hold "REMOTE" and "LOCAL" button at the same time for 10s. Then "REMOTE", "LOCAL"... - Page 52 Before installing side covers, please make sure energy storage system has been turned off and deenergised. Install left and right side covers When installing left side cover, firstly move right and then move upward, make sure the holes are aligned, then can fasten side cover. figure32.
- Page 53 figure34. Install sideboard When installing right side cover, firstly move left and then move upward make sure the holes are aligned, then can fasten side cover. figure35. Install grounding cable...
- Page 54 figure36. install sideboard Then tighten six screws(related tool: Phillips head screwdriver) figure37. Install sideboard Tighten the nuts on the cable glands The cable glands must all be fastened as per diagram (related tool: wrench)
-
Page 55: About Byd
Close all related circuit breakers, the system will be switched on, then the system will automatically run; and then inform the customer that installation is complete. 5. About BYD For any assistance about BYD product, please contact BYD by: Electric Power Research Institute BYD Auto Industry Company Limited NO.3009, BYD Road, Pingshan, Shenzhen, 518118, P.R.China...
Need help?
Do you have a question about the MINI ES-P30B3-AU-R2 and is the answer not in the manual?
Questions and answers