Table of Contents
Advertisement
Quick Links
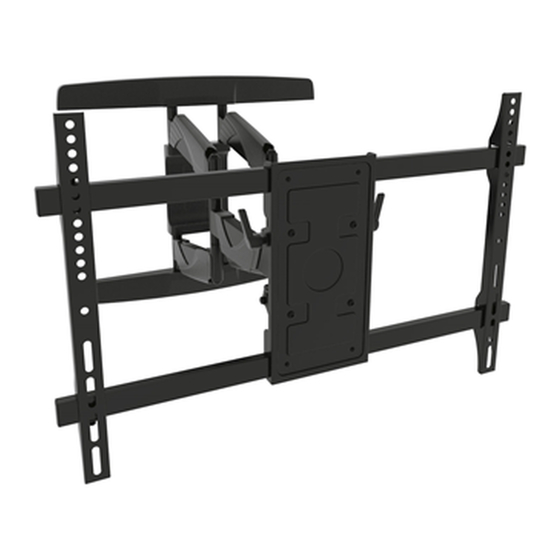
Full-Motion Display Mount
VDM-600-M
THANK YOU
Thank you for purchasing the Vision Display Full-Motion display mount.
Please read these instructions thoroughly before installing or assembling these products.
PRODUCT FEATURES
• Ideal for corner mount installs and single-person servicing
• Cable management built into arms to help maintain signal integrity and aesthetics
• Safety locking features keep the display securely mounted
• Arm extends 20"
• VESA Capability:
VDM-600-M 200x200mm - 600x400mm
VDM-800-M 200x200mm - 800x600mm
Instruction Sheet
VDM Series
VDM-800-M
I-00805
Rev A
Advertisement
Table of Contents

Related Manuals for Middle Atlantic Products VDM-600-M


Summary of Contents for Middle Atlantic Products VDM-600-M
- Page 1 • Cable management built into arms to help maintain signal integrity and aesthetics • Safety locking features keep the display securely mounted • Arm extends 20” • VESA Capability: VDM-600-M 200x200mm - 600x400mm VDM-800-M 200x200mm - 800x600mm I-00805 Rev A...
- Page 2 IMPORTANT SAFETY INSTRUCTIONS / INSTRUCTIONS IMPORTAANTES SUR LA SÉCURITÉ SAVE ALL INSTRUCTIONS / CONSERVER CES INSTRUCTIONS WARNING/AVERTISSEMENT and the exclamation point within an CAUTION/ATTENTION and the exclamation point within an equilateral triangle is intended to alert the user to the possibility of equilateral triangle is intended to alert the user to the possibility of serious injury or death if the instructions are not followed.
-
Page 3: Weight Ratings
WEIGHT RATINGS Model Weight Rating VDM-600-M 100 lbs. Maximum Total Rated Load VDM-800-M 150 lbs. Maximum Total Rated Load REQUIRED TOOLS • #2 Phillips Screwdriver • Level • Power Drill • Protective Eyewear • 3/16” Wood Bit or 3/8” Masonary Bit •... - Page 4 SUPPLIED COMPONENTS (CONTINUED) Display Mount Screws M8 x 16 M8 x 20 M8 x 40 M6 x 12 M6 x 20 M6 x 30 M4 x 12 M4 x 20 M5 x 12 M5 x 30 (M-H) (M-J) (M-K) (M-A) (M-B) (M-C) (M-D)
- Page 5 REMOVING MONITOR MOUNT ARM FROM HORIZONTAL MONITOR SUPPORT 1. Using supplied hex wrench (E), loosen the top 2 flange nuts and remove the bottom nut. 2. Tilt the bottom of display support out and slide up to remove from display arm as shown. (FIGURE A) FIGURE A ATTACHING MOUNT ARM TO STUDS...
- Page 6 ATTACHING MOUNT ARM TO STUDS (CONTINUED) 4. Use (4x) hex head screws (G) and (4x) washers (M) to attach the mount arm to the stud wall as shown. (FIGURE D) NOTE: Display mount slots must face up. FIGURE D ATTACHING MOUNT ARM TO A CONCRETE WALL 1.
- Page 7 ATTACHING MOUNT ARM TO A CONCRETE WALL (CONTINUED) 3. Use (6x) wall anchors (H), (6x) hex head screws (G), and (4x) washers (M) to mount arm to the wall as shown. (FIGURE G) NOTE: Wall anchors may NOTE: To prevent anchors from require a hammer stripping, only use a hand to install.
- Page 8 STOP The VDM-600-M & VDM-800-M display mounts are supplied with a Proximity Series Mounting Plate PRX-MP-9X12. Before installing display mounting brackets to your display, follow the supplied mounting plate installation instructions I-00804 to find the best location for mounting your plate.
- Page 9 ATTACHING DISPLAY MOUNTING BRACKETS TO HORIZONTAL SUPPORT (CONT.) 2. Slide the (2x) display mounting brackets (B) onto the horizontal support as shown. (FIGURE K) FIGURE K 2. Reattach the 4 screws to the ends of the horizontal support as shown. (FIGURE L) FIGURE L ATTACHING MOUNTING BRACKETS TO DISPLAY Attaching to a Flat Back Display...
- Page 10 ATTACHING MOUNTING BRACKETS TO DISPLAY (CONTINUED) Attaching to a Recessed Back Display 1. Use (4x) rectangular washers (J), small and/or (4x) spacers (K) and (L) as desired, and (4x) display mount screws (M-A - M-K) to match the correct screw depth for your display and attach the mounting brackets to your display ensuring screw does not bottom out in mounting hole, or damage to display may occur.
-
Page 11: Adjusting The Tilt
ATTACHING DISPLAY MOUNT ARM TO HORIZONTAL DISPLAY SUPPORT (CONT.) 2. Use a level on top of the display and the supplied hex wrench (E), make any fine adjusments and tighten the top flange nuts as shown. (FIGURE S) FIGURE S 3. -
Page 12: Warranty
- customerservicecanada@middleatlantic.ca Factory Distribution USA: NJ - CA - IL Canada: ON - BC At Middle Atlantic Products we are always listening. Your comments are welcome. Middle Atlantic Products is an ISO 9001 and ISO 14001 Registered Company. Page 12...