Table of Contents
Advertisement
Quick Links
Advertisement
Table of Contents

Related Manuals for DeviceWell HDS6112


Summary of Contents for DeviceWell HDS6112
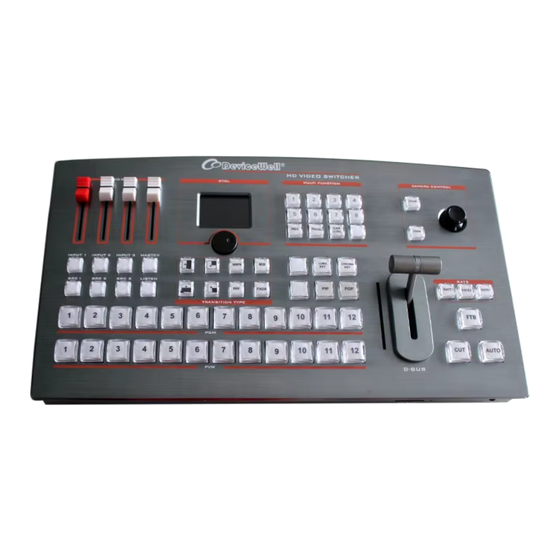
- Page 1 Users’ Manual SWITCHER Model: HDS6112 VER 2.1...
-
Page 2: Precautions
HDS6112 Precautions About this device: Copyright: ●This device belongs to the When using this unit for video and/or audio switching, publishing over the Internet, or the high-frequency video processing like, in some cases it may be necessary to equipment. Therefore, please strictly... -
Page 3: Table Of Contents
HDS6112 Contents Precautions ..........................2 Overview ........................... 5 Product Introduction ................... 5 Function Features ......................6 Preparation Before Installation ..................7 Equipment Unpacking ....................... 8 Size: 409.94*227.9*62mm ................. 8 Interface Specification ....................... 9 Interface Introduction ..................9 Interface Parameters ..................11 Control Panel and Interface ..................... - Page 4 HDS6112 PGM Output Black Field .................. 23 7.3.4 SD Card Recording ................... 23 7.3.5 Audio Settings ....................24 Audio Introduction ................... 24 7.4.1 Mixer Audio Description .................. 24 7.4.2 7.4.2.1 Audio Follow..................... 24 7.4.2.2 Audio Embedding ..................25 7.4.2.3 Mixing mode .................... 25 7.4.2.4 Audio Source Switching ................
-
Page 5: Overview
DEVICEWELL 12-CH switcher HDS6112 is an 12-CH SDI input, 4-CH SDI output, 2-CH HDMI output and multiview output broadcast-level video signal. The 12-CH switcher HDS6112 is suitable for live performance, course recording and in-shed navigation. -
Page 6: Function Features
The live picture has a lot of changes. The HDS6112 is such a switcher with 12 SDI video source inputs and DSKs to meet the needs of live production in a variety of situations, creating exciting and exciting images. -
Page 7: Preparation Before Installation
HDS6112 3. Preparation Before Installation Caution ●During transportation, handling, and installation of switchboard equipment, avoid collisions between the switchgear equipment and doors, walls, shelves, etc. ●When the equipment is unpacked and transported, it is strictly forbidden to put it down and drag it gently to avoid damage to the switchboard equipment. -
Page 8: Equipment Unpacking
HDS6112 4. Equipment Unpacking When unpacking inspection, if the sealing label or packaging is found to be damaged, stop unpacking and report the situation to the equipment dealer. If the quantity of the goods is correct and the packaging is intact, the goods can be inspected. -
Page 9: Interface Specification
HDS6112 5. Interface Specification 5.1 Interface Introduction HDS6112 interface is shown below. Definition Description SDI IN 12-channel SDI video source input 4-channel SDI video output, SDI OUT1 custom output SDI OUT PGM/PVW, SDI OUT2 switch AUX output Audio Cannon head analog differential audio input and output... - Page 10 HDS6112 DB-9Pin interface pin definition diagram (female) Definition Description SD Card SD card recording PGM screen AUDIO 3.5mm audio monitor Website: www.devicewell.com Email: support@devicewell.cn...
-
Page 11: Interface Parameters
HDS6112 5.2 Interface Parameters Series HDS Series Model HDS6112 Input settings 12-CH SDI input Video system HD & SD&3G Video format 3G/HD/SD input: 1080i50/59.94/60Hz 1080p25/30/59.94/60Hz HD Output: 1080i 50/60Hz SD: 576i 50Hz, 480i 59.94Hz Output video format 1080i50/60,1080p24/25/30/50/60 Input signal format... -
Page 12: Control Panel And Interface
In addition to the innovation of the enclosure, the DeviceWell HD switcher has also been completely optimized for the interface connector. Environmentally friendly materials with new RoHS standards are more demanding in terms of durability and environmental protection, providing customers with more stable, cost-effective and environmentally friendly products. -
Page 13: Button Description
6.1.2.2 Knob and LCD menu HDS6112 integrated LCD menu, can be set by knob The LCD menu is mainly divided into status display and menu settings. The knob control menu is divided into 3 states: 1. -
Page 14: Camera Control Area
HDS6112 6.1.2.3 Camera control area HDS6112 switcher supports 8-channel camera control. The joystick can control the distance between the eight cameras. When any button in 1-8 is pressed, the button displays red light to control the camera. Press to select camera 1... -
Page 15: Camera Lens Control Area
HDS6112 6.1.2.4 Camera Lens Control Area Zoom in shooting distance Reduced shooting distance Push the camera rocker up: the lens is up Push the camera rocker down: the lens is down Push the camera rocker left: rotate the lens counterclockwise Push the camera rocker right: rotate the lens clockwise 6.1.2.5 Transition Control Area... -
Page 16: Integrated Control Area
HDS6112 6.1.2.7 Integrated Control Area Luma key, press button to deduct the black and background source overlay. Chroma key, press the button to deduct the specified color and overlay it with the background source. PIP special effects button, open picture-in-picture function... -
Page 17: Button Operation Instructions
HDS6112 7. Button Operation Instructions 7.1 Multi-Screen Output Window Introduction Preview and Program are preview and live output respectively; As shown below: There are 12 windows below that correspond to the input source monitoring, corresponding to the 1 - 12 buttons on the switchboard control panel. -
Page 18: Multi-Screen Preview 12 Channel Source Switching
HDS6112 7.2 Multi-screen preview 12 channel source switching 7.2.1 Panel realizes 12 screen split display and preview switching of 12 channel sources Website: www.devicewell.com Email: support@devicewell.cn... -
Page 19: Pgm&Pvw Switching
HDS6112 7.3 PGM&PVW Switching 7.3.1 T-bar Calibration When the switcher is in use, the fader misalignment may occur, and the origin of the switcher fader is offset. Therefore, the switcher pushrod system should be calibrated before use. First press the 1 and 2 buttons in the PGM area simultaneously with the device turned off. As shown below: Note: The 1 and 2 keys cannot be released during the calibration process. - Page 20 HDS6112 After the device is wired, input SDI camera 1 and camera 2, the default will be displayed in the red mark 1 and 2 position in the figure below; then press 1 and 2 respectively in the PVW and PGM areas of the control panel, then the PVW and PGM boxes above will display correspondingly.
-
Page 21: Panels Enable Pgm And Pvw Channel Selection
HDS6112 7.3.2 Panels Enable PGM and PVW Channel Selection The button board and the 1-12 channels in the PGM &PVW of the PC control software correspond to the 12 multi-screens under the 12-screen segmentation. Press the selection in the PGM area as shown above, and the button will turn red (live). -
Page 22: Transition Control
HDS6112 7.3.3 Transition control The transition control method of DeviceWell HDS6112 portable switcher is mainly divided into two types, one is transition special effect, and the other is transition mode without transition special effect. 1、 No transition effect: Press CUT, CUT button is hard cut. If you select the preview (PVW) screen to switch directly to the main output (PGM), because there is no delay seamless switching, there is no transition effect. -
Page 23: Pgm Output Black Field
HDS6112 7.3.4 PGM Output Black Field In the integrated control area FTB button FTB, this button function is: PGM output black field, press the FTB button will flash the main output will be blackened, can deal with various emergencies, the effect is as shown below. -
Page 24: Audio Settings
PR/ED. 7.4 Audio Settings 7.4.1 Audio Introduction HDS6112 12-CH switcher has 1 XLR balanced audio input; 1 XLR balanced audio output. The audio mode is divided into mixing and following. 7.4.2 Mixer Audio Description HDS6122 switcher supports analog balanced audio input and output;... -
Page 25: Audio Embedding
7.4.2.5 Audio Monitoring The HDS6112 supports audio live monitoring. The 3.5mm standard headphones can be used to monitor the specified audio. By default, the PGM live video is monitored. By pressing the LISTEN on the mixer, you can monitor any audio. -
Page 26: Fade In And Out Transition Effects
HDS6112 The MIX blend effect is a transition effect. After setting, the transition will have the original live screen fade in the main output and then disappear until it disappears completely to the new live screen, as shown below. Select the effect control area MIX and then click to use the T-bar or AUTO to switch. - Page 27 HDS6112 At this time, the information on the LCD screen will be switched to the PIP picture-in-picture setting. After pressing the knob, it can be set according to the requirements. As shown below Screen Select Horizontal Vertical Display Size Small...
- Page 28 HDS6112 PIP size and position You can use the knob to set the parameters of the PIP picture-in-picture, as follows: Horizontal position setting: The value from the top left to the top right is 0-1280, and the value of each rotation knob is increased/decreased by 10.
-
Page 29: Pop Picture-Out-Picture Special Effect
HDS6112 7.5.5 POP Picture-Out-Picture Special Effect The T-bar operates in the B-BUS state. Clicking on the POP button will display a small screen in the upper left corner of the preview. The source signal of the SDI1 is displayed by default. The default background is PVW. -
Page 30: Luma Key
HDS6112 POP size and position You can use the knob to set the parameters of the POP drawing, as follows Screen selection setting: You can select 1/2 two screens. Horizontal position setting: The value from the top left to the top right is 0-960, and the value of each rotation knob is increased/decreased by 10. -
Page 31: Panel Brightness Image
HDS6112 7.5.6.1 Panel brightness image Switch the video or picture of the black background white font to the PVW preview window, and turn on the Luma KEY brightness key function. At this time, the LCD will display a brightness key parameter setting interface, and then use the CUT/AUTO/push switch to superimpose the characters. -
Page 32: Panel Color Image
HDS6112 7.5.7.1 Panel color image Switch the blue background or green background to the PVW preview window, and then turn on the Chroma KEY chroma key function. At this time, the LCD screen will display a parameter setting interface for the chroma key. Use the knob to select the background of your key image. -
Page 33: System Setting
HDS6112 Main Manu Status System Setting SDI1 Network Setting SDI2 Recording Setting SDI3 Device Info Monitor Exit Audio Mode Resolution 1080P30 7.6.1 System Setting After turning the knob to the system setting, you can click the knob to enter the system setting... -
Page 34: Network Setting
HDS6112 7.6.2 Network Setting There are two modes for obtaining an IP address. One Network Setting is dynamic configuration, and the other is a static IP IP Source static IP address. The static IP address needs to be manually IP Address 192.168.1.237... -
Page 35: Failure And Maintenance
HDS6112 8. Failure and 8.1 Common Faults and Solutions (1) The output image is disturbed and may be disturbed by other devices. (2) When plugging in the audio and video interface, if there is obvious static electricity, the device power ground wire may not be good grounding, please ground in the correct way;...
Need help?
Do you have a question about the HDS6112 and is the answer not in the manual?
Questions and answers