
Related Manuals for CoolGear USBNET-400i


Summary of Contents for CoolGear USBNET-400i
- Page 1 Industrial USB 2.0 Over IP Network 4-Port Hub – TCP/IP Network Product Manual Coolgear, Inc. Version 1.1 September 2017 Model Number: USBNET-400i www.coolgear.com...
- Page 2 Coolgear New Manual Format About this document This product manual outlines installation and features of the USBNET-400i Industrial USB 2.0 Over IP Network 4-Port Hub – TCP/IP Network. Scope The scope of this manual is to give the user of the product an understanding of its use with detailed diagrams and verbiage.
-
Page 3: Table Of Contents
USBNET-400i – Product Manual Table of Contents 1. Introduction ......................4 FeaturesFeatures ....................4 2. Installation ......................5 3. Running USB Server Program ................7 4. System Firewall ....................8 Windows Vista Firewall Alert .................. 9 Windows 7 or 8 Firewall Alert................. 9 5. -
Page 4: Introduction
USBNET-400i – Product Manual 1. Introduction The USBNET-400i is an industrial network-enabled USB Server for connecting four USB devices over the 10/100/1000Mbps Ethernet network running TCP/IP. By adding this USB to Ethernet Server to LAN, you can network-enable the USB devices. It breaks the traditional five-meter USB cabling distance limitation. -
Page 5: Installation
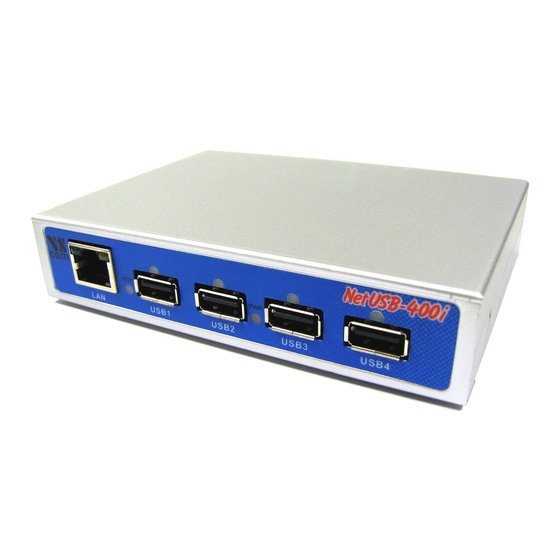
USBNET-400i – Product Manual 2. Installation Step 1 – Connect the USBNET-400i USB Server to your Network. First connect an Ethernet cable to the NetUSB-400i USB Server's Ethernet port. Figure 1 Once the Ethernet cable is connected, connect the other end of the cable to your network. -
Page 6: Figure 3 - Install Shield Wizard
USBNET-400i – Product Manual The NetUSB-400i USB Server hardware installation is now complete. Please proceed to the NetUSB-400i Utility software installation instructions. The NetUSB-400i utility Setup is an Install Shield based application, which can be used for installing, uninstalling and upgrading the NetUSB-400i Software. -
Page 7: Running Usb Server Program
USBNET-400i – Product Manual 3. Running USB Server Program To start the USB Server program, double click the shortcut icon of the USB Server on the Desktop. Figure 5 This would bring up the main dialog as shown below. Figure 6... -
Page 8: System Firewall
USBNET-400i – Product Manual 4. System Firewall When you start the program for the first time, your Windows OS will prompt you for Firewall Access. Please make sure you unblock the software or grant it access, otherwise the program will not work correctly. -
Page 9: Windows Vista Firewall Alert
USBNET-400i – Product Manual 4.1 Windows Vista Firewall Alert Figure 8 If your system is running Windows Vista, please make sure you “Unblock” the program. 4.2 Windows 7 or 8 Firewall Alert Figure 9 www.coolgear.com... - Page 10 10 USBNET-400i – Product Manual If your system is running Windows 7 or Windows 8, please make sure you click on “Allow access” when you see this alert. Once you have done this once, the system will remember your setting and will not prompt you again next time you run the software.
-
Page 11: Main Dialog Box
USBNET-400i – Product Manual 5. Main Dialog Box Once you have start up the program and grant it access through the firewall, you will see this main dialog box. Figure 10 The main dialog box consists of a Control Menu (File, Options, View and Help), a tree... -
Page 12: Occupied By Other User
Please check your network settings. However you can still change its network settings. USBNet-400i USB server does not support some of the devices. A stop sign icon as shown will identify such device. Of course, connecting to an unsupported device is not allowed. -
Page 13: Notes, Tips, Warnings, And Safety
USBNET-400i – Product Manual 6. Notes, Tips, Warnings, and Safety The default configuration for the NetUSB-400i USB server is DHCP enabled. If Note the USB server is not able to get an IP address from a DHCP server, it will use the IP address 169.254.10.10. -
Page 14: Supporting References
© 2017 Coolgear, Inc. All Rights Reserved. All products and accompanying digital documentation including images are the property and / or trademarks of Coolgear Inc. Coolgear Inc. are continuously improving upon its products. Product specifications are subject to change without notice.
Need help?
Do you have a question about the USBNET-400i and is the answer not in the manual?
Questions and answers