H3C SecPath M9000 Series Installation, Quick Start
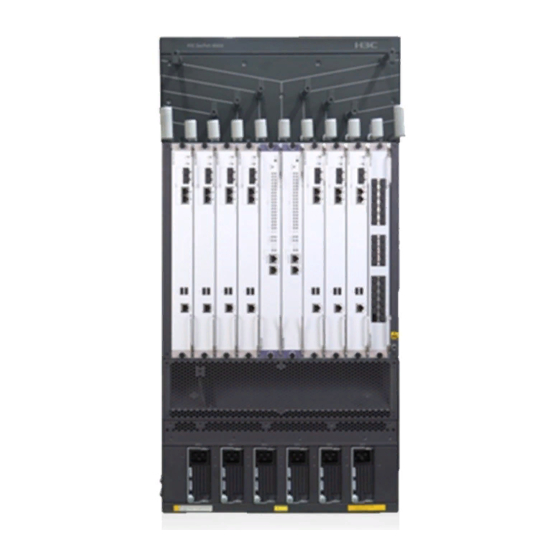
Multi service security gateway
Hide thumbs
Also See for SecPath M9000 Series:
- Manual (90 pages) ,
- Quick manual (4 pages) ,
- Compliance and safety manual (57 pages)
Table of Contents
Advertisement
Quick Links
Download this manual
See also:
Manual
Advertisement
Table of Contents

Subscribe to Our Youtube Channel
Related Manuals for H3C SecPath M9000 Series


Summary of Contents for H3C SecPath M9000 Series
- Page 1 H3C SecPath M9000 Multi Service Security Gateway Series Installation Quick Start New H3C Technologies Co., Ltd. http://www.h3c.com.hk Document version: 6PW104-20170414...
- Page 2 , H3CS, H3CIE, H3CNE, Aolynk, Care, , IRF, NetPilot, Netflow, SecEngine, SecPath, SecCenter, SecBlade, Comware, ITCMM and HUASAN are trademarks of New H3C Technologies Co., Ltd. All other trademarks that may be mentioned in this manual are the property of their respective owners Notice The information in this document is subject to change without notice.
-
Page 3: Table Of Contents
Contents Installation quick start ·················································································································································· 1 Confirming installation preparations ······························································································································· 1 Installing the gateway ······················································································································································· 1 Installing cage nuts ··················································································································································· 2 Installing cable management brackets ··················································································································· 2 Installing mounting brackets ···································································································································· 4 Mounting the gateway to the rack ························································································································· 5 Grounding the gateway ···················································································································································... -
Page 4: Installation Quick Start
Installation quick start This quick start guide provides basic instructions for installing an M9000 multiservice gateway. For more detailed installation procedures, see H3C SecPath M9000 Multi Service Security Gateway Series Installation Guide. Confirming installation preparations Before you install an M9000 multiservice security gateway, verify that: A 19-inch rack is ready for use when you install the gateway to a rack. -
Page 5: Installing Cage Nuts
Installing cage nuts Align the mounting bracket with the left rack post, making sure the bottom edge and the slide rail or rack shelf are level. Mark the positions of the cage nuts on the rack post according to the installation holes on the mounting bracket (each installation hole on the mounting bracket corresponds to one cage nut). - Page 6 The M9010 has two cable management brackets—the signal cable management brackets are • installed at the upper part of the gateway, and the power cable management brackets are installed at the lower part of the gateway. They are installed in the same way. For more information, Figure •...
-
Page 7: Installing Mounting Brackets
Figure 4 Attaching cable management brackets to an M9006 (1) Attach the cable management bracket to the chassis (2) Screw holes for installing the cable management bracket (3) Screws for attaching the cable management bracket to the chassis (4) Power cable management bracket (installed at the lower part of the chassis) Installing mounting brackets Marks L and R are printed inside the mounting brackets to distinguish between the left and right mounting brackets. -
Page 8: Mounting The Gateway To The Rack
Mounting the gateway to the rack CAUTION: Do not hold the handle of the fan tray or power module, or the handle on the rear of the chassis, or the air vents of chassis. Any attempt to carry the gateway with these parts may cause equipment damage or even bodily injury. -
Page 9: Grounding The Gateway
Grounding the gateway CAUTION: Before you use the gateway, connect the grounding cable properly to guarantee lightning protection • and anti-interference of the gateway. Use the supplied grounding cable (yellow-green grounding cable). • Connect the grounding cable to the earthing system in the equipment room. Do not connect it to a •... -
Page 10: Installing Mpus/Lpus/Switching Fabric Modules
Put on the wrist strap. Tighten the wrist strap to keep good skin contact. Insert the ESD-preventive wrist strap into the ESD port on the gateway chassis. Figure 8 Attaching an ESD-prevent wrist strap (on an M9006) Installing MPUs/LPUs/switching fabric modules IMPORTANT: The device is shipped with no filler panels on some card slots. -
Page 11: Installing A Power Module
An AC power module and a DC power module are installed in the same way. This section uses an AC power module as an example. For information about AC and DC power modules, see H3C SecPath M9000 Multi Service Security Gateway Series Installation Guide. -
Page 12: Connecting An Ac Power Cable
Figure 10 Installing a power module in a vertical slot (on an M9010) Figure 11 Installing a power module in a horizontal slot Connecting an AC power cable WARNING! Before you connect the power cable, make sure the circuit breaker on the power cable is switched off. To connect the power cable: Plug the power cable into the power receptacle of the power module. -
Page 13: Connecting A Dc Power Cable
Figure 12 Securing the AC power cable (on an M9006) Connecting a DC power cable WARNING! Make sure each power cable has a separate circuit breaker. • • Before you connect the power cable, make sure the circuit breaker on the power cable is switched off. -
Page 14: Installing An Xfp/Sfp+/Sfp/Qsfp+ Transceiver Module (Optional)
Installing an XFP/SFP+/SFP/QSFP+ transceiver module (optional) Unpack the module. Do not touch the golden finger of the transceiver module. Pivot the clasp of the transceiver module up. Holding the transceiver module, gently push the module into the slot until it has firm contact with the slot (when the top and bottom spring tabs catch in the slot). -
Page 15: Obtaining Documentation
PC before connecting to the gateway, and when you disconnect the cable, first disconnect from the gateway. Obtaining documentation To access the most up-to-date H3C product documentation on the H3C website at www.h3c.com.hk: Go to http://www.h3c.com.hk/Technical_Documents. Choose the desired product category and model.
Need help?
Do you have a question about the SecPath M9000 Series and is the answer not in the manual?
Questions and answers