
Related Manuals for tecan Columbus Washer


Summary of Contents for tecan Columbus Washer
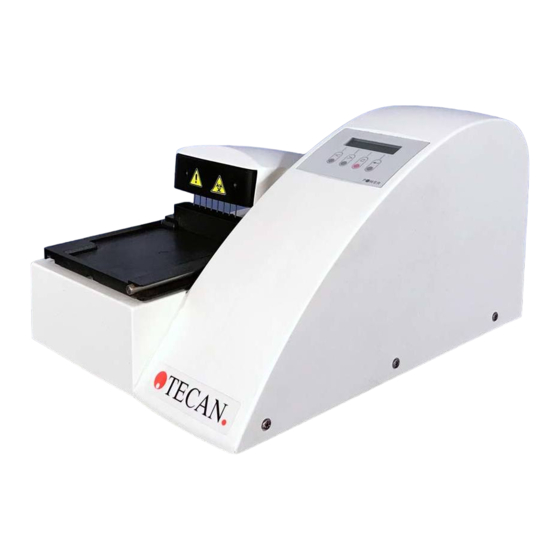
- Page 1 Technical Manual for Columbus Washer Document Part No.: 30000294 2006-02 Document Revision No.: 1.7 Firmware Level: 4.xx...
- Page 2 T +44 118 930 0300 T +1 866 798 3226 Toll Free US: F +44 118 930 5671 helpdesk-sy@tecan.com T +1 800 TECAN US or helpdesk-uk@tecan.com T +1 800 832 2687 helpdesk-us@tecan.com Technical Manual for Columbus Washer No. 30000294 Rev. No. 1.7 2006-02...
- Page 3 E-mail: office.austria@tecan.com www.tecan.com Copyright Information The contents of this manual are the property of Tecan Austria GmbH and are not to be copied, reproduced or transferred to another person or persons without our prior written permission. Copyright © Tecan Austria GmbH All rights reserved.
- Page 4 Indicates a possibility of instrument damage or data loss if instructions are not followed. WARNING INDICATES THE POSSIBILITY OF SEVERE PERSONAL INJURY, LOSS OF LIFE OR EQUIPMENT DAMAGE IF THE INSTRUCTIONS ARE NOT FOLLOWED. Technical Manual for Columbus Washer No. 30000294 Rev. No. 1.7 2006-02...
-
Page 5: Table Of Contents
3.4.1 Hardware Specifications..............3-62 3.4.2 Contents ..................3-65 3.4.3 A. Protocol ..................3-67 3.4.4 Sequence Number................. 3-68 3.4.5 B. Commands - Overview.............. 3-69 3.4.6 Commands - Description ............... 3-71 2006-02 Technical Manual for Columbus Washer No. 30000294 Rev. No. 1.7... - Page 6 Power Supply Board ..............7-6 7.4.1 Replacing the Power Supply Board..........7-7 Keyboard and Display Unit............7-8 7.5.1 Replacing the Keyboard or Display Unit...........7-9 Manifold Detect Board ..............7-11 7.6.1 Replacing the Manifold Detect Board..........7-11 Technical Manual for Columbus Washer No. 30000294 Rev. No. 1.7 2006-02...
- Page 7 Generating Static................. 10-10 10.4.2 Preventing Electrostatic Damage to Equipment ......10-11 10.4.3 Personal Grounding Methods ............10-11 11. Trouble Shooting 11.1 Introduction.................. 11-1 12. Instrument Specifications 12.1 Introduction.................. 12-1 Index 2006-02 Technical Manual for Columbus Washer No. 30000294 Rev. No. 1.7...
-
Page 9: General
1. General General Overview This is a technical manual for servicing the Columbus Washer. The instrument is a microprocessor controlled washer, designed to wash microplates. The instrument can be fitted with either an 8, 12 or 16 way manifold or a 384 Well Manifold. -
Page 10: Instrument Description
Inlets for channels 1 - 4 Switch Aerosol Waste Printer Connector Hand held Bottle Holder with Tubing Tubing Barcode Liquid Sensor for (option) (red) Reader each bottle Serial RS 232 for Remote Control Technical Manual for Columbus Washer No. 30000294 Rev. No. 1.7 2006-02... - Page 11 Serial RS 232 for each bottle Remote Control All connected devices must be proved and listed with regulations EN 60950, UL 1950 or CSA C22.2 No. 950 for Data Processing Devices 2006-02 Technical Manual for Columbus Washer No. 30000294 Rev. No. 1.7...
-
Page 12: Connection Diagram For Columbus (1 Liquid Channel)
Waste green Bottle Wash Liquid Computer for Bottle Holder with liquid Remote Control sensor for each bottle Some of the instruments may include the prime valve. Technical Manual for Columbus Washer No. 30000294 Rev. No. 1.7 2006-02... -
Page 13: Connection Diagram For Columbus (4 Liquid Channels)
Liquid 1 solution Liquid 3 Liquid 2 grey yellow purple Bottle Holders with liquid blue green sensor for each bottle Some of the instruments may include the prime valve. 2006-02 Technical Manual for Columbus Washer No. 30000294 Rev. No. 1.7... -
Page 14: Keyboard And Display Unit
A Light Emitting Diode (LED) in the center of the letter "O" of the word "POWER" indicates when the Washer is switched ON. Key 1 Key 2 Key 3 Key 4 POWER Power ON LED Technical Manual for Columbus Washer No. 30000294 Rev. No. 1.7 2006-02... -
Page 15: Interconnection Diagram
Orbital Shaking Motor Printer / Serial Connector Barcode Reader Keyboard / Display Unit Power Supply Board Fuses Mains Input ON/OFF Switch * The Orbital Shaking option is not used. 2006-02 Technical Manual for Columbus Washer No. 30000294 Rev. No. 1.7... -
Page 17: Installation Procedure
3 spare 0 – ring seals for manifold • Bottle set containing: 3 x 2.5 l bottles for the standard instrument Accessory package Liquid Sensor System and operating manual (optional) Instrument Bottles 2006-02 Technical Manual for Columbus Washer No. 30000294 Rev. No. 1.7... -
Page 18: Unpacking Procedure
The washer requires 2 x T 1.6 A / 250 V (slow blow) fuses. WARNING TO PREVENT THE RISK OF FIRE, THE MAINS FUSES SHOULD ONLY BE REPLACED WITH THE SAME TYPE AND RATING OF FUSE. Technical Manual for Columbus Washer No. 30000294 Rev. No. 1.7 2006-02... -
Page 19: Installation Procedure
Slide the waste tube through the hole in the back panel. Waste Tube Hole Aerosol Tube Hole (optional) Connect the waste tube onto the top connector of the aspirating pump. 2006-02 Technical Manual for Columbus Washer No. 30000294 Rev. No. 1.7... -
Page 20: Connecting The Solution Tubes
The instrument is supplied with four meters of tubing that can be cut to the required length (maximum 1 meter). Inlets for channels 1 - 4 Aerosol Tube* Waste Tube (optional) Technical Manual for Columbus Washer No. 30000294 Rev. No. 1.7 2006-02... -
Page 21: Fitting And Connecting The Liquid Sensors (Optional)
1 green Liquid Sensor Fix the tube support in the bottle holder as shown below. Tube support Insert the tubes and connect the bottle holder to the instrument. 2006-02 Technical Manual for Columbus Washer No. 30000294 Rev. No. 1.7... -
Page 22: Connecting The Barcode Reader (Optional)
Ensure that the on / off switch in the back panel of the instrument is in the off position. Insert the mains power cable into the mains power socket on the rear of the instrument. Technical Manual for Columbus Washer No. 30000294 Rev. No. 1.7 2006-02... -
Page 23: Firmware And Software Description
• Programmable strip selection, the program can be defined so that the strips to be washed can be selected before starting the washing procedure. 2006-02 Technical Manual for Columbus Washer No. 30000294 Rev. No. 1.7... -
Page 24: Onboard Software Menus
Instrument ready to wash microplate XX yyyyyyyy + other yes Caution Do not use the instrument to aspirate or dispense any acidic solutions as this could damage the instrument. Technical Manual for Columbus Washer No. 30000294 Rev. No. 1.7 2006-02... -
Page 25: Rinse
The waste sink is filled with solution and the manifold is lowered into it Manifold left in solution until Stop key pressed Soaking Stop Standby mode XX:yyyyyyy Washing procedure can be performed + other yes 2006-02 Technical Manual for Columbus Washer No. 30000294 Rev. No. 1.7... - Page 26 The waste sink is filled with solution and the manifold is lowered into it Manifold left in solution until Soaking Stop key pressed Stop Standby mode XX:yyyyyyy + other yes Washing Procedure can be performed Technical Manual for Columbus Washer No. 30000294 Rev. No. 1.7 2006-02...
- Page 27 This procedure is the same as the Rinse: Day procedure, except that the rinsing procedure is automatically repeated after a set repeat time. The repeat time can be set in the Adjust menu between 1 and 24 hrs. 2006-02 Technical Manual for Columbus Washer No. 30000294 Rev. No. 1.7...
-
Page 28: Program
This option is not to be confused with the Clear ALL function in the Service menu. 3.2.6 Show Procedure to show the parameters for a program. For more information about the Show procedure, see Columbus Operating Manual. Technical Manual for Columbus Washer No. 30000294 Rev. No. 1.7 2006-02... -
Page 29: Adjust
Select yes to enter the Adjust menu and then the various options in the Adjust menu can now be selected using other. When the required option is displayed, press yes to enter the parameter setting procedure. 2006-02 Technical Manual for Columbus Washer No. 30000294 Rev. No. 1.7... - Page 30 Liquid Detection Sensor setting Exit Adjust Exit Adjust Menu other yes * Instruments that have the prime valve have a priming time of 8 - 99 seconds. Technical Manual for Columbus Washer No. 30000294 Rev. No. 1.7 2006-02...
- Page 31 Overflow Wash Set the position of the aspirating needles for the Position overflow washing procedure. Before starting the adjustment procedure, insert the microplate to be adapted into the plate support. 2006-02 Technical Manual for Columbus Washer No. 30000294 Rev. No. 1.7...
- Page 32 Use '-' and '+' keys to move the manifold so that the exit yes aspirating needles are in the correct position for the Overflow Washing procedure Platetype: Select plate type to be defined + other yes 3-10 Technical Manual for Columbus Washer No. 30000294 Rev. No. 1.7 2006-02...
- Page 33 Use '-' and '+' keys to move the manifold so that the exit yes aspirating needles are in the correct position for the Overflow Washing procedure Platetype: Select Plate type to be defined + other yes 2006-02 Technical Manual for Columbus Washer No. 30000294 Rev. No. 1.7 3-11...
- Page 34 When the dispensing needles are in the correct position, press yes and the following message is displayed: Asp.Pos 1 exit 3-12 Technical Manual for Columbus Washer No. 30000294 Rev. No. 1.7 2006-02...
- Page 35 Pressing the - and + keys move the manifold up and down so that the aspirating needles are positioned higher/lower in the wells. When the aspirating needles are in the correct position, press yes and the following message is displayed: Washpos Botm exit 2006-02 Technical Manual for Columbus Washer No. 30000294 Rev. No. 1.7 3-13...
- Page 36 Platetype: + other yes The parameters for the next plate type can be defined or press other for the next option in the Adjust menu. 3-14 Technical Manual for Columbus Washer No. 30000294 Rev. No. 1.7 2006-02...
- Page 37 When the aspirating needles are in the correct position, press yes and the following message is displayed: Asp.Pos Botm exit 2006-02 Technical Manual for Columbus Washer No. 30000294 Rev. No. 1.7 3-15...
- Page 38 When the aspirating needles are in the correct position, press yes and the following message is displayed: Platetype: exit The parameters for the next plate type can be defined or press other for the next option in the Adjust menu. 3-16 Technical Manual for Columbus Washer No. 30000294 Rev. No. 1.7 2006-02...
- Page 39 When the required rinse time is displayed, either press other to proceed to the next option or press yes to exit from the Adjust menu. * Instruments that have the prime valve have a priming time of 8 - 99 seconds. 2006-02 Technical Manual for Columbus Washer No. 30000294 Rev. No. 1.7 3-17...
- Page 40 To enter the Date option, press other until the following message is displayed: Date:dd mmm yyyy other Where dd mmm yyyy is the displayed date. 3-18 Technical Manual for Columbus Washer No. 30000294 Rev. No. 1.7 2006-02...
- Page 41 Pressing form changes the time format (a.m./p.m. or 24 hr.) When the required time and format is displayed, press other to confirm the setting and the following message is displayed: Sel.Manifold: XX + other 2006-02 Technical Manual for Columbus Washer No. 30000294 Rev. No. 1.7 3-19...
- Page 42 Press yes to confirm the setting and proceed to the next option. When other or yes has been pressed, the following message is displayed: Adjust Liq. Sens.: other 3-20 Technical Manual for Columbus Washer No. 30000294 Rev. No. 1.7 2006-02...
- Page 43 Check that the adjustment of the magnet screw has a blank value of between 5 and 20 If it was necessary to readjust the settings, secure the screws with adhesive. 2006-02 Technical Manual for Columbus Washer No. 30000294 Rev. No. 1.7 3-21...
- Page 44 When all the sensors have been set, press exit and the following message is displayed: Adj.Liq.Sens.: other yes Press other to proceed to the next option. 3-22 Technical Manual for Columbus Washer No. 30000294 Rev. No. 1.7 2006-02...
- Page 45 Press yes and the following message is displayed: Run X:yyyyyyy + other yes The instrument is now in the Standby mode and can be used to wash a microplate. 2006-02 Technical Manual for Columbus Washer No. 30000294 Rev. No. 1.7 3-23...
-
Page 46: Service Menu
Procedure for adjusting the position of the plate support for the Prime / Rinse procedures. (Important adjustment with 16 way manifold) Adj. Plate Ref. Procedure for adjusting the position of the manifold needles. 3-24 Technical Manual for Columbus Washer No. 30000294 Rev. No. 1.7 2006-02... - Page 47 Procedure for adjusting the position of the Adj.Prime Pos. exit plate support for the Prime / Rinse procedures. (Important adjustment with 16 way manifold) Service End Exit Service menu Standby Mode 2006-02 Technical Manual for Columbus Washer No. 30000294 Rev. No. 1.7 3-25...
- Page 48 (Enter ‘1248’ for firmware V4.01 up to but not including V4.20) When the code has been correctly entered the first option of the Service menu is displayed: Clear ALL ? yes exit 3-26 Technical Manual for Columbus Washer No. 30000294 Rev. No. 1.7 2006-02...
- Page 49 This message is displayed as a control to ensure that the programs and settings are not accidentally cleared. Press exit to return to the previous message. Press yes to confirm that all the programs are to be cleared. 2006-02 Technical Manual for Columbus Washer No. 30000294 Rev. No. 1.7 3-27...
- Page 50 When the required setting is displayed, press yes and the following message is displayed: Adj. Access: On exit When the access is not permitted, the menu point Programme is omitted from the Mode Selection menu. 3-28 Technical Manual for Columbus Washer No. 30000294 Rev. No. 1.7 2006-02...
- Page 51 When the required setting is displayed press yes and the following message is displayed: Header: Set exit yes When the access is not allowed, the Adjust menu is omitted from the Mode Selection menu. 2006-02 Technical Manual for Columbus Washer No. 30000294 Rev. No. 1.7 3-29...
- Page 52 When the required character is displayed between the two highlighters in the middle of the display, press the 4 key. The character is then entered into the top line of the display. 3-30 Technical Manual for Columbus Washer No. 30000294 Rev. No. 1.7 2006-02...
- Page 53 (1 - 4) When the required setting is displayed, press yes and the following message is displayed: Skip Messages: yes exit 2006-02 Technical Manual for Columbus Washer No. 30000294 Rev. No. 1.7 3-31...
- Page 54 You should Rinse show exit skip Press 'show' key to display message Press 'skip' key to omit message Skip Messages: Service Duration Test other yes yes exit no 3-32 Technical Manual for Columbus Washer No. 30000294 Rev. No. 1.7 2006-02...
- Page 55 Press yes to exit from the Service menu. Press no to proceed to the next option in the Service menu. When no is pressed, the following message is displayed: Duration Test yes exit 2006-02 Technical Manual for Columbus Washer No. 30000294 Rev. No. 1.7 3-33...
- Page 56 Duration Test. Press 'Stop' key (3rd key) to stop Duration Test XX yyyyyyyy Instrument in Standby Mode + other yes 3-34 Technical Manual for Columbus Washer No. 30000294 Rev. No. 1.7 2006-02...
- Page 57 If the required channel has been primed, press yes and the following message is displayed: Plate inserted ? exit This optional message can be displayed as a reminder to ensure that the microplate has been inserted into the plate support. 2006-02 Technical Manual for Columbus Washer No. 30000294 Rev. No. 1.7 3-35...
- Page 58 If you wish to restart the Duration Test press the 4 key and the test will continue. Where XX is the displayed program number and yyyyyyyy the program name. 3-36 Technical Manual for Columbus Washer No. 30000294 Rev. No. 1.7 2006-02...
- Page 59 Orbital Shaking testing procedure (This option is not used.) Liq.Sens. yes exit no Liquid Detection testing procedure 80517A 80537 exit exit When the following message is displayed: Function Test yes exit 2006-02 Technical Manual for Columbus Washer No. 30000294 Rev. No. 1.7 3-37...
- Page 60 Use no to select which type of motor is to be tested. Plate Motor Plate support movement (forwards and backwards) Manifold Motor Manifold movement (up and down) Pumps Aspirating, dispensing and aerosol pumps switched on or off 3-38 Technical Manual for Columbus Washer No. 30000294 Rev. No. 1.7 2006-02...
- Page 61 When the plate support motor testing has been completed, press exit and the following message is displayed: MotTest:Plate yes exit Press no to select the next motor to be tested or press exit to return to the Select Testing option. 2006-02 Technical Manual for Columbus Washer No. 30000294 Rev. No. 1.7 3-39...
- Page 62 When the manifold motor testing has been completed, press exit and the following message is displayed: MotTest:Manifold yes exit Press no to select the next motor to be tested or press exit to return to the Select Testing option. 3-40 Technical Manual for Columbus Washer No. 30000294 Rev. No. 1.7 2006-02...
- Page 63 Check that the aspirating pump is running. If the pump is not running, the possible causes are: Pump is defective Replace Pump No power to the pump Replace Main Board, Power Supply Board 2006-02 Technical Manual for Columbus Washer No. 30000294 Rev. No. 1.7 3-41...
- Page 64 Press no to select the next motor to be tested or press exit to return to the Select Testing option. * In firmware versions with the prime valve, the aerosol pump does not function. 3-42 Technical Manual for Columbus Washer No. 30000294 Rev. No. 1.7 2006-02...
- Page 65 Switch channel 4 solenoid valve on and off Prime Valve: Off yes exit no Switch prime solenoid valve on and off This valve is no longer fitted to the instruments 2006-02 Technical Manual for Columbus Washer No. 30000294 Rev. No. 1.7 3-43...
- Page 66 Inlets for channels 1 - 4 The number of solenoid valves that is fitted is dependent on the number of dispensing channels fitted. Some of the instruments may include the prime valve. 3-44 Technical Manual for Columbus Washer No. 30000294 Rev. No. 1.7 2006-02...
- Page 67 Press no to select the next testing procedure or press exit to return to the Function Test option. Some of the instruments may include the prime valve. 2006-02 Technical Manual for Columbus Washer No. 30000294 Rev. No. 1.7 3-45...
- Page 68 When the sensor testing has been completed, press exit and the following message is displayed: Sensor Test yes exit no Press no to select the next Testing procedure or press exit to return to the Function Test option. 3-46 Technical Manual for Columbus Washer No. 30000294 Rev. No. 1.7 2006-02...
- Page 69 When the testing has been completed, press exit and the following message is displayed: Test Fill Verif. Yes exit no Press no to select the next testing procedure or press exit to return to the Function Test option. 2006-02 Technical Manual for Columbus Washer No. 30000294 Rev. No. 1.7 3-47...
- Page 70 When the testing has been completed, press exit and the following message is displayed: Barcode Test exit no Press no to select the next testing procedure or press exit to return to the Function Test option. 3-48 Technical Manual for Columbus Washer No. 30000294 Rev. No. 1.7 2006-02...
- Page 71 (4 liquid channels) Purple (4 liquid channels) Waste Show Detected CPU 80C517A 80537 exit yes exit yes Shows which version of micro-controller that is used on the main board. 2006-02 Technical Manual for Columbus Washer No. 30000294 Rev. No. 1.7 3-49...
- Page 72 Press yes to re-enter the Function Test submenu. Press exit to exit from the Service menu. Press no to select the next option in the Service menu. 3-50 Technical Manual for Columbus Washer No. 30000294 Rev. No. 1.7 2006-02...
- Page 73 Press 'other' to move to next option without saving setting Press 'yes' to exit procedure Options END Press 'other' to repeat procedure other yes Adj. Prime yes exit no 2006-02 Technical Manual for Columbus Washer No. 30000294 Rev. No. 1.7 3-51...
- Page 74 Use the - and + keys to set if the Fill Verify option is fitted and to be used. NO = option not fitted and not used YES = option fitted and used Pressing other moves to the next option without saving the setting. 3-52 Technical Manual for Columbus Washer No. 30000294 Rev. No. 1.7 2006-02...
- Page 75 Use the - and + keys to set if the Drip Mode option is fitted and to be used. NO = option not fitted and not used YES = option fitted and used 2006-02 Technical Manual for Columbus Washer No. 30000294 Rev. No. 1.7 3-53...
- Page 76 Press other to return to the start of the select options submenu. Press yes to exit from the Select Options submenu and the following message is displayed: Adj. Prime Pos. yes exit 3-54 Technical Manual for Columbus Washer No. 30000294 Rev. No. 1.7 2006-02...
- Page 77 2. Select the program that dispenses 100 µl of solution in to each well. 3. Accurately weigh the microplate containing the solution. (z) 4. Calculate the weight of solution (z - x = Weight 100) 2006-02 Technical Manual for Columbus Washer No. 30000294 Rev. No. 1.7 3-55...
- Page 78 Ensure that the calibration procedure is repeated if the weight (300 µl) is greater than 33 g or less than 24 g before calibrating the instrument for the first time. 3-56 Technical Manual for Columbus Washer No. 30000294 Rev. No. 1.7 2006-02...
- Page 79 Use the - and + keys to move the position of the plate support. Pressing - moves the plate support more under the manifold. Pressing + moves the plate support out from under the manifold. 2006-02 Technical Manual for Columbus Washer No. 30000294 Rev. No. 1.7 3-57...
- Page 80 When the plate support is correctly positioned so that no solution is dispensed outside the waste sink, press yes, the position is saved and the following message is displayed: Service End 3-58 Technical Manual for Columbus Washer No. 30000294 Rev. No. 1.7 2006-02...
- Page 81 Ref.Pos. Z: 130 exit using the '-' and '+' keys to move up and down Confirm that the set Ref. Pos. OK? positions are correct Manifold is initialized Init Manifold 2006-02 Technical Manual for Columbus Washer No. 30000294 Rev. No. 1.7 3-59...
- Page 82 Press yes and the following message is displayed: Run X:yyyyyyy + other yes The instrument is now in the Standby mode and can be used to wash a microplate. 3-60 Technical Manual for Columbus Washer No. 30000294 Rev. No. 1.7 2006-02...
-
Page 83: External Software
5 language software files (English, German, French, Spanish and Italian) that can change the on-board language of the Columbus (from firmware level 2.23 onwards) in the field. 2006-02 Technical Manual for Columbus Washer No. 30000294 Rev. No. 1.7 3-61... -
Page 84: Serial Interface
Pin 5 Pin 9 Pin 6 All connected devices must be approved and listed as per EN 60950, UL 1950 or CSA C22.2 No. 950 for Data Processing Devices 3-62 Technical Manual for Columbus Washer No. 30000294 Rev. No. 1.7 2006-02... - Page 85 RTS connected to CTS DSR connected to DCD and DTR Use the computer handbook to find the correct pin connections. Instrument Computer 25 pin Instrument Computer 9 pin 2006-02 Technical Manual for Columbus Washer No. 30000294 Rev. No. 1.7 3-63...
- Page 86 To select a different device address, start the Remote Mode with the default device address (#31) and send the command to X 37 (to select the device address #37). 3-64 Technical Manual for Columbus Washer No. 30000294 Rev. No. 1.7 2006-02...
-
Page 87: Contents
3 – 78 Read Number of Liquid Channels 3 – 79 Read Manifold Information 3 – 79 Define Manifold Type 3 – 79 Read Dispense Rates 3 – 79 2006-02 Technical Manual for Columbus Washer No. 30000294 Rev. No. 1.7 3-65... - Page 88 3 – 85 Start Program 3 – 86 Start Prime 3 – 86 Download Program 3 – 87 Download Plate 3 – 90 Download Rinse Parameter 3 – 91 3-66 Technical Manual for Columbus Washer No. 30000294 Rev. No. 1.7 2006-02...
-
Page 89: Protocol
(Error). Line turn around character - to make sure that the last byte (Checksum) is received complete. It is possible that this character will not be sent complete. 2006-02 Technical Manual for Columbus Washer No. 30000294 Rev. No. 1.7 3-67... -
Page 90: Sequence Number
Manifold Transport Error Dispense Pump Error Fill Verification Error Manifold Error Waste Full Error Test Not Defined Command Overflow Fill Verification Function Error Fill Verification Aspiration Error Ready Busy 3-68 Technical Manual for Columbus Washer No. 30000294 Rev. No. 1.7 2006-02... -
Page 91: Commands - Overview
Select Options '0' , '1' 3 – 78 Read_Manifold_Information 3 – 79 Define Manifold Type 08 / 12 / 16 3 – 79 Define_Program_Lockstatus ´#´,´ ´ 3 - 70 2006-02 Technical Manual for Columbus Washer No. 30000294 Rev. No. 1.7 3-69... - Page 92 3 – 84 Continue Program None Run time 3 – 85 Last Processed Strip None Run time 3 – 85 Fill Verification Status None Always 3 – 85 3-70 Technical Manual for Columbus Washer No. 30000294 Rev. No. 1.7 2006-02...
-
Page 93: Commands - Description
GP<p> p: liquid channel Start Rinse GR<p1><p2> p1: Rinse mode 0:SOAK 1: DAY 2: NIGHT 3: AUTO p2: liquid channel (0 = all channels) Stop Rinse Stop Program/Prime 2006-02 Technical Manual for Columbus Washer No. 30000294 Rev. No. 1.7 3-71... - Page 94 Command Parameter Answer Define Program Lock Status N<p1> p1: Program number <p2> p2: Lock Status P2 = ´#´ ⇒ Prog. locked P2 = ´ ´ ⇒ Prog. unlocked 3-72 Technical Manual for Columbus Washer No. 30000294 Rev. No. 1.7 2006-02...
- Page 95 4. Parameter: Dispense Volume 0050-3000 – 9 character (in µl) 2. Aspirate Code: character 1. Parameter: Aspirate Time 01-20 & 3 character 2. Parameter: Aspirate Speed 01-20 & 5 character 2006-02 Technical Manual for Columbus Washer No. 30000294 Rev. No. 1.7 3-73...
- Page 96 3. Parameter: Repeat Number 00-09 & 6 character 4. Parameter: Proc. in Cyc. 01-59 & 8 character b. End of Program Code: character 1. Parameter: Type of END character 3-74 Technical Manual for Columbus Washer No. 30000294 Rev. No. 1.7 2006-02...
- Page 97 Read Program Lock Status Command Parameter Answer Read Program Lock Status p1: Program p2: Lock Status number p2 = ´#´ ⇒ Prog. Locked P2 = ´ ´ ⇒ Prog. unlocked 2006-02 Technical Manual for Columbus Washer No. 30000294 Rev. No. 1.7 3-75...
- Page 98 ´PLATENAME´ Plate-Nr .: 1 - 9 Platename (9 characters): 1 - 8: Name ´#´ ⇒ Plate locked 9: Lock status of plate ´ ´ ⇒ Plate unlocked 3-76 Technical Manual for Columbus Washer No. 30000294 Rev. No. 1.7 2006-02...
- Page 99 RD<p1><p2> p1: Rinse Time Parameter p2: Auto Rinse Time p1: Rinse Time (01 - 99 / in seconds) p2: Auto Rinse Time (01 - 24 / in hours) 2006-02 Technical Manual for Columbus Washer No. 30000294 Rev. No. 1.7 3-77...
- Page 100 0 ... 15: Power On Header • 16 ... 31: Firmware Version 12. Define Power On Header Command Parameter Answer Define_Header <p1> p1: String of 16 characters (Power On Header) 3-78 Technical Manual for Columbus Washer No. 30000294 Rev. No. 1.7 2006-02...
- Page 101 String of 8 characters ('0' or '1' / 0 = no, 1 = yes) 1. Position: reserved 2. Position: reserved 3. Position: reserved 4. Position: reserved 5. Position: reserved 6. Position: reserved 7. Position: Dispense Drip Mode 8. Position: Liquid Sensors 2006-02 Technical Manual for Columbus Washer No. 30000294 Rev. No. 1.7 3-79...
- Page 102 Dispense Drip Mode 8. Position: Liquid Sensors 15. Read Device Status Command Parameter Answer Query Used to check the Status Code of the communication (Busy/Ready & Error Codes) 3-80 Technical Manual for Columbus Washer No. 30000294 Rev. No. 1.7 2006-02...
- Page 103 Dispense Rate for Speed Nr. 3 (3 characters) p6: Dispense Rate for Speed Nr. 4 (3 characters) p7: Dispense Rate for Speed Nr. 5 (3 characters) p8: Dispense Rate for priming (3 characters) 2006-02 Technical Manual for Columbus Washer No. 30000294 Rev. No. 1.7 3-81...
- Page 104 (3 characters) p3: Aspirate Rate for Speed Nr. 3 (3 characters) p4: Aspirate Rate for Speed Nr. 4 (3 characters) p5: Aspirate Rate for Speed Nr. 5 (3 characters) 3-82 Technical Manual for Columbus Washer No. 30000294 Rev. No. 1.7 2006-02...
- Page 105 24. Read Total Test Time & Power On Time Command Parameter Answer Read_Test&_PowerOn_Time p1:Times p1: Test & PowerOn Time (hhhhhh:mm:ss- hhhhhh:mm:ss) 25. Clear Total Test Time & Power On Time Command Parameter Answer Clear_Test&_PowerOn_Time 2006-02 Technical Manual for Columbus Washer No. 30000294 Rev. No. 1.7 3-83...
- Page 106 The device starts again and is out of remote mode. (All settings are reset to factory settings and all programs are empty). 30. Start Flash Load Mode Command Parameter Answer Start Flash Load Mode 3-84 Technical Manual for Columbus Washer No. 30000294 Rev. No. 1.7 2006-02...
- Page 107 01 - 12 p6: year 00 – 99 33. Enable/Disable Fillverification Command Parameter Answer Enable / Disable p1: Selection Fillverification p1 = 0: disable fillverification p1 = 1: enable fillverification 2006-02 Technical Manual for Columbus Washer No. 30000294 Rev. No. 1.7 3-85...
- Page 108 Needle 1: right side Needle 8 (12): left side of manifold 35. Abort Program Command Parameter Validity Answer Abort Program Run time The current active wash program is stopped. 3-86 Technical Manual for Columbus Washer No. 30000294 Rev. No. 1.7 2006-02...
- Page 109 Gives a reply of the strip number in which the Fill Verification Error has occurred. 38. Fill Verification Status Command Parameter Validity Answer Fill Verification Status F? P2: Status Fill Always Verification p2: 1 = On 0 = Off 2006-02 Technical Manual for Columbus Washer No. 30000294 Rev. No. 1.7 3-87...
-
Page 110: Examples For Remote Control - Command Sequences
ALT-'68' Change Device Address (FF)(STX)(ADR)(SNr.) :Start : Command 'X', New Device Address: 37hex (ETX)(CS) : End Meaning Character Keyboard ALT-'255' ALT-’2’ / ^B DATA: ALT-’3’ / ^C ALT-’93’ 3-88 Technical Manual for Columbus Washer No. 30000294 Rev. No. 1.7 2006-02... - Page 111 (FF)(STX)(ADR)(SNr.) : Start : Command 'GP' (Start Prime with liquid channel Nr. 1) (ETX)(CS) : End Meaning Character Keyboard ALT-’255’ ALT-’2’ / ^B DATA: ALT - ‘3’ / ^C ALT-’39’ 2006-02 Technical Manual for Columbus Washer No. 30000294 Rev. No. 1.7 3-89...
- Page 112 End of Cycle (0), Cycle Nr.01, Repeat Factor 02, Proc. in Cycle 02 End of Program (1) (ETX)(CS) Resulting Character Sequence Meaning Character Keyboard ALT-’255’ ALT-’2’ / ^B DATA: 3-90 Technical Manual for Columbus Washer No. 30000294 Rev. No. 1.7 2006-02...
- Page 113 Aspirate procedure, Aspirate time 02 sec, Manifold speed 14mm/s E0010204 End of Cycle (0), Cycle Nr.01, Repeat Factor 02, Proc. in Cycle 04 End of Program (1) (ETX)(CS) 2006-02 Technical Manual for Columbus Washer No. 30000294 Rev. No. 1.7 3-91...
- Page 114 3. Firmware and Software Description Resulting Character Sequence Meaning Character Keyboard ALT-’255’ ALT-’2’ / ^B DATA: ‘ ‘ ‘ ‘ ‘ ‘ ‘ ‘ 3-92 Technical Manual for Columbus Washer No. 30000294 Rev. No. 1.7 2006-02...
- Page 115 Bottom aspirate position (0280), Bottom wash position (0270) Overflow position (0150), Dispense position (0376) Aspirate position 1 (0320), Aspirate position 2 (0370) (ETX)(CS) Meaning Character Keyboard ALT-’255’ ALT-’2’ / ^B DATA: ALT-’3’ / ^C ALT-’27’ 2006-02 Technical Manual for Columbus Washer No. 30000294 Rev. No. 1.7 3-93...
- Page 116 Download Rinse Parameter (FF)(STX)(ADR)(SNr.): Start RD1503: Command Rinse Time 15 sec, Auto Rinse Time 03 hours (ETX)(CS): Meaning Character Keyboard ALT-’255’ ALT-’2’ / ^B DATA: ALT-’3’ / ^C ALT-’16’ 3-94 Technical Manual for Columbus Washer No. 30000294 Rev. No. 1.7 2006-02...
-
Page 117: Description Of Error Messages
3. The following message is displayed: Manif. arm Error ! Exit When an error occurs, the Service menu can be used to check the various motors and sensors. 2006-02 Technical Manual for Columbus Washer No. 30000294 Rev. No. 1.7 3-95... - Page 118 2. Plate transport motor defective or blocked 3. Home position optical switch defective When an error occurs the Service menu can be used to check the motors and sensors. 3-96 Technical Manual for Columbus Washer No. 30000294 Rev. No. 1.7 2006-02...
- Page 119 Where XXXXXXXX is the displayed procedure message. The instrument is now locked with this error message, switch the instrument off and then switch it on again. Change the dispensing pump. 2006-02 Technical Manual for Columbus Washer No. 30000294 Rev. No. 1.7 3-97...
- Page 120 This message is displayed only when the Liquid Sensor option is set to yes in the service menu. The bottle holder should not be connected to the instrument. Waste Sens Error 3-98 Technical Manual for Columbus Washer No. 30000294 Rev. No. 1.7 2006-02...
- Page 121 Check that the manifold arm is not blocked. Check if the needles are catching on the side of the microplate, use the Adjust menu to adjust the positions for this type of microplate. 2006-02 Technical Manual for Columbus Washer No. 30000294 Rev. No. 1.7 3-99...
- Page 122 Connector 1 should be used for 16 manifolds and connector 2 for 8 and 12 manifolds. Screws Fill Verify Board Sensor For an 8 or 12 manifold only use connector 2 3-100 Technical Manual for Columbus Washer No. 30000294 Rev. No. 1.7 2006-02...
- Page 123 Check that the dispensing needles are clear and that the reagent bottle has enough solution and the inlet tube is in the solution. Use the Prime menu to fill the liquid system with solution. 2006-02 Technical Manual for Columbus Washer No. 30000294 Rev. No. 1.7 3-101...
- Page 124 The amount of wash liquid dispensed must be enough so excluding the Overflow Position at least 100 µl overflow is produced. • At least 450 µl should be dispensed with an Overflow Position slightly above the upper well limit. 3-102 Technical Manual for Columbus Washer No. 30000294 Rev. No. 1.7 2006-02...
- Page 125 Phosphat buffer concentrate 1:25 13.7 mS/cm BOUTY.Beta IgM 1:20 14.2 mS/cm MUREX .Wash fluid (Glycine/Borate) 1:20 7.8 mS/cm BIOTEST ELPHA . ( Nr. 3+4) 1:10 28.1 mS/cm 2006-02 Technical Manual for Columbus Washer No. 30000294 Rev. No. 1.7 3-103...
-
Page 127: Removing And Replacing The Instruments Cover
3. Raise the manifold arm so that it is in the fully open position. 4. Carefully tilt the plate support and pull the plate support away from the instrument. Guide Bar Screws 2006-02 Technical Manual for Columbus Washer No. 30000294 Rev. No. 1.7... - Page 128 8. Carefully lift the cover a small distance away from the instrument. 9. Either place the cover by the side of the instrument or disconnect the keyboard/display connector from the main board. Technical Manual for Columbus Washer No. 30000294 Rev. No. 1.7 2006-02...
-
Page 129: Replacing The Instruments Top Cover
10. Push the plate support so that it is fully placed in the instrument. 11. Lower the plate support. 12. Lower the manifold arm. 13. Insert the mains power cable and switch the instrument on. 2006-02 Technical Manual for Columbus Washer No. 30000294 Rev. No. 1.7... -
Page 131: Liquid System
Aerosol pump and special manifold to aspirate any aerosol vapors away from the microplate when it washed. Waste bottle full sensor to detect when the waste bottle is full. Fill Verification manifold to detect that each channel is dispensing liquid. 2006-02 Technical Manual for Columbus Washer No. 30000294 Rev. No. 1.7... -
Page 132: Liquid System Diagram
Marked blue Marked red Dispensing Pump Prime Valve Marked yellow Marked Aspirating Pump Marked yellow Channel select Solenoid Valves Aerosol Pump Some of the instruments may include the prime valve. Technical Manual for Columbus Washer No. 30000294 Rev. No. 1.7 2006-02... -
Page 133: Dispensing System Description
Instruments with Pinch Valves Tubing to Prime Dispensing Pump input Valve Instruments with Solenoid Valves. Waste Tube Hole Aerosol Tube Hole Some of the instruments may include the prime valve. 2006-02 Technical Manual for Columbus Washer No. 30000294 Rev. No. 1.7... -
Page 134: Replacement Procedure
8. Exchange the dispensing pump. 9. Insert the cable and connector through the slot in the middle plate. 10. Carefully place the dispensing pump into position and secure it with the three screws. Technical Manual for Columbus Washer No. 30000294 Rev. No. 1.7 2006-02... - Page 135 33 g or less than 24 g before calibrating the instrument for the first time. Reset all features of the instrument (Plate Type, Customers specific programs, Manifold Type, Priming position, Adj. Plate. Ref, Options and select number of liquid channels). 2006-02 Technical Manual for Columbus Washer No. 30000294 Rev. No. 1.7...
-
Page 136: Replacing The Solution Solenoid Valves (Instruments With Pinch Valves)
16. Insert the inlet tubing connector into the holding plate above the solenoid valves. 17. Adjust the tubing so that it is not bent. Technical Manual for Columbus Washer No. 30000294 Rev. No. 1.7 2006-02... - Page 137 7. Remove the inlet and the outlet tubing from the valve block. 8. Unscrew the two screws securing the valve block on to the instrument. Screws Inlet solenoid valves 9. Remove the complete valve block from the instrument. 2006-02 Technical Manual for Columbus Washer No. 30000294 Rev. No. 1.7...
-
Page 138: Replacing The Dispense Solenoid Valve
7. Exchange the solenoid valve. 8. Reconnect the tubing onto the solenoid valve. 9. Reconnect the electrical connectors. 10. Screw the new solenoid valve into place on the bottom plate. Technical Manual for Columbus Washer No. 30000294 Rev. No. 1.7 2006-02... -
Page 139: Replacing The Aspirating Pump
Rubber Mounting Blocks Pump Pump Outlet Inlet 12. Reconnect the aspirating pump connector onto the main board. 13. Reconnect the tubing. 14. Replace the instrument's cover. (See chapter 4) 2006-02 Technical Manual for Columbus Washer No. 30000294 Rev. No. 1.7... -
Page 140: Replacing The Aerosol Pump
Rubber Mounting Blocks Pump Outlet Pump Inlet 12. Reconnect the aerosol pump connector onto the main board. 13. Reconnect the tubing. 14. Replace the instrument's cover. (See chapter 4) 5-10 Technical Manual for Columbus Washer No. 30000294 Rev. No. 1.7 2006-02... -
Page 141: Mechanical System
For example: if the needles are incorrectly positioned and touch the microplate. Bottom Position Optical Switch Sensor Manifold Top Position Manifold Optical Switch Sensor Error Condition Manifold Optical Switch Sensor Microplate 2006-02 Technical Manual for Columbus Washer No. 30000294 Rev. No. 1.7... -
Page 142: Description Of Manifold Arm Movement Parts
Screws Adjust the manifold so that when the manifold is in the lowered position, the aspirating needles are in the middle of the crosshair on the adjustment plate Technical Manual for Columbus Washer No. 30000294 Rev. No. 1.7 2006-02... -
Page 143: Plate Transport System
Gear Wheel Instrument Frame Top View Bottom View Guide Bar Home Position Edge Home Position Optical Switch Rack Motor Gear Wheel Motor Gear Wheel Home Position Guide Bar Optical Switch 2006-02 Technical Manual for Columbus Washer No. 30000294 Rev. No. 1.7... -
Page 144: Plate Support
The plate support contains an automatic plate positioning system so that the microplate is always correctly positioned. Microplat Guide e Positionin g Plate Waste Sink e Positio n Edg Microplat e P ositionin g Plat Sprin Technical Manual for Columbus Washer No. 30000294 Rev. No. 1.7 2006-02... -
Page 145: Leveling The Plate Support
7. Push the plate support in until it is over the first support screw. 8. Adjust the height of the first support screw until it just touches the plate support. 2006-02 Technical Manual for Columbus Washer No. 30000294 Rev. No. 1.7... - Page 146 15. Push the plate support backwards and forwards to check that it can move freely over all the support screws. Lock the support screws into place with screw retaining liquid. 16. Remove the plate support. 17. Remove the guide bar. Technical Manual for Columbus Washer No. 30000294 Rev. No. 1.7 2006-02...
-
Page 147: Microplate Positioning System
Microplate Positioning When the plate support is returned to the home position the pin pushes the plate back so that the microplate is released and can be removed. 2006-02 Technical Manual for Columbus Washer No. 30000294 Rev. No. 1.7... -
Page 148: Replacement Procedure
10. Lower the manifold arm to the normal position. 11. Reconnect the instrument to the mains power supply and switch the instrument on. 12. Use the Service menu to check that the optical switch is working correctly. Technical Manual for Columbus Washer No. 30000294 Rev. No. 1.7 2006-02... -
Page 149: Replacing The Motor
8. Connect the motor connector onto the main board. 9. Connect the spring between the pin on the positioning disk and the bracket on the middle panel. 10. Replace the instrument's cover. 2006-02 Technical Manual for Columbus Washer No. 30000294 Rev. No. 1.7... -
Page 150: Replacing The Top Position Optical Switch
5. Screw the new optical switch onto the sensor holding plate, ensure that the positioning disk is in the middle of the optical switch. 6. Connect the optical switch onto the main board. 7. Replace the instrument's cover. 6-10 Technical Manual for Columbus Washer No. 30000294 Rev. No. 1.7 2006-02... -
Page 151: Replacing The Plate Support Home Position Optical Switch
12. If a 16 way manifold is used, use the Service menu to set the Prime and Rinse positions as these could be slightly different with the new optical switch. 2006-02 Technical Manual for Columbus Washer No. 30000294 Rev. No. 1.7 6-11... -
Page 153: Electronic System
The keyboard and display unit is used to communicate with the instrument. 4. Other Switches This section gives the layout and circuit diagrams for the other switches that are used in the instrument. 2006-02 Technical Manual for Columbus Washer No. 30000294 Rev. No. 1.7... -
Page 154: Interconnection Diagram
Connector Jumper x 100 RS232 (open) RS485 (closed) Barcode Reader Keyboard / Display Unit Power Supply Board Fuses Mains Input ON/OFF Switch The Orbital Shaking option is not used. Technical Manual for Columbus Washer No. 30000294 Rev. No. 1.7 2006-02... -
Page 155: Main Board
Position Sensor Plate Support Home Position Sensor Orbit Shaking Home Position Sensor Orbit Shaking Slotted Disk Sensor EEPROM Keyboard/Display Connector Aerosol Pump Connector Aspirate Pump Connector Battery Jumper Battery 2006-02 Technical Manual for Columbus Washer No. 30000294 Rev. No. 1.7... -
Page 156: Replacing The Main Board
4. From the bottom of the instrument, remove the nine screws that hold the main board onto the bottom plate. Main Board Screws 5. Carefully remove the main board from the instrument. Technical Manual for Columbus Washer No. 30000294 Rev. No. 1.7 2006-02... -
Page 157: Replacing The Battery
Reset all features of the instrument (Plate Type, Customers specific programs, Manifold Type, Priming position, Adj. Plate. Ref, Options and select number of liquid channels). 2006-02 Technical Manual for Columbus Washer No. 30000294 Rev. No. 1.7... -
Page 158: Power Supply Board
The power supply board supplies all the required voltages for the instrument. Fuse 2 A/250V Quick Blow Mains Power Output Voltages Output Voltage Definition +24 Volt Cable Connector Black Green Technical Manual for Columbus Washer No. 30000294 Rev. No. 1.7 2006-02... -
Page 159: Replacing The Power Supply Board
14. Replace the cover for the power supply board and screw it into place. 15. Replace the instrument's top cover. (See chapter 4) 16. Reconnect the instrument to the mains power supply and switch the instrument on. 2006-02 Technical Manual for Columbus Washer No. 30000294 Rev. No. 1.7... -
Page 160: Keyboard And Display Unit
Adjust potentiometer until the displayed messages can easily be read but the blocks that make up each segment can not be seen. Correct Too Dark Too Light T E S T T E S T T E S T Technical Manual for Columbus Washer No. 30000294 Rev. No. 1.7 2006-02... -
Page 161: Replacing The Keyboard Or Display Unit
LED into the small hole. 10. Reconnect the ribbon cable onto the display unit. 11. Screw the display unit loosely into place with the four screws. 2006-02 Technical Manual for Columbus Washer No. 30000294 Rev. No. 1.7... - Page 162 7. Replace the instrument's top cover. 8. Reconnect the instrument to the mains power supply and switch the instrument on. 7-10 Technical Manual for Columbus Washer No. 30000294 Rev. No. 1.7 2006-02...
-
Page 163: Manifold Detect Board
4. Remove the two screws that hold the manifold in place. 5. Remove the manifold from the instrument. 6. Remove the two screws that hold the board in place. 2006-02 Technical Manual for Columbus Washer No. 30000294 Rev. No. 1.7 7-11... - Page 164 16. Reconnect the instrument to the mains power supply and switch the instrument on. 17. Use the Service menu to check that the optical switch is working correctly. 7-12 Technical Manual for Columbus Washer No. 30000294 Rev. No. 1.7 2006-02...
-
Page 165: Fill Verification Board
6. Remove the two screws that hold the manifold in place. 7. Remove the manifold from the instrument. 8. Remove the three screws that hold the board in place. 2006-02 Technical Manual for Columbus Washer No. 30000294 Rev. No. 1.7 7-13... - Page 166 19. Reconnect the instrument to the mains power supply and switch the instrument on. 20. Use the Service menu to check that the optical switch is working correctly. 7-14 Technical Manual for Columbus Washer No. 30000294 Rev. No. 1.7 2006-02...
-
Page 167: Optical Switches
The instrument uses the following optical switches: • Transport home position • Manifold arm top position • Orbital shaking home position • Orbital shaking step counter Switch Layout Circuit Diagram G RD O UT 2006-02 Technical Manual for Columbus Washer No. 30000294 Rev. No. 1.7 7-15... -
Page 169: Serial Interface
Pin 5 Pin 9 Pin 6 All connected devices must be approved and listed as per EN 60950, UL 1950 or CSA C22.2 No. 950 for Data Processing Devices 2006-02 Technical Manual for Columbus Washer No. 30000294 Rev. No. 1.7... -
Page 170: Rs-232-C Interface Lines
RTS connected to CTS DSR connected to DCD and DTR Use the computer handbook to find the correct pin connections. Instrument Computer 25 pin Instrument Computer 9 pin Technical Manual for Columbus Washer No. 30000294 Rev. No. 1.7 2006-02... -
Page 171: Synchronization And Data Format
To select a different device address, start the Remote Mode with the default device address (#31) and send the command to X 37 (to select the device address #37). 2006-02 Technical Manual for Columbus Washer No. 30000294 Rev. No. 1.7... -
Page 173: Description Of Options
Note The Aerosol Protection option can not be combined with the Fill Verification option. Possible from firmware level 3.23 onwards. Factory installation required! Not available for 384 Well Manifold. 2006-02 Technical Manual for Columbus Washer No. 30000294 Rev. No. 1.7... - Page 174 Manifold. 384 Well Manifold This option is used for washing the 384 well microplate in (starting at 4.x) rows and can only be performed with a 32 way Manifold. Technical Manual for Columbus Washer No. 30000294 Rev. No. 1.7 2006-02...
-
Page 175: Liquid Detection Option
Remote Control 5. To set the instrument so that the Liquid Detection option is used, the option must be activated using the Set Options option in the Service menu. 2006-02 Technical Manual for Columbus Washer No. 30000294 Rev. No. 1.7... -
Page 176: Barcode Reader Option
7. Switch the instrument on. 8. To set the instrument so that the Barcode option is used, the option must be activated using the Set Options option in the Service menu. Technical Manual for Columbus Washer No. 30000294 Rev. No. 1.7 2006-02... -
Page 177: Printer Option
9. To set the instrument so that the Printer option is used, the option must be activated using the Set Options option in the Service menu. 10. Use the Date and Time options in the Service menu to set the correct date and time. 2006-02 Technical Manual for Columbus Washer No. 30000294 Rev. No. 1.7... -
Page 178: Manifold Detection Option
Slot it between the arm support and plate and then through the large slot in the middle plate. Ensure that the cable does not block the movement of the manifold arm. Technical Manual for Columbus Washer No. 30000294 Rev. No. 1.7 2006-02... - Page 179 15. Switch the instrument on. 16. To set the instrument so that the Manifold Detection option is used, the option must be activated using the Set Options option in the Service menu. 2006-02 Technical Manual for Columbus Washer No. 30000294 Rev. No. 1.7...
-
Page 180: Fill Verification Option
When the required option has been fitted, the instrument must be configured for the option using the Select Options in the Service menu. For more information, see chapter 3.2.8. Technical Manual for Columbus Washer No. 30000294 Rev. No. 1.7 2006-02... -
Page 181: Maintenance
The manifold is removed from the instrument by removing the two screws that hold the manifold onto the holder. Screws Figure 10-2 When the two screws have been removed, carefully pull the manifold away from the holder. 2006-02 Technical Manual for Columbus Washer No. 30000294 Rev. No. 1.7 10-1... - Page 182 Metal Plate Figure Carefully pull the metal plate away from the manifold. Carefully pull the needle block away from the front block. Ensure that the seals are not damaged. 10-2 Technical Manual for Columbus Washer No. 30000294 Rev. No. 1.7 2006-02...
-
Page 183: Exchanging The Manifold
8. If the Fill Verification option is fitted, connect the small ribbon cable onto the connector block on the left-hand side of the circuit board in the manifold arm. 2006-02 Technical Manual for Columbus Washer No. 30000294 Rev. No. 1.7 10-3... - Page 184 Connectors For a 8 or 12 manifold only use connector 2 Figure 10 When all the required tubing and ribbon cable have been connected, lower the manifold arm. 10-4 Technical Manual for Columbus Washer No. 30000294 Rev. No. 1.7 2006-02...
-
Page 185: Exchanging The Plate Support
To reinstall the plate support follow the procedure listed below: Push the plate support so that it is fully inserted into the instrument. Lower the plate support. Lower the manifold arm. 2006-02 Technical Manual for Columbus Washer No. 30000294 Rev. No. 1.7 10-5... -
Page 186: Instrument Disinfection
5. Disconnect the instrument from any accessories that are used for example: printer, computer, cartridge and so forth. Accessories that should be shipped together with the instrument have to be included in the disinfection procedure. 10-6 Technical Manual for Columbus Washer No. 30000294 Rev. No. 1.7 2006-02... - Page 187 Name:........................Firm: ........................Address: ......................................................................... Country:........................ Signature:......................2006-02 Technical Manual for Columbus Washer No. 30000294 Rev. No. 1.7 10-7...
-
Page 188: Preventive Maintenance Plan
Replace the manifold sealing and clean the inner parts of the manifold. • Check the aspirating pump and replace if necessary. • Recalibrate the dispensing pump. (See chapter 3) • Download the specific saved programs to the washer. 10-8 Technical Manual for Columbus Washer No. 30000294 Rev. No. 1.7 2006-02... -
Page 189: Service Tools
8, 12 and 16. Place the adjustment plate on the plate support and enter the Service menu. alignment points for the 8 manifold needle Adjustment Plate For more information about Adjustment Plate Reference, see chapter 3. 2006-02 Technical Manual for Columbus Washer No. 30000294 Rev. No. 1.7 10-9... -
Page 190: Electrostatic Discharge Information
* Dual Inline Packaging (DIP) is the packaging around individual microcircuitry. These are then multi-packaged inside plastic tubes, trays, or Styrofoam. Note 700 volts can degrade a product. 10-10 Technical Manual for Columbus Washer No. 30000294 Rev. No. 1.7 2006-02... -
Page 191: Preventing Electrostatic Damage To Equipment
For all components marked with ESD – Sticker it is absolutely necessary to use the grounded wrist strap to avoid damaging any electrical parts! 2006-02 Technical Manual for Columbus Washer No. 30000294 Rev. No. 1.7 10-11... -
Page 193: Trouble Shooting
If the fill verification board needle status can not be deleted Fill Asp. Err When the well is not correctly aspirated New Firmware Empty Battery Auto Clear All 2006-02 Technical Manual for Columbus Washer No. 30000294 Rev. No. 1.7 11-1... -
Page 195: Introduction
Auto sensing for the settings 100 - 120 volt or 220 - 240 volt, 50 / 60 Hz Consumption < 65 VA Main fuse 2 x 1.6 T Amp. (slow blow) 2006-02 Technical Manual for Columbus Washer No. 30000294 Rev. No. 1.7 12-1... - Page 196 3.5 Hz 5.0 Hz The instruments conform to the legal norms at date. For more information, see the Declaration of Conformity Certificate on the last page of this manual. 12-2 Technical Manual for Columbus Washer No. 30000294 Rev. No. 1.7 2006-02...
- Page 197 Show Detected CPU ........3-49 Solenoid Installing the Instrument ......... 2-1 Testing ............3-43 Instrument Support Screws ..........6-5 Connections ..........1-2 Description ..........1-2 Waste Sensor..........3-22 Keyboard ..........1-6, 7-8 2006-02 Technical Manual for Columbus Washer No. 30000294 Rev. No. 1.7 Index...
Need help?
Do you have a question about the Columbus Washer and is the answer not in the manual?
Questions and answers